HULK Build Thread

UARandy,
Thanks for the compliment! I hightly recommend the Taco Whip antenna, it has increased my reception greatly and I no longer suffer from a broken mast and stupid motorized system.

As far as wheel balancing, I was on the same page with NOT wanting the weights mounted on the back side. The 33" tires take a huge amount of weights, and I called around tire shops to price shop and just talked to their managers about letting me observe the balancing. I also had them CONFIRM that they can use the weights on the inside of the wheels. They are 1/4 oz sticky weights, and you are right with that much rubber there is a S*** ton of them. Either way, they balanced as well as they can and the counterweights are only visible if you get up close to the wheel. So, like you said, just call around and you will find a shop who is willing to help you. With my OCD, I have always liked shops who let me stand over them while they balance to ensure they do the best job possible.


Thanks for the props 4R!! What does sub'd mean??

Subscribed :thumb3:
 
Some Ideas for Days off

So I have some ideas, and as I have done before I will list the ideas before the build pcitures and text come in about a week. After learning more and more, I am seeing that my build thread does not cover the detail that I would like it to...as I do almost all of the work myself, I would like to try and document it such that people can learn from my stuff as I have learned from theirs. I will work on either changing the previous posts, or just simply make the future ones better. So here are some of the ideas for this days off:

1.) I need to adjust the SS 1.2 System up in the front. The SW bumper has dropped the front end, and it is causing a increase in the amount of rubbing. Not to mention the back sits considerably higher now. I will take before/after measurements and photos. With the help of BigFishAllDay and Steve at SS, I believe I can do the work myself. It will simply involve the use of a spring compressor and some paint

2.) I pulled the trigger on some AVS in-channel vent-visors. When it is snowing and raining, it is quite annoying to have it constantly drip on the inside and I also seem to like the look. Got the smoke color lens from amazon for $53. AVS in-channel for 3rd Gen

3.) I plan on painting my clevis shackles probably red, and having them permanently mounted in the front. I have kept them off for fear of theft, but since I live in the sticks I am pretty confident they will stay put. It will also give an additional red 'accent' to go with the TRD emblems on the side of the truck

4.) I pulled the trigger on the anti-sway kit from Wheelers off-road. Included poly bushings for both the front and rear. I plan on doing this install, as I did NOT do the steering rack bushings but I do like the increase in performance. For the price, it seems to be very worth it. Wheelers Offroad Kit

5.) I am going to finally remove the emblems and give them a nice Rustoleum Flat Black and Clear Coat

6.) Again, BigFishAllDay aided in my getting the courage up to put grip tape on my rock sliders. Ever since purchase, they have been very slippery...and during snow it is actually dangerous for a short person to get in the truck using that as a step. The Lowe's product is about $10, and I will line the top portion of the rock slider

7.) I have an outer CV boot that is torn, so I need to replace it. Parts are on the way. This is nothing fun, but may be a helpful thread for those of you that see the same tearing issue.

8.) I plan on painting the KC and PIAA lettering on the light covers for both the 4WD and Fog Lights. I am on the fence about this, so I may go Plasti-dip the first go-around in case I prefer the white lettering.


Items in the queue

1.) Rear bumper, been in discussion with CBI and Sonoran about different alternatives. I would really like a matching rear bumper and ultimately get the low hanging hitch and spare off the back. I just need to find the option I like the best. I am not too excited about a swing-away since I get in the back so much and the bumper originally is a body mount so the new bumpers tend to flex while wheeling, which would be increased with the spare on the back.

2.) Floor liners. I like JSmarines Lloyd mats...but am also looking into WT and Husky floor liners. The outer lip is what is holding me up, I am debating whether or not I will find it cumbersome over time to have that large lip around the outside of all the liners.

3.) I have been staring at my front bumper for some time, and I know when I installed it I pulled the front down a slight bit to ensure I had access to the hood release...but ever since I sometimes am bothered by it not sitting 100% level (see pictures). If anybody has any ideas on how I can get this bumper to sit level after already installing with this orientation...it would be GREATLY APPRECIATED


And again, as always, feedback is welcome.....

Thanks!

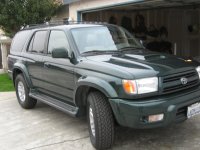
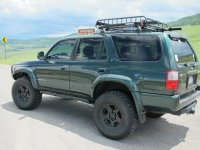
Since I prefer to see posts with photos, I figured it would be timely for a good before and after.

First is BEFORE EVERYTING

Second is CURRENTLY, of course the photo happens to have the sign lurking in the background of the unit I hunt elk!

 

Attachments

  • before.jpg
    before.jpg
    72.5 KB · Views: 2,125
  • after.jpg
    after.jpg
    79.5 KB · Views: 1,716
1st Gen Roll Bar

Contacted a local Colorado salvage yard, and they had a 1st gen with a roll bar. I am strongly debating adding one in the back for: 1.) Looks 2.) Spare tire storage 3.) Additional mounting for equipment such as a hi-lift

I am going to buy it no matter what when I get back home, but need to look at everything and make sure I will be happy with it. I think it is a unique modification, and I always loved the 1st Gen 4Runners so it is almost a tribute to them! If anybody has done this, and has any comments/concerns about it please share.

I also learned the benefit of using Photobucket, after reading so many build threads that are helpful I realized that my thread is really not all that helpful. I am going to slowly go through and make all my posts more detailed as to hopefully help anybody who may be doing the same things I am doing!
 
very nice build, because of you know, i am going to paint my wheels black:)

Thanks for the props! I really think the black wheels make a huge difference on appearance. I went with the powder coating option since it is more durable and I am always skeptical with my rattle can abilities.
 
Thread overhaul is turning out very nice!

Thanks Ripcord, I do not have all my photographs with me so I have not updated everything. I plan to do everything, so at least it makes a bit more sense...and maybe people can follow what I have done!
 
August Days Off

So in the evenings I have been following through with overhauling the build thread, so those of you who are interested I have updated about the first 30% to be more detailed and the photos should be better as well.

Now for this days off, since I already posted a very wordy reply on my plans I will start with all of the goodies to be installed!!

IMG_1378-1.jpg~original


I began the time with re-doing my CB install. I will update that post, but this was another project so it warrants a little more detail.

Here is a before photo, and I was simply NOT happy with how it did not sit level (nitoce the passenger side of the unit sits lower) and was not as flush to the dash as it could be.

IMG_1380.jpg~original


So the main culprit was poorly placed cable direction for the antenna and there is a pesky wire behind the old ashtray that was holding my up. It is much cleaner looking now, and I am happy with it.

IMG_1386-1.jpg~original


And the wiring on the back that avoided some contact with parts in the dash to allow for a more flush fitment.

It should also be noted that the PA speaker wire was taking a pretty good beating, so I added even more electrical tape to aid in the support of the wire while it is smashed to the side

IMG_1388.jpg~original


I had been debating where to mount the microphone that would be convenient yet not in the way. I decided on utilizing the little cubby to the drivers side of the CB since I have absolutely no use for that. So while the dash was apart I decided to drill this in.

Before
IMG_1393-1.jpg~original


After
IMG_1394-1.jpg~original


I mocked a screwdriver into a convenient little slot that allows to tighten the screws which would otherwise be nearly impossible to tighten!

IMG_1396.jpg~original


I like how it turned out, and it is certainly very functional while not getting in the way of my knee while driving.


And finally it all installed, again I am much happier with this as it does sit level finally!!!

IMG_1401.jpg~original


IMG_1400.jpg~original


One last thing I did was change the wiring harness for the dash clock. I learned on here that there are two slots that the wiring harness can fit into (which made no sense to me, but is entirely true). Since I was unable to find a photo, I went ahead and took one in case anybody else has had this issue. DASH CLOCK WORKS NOW TOO!!

IMG_1398.jpg~original
 
Looks awesome.Very well done..All you need now is to do the manual lock-outs and that will help your boots from splitting...

I have 285/75/16 on those same wheels and they don't rub the upper arms. (Falken Rocky Mountain) Maybe a difference in tire??????????
 
Adjusting the front SS 1.2 up 1 Notch

So I wanted the front to sit a bit higher, and with the front bumper it did sag a little bit. After some help from BigFishAllDay, Steve at Sonoran Steel and a bit of independent research I decided to pull the trigger

Whats Needed:
1.) Spring Compressor (I rented the one from AutoZone that is OEM brand)
2.) Some sort of paint or marker, I used whiteout with a brush tip
3.) Enough patience to last a little while
4.) Socket set and a cheater bar/snipe

Here is a measurement of the height before the change. NOTE: the front bumper is not installed and the vehicle is not level. I apologize for the measurements not being great, I sort of did multiple projects at the same time this week.

IMG_1408.jpg~original


Looks to be close to 38"...Again, remember that this is at an angle and that the front bumper is not installed at this moment.
IMG_1409.jpg~original


So the first step is to remove the struts. This involves 3 nuts (14 mm) on the top, and one for the bottom of the shock (I believe 19 mm). Two of the top nuts can be removed with a deep socket, the third needs an end wrench to get at.

Shown is the top plate where the 3 nuts are, they are 14 mm nuts. I recommend getting the bottom bolt out before removing these. Then pull these three out, and be careful as the strut can fall and pinch a finger or worse!

IMG_1436.jpg~original


Next step is to make sure that the alignment is not comprimised. THIS IS VERY IMPORTANT! Paint a line from the top plate on to the spring and follow this line down from the spring to the bottom cup and lastly the shock itself.

This is necessary because otherwise the bottom of the shock will not align itself with the slot if the top place bolts are not aligned perfectly. ***Another note is that this kit is designed such that the tail end of the coil points toward the inside of the vehicle***

Here is an example of the line I drew, I used whiteout since it is cheap and easy.

IMG_1440.jpg~original


Next step is dangerous and tedious...
Attach the spring compressor to the strut and compress the spring enough so that the shock is no longer under any load and can be loosened. A snipe on the end of a socket wrench is the only way I could get enough load on it. Steve at SS recommended using an impact wrench, of which I do not have so I had to rely on brute force.

IMG_1446.jpg~original


So once the shock can be loosened by the nut (I think 17 mm) on top, then the whole assembly will come apart. At this point, there is a snap ring around the shock that determines the lift height. The recommended setting is 1 below the middle, and with a front bumper the middle notch is recommended. So, with a snap ring wrench, simply remove the ring and move up 1 notch.

IMG_1447.jpg~original


IMG_1447.jpg~original


Next step is to re-do what you just did. Again, getting the alignment right is imperitive! I did not get it right, within milimeters and had to re-do the spring compression work three seperate times.... : (

Just get the alignment right when putting it all back together in the exact order that it was disassembled and then uncompress the spring with whatever tools you used to compress it.

IMG_1453.jpg~original


Once this is done, all that is left to do is re-install the struts to their spot. Remember the orientation of the spring relative to the vehicle. Follow the Sonoran Steel instructions, and there will be no problem.

It is recommended to have a friend for this work. I spent the better part of an entire day trying to design my own lever tools such that I could flex the arm enough to get the bottom bolt through the shock eye....and was not successful. With a friend it took no longer than 3 minutes. HAHA

Now some after measurements. ***Please note that these are not directly related to the change, as I was doing multiple projects at the same time***

IMG_1474.jpg~original


I am VERY happy with the way the ride looks now and it certainly performs much better. I have NO rubbing when I turn the wheel fully to either direction and it does not droop as much in the front, however still has the aggressive looking rake!

I will post a good post photo as soon as I get one....
 
Time for some more weatherproofing!!

I did a good amount of research on here and decided on the Weathertech floorliners. The price was right at $300 shipped. This is somewhat expensive, but as others have posted on here there is no more vacuuming!!

The packaging is great from them, and the delivery was less than 1 week. I also price shopped and could not find any better deal than the dealers website.

*I went with the tan since my seat covers being black do show a good amount of dirt. I also think it matches the rest of the interior without standing out too much*

Driver Side:

IMG_1382.jpg~original


Passenger Side:

IMG_1385.jpg~original


Rear Seats:

IMG_1383.jpg~original


IMG_1384.jpg~original


Lastly, the cargo liner. This did not come in the same shipment, but still was delivered relatively timely.

Packaging:

IMG_1455.jpg~original


Before photo:

IMG_1458.jpg~original


Everything removed from the back, and a solid vacuum job (hoepfully my last!!):

IMG_1459.jpg~original


Final install of the rear cargo liner:

IMG_1461.jpg~original


Overall I am very pleased with the product. I debated between these, the Husky liners, and just all weather floormats. I do not regret this decision, and my only complaint about the product is the outer lining coming up a little high which causes a small lip to catch your foot on. I have not had the cargo liner in long enough to have an opinion, however thus far I do not think I will have anyh complaints
 
Love the knobs, gives me an Idea..

Nice ride

Thanks TOY2G! What is your idea, do share...???

Looks awesome.Very well done..All you need now is to do the manual lock-outs and that will help your boots from splitting...

I have 285/75/16 on those same wheels and they don't rub the upper arms. (Falken Rocky Mountain) Maybe a difference in tire??????????

Thank you for the compliment Whackmaster! Manual locking hubs will help with the tearing of the CV boots? I mean I guess it makes sense with it not being a free wheeling hub there will not be as much rotating...but is that what is causing the tearing...or is it just increased amounts of force due to the higher angle after a lift??

As far as the tires go, the rubbing was not major...only slight when I had it almost at full flex. So I figured I would try the spacers, and as a result I like the look as well as the increase in width....

Lookin good man! Great work!

Thanks fightman!!
 
Front Bumper

I know I have made mention to doing multiple projects at once...well one of them was trying to adjust my front bumper such that it sits level

I installed this bumper on my own (also not recommended due to the weight and danger of dropping it on yourself) about a year ago and did not remember how it all went together. I contacted Shrockworks and was reminded that all the mounting points are not holes, rather slots...therefore allowing for some adjustment.

Here are a couple photos to illustrate what it was that I was trying to fix:

IMG_1402.jpg~original


IMG_1404.jpg~original


So I began by pulling it all apart while I had the front end apart to adjust the suspension up, as seen in an earlier post. Since I had the front end up a bit, the floor jack was not tall enough. I improvised and used what I had (living in the mountains I had firewood) to help support the part for removal...

IMG_1407.jpg~original


So I inspected all the slots on the bumper as well as the mounting brackets, and after half of a day of drawing up schematics of what I thought I had I decided to call Shrockworks and send them a couple photos. They are still a bit perplexed about why it won't sit completely level, but it may be that the frame on my truck is not completely square for some reason.

I did pull each frame bracket off, and inspect all parts for any potential issues. Then put them back on using the c-clamps, as illustrated in an earlier post for installing this bumper.

***AGAIN, this is not a job recommended to do alone. I nearly hurt my shoulder and did drop the bumper once which caused some minor superficial damage***

IMG_1429.jpg~original


IMG_1430.jpg~original


I did get some adjustment out of the project, and it does fit tighter. Of course the grille is no longer in place to see a perfect comparison...again this is me multi-tasking while I had the front end torn apart! Sorry for a lack of complete documentation, this one had me pretty frustrated and so I was not in the camera mood!

IMG_1473.jpg~original
 
ameining,

Awesome job writing up the adjustment of the SS 1.2 fronts. That will help some people out in the future for sure.

Glad so see you getting the details ironed out. Seems like everytime you do a mod, it reveals something else that needs to be tweaked to make it work right. It's an ongoing process, and it's a good thing we all enjoy it.

Also, that's the first time I've EVER seen the shrockworks mounts.

:bigok:
 
AVS Ventshades

I was sick and tired of rolling my window down while it was raining or snowing and having each drop of the moisture fall directly on the control panel for the windows and the door locks!!

So I searched around, and one option was to go with the Weathertech ones...which would come as a package with the floor liners. My biggest criteria was that I wanted the 'in-channel' ones so that they would not stick out so much they would be obnoxious.

There are some guys on here with different brand choices, and for this part I honestly feel like it is 6 to 1, half a dozen to the other. I found a great deal on the AVS brand visors on Amazon, and as long as that link is still live it will be less than $55 shipped to your house. This was almost half of what Weathertech was asking for theirs...so I pulled the trigger!

Install is virtually painless, which is what I needed after this weeks challenges in the shop. It took less than 10 minutes to get all 4 of them installed. I downloaded a variety of instructions from different companies just to make sure I did not mess them up. All in all, the instructions are not all that helpful or necessary.

Steps:
1.) Clean the upper portion of each window well and then do a dry fit with each visor (by dry I mean do not remove the sticky section from the adhesive) to ensure they will fit.
2.) Try the dry fit one more time so that you have a good plan on how to slide them in place
3.) I would not recommend doing the huge amount of 'flexing' that the instructions call for...
3.a) Rear: Just get the rear side in place and slide the front in from the bottom up.
3.b) Front: Get the front side in place, and then slide the rear side in from the bottom up.
4.) Firmly affix each adhesive surface to its mated face. This will ensure a smooth transition for the window to pass
5.) Cycle each window at least 10 times
6.) I left each window in the upward position overnight. They are firmly attached now with no issues.

Now for some photos, here is a shot of the packaging of the parts, great packaging and the cardboard box they came in always comes in handy for whatever painting project you may have coming up!:

IMG_1472.jpg~original


Driver Before:

IMG_1469.jpg~original


IMG_1470.jpg~original


Passenger Before:

IMG_1468.jpg~original


IMG_1471.jpg~original


Driver After:

IMG_1491.jpg~original


IMG_1492.jpg~original


Passenger After:

IMG_1493.jpg~original


IMG_1494.jpg~original


And just a couple more to show how the 'in-channel' ones do not protrude all that much from the side of the vehicle:

IMG_1496.jpg~original


IMG_1495.jpg~original


I think they look great, and have not had the weather yet to give them a good test but we will see!! They do add a bit more of an accent to the vehicle, and of course the color somewhat matches the rest of the color scheme I have happening...
 
Shackle Color

Since buying the bumper I have been on the fence about keeping the shackles on the bumper at all times. I have seen a lot of guys with the shackles painted red, and thought about it since my TRD emblems are red and I plan on doing my 231 Tundra brakes red as well...however I wanted to try something different.

My only complaint about the Shrockworks bumper is that the shackle mounts are bored out to a diameter such that the shackles hang at an angle. I tried a few different ways to get this to change but thought it was just too much work for a piece of recovery equipment!

Either way, I had a rattle can day...of which you will see the results soon, and so I decided to throw a coat on the shackles. I decided to go with a green (not a perfect match to the Imperial Jade, but close enough for me)

Tools needed:
1.) Spray paint of your choice
2.) Clear coat of your choice
3.) Sandpaper

So I decided to do the pins in black, and the shackles themself in a green. Here you can see them hanging to dry.

IMG_1412.jpg~original


IMG_1413.jpg~original


Basically, I just gave them a quick sandpaper job to roughen up the surface and did not even bother with primer since they will likely get banged up sooner rather than later.

I gave each part 2-3 coats of paint and then 1-2 coats of clear coat protectant. I am NOT a huge fan of the clear coat, as it gives it a major sheen and can make parts look cheap...however it does serve to protect the paint somewhat...

And, here's a shot of them installed. I like the look, and am open for opinions or suggestions

IMG_1467.jpg~original
 
ameining,

Awesome job writing up the adjustment of the SS 1.2 fronts. That will help some people out in the future for sure.

Glad so see you getting the details ironed out. Seems like everytime you do a mod, it reveals something else that needs to be tweaked to make it work right. It's an ongoing process, and it's a good thing we all enjoy it.

Also, that's the first time I've EVER seen the shrockworks mounts.

:bigok:

Thanks for the compliment BigFish, and also thank you for the help while I was asking you all those questions the last couple weeks!

I am working on updating the rest of my build so that it can be as detailed as the SS writeup...so, as you said, others can maybe use it to their benefit!

You are right about their always being something new, but that is what makes this hobby fun...there is really never any end to it! Have you really never seen those mounts? Well...I think it is time you go ahead and get one of those bad boys for your bad a** rig!!
 
ameining,

great job with the rig. it is really impressive and so is all the hard work you have put in. how do you time to post so much in one month, are you on summer break?

I used your rig as a reference to swap over to powder-coated 5-stars myself. I get them installed next week.

Did you paint your calipers red yet? I would really like to see some shots of those wheels with the red calipers. I am debating if I should paint mine red or silver.

:thumb3:
 

Members online

Forum statistics

Threads
278,306
Messages
3,554,045
Members
248,016
Latest member
Advally Service

Trending content

Back
Top