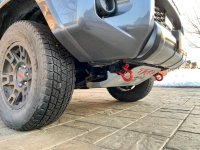
If you have a TRD Skid Plate Read This!

Man, you scared me. I checked like 20 times before I started anything (even when I went to tap... the wrong hole lulz) and still had to rummage through the garage to find the package sitting in a bag. Yep, metric tap.

This is the tap I bought: 10mmx1.25mm

https://www.amazon.ca/CHANNELLOCK-8...rip+tap&qid=1565358607&s=gateway&sr=8-1-spell

The bolts torqued to 22 ft/lbs... whatever that means.

I wouldn't overthink this.

I put a dab of anti-seize on the tap threads. Then screwed the tap into the holes on the frame and unscrewed it. I took a paper towel, quickly wiped off any metal shavings, wiped a dab of anti-seize on the tap and did the next hole. I spent maybe 5 to 10 minutes on the whole process.

The purpose of this venture is just to clean the threaded holes in the frame and to lube them. This is to make the skid plate bolts easier to remove for future oil changes and vehicle modifications.

No need to keep screwing the tap deeper into the frame than needed. Stop twisting when the threads at the bottom of the tap are all the way up in the frame holes.

Regarding "The bolts torqued to 22 ft/lbs... whatever that means."

You're going to want to pick up a torque wrench. I bought a cheap one from Harbor Freight to use on the skid plate and Warn winch bumper.

Torque specifications are put out by the manufacturer to keep bolts from unscrewing on their own. Plus to prevent over tightening of bolts resulting in failure of the bolt or damage to the frame.

You don't want to be driving down the road and have your skid plate fall off. The same thing applies to the lug nuts on your wheels. Over tightening them will make them impossible to get off when you need to change a tire. Under tightening them can result in your wheel falling off as you drive down the road.

Basic Torque Wrench How to video:
YouTube

 
I wouldn't overthink this.

I put a dab of anti-seize on the tap threads. Then screwed the tap into the holes on the frame and unscrewed it. I took a paper towel, quickly wiped off any metal shavings, wiped a dab of anti-seize on the tap and did the next hole. I spent maybe 5 to 10 minutes on the whole process.

The purpose of this venture is just to clean the threaded holes in the frame and to lube them. This is to make the skid plate bolts easier to remove for future oil changes and vehicle modifications.

No need to keep screwing the tap deeper into the frame than needed. Stop twisting when the threads at the bottom of the tap are all the way up in the frame holes.

Regarding "The bolts torqued to 22 ft/lbs... whatever that means."

You're going to want to pick up a torque wrench. I bought a cheap one from Harbor Freight to use on the skid plate and Warn winch bumper.

Torque specifications are put out by the manufacturer to keep bolts from unscrewing on their own. Plus to prevent over tightening of bolts resulting in failure of the bolt or damage to the frame.

You don't want to be driving down the road and have your skid plate fall off. The same thing applies to the lug nuts on your wheels. Over tightening them will make them impossible to get off when you need to change a tire. Under tightening them can result in your wheel falling off as you drive down the road.

Basic Torque Wrench How to video:
YouTube
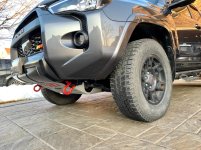
Oh haha sorry, I wasn't clear. I already tapped the holes with the expectation that I was just cleaning the threads -tapped until the bottom threads just started to disappear into frame. For whatever reason, I experienced a lot more resistance than a lot of people here have. Frequently applied cutting lube, 4-5 slow turns in (not full 360 revolutions of the handle, but turns of my wrist), 2-3 slow turns out, half way through I'd back all the way out to clean the tap. After I tapped the holes, I sprayed into the holes with some diluted citrus solution to get out any debris/shavings, rinsed, I then applied anti-seize to the bolt and went for a test fit. Bolt went in really nicely -a little bit of bite to show that it was snug, but no real resistance. Repeat for the other 3 holes.

I torqued the skid plate bolts to 22 ft/lbs, but by, "The bolts torqued to 22 ft/lbs... whatever that means", I was (way too) vaguely implying that just because something is torqued to 22 ft/lbs doesn't mean the bolts are fastened correctly. e.g. you could cross thread a bolt and still torque it to 22 ft/lbs or if the tap was done improperly and the threads are super brittle, the bolts could be hanging on by dear life and you could still torque it to 22 ft/lbs -if you tried 23 ft/lbs, maybe you'd strip the threads. It was a bad joke :banana:
 
Last edited:
DONE - 2019 TRD PRO.
M10x1.25 tap All 4 holes. My experience was like most, lots of junk, had to remove and clean tap and start again on the front holes there was so much crud up in the holes.

All bolts are M10 x1.25 X45mm Zinc coated steel.
Also tapped out the sway bar bushings frame mount bolts while I was replacing the rubber bushings with polyurethane...Same crud as the plate bolt holes.
Anti seize applied and "snug them down". Looks like Toyota does not clean the holes on anything that bolts to the frame. Quick easy insurance to clean and Anti seize anything you are working on.

Just for arguments sake, anyone replaced the skid plate bolts with studs and nuts?
Seems it would make re-installing it super easy...
 
I just installed the 2019 TRD Skid Plate on my 2010 T4R TE. (no KDSS) This is the aluminum one with red plastic TRD letters. (PTR60-89190) Though the Toyota part claims only 2014+, I had no clearance issues what so ever on my 2010 T4R TE. Paid like $282 for the plate and ordered it online shipping from Toyota in LA.

Now what I did have to contend with was my Toytec Ultimate 3 inch lift - it like others causes the front sway bar to contact the driver's side radiator cross member. (really it's a front suspension cross member) So this causes that cross member to slightly not contact the front perpendicular frame member, maybe by 1/4 inch. (so I placed SS washers there) If you look at the front and passenger radiator cross members, they aren't symmetrical around vehicle center and the passenger one is skewed farther from the middle and easily clears the sway bar. Kind of odd Toyota designed them this asymetrical way.

At anyrate, I did have to make the radiator cross member access holes slightly larger to give better tolerances for the later bolt alignments. You can easily remove the last (3rd bolt) to do so and I just took a drill pit to enlarge the access hole. But this was due to my lift kit and what it does with the driver side radiator cross member.

After this I took a M10 1.25mm tap (Ace Hardware) along with tap t-wrench handle I manually tapped out each of the 4 bolt holes. I used WD40 as a lubricant/cleaning agent and wow did I pull some gunk out! Best to turn 1-2 revolutions, back out 1/2 revolution to cause the gunk to fall out into the tap flutes.

About bolts: as I have a 3 inch lift, and the differential has spacers now, I used slightly longer M10 x 1.25 bolts. I got all of them at Home Depot, along with M10 washers/lock nuts. I think they're all Zinc coated, was hoping to find SS ones but no luck. Oddly Lowes and Ace Hardware do not seem to carry M10 1.25. M10 1.5 is the most common I think.

So in front I used 60mm long M10 x 1.25 bolts, using the existing aluminum spacer, ditching the retaining nut though. In the back I used 60mm long M10 x 1.25 bolts, and I also added a 3/4" long x 3/8" diameter SS bushing from Ace Hardware. These allowed the TRD skid plate to adequately clear the lowered differential which has spacers now due to the lift kit. And I'd say it gives a nice 1/4" of clearance skid plate to differential. Just thought I'd play it safe and not have the TRD skid plate contact the lowered differential. (maybe it isn't important though) I should say I could not get the 40mm front bolts that came with the skid plate to get good initial threading, and that once I got the 60mm long bolts for the front, I then was able to get good initial threading. It was a big difference in my case. I did not torque them down super hard in fear of the weak welds on the inner cross member nuts. I did apply a skosh of anti-sieze and some WD40 to each bolt. The whole TRD skid plate is very solid.

In the the future I'll likely paint it black to match my black 2010 T4R TE.

So in the books is another fun and crazy SUV project!
 
Installed skid plate today- The back bolts would not go in all the way. almost thought of going with the Stock bolts. Decided to buy all the stuff to do the job right. Got the holes cleaned out and everything worked. Thanks for the info.
 
They are normally called plug taps or starter taps because the lead angle never heard of a chaser tap lol. But the angle self-centers the tap and keeps you from cross threading while hand tapping and chasing.
There's also flat bottom taps where if the hole is blind it will thread all the way to the bottom. There's also Roll taps, sti taps but those are irrelevant to this.

Make sure your tap is gh2 or gh3. The bigger the number the looser the fit last thing you want is to chase it with a gh5 or larger and end up with a over-sized thread and have a loose fitting bolt.

And buy a quality tap like OSG I've had to extract out sooo many cheap Chinese taps for people, or broken drills and easy outs from them trying to remove the broken tap its not even funny. Last thing you want is to pack up a cheap tap and snap it off under your rig. They never snap cleanly and its impossible to drill it out with a hand drill and carbide drill bit without destroying the threads and having to install a helicoil or worse snap that drill off in the process.

Sorry for the long winded post 10 years of machining and a slow day in the shop. :ranger:

Just to be clear, starter taps and plug taps are not the same.
Starter taps are more commonly called taper taps, then mid taps or plug taps and lastly bottom taps.
Decades ago, one would normally buy a certain size in a set of three, one of each style to build a decent collection. Today starter taps are rarely stocked or even sold, as plug taps are the favorite.
Additionally, using a product such as copper anti seize is always beneficial or if your pockets are deeper TefGel.
 
2020 TRDP here. Need to add this to the list of things I'm making to look at under this stay at home nonsense. Pretty unbelievable that this is even an issue, but at least someone noticed it and has a way to deal with it. Thanks for the post, OP. Great old threads never die
 
Installed skid plate today- The back bolts would not go in all the way. almost thought of going with the Stock bolts. Decided to buy all the stuff to do the job right. Got the holes cleaned out and everything worked. Thanks for the info.

i didn't have any issues using the bolts hat came with the Pro skids. took out radiator support brackets and the Pro skid fit perfectly with the supplied bolts. took specified Torque too. this is my 2020 TRD OffRoad with KDSS. The SKID itself is from 2019-2020 model with plastic letters.
 

Attachments

  • IMG_1178.jpg
    IMG_1178.jpg
    139.4 KB · Views: 1,946
  • IMG_1180.jpg
    IMG_1180.jpg
    137.7 KB · Views: 1,882
Last edited:
Aluminum skid plate with access panels?

Hi, I joined t4r.org to ask a question over 2 years ago. Every time I try to post the question it says I have not replied enough times. It's going on 3 years. I don't know where to ask the question. So sorry for hijacking the thread! Winter is coming and after 3 years my metal skid plate is rusting out bad after 3 years trying to ask the question. Does anyone know a "bolt on" ALUMINUM skid plate that has access panels for both the filter and oil drain plug? Thanks in advance!
 
Hi, I joined t4r.org to ask a question over 2 years ago. Every time I try to post the question it says I have not replied enough times. It's going on 3 years. I don't know where to ask the question. So sorry for hijacking the thread! Winter is coming and after 3 years my metal skid plate is rusting out bad after 3 years trying to ask the question. Does anyone know a "bolt on" ALUMINUM skid plate that has access panels for both the filter and oil drain plug? Thanks in advance!


RCI and Heftyfabworks both I believe have what you are looking for.

Engine Skid Plate | 10-Present 4Runner – RCI Off Road


'10-'20 4Runner Upgraded Radiator/Engine Skid | Store - Hefty Fabworks

That's a long time to wait for this info.

:cheers:
 
Thanks for the info. I just got a (new to me) 2010 SR5 with really bad skid plate rust. I likely will not be heavily off roading so not sure where I could find an inexpensive replacement. The screw tip, is a great one though.
 
Great info. Installed skid plate yesterday, and sure enough the passenger side rear bolt would only go in about an inch. Chased the threads and was amazed how much work it needed to get it clean all the way through. Lots of material/shavings.

All good now.
 
I installed a TRD plate on my 21 T4R recently, chased the threads and same as when I did my 14, lots of crap in the threads. Sprayed brake cleaner in the threads to wash out remaining debris. Also, put a little never seize on the bolts.
 
Last edited:
Great info here but I have a couple of questions first has anyone placed longer/stronger bolts from the top down and can/ how an access panel be cut in the TRD pro skid?:fear:
Mike
 
Great info here but I have a couple of questions first has anyone placed longer/stronger bolts from the top down and can/ how an access panel be cut in the TRD pro skid?:fear:
Mike

The first part of your question: You could place longer bolts from the top. Doing so exposes something to hang up on stuff plus possible damage to threads, then you will have to cut the nits/ bolts to remove the plate.
Second: Sure, you could cut the plate, drill holes, make a cover plate and fasten plate to to the skid.
Haven’t seen anyone do this with the TRD Plate yet.

Hey, give it a try, you may be on to something.....
 

Members online

Forum statistics

Threads
278,316
Messages
3,554,121
Members
248,016
Latest member
Advally Service

Trending content

Back
Top