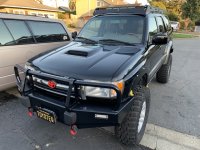
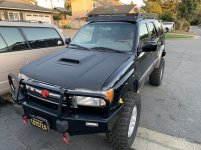
InfamousRNR's 2000 Limited BU!LD THREAD

You might need a bit more grinding to get a flat surface on the front there. Not sure how the ARB bumper works though. The Shrockworks one needs a flat surface:

The Shrockworks bracket has a return on it to allow a plug weld through one of the sides (just barely visible above). It was ground flat on the front and painted. Oh, and that was my first time welding too. :nod:

-Charlie

The front doesn’t need to be flush for the ARB... it actually has a good 1/4 inch or so before the mount touches the frame. So unlike the shrockworks, the ARB crush can’s that mount to the frame has some “wiggle” room.

I wanted to get this done before I mounted my winch to strengthen the end of the frame and also add the additional bolt for extra mounting strength. Dont want to be that guy on the trail that rips his bumper off when winching.

Your welds look better than mine. Now I’m less stoked on mine :nono:
 
Last edited:
Solo dude that owns his own business. He did this in Europe (I think Germany) and then came to the states to continue his trade. Really nice guy. I never leave yelp reviews but I’m going to leave this guy one. He’s mobile so he comes to you, he has a lot of knowledge and the tools to do the job right. I was stoked to pull the trigger with this guy.

Could you PM me his contact info? I am in the Bay and need mine done soon.
 
Had an epiphany the other day about how I could tackle boxing the end of my frame rail from when I chopped them off for the ARB Bumper installation.

I took the end caps that should have been installed if I had a Tacoma, and chopped them up.. these end caps were perfect because they already have a nut welded to the back of them. With the help of [MENTION=271883]T4topher[/MENTION] we ended up with some pretty sicmods. What do you think of my very first welds [MENTION=166333]thenightman[/MENTION] ?? Not bad for my first time eh? Welding vertically seemed to work out ok. Still need to work on my horizontal welds.


.

For being your first welds, those are impressive. I know people who have been welding for years that make way uglier welds then that. You will be an expert in no time.
 
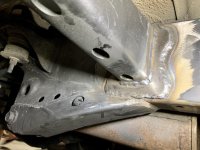
Got my [MENTION=28464]eimkeith[/MENTION] PCK and my lower link reinforcement kit welded on thanks to [MENTION=271883]T4topher[/MENTION] and [MENTION=166333]thenightman[/MENTION] ..

When I was thinking about how I’m going to weld on these items, I thought to myself “only one man can weld these on, and his name must be KEITH”

Naturally a bracket made by a guy named Keith needs to be handled with care by a man of the same name. Hahah.

But in all seriousness a HUGE thank you to @theknightman . This dude has some serious welding skills. And a HUGE thanks to [MENTION=271883]T4topher[/MENTION] for lending his space and tools and welder.

It turned into an all day affair (Tim and I know this all too well) it definitely took longer than expected due to some slight adjustments and other factors. But in the end, we prevailed!

.

Those lower link reinforcements look good. I need to get mine welded on soon, my passenger side mount could use some straightening.
 
For being your first welds, those are impressive. I know people who have been welding for years that make way uglier welds then that. You will be an expert in no time.

not the best but certainly not the worst I've seen.. just need a little more practice. not as good as you of course. I am satisfied too say the least.


Those lower link reinforcements look good. I need to get mine welded on soon, my passenger side mount could use some straightening.

yeah I am stoked on the sicmods [MENTION=28464]eimkeith[/MENTION] has developed for our 3rd gens... I highly recommend getting these.
 
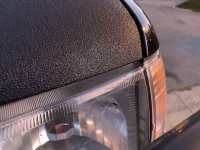
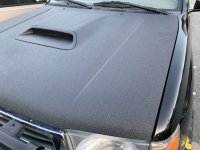
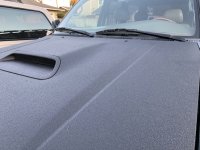
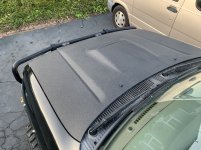
rhino-lined my aftermarket, non-OEM hood, cut the back off the hood scoop insert and attempted to mock up a light bar but that needs some more R&D before I get a bracket made to hold the light bar in place.


.
this is the brand I got
.
IMG_0184.jpg


finished result
.
 

Attachments

  • IMG_0184.jpg
    IMG_0184.jpg
    159.7 KB · Views: 429
  • IMG_0397.JPG
    IMG_0397.JPG
    119.9 KB · Views: 438
  • IMG_9259.JPG
    IMG_9259.JPG
    96.5 KB · Views: 441
  • IMG_1159.JPG
    IMG_1159.JPG
    115.5 KB · Views: 440
  • IMG_9390.JPG
    IMG_9390.JPG
    115.9 KB · Views: 421
Polishing the princess

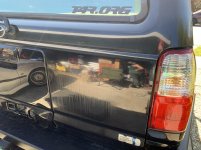
I did a little polishing on some parts of the rig just to get a glimpse to see if I know what I am doing...


First time polishing. There were some weird dried soap residue lines or something on the hatch and the DA polisher did exactly what it is designed to do.


I do still have some type of etching around the rim of the handle surround that I couldn't remove.


Does ANYONE have an idea of how I could polish that area? it looks more like fine scratches or something...


.
 

Attachments

  • IMG_5132_JPEG.jpg
    IMG_5132_JPEG.jpg
    130.9 KB · Views: 290
  • IMG_5137_JPEG.jpg
    IMG_5137_JPEG.jpg
    131 KB · Views: 296
  • IMG_5134_JPEG.jpg
    IMG_5134_JPEG.jpg
    132.7 KB · Views: 286
yeah.

wash, clay. wash, dry, ultimate compound with the DA. then seal it up with a wax/ceramic coat whatever you want.... but don't leave it bare after the compound/polishing step.

no polishing step here. just accepted the results the ultimate compound gave me. its like a compound & polish in 1.


.
 
Black really looks the best polished!


2001 SR5 4x4 Premium
2017 SR5 4x4 Premium

doesn't it?!?! I wash impressed on how much it shines now... only in the little area I did so far.


.

Did you try clay yet? It has been a while, before the 4Runner, but I recall claying working very well...


yeah.

wash, clay. wash, dry, ultimate compound with the DA. then seal it up with a wax/ceramic coat whatever you want.... but don't leave it bare after the compound/polishing step.

no polishing step here. just accepted the results the ultimate compound gave me. its like a compound & polish in 1.
 
Drat. I recall clay, multiple passes removing something like that, if indeed on the surface, as opposed to those streaks being below the finished surface, which would suck...

Ever hear of rhino-lining? :biggrin1: Love what you did with your hood and I sort of like the consistency of both the front and rear being the same. That said, I want to truck bed line the whole dang thing!
 
Finally got my BAMF sliders burned on thanks to [MENTION=271883]T4topher[/MENTION]! It was pretty much my first time welding so no perfect welds here but definitely pleased with how they came out. It's crazy hard to try & weld laying down getting in those tight spots.


IMG_2731.jpg


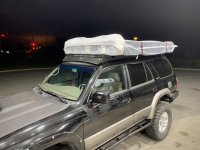
Also mounted my new RTT... It's just a mattress but it was cheaper than a Tepui.


IMG_0990.jpg


.
 

Attachments

  • IMG_2731.jpg
    IMG_2731.jpg
    130 KB · Views: 624
  • IMG_0990.jpg
    IMG_0990.jpg
    132.8 KB · Views: 637
Last edited:
Drat. I recall clay, multiple passes removing something like that, if indeed on the surface, as opposed to those streaks being below the finished surface, which would suck...

Ever hear of rhino-lining? :biggrin1: Love what you did with your hood and I sort of like the consistency of both the front and rear being the same. That said, I want to truck bed line the whole dang thing!

Rhino lining the whole;e truck would give a great deal of piece of mind in the brush. with that said, since having the hood lined, I haven't even washed it & it looks brand new. Very easy upkeep.


AutoDetailing: The Detailer'''s Domain

And this should help

Recommended Kits – Auto Detailing Wiki

I bought a bunch of stuff based on a them detailing experts.

I know for sure ONR is the best. I've used this so many times and always impressed. It's magical


Thanks for the suggestions. I am new to auto detailing in general & tend to spend a lot of time watching other people explain their technique. It's definitely an art & having the right products really helps to be efficient.
 
Finally got my BAMF sliders burned on thanks to [MENTION=271883]T4topher[/MENTION]! It was pretty much my first time welding so perfect welds here but definitely pleased with how they came out. It's crazy hard to try & weld laying down getting in those tight spots.


View attachment 357907


Also mounted my new RTT... It's just a mattress but it was cheaper than a Tepui.


View attachment 357908


.

Ive been wanting to source some of these limited panels to throw them on my truck. They look great with the black.
 
it's been a while since I touched this thread.


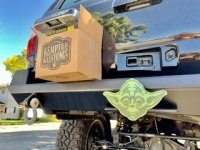
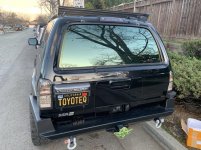
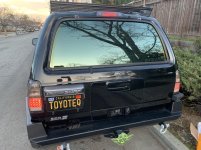
some quick sicmods - LED smoked tails and 3rd


.
 

Attachments

  • IMG_4973.jpg
    IMG_4973.jpg
    139.4 KB · Views: 523
  • IMG_1152.jpg
    IMG_1152.jpg
    138.4 KB · Views: 517

Members online

No members online now.

Forum statistics

Threads
278,312
Messages
3,554,083
Members
248,016
Latest member
Advally Service

Trending content

Back
Top