

jdkilroy
Member
As there are a few folks expecting sliders soon, I thought this might be helpful:
Tools:
scissors jack, floor jack, large C clamp, a maul, some short pieces of wood (2 x 6, 4 x 6, a piece of soft wood like a shingle), 12mm, 14mm, 15mm box or ratchet wrenches (sockets will do you no good on this job except for the 12mm for which a long extension will make life better)
Removed the OEM running boards and after greasing the bolts, put them back in the holes they came from to reduce corrosion.
Cardboard on the floor, positioned the scissors jack at the balance point of the slider with a piece of 2x6 on it. Placed the slider on the scissors jack and got it positioned fore and aft so it lined up where it needed to be. The front edge of the back bracket needs to land just behind the weld on the frame rail.
Start jacking the slider into place with your jack. Helps to whack the underside of the slider brackets as you go along with one of your heavier pieces of wood to encourage it to travel up the frame rail. Watch the back bracket to be sure that it is far enough back to clear the piece of chassis that the bracket is notched out for.
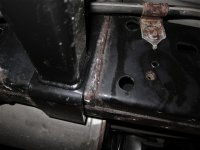
DRIVER"S SIDE:
The bolt for the back bracket has to pass from outer to inner and access to the inside is severely limited due to the gas tank sitting right there next to the frame. I ended up using a thin stick with some really sticky stuff on the end to hold and place the washer, the lock washer and finally the nut onto the end of that bolt. That one took a while and was cause for more than a few exclamations.
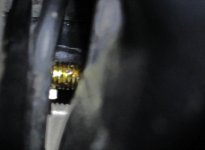
The inside of middle bracket passes behind two brake lines that are attached to the inside of the frame. You don't need to detach them but you need to ID them and make a mark on the outside of the frame so you know you are not running into them as you jack the slider into place.
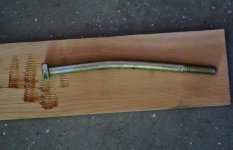
The bolt needed to be bent to get over the weld on top of the frame and then back into the hole on the other side. I just laid it on the edge of a 2 x 6 with the threads resting on the piece of soft wood and hit it in the middle with a 3# maul until I achieved a precision radius.
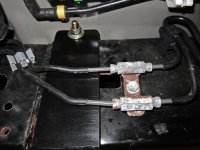
The front bracket on driver's side required removal of the heat shield over the exhaust pipe (12mm nuts x 3; here's where that long extension comes in handy). Now you have to deal with the gas lines that are right in the way of passing that bolt which has to pass from inside to outside. You will need to gently urge the tubing downward in order to get the bolt into the inside bracket hole. Replace heat shield and head on over to the passenger side.
PASSENGER SIDE:
The same process gets the sllder up onto the frame and again.
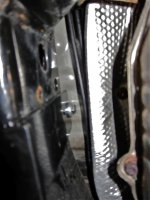
I started by positioning the back bracket as in the picture above and securing it with a bolt. The muffler shield needed to be bent temporarily to give better access. Bolt passes outside to inside.
The middle bracket was the easiest of all six. Bolt passes outside to inside.
The front bracket bolt passes inside to outside and again, the bolt required bending so that it could "find" the hole on in the outer bracket.
Both the front brackets required the use of a large clamp to bring the two ears of the bracket together enough so I could get a washer and lock washer on before the nut.
Nothing too severe and again, I'm writing specifically for the 2008 V8; other models may well have other obstacles to overcome. But you can do it alone pretty easily with only a few tools. No question; having two would be handy.
Tools:
scissors jack, floor jack, large C clamp, a maul, some short pieces of wood (2 x 6, 4 x 6, a piece of soft wood like a shingle), 12mm, 14mm, 15mm box or ratchet wrenches (sockets will do you no good on this job except for the 12mm for which a long extension will make life better)
Removed the OEM running boards and after greasing the bolts, put them back in the holes they came from to reduce corrosion.
Cardboard on the floor, positioned the scissors jack at the balance point of the slider with a piece of 2x6 on it. Placed the slider on the scissors jack and got it positioned fore and aft so it lined up where it needed to be. The front edge of the back bracket needs to land just behind the weld on the frame rail.
Start jacking the slider into place with your jack. Helps to whack the underside of the slider brackets as you go along with one of your heavier pieces of wood to encourage it to travel up the frame rail. Watch the back bracket to be sure that it is far enough back to clear the piece of chassis that the bracket is notched out for.
DRIVER"S SIDE:
The bolt for the back bracket has to pass from outer to inner and access to the inside is severely limited due to the gas tank sitting right there next to the frame. I ended up using a thin stick with some really sticky stuff on the end to hold and place the washer, the lock washer and finally the nut onto the end of that bolt. That one took a while and was cause for more than a few exclamations.
The inside of middle bracket passes behind two brake lines that are attached to the inside of the frame. You don't need to detach them but you need to ID them and make a mark on the outside of the frame so you know you are not running into them as you jack the slider into place.
The bolt needed to be bent to get over the weld on top of the frame and then back into the hole on the other side. I just laid it on the edge of a 2 x 6 with the threads resting on the piece of soft wood and hit it in the middle with a 3# maul until I achieved a precision radius.
The front bracket on driver's side required removal of the heat shield over the exhaust pipe (12mm nuts x 3; here's where that long extension comes in handy). Now you have to deal with the gas lines that are right in the way of passing that bolt which has to pass from inside to outside. You will need to gently urge the tubing downward in order to get the bolt into the inside bracket hole. Replace heat shield and head on over to the passenger side.
PASSENGER SIDE:
The same process gets the sllder up onto the frame and again.
I started by positioning the back bracket as in the picture above and securing it with a bolt. The muffler shield needed to be bent temporarily to give better access. Bolt passes outside to inside.
The middle bracket was the easiest of all six. Bolt passes outside to inside.
The front bracket bolt passes inside to outside and again, the bolt required bending so that it could "find" the hole on in the outer bracket.
Both the front brackets required the use of a large clamp to bring the two ears of the bracket together enough so I could get a washer and lock washer on before the nut.
Nothing too severe and again, I'm writing specifically for the 2008 V8; other models may well have other obstacles to overcome. But you can do it alone pretty easily with only a few tools. No question; having two would be handy.
Attachments







Last edited:


