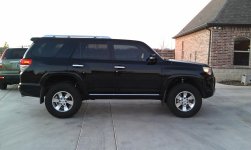
Thanks for the reply Jesse. The instructions are pretty good, but there's a couple 5th gen specific things I'm concerned about.
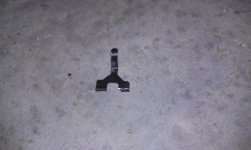
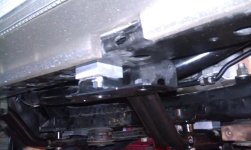
-The toytec rep mentioned something about a radiator bracket relocator??? I see nothing on their website about that.
-Is there anything special (bushings, etc.) I need to make the rear 5100's fit?
-Do people use locktite on any bolts when they put everything back together?
Finally, how soon do I need a front alignment? How important is it? If I install tomorrow, I won't be able to get it done until late Monday after work. Will I be safe driving to work without it?
BTW. I'm not doing UCA's just the lift. And I have a couple more-experienced friends helping out.
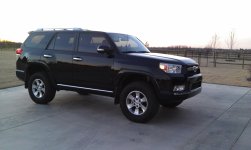
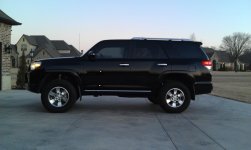
I put my toytec ultimate in my 2010 TE last weekend, solo... took longer than planned due to going slow to make sure I didn't break anything (brake lines, etc mostly). Your install will be a little different with the SR5 so consider yourself lucky that you don't have to deal with reattaching the KDSS sway bar -- that was the biggest pain in the a$$ of the whole job, I was hoping to get it done without disconnecting the sway bar at all but proved to not be the case. I'd definitely recommend downloading the TIS FSM manual that nashman69G posted back in 2010 (it's under the Mods/Writeups sticky on the main 5th Gen page, or here's a link to the combined pdf that Harper7 posted
http://www.toyota-4runner.org/5th-gen-t4rs/101802-5th-gen-repair-manual-help.html#post907429). I printed out the approptiate pages so I didn't have to take my laptop out to the garage with me. The manual also lists all the torque specs so you'll definitely want to have it handy once you get everything installed. So, let's see here, answers to your specific questions:
1) Nothing for the radiator but I do know they make (and include with the Ultimate kit) a pair of sway bar relocating brackets for non-KDSS kits. Sure that's not what they mentioned? Think it's a pretty straightforward piece of aluminum to install...
2) Nothing special needed. When installing the new shocks, I found it easier to attach the bottom eyelet first then compress the shock (which is fairly easy to do) and position the top of the shock into place (i.e. put the threaded shaft though the upper mount hole). DEFINITELY put the new coils in the rear end before you do this though.
3) I did use some red loctite on the major mounting bolts both front and rear. With proper torque settings nothing is going anywhere but a little dab of loctite won't hurt, especially on the 3 top mounting bolts for the front COs. The threads are way longer than needed and require a deep socket to tighten. Problem is that the deep socket attached to my torque wrench was too tall to fit. The torque spec on those 3 bolts isn't super high (18 ft*lbf I think) so that's probably the only spot that really benefits from the loctite (although, even if a nut came loose there is no way for the CO to pop out...)
4) I installed new UCAs and my camber was WAY out of whack when everything was put back together. Most of that was b/c I screwed up and used the "A" or "+4.0" setting on the Light Racing UCA (something I remedied middle of the week after experiencing a ton of tire rub in the back - should have read a little more on the forum b/c the recommended "D" setting is well documented). Regardless, there was no way I wanted to drive anywhere other than straight to get an alignment after doing the install. With your stock UCAs I'm not sure how far out the camber will be since the ball joint is in a fixed location. If the wheels look straight enough then you'll be fine driving it around for a day or 2, but I wouldn't go tearing down the BA Expressway or Creek T-Pike before you get the alignment done... I will be curious to hear if you can get things in spec with the stock UCAs though. I decided to spend the extra $$ given that I'm running 285 tires and knew I'd need the extra adjustment to get the camber in spec after setting the caster to max.
Couple of other thoughts:
-- You'll definitely want coil compressors to install the Superflex coils in the rear (it also makes removing the stock coils easier). The 54.99 ones from Sears worked fine for me. It took me a while to install the driver side coil in the rear b/c I had to take the stinking compressors apart 3 times to get them positioned in the right place on the coils to clear the fuel tank and brake lines, etc. You'll still probably need a prybar to pop the coil into place though with some helping hands to pull down on the rear axle you'll probably have an easier time than I did solo. Also, a prybar will make the removal/instal of the front struts/COs easier.
-- You don't need special tool to disconnect the ball joint on the UCA from the steering knuckle as called for in the instructions. Loosen the nut (but don't remove it all the way, this way your lower arm doesn't just drop when things break loose) and then give the steering knuckle a few good taps either side with a hammer.
-- Test fit the threads on the long bolts of your diff drop kit before you install them. One of my nuts wouldn't thread past the end of the bolt (had a jacket up thread right at the top edge of the nut) and I couldn't get it tight. I had to scavenge for some washers to fill the gap. I picked up 2 nylon insert nuts at ACE yesterday and will be "fixing" things tomorrow (2 of the washers I had to use were nylon -- I didn't have any metal ones that were big enough). Probably an isolated case but worth checking while it's still easy to run to the store. Also, the instructions said to reuse the stock washers on the stock bolts but my washers wouldn't clear the bolt threads despite all the hammering and cursing I tried. Pick up some big washers just in case (my kit did include 2 washers that probably would have been all I needed if I didn't have the other nut issue). All the extra grade 8 stuff at Ace was ~$2.50.
I'm assuming that you or your buddies will have a full socket/wrench set but I recall that 19mm, 17mm and 14mm were the size of most of the bolts (my skid plates now have a mix of 10mm and 12mm bolts with the diff drop kit too). If you do end up adding new UCAs down the road (if you can't get the alignment in spec), the big nut on the LR UCAs is a 32mm. Oh, when tightening down the top mount of the rear shocks you'll want a thin blade 19mm or 3/4 in open ended wrench to keep the shock body from spinning while you tighten the top nut.
Good luck!