Jangoforhire's Build and Pictures

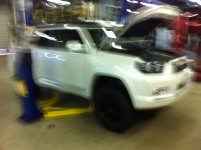
And so it begins....
DUMP 046.jpg
 

Attachments

  • DUMP 046.jpg
    DUMP 046.jpg
    115.8 KB · Views: 4,192
Super excited...this wait is going to feel like FOREVER.
You won't recognize it when you go to pick it up :nono: Looking forward to seeing it in person.

Definitely going to have to take it out on the trails this weekend to break it in :thumb3: Just make sure Duc is behind you.:wink2:
 
Last edited:
You won't recognize it when you go to pick it up :nono: Looking forward to seeing it in person.

Definitely going to have to take it out on the trails this weekend to break it in :thumb3: Just make sure Duc is behind you.:wink2:

Oh yea! :hungry::hungry:

Bobby is awesome and has a great shop set up. No doubts that they will get the job done right. I hung out for most of the day and he let me walk on back and check the progress and abuse their wifi connection all day long. Plus he gave me a tour of the shop, and did a great job explaining just how they were going about installing everything, and how it will all work.

Can't wait to get back tomorrow afternoon to see it finished up!


PS. Got to check out Bobby's 4Runner in person and it is one sick ride! Plus he was letting me in on a few of his new mods for this weekends meet-up. Including "Enhanced Party Mode" (yep, made that name up myself).
 
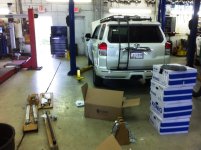
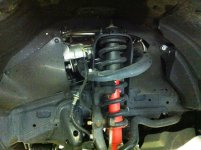
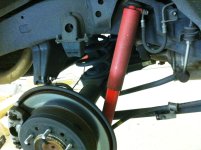
Not that this is anything new for you guys, but here's some before shots. I told Jango that I would document as much as possible for his build thread.
Front
jango 001.jpg

Rear
jango 002.jpg

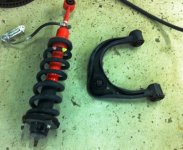
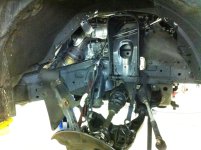
...And it's time to start ripping stuff off!
jango 003.jpg
jango 004.jpg
 

Attachments

  • jango 001.jpg
    jango 001.jpg
    136 KB · Views: 3,889
  • jango 002.jpg
    jango 002.jpg
    117.8 KB · Views: 3,843
  • jango 003.jpg
    jango 003.jpg
    123.7 KB · Views: 3,864
  • jango 004.jpg
    jango 004.jpg
    130.9 KB · Views: 3,849
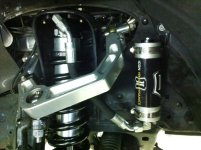
Some of you have experience with the reservoir system from Icon. As you know, that front bracket for the reservoir is universal for the Tacoma, 4Runner, FJ, etc. There are multiple holes for each application at the bottom.

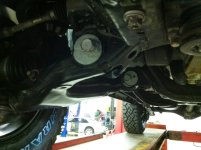
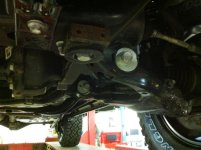
As you 5th Gen owners know, the washer reservoir is in the passenger side front fender well. So, when you mount this bracket where Icon wants you to, it places the reservoir right up against the washer bottle and really, really close to the upper control arm. (I believe Limamike and Joneseyyy can confirm these minor issues as we've had to do some adjustments to their systems as well). So here was High Tech's solution...
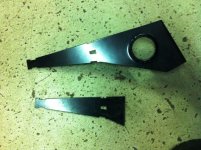
jango 006.jpg

The top is the bracket whole. The bottom is where we cut it. We will attach the bracket to the side of the frame instead of the bottom. This will allow for three things.
1. A reservoir mounted perpendicularly (aesthetics)
2. Clearance for the control arm (hose, reservoir body, and washer bottle)
3. What we feel is a more solid mount. Now there is no 'flex' in the bracket from being mounted only to the bottom. It is mounted directly to the side of the frame.

Like this...
jango 007.jpg
 

Attachments

  • jango 006.jpg
    jango 006.jpg
    59.3 KB · Views: 3,827
  • jango 007.jpg
    jango 007.jpg
    121.5 KB · Views: 6,678
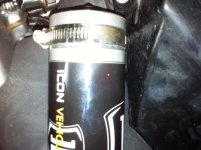
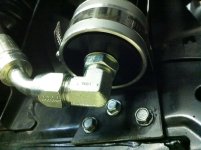
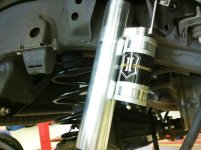
Here are some close ups of the bracket and how close the reservoir is to the fender liner (where our washer bottles are).
jango 009.jpg
jango 008.jpg
 

Attachments

  • jango 009.jpg
    jango 009.jpg
    94.5 KB · Views: 3,842
  • jango 008.jpg
    jango 008.jpg
    111.7 KB · Views: 3,862
:bravo: Janoforhire you'd better make sure Ducmonsta is on your Christmas list! Its one thing to find a talented mechanic that really understands the vehicle he is modifying but a whole other to take pictures of the process.

VERY jealous of whats going on under your fender wells!

:cheers:
 
^^ what he said.

I wish there was such a shop around here. Oh and looking amazing man! Can't wait to see it all finished up.
 
If only I could start a poll in the middle of someone else's thread.

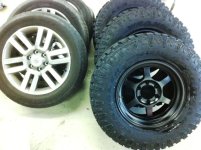
Which set of wheels and tires should I put back on Jango's truck?
jango 010.jpg
 

Attachments

  • jango 010.jpg
    jango 010.jpg
    126.4 KB · Views: 3,853
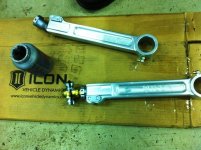
So, in Icon's directions, they never say anything about anti seize on any of their parts. We all know what that does if you're ever working on a vehicle with adjustable points. We take the liberty in applying as needed.
jango 011.jpg

And the uppers...
jango 012.jpg
 

Attachments

  • jango 011.jpg
    jango 011.jpg
    104.3 KB · Views: 3,807
  • jango 012.jpg
    jango 012.jpg
    53.6 KB · Views: 3,839
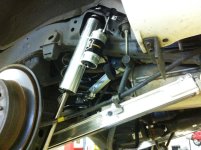
Starting to look damn good!!!
jango 013.jpg

A little farther out...
jango 015.jpg
 

Attachments

  • jango 013.jpg
    jango 013.jpg
    117.2 KB · Views: 3,806
  • jango 015.jpg
    jango 015.jpg
    125.4 KB · Views: 3,822
This is awesome Duc! Thank's for throwing these up. It makes the wait at home a little more bearable. Can't wait to head back down their this afternoon and see it all in person!


:bravo: Janoforhire you'd better make sure Ducmonsta is on your Christmas list! Its one thing to find a talented mechanic that really understands the vehicle he is modifying but a whole other to take pictures of the process.

VERY jealous of whats going on under your fender wells!

:cheers:

Oh believe me, I know. Duc and his boys at High-Tech have definitely earned a customer for life out of me. It makes a world of difference when you can walk back and see how the work is going, personally meet and talk to the mechanic who is doing all the work, and have the shop manager check with you to make sure every little thing is right - and even explain it to make sure you know what's going on.

I know it has been said on here a thousand times, but if anyone needs any work done and is within reasonable driving distance to High Tech (reasonable meaning nothing over a 5 day drive :thumb3:), High Tech is the place to be.

Oh and MeBe4running, if you mean Christmas list as in paying him to install all the new parts I get around christmas...then yes...he definitely will be! :frisky:
 
In Antman style....here she is!
jango.jpg

I will let Jango do all of the final pics of everything. I feel that it's his baby so he should be the one to put all the 'good' pics up.

Jango-you'll be getting a call here soon. We're in the middle of the alignment now. Sometime that process alone is a couple of hours.

I gotta say....I'm a little jealous of all the hardware. Can't wait til we go camping this weekend.
 

Attachments

  • jango.jpg
    jango.jpg
    89.9 KB · Views: 4,036
Speaking of alignments, here is what your lower control arm eccentrics 'should' look like to get as much caster as possible. This is not always going to be the case. If you do not have adjustable upper control arms, these next 2 photos will vary. But this is generally where you would like them to be.
These pics are from the front of the vehicle.

Passenger side
jango 016.jpg

Driver's side
jango 017.jpg
 

Attachments

  • jango 017.jpg
    jango 017.jpg
    108.5 KB · Views: 4,069
  • jango 016.jpg
    jango 016.jpg
    111.9 KB · Views: 4,047

Members online

No members online now.

Forum statistics

Threads
278,316
Messages
3,554,120
Members
248,016
Latest member
Advally Service

Trending content

Back
Top