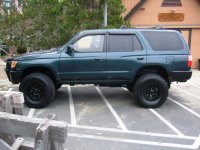
JasetheDamager's build thread for a 97 SR5 4x4

I just bought a used version of this kit and I wanted to ask, in regards to the picture, what are those two pieces visible below the land cruiser springs and also those gold bolts shown.

Hey FrankM23, I'm sorry to sound like a total noob, but I had my shop install my suspension. I know coils and shocks, and some of the other basic parts, but I'm guessing about specifics at this point. I believe the gold bolts are for the front differential drop spacers, though I could be wrong. Perhaps the two pieces under the LC coils are upper shock bushings. I hate to give bad info, and just in case I'm wrong, I'll post a list straight from Sonoran Steel's website. You can call them and talk to Steve as well. He's the owner, and he's very helpful. Also, you can contact Brianemc2, a member who's helped me out a great deal. He runs the same kit and is the guy who helped me decide what kit to buy. All I know is the kit is awesome! My truck feels capable no matter the conditions now. Hope this helps man. Sorry I can't be more certain, but I'm still learning.

(1)-Toyota Progressive TRD Front Coil: Driver/Left Side
(1)-Toyota Progressive TRD Front Coil: Passenger/Right Side
(2)-Toyota Stover Nuts
(2)-Toyota Upper Shock Bushings
(2)-Sonoran Steel Fabrication L.L.C. Custom Polyurethane Top Plate Retainers
(2)-Bilstein 5100 Series Height Adjustable Nickel Plated Heavy Duty Front Shocks
(2)-Sonoran Steel Fabrication L.L.C. Front Differential Drop Spacers

Rear:
(2)-Toyota 80 Series Land Cruiser Coils
(2)-Genuine Toyota Tokico Black Rear Shocks & Supporting Hardware
(1)-Sonoran Steel Fabrication L.L.C. Adjustable Trac/PanHard Bar
(2)-Sonoran Steel Fabrication L.L.C. Extended Bump Stop Adapters with
(2)-Daystar "Competition Style" Bump Stops
(2)-Sonoran Steel Fabrication L.L.C. Rear Sway Bar Adjustment Brackets
(1)-Sonoran Steel Fabrication L.L.C. Braided Stainless Steel Extended Brake Line
(1)-Sonoran Steel Fabrication L.L.C. Parking/Emergency Brake Bracket
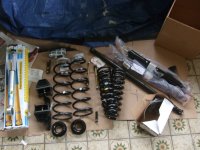
 
I just realized how lame the first pic of my SS 1.2 A Kit looked, so I'm reposting another pic, just cuz I can glance at such beauty all day. Truly, my GF doesn't understand. She just thinks I'm crazy. Then she drove my truck for the first time yesterday and now she gets IT.

DSCF3327.JPG

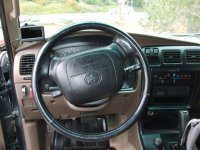
I finally plasti-dipped my emblems. I also installed my Ultra-Gauge, which took 5 minutes and 2 zip-ties. I still need to calibrate it though. I'm also doing the Taco Whip mod in the next 2 or 3 days, so I'll post some pics when I'm done.
 

Attachments

  • DSCF3327.JPG
    DSCF3327.JPG
    132.3 KB · Views: 964
Last edited:
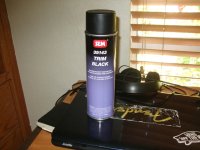
I finally bought my SEM trim paint and primer adhesive from a local body shop here in OC. My plan is to black out my remaining chrome, front and rear bumpers. During the last two days on my breaks from work I decided to clean, sand, and paint my entire chassis/undercarriage, including using high heat primer and paint for my muffler/exhaust pipes. The difference is incredible! I'm letting it dry tonight, and I'll post pics tomorrow.

I taped up the seals and joints on my driveshaft. My mechanic friends told me everything else is fair game as long as you use the proper paint on the exhaust pipes, which I did. My SS 1.2 suspension lift and 33" tires really showed some of the rust spots I never noticed when I originally bought the truck 6 weeks ago. Altogether my Runner has now undergone a transformation that I believe will make it last another 10-20 years, depending upon my plans. Pics forthcoming I promise!
 
This update is pic heavy. First two pics are of my Ultra-Gauge installed.
DSCF3353.JPG
DSCF3354.JPG

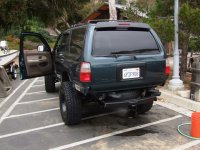
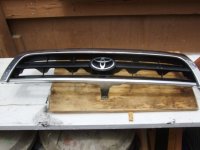
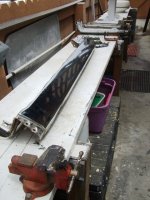
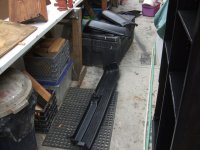
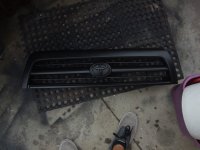
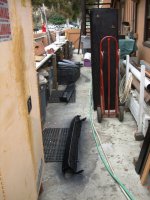
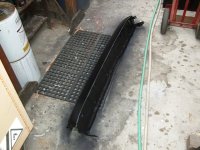
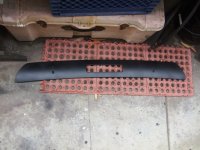
I decided to paint my front bumper, front grille, rear bumper, rear spoiler, and plastic over the bumper. I used SEM trim black, a paint I stumbled across on COB's thread, and I talked to Brianemc2 about it as well.
DSCF3373.JPG

The paint is a satin finish that perfectly matches my powder coated wheels. Everybody around my shop has commented that it looks like a professional job. I accidentally threw out the can of adhesive I used as a primer. I bought the supplies from a place called the Paint Store in Laguna Niguel here in OC. The guy knew his business. I cleaned the chrome with soap and water, sanded it with 400 grit wet/dry, then used 2 coats of spray adhesive, followed by 4 coats of SEM. I missed two spots I need to finish up cuz I used all 3 cans I bought. I'll finish it tomorrow. Here are additional pics:
 

Attachments

  • DSCF3353.JPG
    DSCF3353.JPG
    126.9 KB · Views: 1,144
  • DSCF3354.JPG
    DSCF3354.JPG
    127.6 KB · Views: 762
  • DSCF3373.JPG
    DSCF3373.JPG
    121.9 KB · Views: 921
  • DSCF3355.JPG
    DSCF3355.JPG
    131.7 KB · Views: 750
  • DSCF3357.JPG
    DSCF3357.JPG
    119.4 KB · Views: 681
  • DSCF3356.JPG
    DSCF3356.JPG
    132.7 KB · Views: 664
  • DSCF3362.JPG
    DSCF3362.JPG
    121.3 KB · Views: 720
  • DSCF3359.JPG
    DSCF3359.JPG
    132.6 KB · Views: 674
Last edited:
More pics from my 8-hour paint-fest:
 

Attachments

  • DSCF3365.JPG
    DSCF3365.JPG
    123.5 KB · Views: 655
  • DSCF3366.JPG
    DSCF3366.JPG
    113.3 KB · Views: 675
  • DSCF3363.JPG
    DSCF3363.JPG
    135 KB · Views: 663
  • DSCF3364.JPG
    DSCF3364.JPG
    118.8 KB · Views: 640
  • DSCF3368.JPG
    DSCF3368.JPG
    127.5 KB · Views: 668
  • DSCF3358.JPG
    DSCF3358.JPG
    131.2 KB · Views: 662
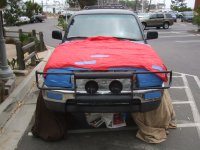
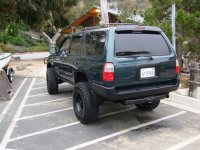
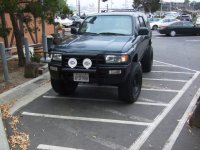
I need to take better pics, but here's my truck as of now:
DSCF3369.JPG

DSCF3371.JPG

DSCF3372.JPG

I'm thrilled with the way the SEM paint turned out. Now we'll just have to see if it's durable, but I've heard excellent reviews! I'll keep you guys posted.
 

Attachments

  • DSCF3369.JPG
    DSCF3369.JPG
    123.3 KB · Views: 772
  • DSCF3371.JPG
    DSCF3371.JPG
    124.6 KB · Views: 732
  • DSCF3372.JPG
    DSCF3372.JPG
    122.8 KB · Views: 1,539
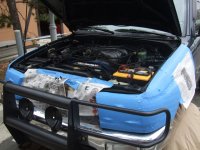
The paint looks great and makes a huge difference. But that engine bay, DAMN! its spotless! Makes me wanna clean mine
 
The paint looks great and makes a huge difference. But that engine bay, DAMN! its spotless! Makes me wanna clean mine

Thanks Zachpins! I appreciate the kind words. The bumpers turned out better than I had hoped. I painted them cuz I've had to spend unexpected cash the last 2 months, thus delaying an Outdoor Logic bumper for the foreseeable future.

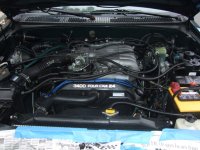
And this may sound weird, but I've been on a cleaning binge lately, including painting my entire chassis/undercarriage to prevent rust, and cleaning out my engine. I bought the truck almost 2 months ago, so I want all the dirt to be mine, not the PO's. That way I know I earned it. I've actually been looking at the front D-ring mount thread and stumbled across your name. The mod list is endless, so I'm adding those to the wishlist.
 
Nice job on the bumpers. I'm in the process of painting mine as well, but I went cheap and got Duplicolor. I thought about the SEM paint, but at $15 a can it was way too much since I have my cladding to do as well. Also Duplicolor is buy one get one free right now, so $6 for 2 cans is worth it.

Did you use any clear? I'm still debating using clear myself.
 
Nice job on the bumpers. I'm in the process of painting mine as well, but I went cheap and got Duplicolor. I thought about the SEM paint, but at $15 a can it was way too much since I have my cladding to do as well. Also Duplicolor is buy one get one free right now, so $6 for 2 cans is worth it.

Did you use any clear? I'm still debating using clear myself.

Hey SCRunner12, I was just looking at your thread the other day and saw you were painting your truck as well. I'm no expert when it comes to metal/automotive paint, but I work as a carpenter and often use paint when it comes to finishing work. I also work on boats---wooden, metal, fiberglass---and I rarely use a clear, since it's more difficult to maintain and refinish. I didn't use a clear, but that's not necessarily the best way, just the way I decided to do it. Of course, other people have other opinions. I'm the type of guy, who if somebody shows me a better way, I'll go for it, pride be damned.

As for Dupli-Color, I have no experience with their product. I was lucky with my SEM. I got it on sale for 10$ a can, though I need 2 more and I'm not sure I'll get it that cheap again. I used 3 cans on this project and there's a couple more spots I need to touch up, so all told I'll end up using at least 4 cans, maybe all 5. That gets pricey pretty quick when you consider taxes as well. I ended up doing 4 light coats on top of an adhesive spray for my finished product. We'll see how this holds up over the long term and if it's worth the money. I know COB has used it on his rig, and I'm pretty sure Brianemc2 has as well.

I work with a lot of tradesmen and every single guy who saw my rig today thought it looked like a pro job. I took my time, cleaned everything, and followed the paint directions, and I love the results. I'll let everybody know how it holds up long term.
 
I have been wanting to paint my fender flares, either that or rhino line it

Hey SCRunner, my parents just bought a house outside of Santa Cruz, near Ben Lomond, which is up in the mountains I think. I haven't had a chance to visit their new house yet. Anyway, you seem like a younger guy and you have a great looking rig! I drove a 289 1965 Mustang for my first car and while it was cool, it broke down all the time, though I learned a lot about fixing cars, at least older ones pre-computer days.

I had Rhino Line in the bed of my last Chevy Silverado (which doesn't even compare to a Runner) and it was a durable material that I often abused with large chunks of wood, all types of outdoor equipment, and anything my college friends needed to move since I was the guy with a truck. I prefer the satin powder-coated look of the SEM, but that's all personal preference. As I've mentioned, I can't vouch for durability yet, cuz I just applied it yesterday. Post some pics if you use Rhino Line.

Looks great! Did you prep the chrome at all or just paint right on it?

Thanks Hepar! I cleaned the chrome with a Simple Green solution lying around my shop, sanded the back with 220 since it was rusty, then 400, then sanded the front with 400. Once sanding, I cleaned the dust off with denatured alcohol, which I prefer over acetone as a final cleanser pre-topcoating. I feel like an idiot now, but I threw out the can of adhesive I applied as a primer, and I meant to post pics of the can. I applied 1 coat, waited 5 minutes, then applied a 2nd coat. After waiting 20 minutes, I applied my 1st coat of SEM, then waited 5 minutes between coats until I had 4 light-to-medium coats. The bumpers felt dry to the touch in less than 30 minutes and I reattached everything 2 hours later without a single scratch or smudge. The SEM paint really impressed me!
 
Last edited:
Hey SCRunner12, I was just looking at your thread the other day and saw you were painting your truck as well. I'm no expert when it comes to metal/automotive paint, but I work as a carpenter and often use paint when it comes to finishing work. I also work on boats---wooden, metal, fiberglass---and I rarely use a clear, since it's more difficult to maintain and refinish. I didn't use a clear, but that's not necessarily the best way, just the way I decided to do it. Of course, other people have other opinions. I'm the type of guy, who if somebody shows me a better way, I'll go for it, pride be damned.

As for Dupli-Color, I have no experience with their product. I was lucky with my SEM. I got it on sale for 10$ a can, though I need 2 more and I'm not sure I'll get it that cheap again. I used 3 cans on this project and there's a couple more spots I need to touch up, so all told I'll end up using at least 4 cans, maybe all 5. That gets pricey pretty quick when you consider taxes as well. I ended up doing 4 light coats on top of an adhesive spray for my finished product. We'll see how this holds up over the long term and if it's worth the money. I know COB has used it on his rig, and I'm pretty sure Brianemc2 has as well.

I work with a lot of tradesmen and every single guy who saw my rig today thought it looked like a pro job. I took my time, cleaned everything, and followed the paint directions, and I love the results. I'll let everybody know how it holds up long term.

Interesting about the clear. I really have no clue what to do. I was washing my flares and got some water on the back. After that I had some water marks on the black. That is was got me thinking of the clear. To help keep it away from the elements better. I definitely will be wheeling my 4runner so touch ups are going to be needed.

I understand about the SEM. If I didn't need around 7-9 cans to cover my entire bumpers and cladding then I probably would have gone that route. It would just cost me over $100 in just the top coat. I definitely like how yours turned out though. Nice work.

I also saw your comment about your parents place in Ben Lomond. It's really nice up there and apparently some random wheeling spots. If you're ever up our way let us know. I'd be great to meet up and we can make a day trip to Hollister.
 
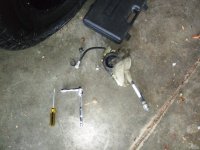
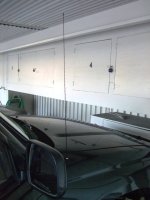
Had an hour of free time last night, so I finally decided to install the Taco Whip Mod. Took about an hour total cuz the PO really mashed up the bezel nut where it connected to the truck. The hardest part was running the antenna to the radio, but it was straightforward enough and I'm pleased with the results.
Here's the old motorized unit:
DSCF3374.JPG

Here's the new antenna. I snapped a quick photo before I had to run errands:
DSCF3375.JPG
 

Attachments

  • DSCF3374.JPG
    DSCF3374.JPG
    126.7 KB · Views: 524
  • DSCF3375.JPG
    DSCF3375.JPG
    104.4 KB · Views: 512
did you respray the tow hitch? going to repaint mine soon, trying to figure out what solution to use. Thanks!

Hey Jada, I like your rig! I was looking for a black runner, but I found this one and actually decided I like this color just as much, especially as I've blacked out the rest of the exterior. I'm going to paint my tow hitch today, as I ran out of paint on my first go round. I'm using SEM trim black paint in a satin finish. I loved the results on the rest of my truck. As I've previously mentioned, I can't vouch for durability yet, but the appearance perfectly matches my powder-coated wheels and looks just as professional in my opinion.
 
thanks for the info- where are you located?

I want to do the taco whip mod too my antenna motor is shot.

any prep work for the tow hitch prior to the sem paint?
 
I did my tow hitch a while back, just make sure sit is clean and doesnt have any dirt or anything on it. I just used regular spray paint and gave it a couple coats, has held up great!
 
Hey SCRunner, my parents just bought a house outside of Santa Cruz, near Ben Lomond, which is up in the mountains I think. I haven't had a chance to visit their new house yet. Anyway, you seem like a younger guy and you have a great looking rig! I drove a 289 1965 Mustang for my first car and while it was cool, it broke down all the time, though I learned a lot about fixing cars, at least older ones pre-computer days.

I had Rhino Line in the bed of my last Chevy Silverado (which doesn't even compare to a Runner) and it was a durable material that I often abused with large chunks of wood, all types of outdoor equipment, and anything my college friends needed to move since I was the guy with a truck. I prefer the satin powder-coated look of the SEM, but that's all personal preference. As I've mentioned, I can't vouch for durability yet, cuz I just applied it yesterday. Post some pics if you use Rhino Line.


QUOTE]

Thats sweet, its very nice up there, like scrunner12 said let us know if your every up this way and we can take a trip to Hollister hills!

I will probably be painting them in the next couple weeks. need to see what kind of prep i need to do.
 

Members online

Forum statistics

Threads
278,316
Messages
3,554,113
Members
248,016
Latest member
Advally Service

Trending content

Back
Top