
You are using an out of date browser. It may not display this or other websites correctly.
You should upgrade or use an alternative browser.
You should upgrade or use an alternative browser.
Jerod's Supercharged T[u]RD Build
- Thread starter gamefreakgc
- Start date

gamefreakgc
Elite Member
Didn't see an update ... did you get your cams back yet? Sent mine yesterday and am just curious what the turn around time is. Geoff stated they shouldn't be in his shop more than 5-7 business days. So I am hoping 7 business days plus shipping time.
Oh really? It's going on two weeks for me. I should give him a call then, maybe something went wrong. He still has not contacted me or charged me.

4'running'26
New member
I want to free up as much airflow as possible, and heard of this mythical "MAF swap" from the turbine design to the smaller MAF in newer 99-02 4Runners. Here's what I am talking about:

Smaller restriction = more air flow. Turns out, all you have to do is move the black wire from the end, over 4 spots like this:

Thanks to [MENTION=106741]bambi_runner6[/MENTION] for the photo! Hoping this photo lives on to help others and to encourage people to learn Elvish.
So all that is needed is a small screwdriver. First, pop out the white lower section of the MAF plug. Pry under it and it'll come out. Next, you'll see little black tabs under each wire connector. Pull on the wire a bit on the backside while prying the little tab down. It should pop down and stay in place. Do this to all five wires and pull them out the back of the connector.
Next, move the black wire from the end to the second to last position as shown in the photo. No other wires move around. Then reinsert the wires until each one "clicks" in place. Re-insert the white lower portion and you are done!
What's interesting is that my Long-Term Fuel Trims went from roughly +9% (from the deckplate and Airaid tube) to +19.5%. I'm flowing roughly 10% more air in than before, not bad! The computer adjusts just fine to the newer MAF's as well. Now that I've got more airflow, it's time to crank up the boost!
P.S. You will also need to swap the airbox with the 99-02, since the MAF sits in the airbox, while the turbine style actually is part of the intake.
Sorry if this is a really dumb question...
Would there be anything wrong with doing this wire switch on my '99 even though I have absolutely no other performance upgrades, other than a factory 5spd :wink2:
Maybe it wouldn't be good and/or beneficial at all considering everything else is stock. It just seems like a quick and simple way to add 10% more airflow.
Awesome build thread by the way! Fun to read.
Cheers.
JT
gamefreakgc
Elite Member
Sorry if this is a really dumb question...
Would there be anything wrong with doing this wire switch on my '99 even though I have absolutely no other performance upgrades, other than a factory 5spd :wink2:
Maybe it wouldn't be good and/or beneficial at all considering everything else is stock. It just seems like a quick and simple way to add 10% more airflow.
Awesome build thread by the way! Fun to read.
Cheers.
JT
99's already have the smaller MAF unless manuals are a fluke and still have the old turbine. The easiest way to check is to is if the airbox is just the box and the engine MAF attaches to the tube, or if the airbox is extended and the MAF slips into a slot. The newer kind just slip into the longer air boxes.
Speaking of airbox, if you have not done the deck plate mod it's just as easy and cheaper and gives power even for stock engines:
Air Induction
4'running'26
New member
99's already have the smaller MAF unless manuals are a fluke and still have the old turbine. The easiest way to check is to is if the airbox is just the box and the engine MAF attaches to the tube, or if the airbox is extended and the MAF slips into a slot. The newer kind just slip into the longer air boxes.
Speaking of airbox, if you have not done the deck plate mod it's just as easy and cheaper and gives power even for stock engines:
Air Induction
Ah, that makes sense. I misunderstood what I read. I was thinking you had to ha e the smaller MAF and rearrange the wires. Thanks for the reply!
gamefreakgc
Elite Member
Didn't see an update ... did you get your cams back yet? Sent mine yesterday and am just curious what the turn around time is. Geoff stated they shouldn't be in his shop more than 5-7 business days. So I am hoping 7 business days plus shipping time.
Spoke with him on Tuesday, he's behind with orders right now. Said he'll have mine done late next week and then ship it out, which takes another week. So about 2 weeks from now I'll have the cams. I'm guessing yours will probably be around the same time as well.
Spoke with Geoff @ Colt Cams today to make sure they received my cams. He said they had AND he was in the process of getting a recently completed set of cams boxed up to ship out ... guessing / hoping they may be yours.
During your re-install, what other work are you planning, if any? You changing out rocker arms? Replacing valve shims? Did you consider converting your heads from a shim-over bucket to shim-under buckets to allow more surface area for the cam lobes to ride on the buckets ? LCE sells a kit but I am not sure if it is compatible, desireable or even needed BUT do know it is pricey.
During your re-install, what other work are you planning, if any? You changing out rocker arms? Replacing valve shims? Did you consider converting your heads from a shim-over bucket to shim-under buckets to allow more surface area for the cam lobes to ride on the buckets ? LCE sells a kit but I am not sure if it is compatible, desireable or even needed BUT do know it is pricey.
gamefreakgc
Elite Member
Spoke with Geoff @ Colt Cams today to make sure they received my cams. He said they had AND he was in the process of getting a recently completed set of cams boxed up to ship out ... guessing / hoping they may be yours.
During your re-install, what other work are you planning, if any? You changing out rocker arms? Replacing valve shims? Did you consider converting your heads from a shim-over bucket to shim-under buckets to allow more surface area for the cam lobes to ride on the buckets ? LCE sells a kit but I am not sure if it is compatible, desireable or even needed BUT do know it is pricey.
I hope they are mine, but I won't know for sure. He said he's been getting quite a few orders for the 5VZ-FE's lately, which is cool.
A valve adjustment is required, I got my hands on an engine's worth of spare shims of different thickness so that'll help immensely, no waiting for parts from the dealership. I was told Colt Cams will give some shim spacers, but I'd rather just install the correct sized shims in the first place. The 5VZ-FE doesn't have rocker arms, just the 4 cylinder 3RZ-FE.
Since these cams are drop-in and don't change the lift all that much, I'm keeping stock springs and valves. The crazies over on Tacoma World and the engine builders I've talked to said there's really no reason to change the springs or convert to shim under bucket unless you are pushing over 6000 RPM's or putting in cams with very aggressive lift, in which the stock springs won't close the valves fast enough. Plus the kit is really expensive like you said, over $1,000 just for the parts. The valves will float above 6200 RPM on stock springs.
I looked into cylinder head work such as a port & polish or putting in oversized valves but with a supercharger there's not much to be gained and it'd cost about $3,000, which I could do a whole lot of other stuff with that much money!
gamefreakgc
Elite Member
Where did you source your shims... from a private party? I haven't checked my valves but am guessing some adjustment is going to be required. It would be nice to have a selection of shims on hand as opposed to ordering and waiting.
Yeah was from a guy parting out an engine. I was going to hit up the pick-n-pull yard if it had not worked out.
gamefreakgc
Elite Member
Didn't see an update ... did you get your cams back yet? Sent mine yesterday and am just curious what the turn around time is. Geoff stated they shouldn't be in his shop more than 5-7 business days. So I am hoping 7 business days plus shipping time.
Look what came in the mail today...


gamefreakgc
Elite Member
Good deal!
How do you tune for these?
Something something about too much air at low RPM's and something about more fuel at high RPM's... yeah that's it!
I have no clue. I'll be road tuning it after I get them in and watching my AFR curves.
gamefreakgc
Elite Member
IT LIVES!!!
Wow, that was quite the job to install both new camshafts and a complete timing belt job. Didn't help that people before me crossthreaded and stripped out bolts...
More info to come, just finished in breaking in the new cams (zinc additive plus 18-20 minutes of revving Camshaft Tech Tips - Colt Cams) and need to get it out on the road for a little bit and change the oil again before I'm completely in the clear.
Wow, that was quite the job to install both new camshafts and a complete timing belt job. Didn't help that people before me crossthreaded and stripped out bolts...
More info to come, just finished in breaking in the new cams (zinc additive plus 18-20 minutes of revving Camshaft Tech Tips - Colt Cams) and need to get it out on the road for a little bit and change the oil again before I'm completely in the clear.
reednielsen
New member
Awesome build!
gamefreakgc
Elite Member
CS144 Alternator Upgrade
I actually did this over a week ago, but been out of town and busy with other projects so I haven't had a chance to post anything.
My alternator has been giving me trouble for a while, but over the past few weeks it really had become bad. I tried rebuilding it with new brushes but it still wasn't up to the task since I have an electric fan that pulls 20 amps when on and the stock amp puts out about 75 amps total. My battery (Red top Optima) was up to the task of keeping my rig from dying but it was clear I needed something better.
Enter the CS144 alternator. It's a common swap for many vehicles since it puts out a whole lot more amps, almost double a stock 4Runner alternator. It was completely plug and play with these parts:
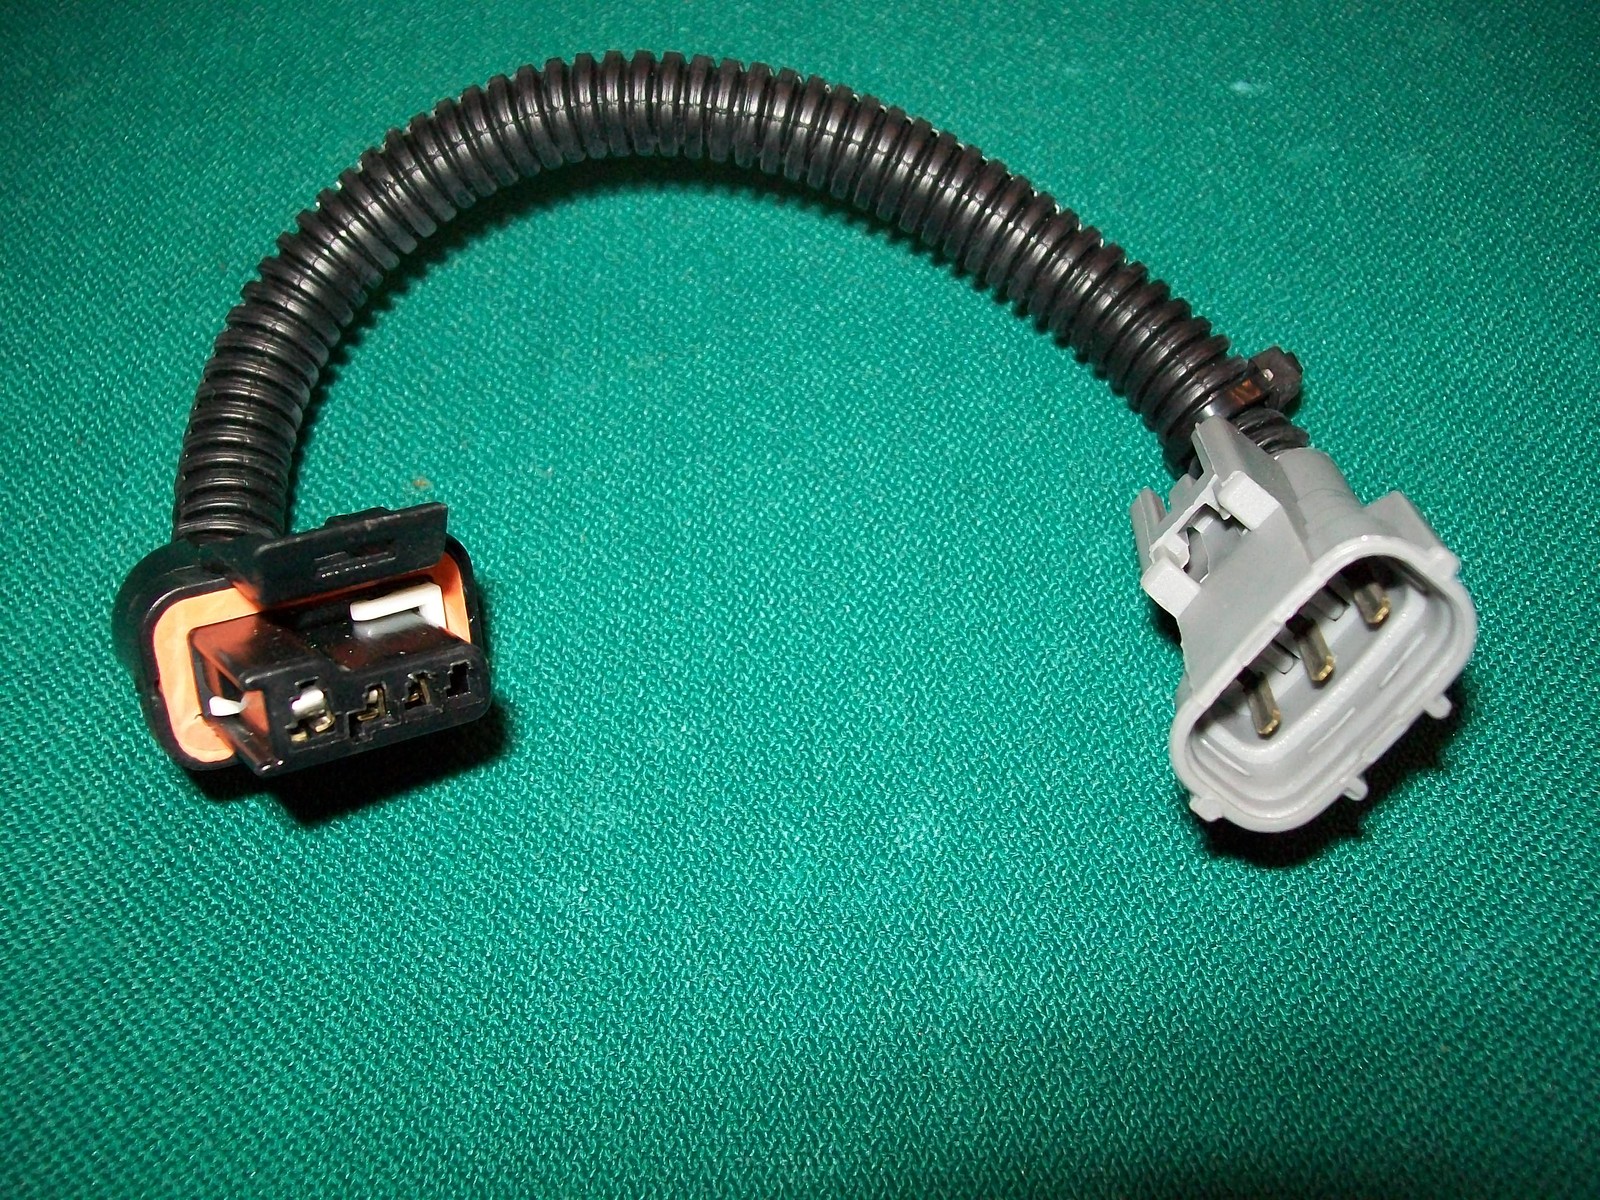
https://www.ebay.com/itm/Alternator...e=STRK:MEBIDX:IT&_trksid=p2057872.m2749.l2649 - $20.35

https://www.rockauto.com/en/moreinfo.php?pk=3467661&cc=1025783&jsn=409 - $110.79
A set of Dorman washers I picked up from O-Reilly's - $15. They didn't have the size I needed in a small container, oh well.
The swap was actually pretty easy, I used Doc's tips and photos here: http://www.toyota-4runner.org/3rd-gen-t4rs/135318-docs-cs144-alternator-upgrade.html. Since I have a supercharger and the dynamic tensioner gave me some extra slack, I just took out the old unit, and put in the new. The only hard part was wiggling the new alternator in there since it's a tight fit. I ended up taking out the battery for more space. Also, the nut on the back is a little tricky to get a wrench on but it's not impossible.
Overall, I went from 11.7 volts at idle and 12.3 under load (measured at the OBD port, not the battery) to 12.4 at idle and 12.9-13.3, depending on heat soak. A huge improvement and my battery is no longer draining.
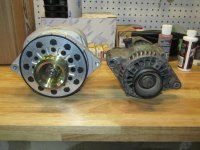
Photo comparisons of the old DENSO unit (small) and new CS144 (large).
I actually did this over a week ago, but been out of town and busy with other projects so I haven't had a chance to post anything.
My alternator has been giving me trouble for a while, but over the past few weeks it really had become bad. I tried rebuilding it with new brushes but it still wasn't up to the task since I have an electric fan that pulls 20 amps when on and the stock amp puts out about 75 amps total. My battery (Red top Optima) was up to the task of keeping my rig from dying but it was clear I needed something better.
Enter the CS144 alternator. It's a common swap for many vehicles since it puts out a whole lot more amps, almost double a stock 4Runner alternator. It was completely plug and play with these parts:
https://www.ebay.com/itm/Alternator...e=STRK:MEBIDX:IT&_trksid=p2057872.m2749.l2649 - $20.35
https://www.rockauto.com/en/moreinfo.php?pk=3467661&cc=1025783&jsn=409 - $110.79
A set of Dorman washers I picked up from O-Reilly's - $15. They didn't have the size I needed in a small container, oh well.
The swap was actually pretty easy, I used Doc's tips and photos here: http://www.toyota-4runner.org/3rd-gen-t4rs/135318-docs-cs144-alternator-upgrade.html. Since I have a supercharger and the dynamic tensioner gave me some extra slack, I just took out the old unit, and put in the new. The only hard part was wiggling the new alternator in there since it's a tight fit. I ended up taking out the battery for more space. Also, the nut on the back is a little tricky to get a wrench on but it's not impossible.
Overall, I went from 11.7 volts at idle and 12.3 under load (measured at the OBD port, not the battery) to 12.4 at idle and 12.9-13.3, depending on heat soak. A huge improvement and my battery is no longer draining.
Photo comparisons of the old DENSO unit (small) and new CS144 (large).
Attachments
gamefreakgc
Elite Member
Colt Camshafts and LCE Lightweight Crankshaft Pulley
After 3 solid days of wrenching, the Colt Cams 262* grind and the LCE Lightweight Crankshaft Pulley are in! I was pressed for time so no photos... but not like it would have helped much. If you are reading this to figure out how to put them in, refer to the FSM for detailed instructions. You'll have to take off the upper intake/plenum, timing belt, radiator, and the crankshaft pulley just to swap out cams. It's a very involved job with a lot of checking, double-check, and triple checking as well as a dreaded valve adjustment.
The power is really there at 4000+ RPM's from the cams, and the lightweight pulley helps a lot with passing and quick accelerations around town. It accelerates quicker, and hauls all the way to redline very easy! I noticed a lot more power at 4500+ RPM. The supercharger helps a bit to alleviate the power drop off up there but never seemed to enjoy redlining much. now it pulls even in the 5000's with plenty of power and torque like never before! That's the whole point of performance camshafts anyway, they add power at higher RPM's.

LCE Lightweight Crankshaft Pulley - This claims 2.7 acceleration horsepower per pound removed, and is 7.5 lbs lighter. So that's 20.25 hp gain of "acceleration HP" which is a made up term, by the way. In the real world, you notice this when stomping on the gas to pass on the highway, or going from a dead stop. Less rotating mass = more power to the wheels. It adds nothing as far as engine performance but rather frees up the engine to rotate the wheels, not the pulley. However it will still show up as a performance gain on a intertia-based dyno because of science and physics stuff. Since I had to take the crankshaft pulley off anyway for the timing belt, it was a no-brainer. Easy bolt-on performance.
Colt Cams 262 degree 5VZ-FE Camshafts - These are dyno tested to gain 22 HP, and I can guess where! My engine pulls much harder at 4500-5500 RPM's and loves to redline. I need to get this on a dyno soon to see if there's extra power to bump up the redline to 6,000 RPM's but not sure. There's not really much as far as gains in the 2k to 4k range, so if you are looking for some extra torque down low these are not what you want. These cams gain power by slightly changing the intake and exhaust timing, I'm talking maybe a couple of degrees difference. Side by side the stock cams are almost identical until you look hard. It idles a little rougher than stock but combined with extra lift on the intake side over stock, provides some nice power in the upper RPM's.
This was a VERY involved job. As a few people on here also have bought them so hopefully I can provide a few tips to help in the process.
First off, you will need a digital caliper to measure the valve shim thicknesses. This is not optional. Second, a valve adjustment job is a must and you will need to custom order shims from Toyota since the exhaust valves WILL be out of spec. The shim spacers provided from Colt Cams are not quite thick enough to provide the right valve clearances (printed on the sticker under your hood). I needed to buy 9 of the 12 exhaust shims, 3 of them I was able to swap around to bring them into spec. Only 3 intake valves were out of spec initially and swapping shims around fixed all 3. Shims cost $15 each, so I was out $135 just for those.
When you fit the shim spacers supplied by Colt Cams in and you go to check the clearances, rotate the cams one complete revolution before measuring the gaps. I noticed that the oil in between the spacers and buckets would actually cause the reading to be off until it was pressed by the camshaft lobe at least once. Almost pulled my hair out thinking I had ordered the wrong size shims. Also, you will not get the clearances perfect. Since Toyota only makes them in 0.05mm increments (i.e. 3.00mm, 3.05, 3.10, etc.) it's hard to always get the perfect size. When it doubt, for exhaust valves go a little too big instead of too small. Exhaust valves will widen over time so having the gaps a little smaller initially will get you more life out of your exhaust valves.
Give yourself plenty of time to do this job. I had to remove the stock cams, remove all shims, install all shim spacers, measure all shim thicknesses, put in the new cams, check clearances and write it all down, then remove all cams, then order new shims, then install new shims, install camshafts, measure all clearances, remove exhaust camshafts, swap a few shims around, install camshafts again. That process took me about 8 hours. This is NOT an easy job nor something to be done by first time DIY mechanics.
I realize that this is the only real review of 5VZ-FE camshafts on the internet. These are the same camshafts that were offered by Sea2Sky tuning, Geoff at Colt Cams made this grind for that shop. The shop closed but Geoff still has the grind and told me he's been selling quite a few lately. Please feel free to PM me for any questions on installation or anything else related to these camshafts.
And yes, I am getting this thing ready for another dyno run!
After 3 solid days of wrenching, the Colt Cams 262* grind and the LCE Lightweight Crankshaft Pulley are in! I was pressed for time so no photos... but not like it would have helped much. If you are reading this to figure out how to put them in, refer to the FSM for detailed instructions. You'll have to take off the upper intake/plenum, timing belt, radiator, and the crankshaft pulley just to swap out cams. It's a very involved job with a lot of checking, double-check, and triple checking as well as a dreaded valve adjustment.
The power is really there at 4000+ RPM's from the cams, and the lightweight pulley helps a lot with passing and quick accelerations around town. It accelerates quicker, and hauls all the way to redline very easy! I noticed a lot more power at 4500+ RPM. The supercharger helps a bit to alleviate the power drop off up there but never seemed to enjoy redlining much. now it pulls even in the 5000's with plenty of power and torque like never before! That's the whole point of performance camshafts anyway, they add power at higher RPM's.
LCE Lightweight Crankshaft Pulley - This claims 2.7 acceleration horsepower per pound removed, and is 7.5 lbs lighter. So that's 20.25 hp gain of "acceleration HP" which is a made up term, by the way. In the real world, you notice this when stomping on the gas to pass on the highway, or going from a dead stop. Less rotating mass = more power to the wheels. It adds nothing as far as engine performance but rather frees up the engine to rotate the wheels, not the pulley. However it will still show up as a performance gain on a intertia-based dyno because of science and physics stuff. Since I had to take the crankshaft pulley off anyway for the timing belt, it was a no-brainer. Easy bolt-on performance.
This was a VERY involved job. As a few people on here also have bought them so hopefully I can provide a few tips to help in the process.
First off, you will need a digital caliper to measure the valve shim thicknesses. This is not optional. Second, a valve adjustment job is a must and you will need to custom order shims from Toyota since the exhaust valves WILL be out of spec. The shim spacers provided from Colt Cams are not quite thick enough to provide the right valve clearances (printed on the sticker under your hood). I needed to buy 9 of the 12 exhaust shims, 3 of them I was able to swap around to bring them into spec. Only 3 intake valves were out of spec initially and swapping shims around fixed all 3. Shims cost $15 each, so I was out $135 just for those.
When you fit the shim spacers supplied by Colt Cams in and you go to check the clearances, rotate the cams one complete revolution before measuring the gaps. I noticed that the oil in between the spacers and buckets would actually cause the reading to be off until it was pressed by the camshaft lobe at least once. Almost pulled my hair out thinking I had ordered the wrong size shims. Also, you will not get the clearances perfect. Since Toyota only makes them in 0.05mm increments (i.e. 3.00mm, 3.05, 3.10, etc.) it's hard to always get the perfect size. When it doubt, for exhaust valves go a little too big instead of too small. Exhaust valves will widen over time so having the gaps a little smaller initially will get you more life out of your exhaust valves.
Give yourself plenty of time to do this job. I had to remove the stock cams, remove all shims, install all shim spacers, measure all shim thicknesses, put in the new cams, check clearances and write it all down, then remove all cams, then order new shims, then install new shims, install camshafts, measure all clearances, remove exhaust camshafts, swap a few shims around, install camshafts again. That process took me about 8 hours. This is NOT an easy job nor something to be done by first time DIY mechanics.
I realize that this is the only real review of 5VZ-FE camshafts on the internet. These are the same camshafts that were offered by Sea2Sky tuning, Geoff at Colt Cams made this grind for that shop. The shop closed but Geoff still has the grind and told me he's been selling quite a few lately. Please feel free to PM me for any questions on installation or anything else related to these camshafts.
And yes, I am getting this thing ready for another dyno run!
Last edited:
gamefreakgc
Elite Member
Good deal!
How do you tune for these?
For tuning these camshafts, all I had to do was increase the methanol nozzle from 175 cc/min to 225 cc/min and my AFR's are perfect again at 11.6 - 12.0. That was easy!
gamefreakgc
Elite Member
I have my AFR's exactly how I want them for closed loop boost and WOT and my tune is pretty much spot on at this point. For closed loop it's between 13.0 and 12.5, and at WOT it's between 11.7 and 12.0. Pretty much perfect. This is done by skewing the O2 sensor and removing and adding fuel by modifying the fuel injection pulse.
However, my timing is still not where I want it to be. Cruising on the highway it runs 24-25 degrees of timing advance with the highest value occurring during downhills where it hits 30 degrees. However in closed loop boost that drops to 13 degrees, which will max out at 15 degrees at WOT near redline. With the methanol injection and 91 octane fuel, I'm really running about 96 octane fuel so I should be able to handle more ignition timing without any spark knock/pinging.
I'm going to be utilizing the third fuel map, the MAF table to try and increase ignition timing. From looking at past runs, I know that the MAF voltage peaks at 4.74 volts at 5500 RPM and the low is 1.4 volts at idle. I'm hoping to either modify or clamp the MAF voltage, say about 3.5, to trick the ECU into running more advance ignition timing to gain more power. I've got plenty of fuel to use, since some of my values on the fuel map are -20%, with the max being +10% at redline. I need to collect more data on when the engine starts pulling timing and at what MAF voltage so I can clamp it at that point in an attempt to advance ignition. Here goes nothing!
However, my timing is still not where I want it to be. Cruising on the highway it runs 24-25 degrees of timing advance with the highest value occurring during downhills where it hits 30 degrees. However in closed loop boost that drops to 13 degrees, which will max out at 15 degrees at WOT near redline. With the methanol injection and 91 octane fuel, I'm really running about 96 octane fuel so I should be able to handle more ignition timing without any spark knock/pinging.
I'm going to be utilizing the third fuel map, the MAF table to try and increase ignition timing. From looking at past runs, I know that the MAF voltage peaks at 4.74 volts at 5500 RPM and the low is 1.4 volts at idle. I'm hoping to either modify or clamp the MAF voltage, say about 3.5, to trick the ECU into running more advance ignition timing to gain more power. I've got plenty of fuel to use, since some of my values on the fuel map are -20%, with the max being +10% at redline. I need to collect more data on when the engine starts pulling timing and at what MAF voltage so I can clamp it at that point in an attempt to advance ignition. Here goes nothing!
Last edited:
Similar threads

- Replies
- 0
- Views
- 332
- Replies
- 1
- Views
- 840


