John's Turbo v6 Build

Im a big fan of water-methanol injection for intercooling. Truly amazing stuff can be done with it. I used it on my turbo Eclipse 22psi on a larger turbo with pump gas. Works great :)

If/when you get to needing larger injectors, see if the Apexi SAFC or Neo is compatible with 4Runner... or other compatible piggyback fuel controllers to dial in the fuel curves. Combine that with your wideband and you can get pretty far with it

Awesome thank you for all that info! I'll do some research on those
 
rip to my wallet lol

Well as the title suggests I just bought the majority of the other parts I needed for this project. Should be in by the end of this week and into next week. No turning back now lol. Still deciding on what piping I want to run for the charge pipes. I might mock them up with pvc first to get measurements and then use exhaust tubing for the final product. Stay tuned!:clap2::banana:
 
Exhaust tubing is ok but too heavy, aluminum piping is much easier to work with. I use exhaust tubing when i have spares laying around, but if i have to buy i go aluminum.

Aluminum Pipe

They also have better pricing on eBay
 
Exhaust tubing is ok but too heavy, aluminum piping is much easier to work with. I use exhaust tubing when i have spares laying around, but if i have to buy i go aluminum.

Aluminum Pipe

They also have better pricing on eBay

I'll definitely check that out. Do you know any big chain stores that sell aluminum tubing by the foot? I'm probably going to need from my measurements close to 7 feet lol.
 
Cool project. I think aluminum piping kits are available on eBay. For the charge pipes make sure the ends are bead rolled to catch the clamps on the silicone connectors. Otherwise they will blow off with any amount of boost.

Also, STS makes a rear mount turbo kit for the 4.0L. It may be worth contacting them just to see what their kit has, and whether you can utilize any components.

Toyota Tacoma Turbo Kit Options - TacomaHQ


I'll definitely check that out. Do you know any big chain stores that sell aluminum tubing by the foot? I'm probably going to need from my measurements close to 7 feet lol.
 
more parts

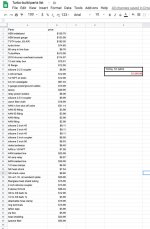
well as the title suggests here are basically all the parts I've ordered to date haha. Within this list you will probably see a few extra items which I've done for a safety factor. In case I'm driving and experience a pump failure this will give me the option to cut the oil feed via a valve or in the case of a oil line failure the ability to cut both oil feed and power to the pump. granted this would require unbolting of the turbo but roughly 10 bolts and 10 minutes and a small price to pay in case of a pump/oil line failure in my opinion. I will also be tapping and threading connections on the frame for the pump and braided line for peace of mind.
 

Attachments

  • Screen Shot 2019-05-27 at 10.29.29 PM.jpg
    Screen Shot 2019-05-27 at 10.29.29 PM.jpg
    123.1 KB · Views: 809
parts getting mounted

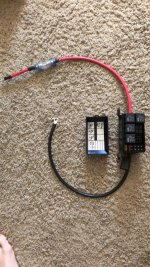
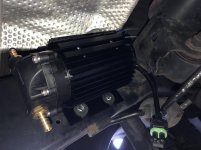
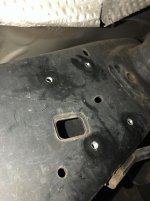
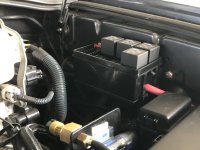
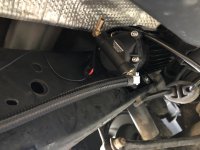
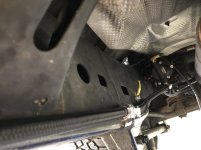
So for me I wanted to make everything bolt on connections so I bought a drill tap and made mounts for the scavenge pump and hose routing. I also built this relay/fuse box to keep everything organized and safe. This will allow me to have the pump on its own relay and the other three relays are for the fuses on the side. (1 relay per two fuses) This will also allow me to run the turbo timer on the pump circuit as well as power the gauges from here.

along with this my ebay wastegate came in lol. Overall construction looked good but it did need some work. I completely took it apart, removed any burrs, sanded and polished the mating surfaces and lapped the valve. (thread locked the alen keys) I also added a liberal amount of nickel anti-seize to make everything play nice and keep the diaphragm from ripping. After all this it seats properly and holds pressure with no leaks.
 

Attachments

  • IMG_2277 (1).jpg
    IMG_2277 (1).jpg
    155.6 KB · Views: 800
  • IMG_2268 (1).jpg
    IMG_2268 (1).jpg
    129.8 KB · Views: 820
  • IMG_2266 (1).jpg
    IMG_2266 (1).jpg
    129.4 KB · Views: 790
  • IMG_2269 (1).jpg
    IMG_2269 (1).jpg
    127.5 KB · Views: 791
i'll be watching this cool thread. what turbo exhaust manifold do you have in mind for modfying?

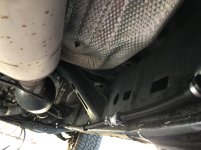
Thanks! and no manifold will be used. my t3 flange will be welded onto the exhaust back before the up-bend for the rear of the exhaust (in front of rear axle) the wastegate will also be there
 
more work complete

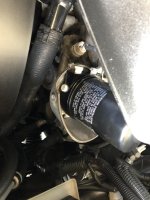
I got the new 90 barb fittings installed today on the scavenge pump and also ran the power and ground line for it. The ground is on a waterproof ring terminal grounded to the frame with a bolt and the power is covered with wire loom. (this power line will be run to my junction box I built once I build the plug)

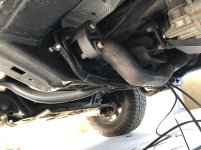
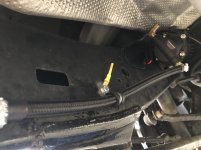
Along with this I added more bolt taps and got all of the main oil feed and return lines run.

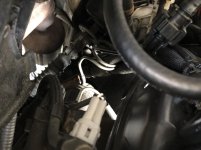
The feed is 4AN braided line which will have a safety shut off near the engine bay and utilize 4AN bolt on fittings since it will see a decent amount of pressure.

The return is 6AN braided line which will dump back into the oil filler neck via a barb fitting. It is bolted to the frame to keep everything secure. It also has a 3/8 check valve installed so that if it is on a hill oil won't drain back towards the pump.

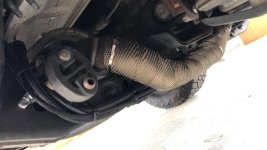
Up where the cats and exhaust is I used fiberglass heat shielding tube for both oil lines as I wanted to protect them and keep temps down.

I also drilled and tapped for the junction box which is placed level on the drivers side next to the brake system. The 4 gauge ground is run to chassis with a bolt and the power has an in line 80 amp fuse which once all wiring is complete will be run to the positive on the battery.

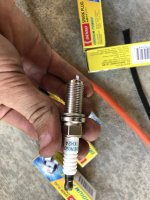
I also replaced all the spark plugs with IKH24's which is a colder plug to help with knock resistance. The old plugs looked great so no worries there.


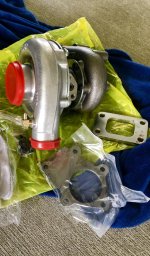
Oh and I'm very excited because the turbo is suppose to come in tomorrow lmao :bounce::heh::clap2:
 

Attachments

  • IMG_2280 (1).jpg
    IMG_2280 (1).jpg
    128.2 KB · Views: 890
  • IMG_2281 (1).jpg
    IMG_2281 (1).jpg
    126.2 KB · Views: 873
  • IMG_2282 (1).jpg
    IMG_2282 (1).jpg
    125.1 KB · Views: 867
  • IMG_2283 (1).jpg
    IMG_2283 (1).jpg
    121.7 KB · Views: 876
  • IMG_2284 (1).jpg
    IMG_2284 (1).jpg
    124.7 KB · Views: 870
  • IMG_2285 (1).jpg
    IMG_2285 (1).jpg
    125.1 KB · Views: 874
  • IMG_2286 (1).jpg
    IMG_2286 (1).jpg
    123.5 KB · Views: 860
  • IMG_2287 (1).jpg
    IMG_2287 (1).jpg
    127.5 KB · Views: 855
Parts and progress

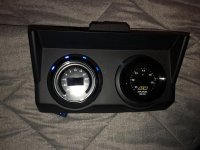
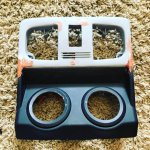
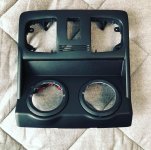
One of the most important parts of the build just arrived Also I installed more heat shielding to protect the oil lines and got the oil feed plumbed in with a shutoff valve. I also started building my custom overhead console. Here is the beginning of what will be the gauge pod portion.
 

Attachments

  • 3CA1D39A-FA05-4F62-A204-8E8A1A6ADC17.jpg
    3CA1D39A-FA05-4F62-A204-8E8A1A6ADC17.jpg
    146.5 KB · Views: 808
  • A5A13230-EDE9-4FFE-A23C-4A6D49AAE60A.jpg
    A5A13230-EDE9-4FFE-A23C-4A6D49AAE60A.jpg
    130.3 KB · Views: 829
  • 3CF0F071-5201-4CEA-8306-0E98BAF0279C.jpg
    3CF0F071-5201-4CEA-8306-0E98BAF0279C.jpg
    129.3 KB · Views: 839
  • 01B8CD6C-D57E-48FC-86F7-F9AE7439D725.jpg
    01B8CD6C-D57E-48FC-86F7-F9AE7439D725.jpg
    133.5 KB · Views: 826
Coming along nicely! Is that gauge pod going to replace the existing console, or somehow attach to it? Curious..., what made you go that route instead of adding the pods to the pillar post, or something like that?
 
Coming along nicely! Is that gauge pod going to replace the existing console, or somehow attach to it? Curious..., what made you go that route instead of adding the pods to the pillar post, or something like that?

Thanks! And my original overhead console is in pieces lol. I’ll be fabricating this onto where the sunglasses holder was. I guess the reasoning for it was I wanted it to look like it was meant to be there and not added in as an afterthought. If it gives you any idea the look I’m going for I’m building an addition manual to go with the Toyota one about maintinence and diognosing problems haha
 
Thanks! And my original overhead console is in pieces lol. I’ll be fabricating this onto where the sunglasses holder was. I guess the reasoning for it was I wanted it to look like it was meant to be there and not added in as an afterthought. If it gives you any idea the look I’m going for I’m building an addition manual to go with the Toyota one about maintinence and diognosing problems haha

Nice! That makes sense. So, if I’m understanding correctly, you’re still retaining the gray frame with the map lights, but replacing the swing down door with the gauge pod, correct? Can’t wait to see this turbo project completed and running!
 
Nice! That makes sense. So, if I’m understanding correctly, you’re still retaining the gray frame with the map lights, but replacing the swing down door with the gauge pod, correct? Can’t wait to see this turbo project completed and running!

That was originally the plan but I had to cut that whole front half off and do a lot of fabrication work haha. Its almost done though.
 
Getting closer every day

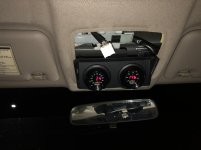
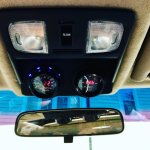
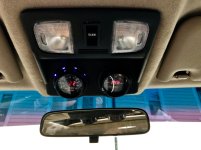
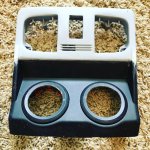
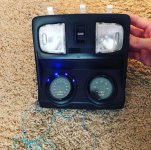
Just finished my custom overhead console. It incorporates a 4th gen one and a 5th gen trd pro console to make what I have. It houses my boost and wideband gauges and also has some modifications made. For one I have blue illumination around the boost gauge when the headlights turn on, for 2 I fabricated the 5th gen mic grill in place to house my kenwood radio mic and used the 5th gen sunroof switch. Making progress!
 

Attachments

  • EB8FD979-2656-4C31-85A6-D37214EA2DEE.jpg
    EB8FD979-2656-4C31-85A6-D37214EA2DEE.jpg
    124.9 KB · Views: 774
  • A74F930A-4F34-4E6B-AF94-E9B478EFE7B5.jpg
    A74F930A-4F34-4E6B-AF94-E9B478EFE7B5.jpg
    126.3 KB · Views: 776
  • 59099FB1-619C-4F65-8765-3927D689E358.jpg
    59099FB1-619C-4F65-8765-3927D689E358.jpg
    134.7 KB · Views: 775
  • 0D4399DF-2EAA-4C67-9591-2E88F7F6BDC5.jpg
    0D4399DF-2EAA-4C67-9591-2E88F7F6BDC5.jpg
    135.5 KB · Views: 746
  • 8EA2E258-C2D9-4231-B562-D245CD1369D8.jpg
    8EA2E258-C2D9-4231-B562-D245CD1369D8.jpg
    133 KB · Views: 785
  • 05EF96C1-7D28-420C-8E15-0EAA21EDB46E.jpg
    05EF96C1-7D28-420C-8E15-0EAA21EDB46E.jpg
    134.1 KB · Views: 735
Just finished my custom overhead console. It incorporates a 4th gen one and a 5th gen trd pro console to make what I have. It houses my boost and wideband gauges and also has some modifications made. For one I have blue illumination around the boost gauge when the headlights turn on, for 2 I fabricated the 5th gen mic grill in place to house my kenwood radio mic and used the 5th gen sunroof switch. Making progress!


That turned out super clean!


Sent from my iPhone using Tapatalk
 
Im not following the scavenge pump idea, why not just allow the oil to drain through the pan? You will have better reliability by not having the pump at all.
 
Im not following the scavenge pump idea, why not just allow the oil to drain through the pan? You will have better reliability by not having the pump at all.

It's a remote-mount turbo setup, not located in the engine bay where gravity drains the oil.

You can't rely on just the pressure from the feed side of the turbo's oiling setup to drain the oil quickly enough when the turbo is mounted at or below the oil pan level.
 
Last edited:

Members online

Forum statistics

Threads
278,312
Messages
3,554,089
Members
248,016
Latest member
Advally Service

Trending content

Back
Top