Jsmarine's 4runner build thread (lots of pics)

Actually I was secretly trying to organize some folks (SamSter) who I have only met on the internet to agree to kidnap someone else they have only met on the internet (you), and travel to a relatively inaccessible location where we will proceed to "camp" and consume "tasty adult beverages." :fishing:

You guys don't have to go to all that trouble, how about just come over and hang out in my garage, you guys can talk about my build thread and how envious you are of my Daystar hockey pucks up front hahaha...oh and drink some "tasty adult beverages". I always have plenty to share!

The Arkansas trip will have a thread soon. We will be traveling a similar route to the last Ouachitas / Ozarks trip last March, and will cover around 400 miles of trails and forest roads during the prettiest part of the year up there (late October).

Sounds good to me!

Lots of folks paint their hoods matte black (in the middle and sometimes the whole thing). You could also try to make a sort of shield below the light to try to cast a shadow over the hood. Some manufacturers make curved shields that attach to the bottom of the lights.

The lights aren't really reflecting off the hood (I think) but more or less reflecting off the windshield. I will try and think up some sort of shield and see what I can come up with.
 
Actually I was secretly trying to organize some folks (SamSter) who I have only met on the internet to agree to kidnap someone else they have only met on the internet (you), and travel to a relatively inaccessable location where we will proceed to "camp" and consume "tasty adult beverages." :fishing:

The Arkansas trip will have a thread soon. We will be traveling a similar route to the last Ouachitas / Ozarks trip last March, and will cover around 400 miles of trails and forest roads during the prettiest part of the year up there (late October).

Give me some dates so I can block my calendar, I am sure Bianca my Wife would be interested too. Hmm, October.. due to the distance, I am guessing this is a "week" trip, not a weekend trip? I got kids in School, so I am somewhat limited during the school year unless it is a holiday week.

:D

Camping, Wheeling, & Drinking.. my Three favorite things.. :guitar3:
 
Give me some dates so I can block my calendar, I am sure Bianca my Wife would be interested too. Hmm, October.. due to the distance, I am guessing this is a "week" trip, not a weekend trip? I got kids in School, so I am somewhat limited during the school year unless it is a holiday week.

:D

Camping, Wheeling, & Drinking.. my Three favorite things.. :guitar3:

Mr Leary would know better, but I guessing it would probably be a long weekend trip. Head out Thursday after work and all meet up and camp out that night, Friday morning start the trails and go until Sunday morning, break camp and go home. Chances are you would only need to take off one day of work. Im like you, and cannot take off a lot of time for these trips
 
Mr Leary would know better, but I guessing it would probably be a long weekend trip. Head out Thursday after work and all meet up and camp out that night, Friday morning start the trails and go until Sunday morning, break camp and go home. Chances are you would only need to take off one day of work. Im like you, and cannot take off a lot of time for these trips

Perfect! That works, Poll for weekends? start a new thread instead of thread jacking your Build thread? (Sorry BTW).
 
Perfect! That works, Poll for weekends? start a new thread instead of thread jacking your Build thread? (Sorry BTW).

Id check with Mr. Leary, he will probably start a thread on expeditionportal.com, he spends most of his time there. Look him up on there and you will find a lot of trip threads; trip planning threads and completed trip threads as well. Once he gets something going over there we can start a thread here to gain interest and point them to expo for the trip details.
 
Nice

Wow keep it up! I just purchased my first runner, its a 95 SR5 3.slo and I love it! My wife is already *****ing about the amount of time I spend on it. So far the only thing I've had time to do is add Skyjacker 7000 Nitros front and back along with a Skyjacker Steering Stabilizer. What is the "ISR Mod" and what will it do for my runner if I add it?

<table style="width:auto;"><tr><td><a href="http://picasaweb.google.com/lh/photo/EC-SeflbnRtDh3hgL30gFD96LEpzAYd0ZeV38zL-nSo?feat=embedwebsite"><img src="http://lh6.ggpht.com/_9NIVU7PRG20/THxdondnztI/AAAAAAAAAPs/t930sIppq8g/s800/photo-1.JPG" /></a></td></tr><tr><td style="font-family:arial,sans-serif; font-size:11px; text-align:right">From <a href="http://picasaweb.google.com/OfficerTerry/Desktop?authkey=Gv1sRgCOnS7-COxcugQg&feat=embedwebsite">Desktop</a></td></tr></table>
 
Duhockey had asked about my limb risers (the cables from my bumper to the roof rack) so I thought I would post a write up about them. They are very easy to make, all the parts are from Home Depot. I used 1/8 aircraft cable, 2 jack nuts, 4 aluminum stops, 4 eye bolts, 2 turn buckles, and 2 steel clips. I think the 1/8 cable was about $0.35 per foot, so I got 20’ just so I had enough to play with.
I just cut the cable to length, and I made the loops at either end, then just slip the stops over the cable and use a BFH and smash them shut. The jack nuts I used on the front bumper, drill the hole and insert the jack nut and tighten down, then remove the bolt you used and now you basically have a taped hole in the bumper hoop; then insert your eyebolts. You don’t have to use the jack nuts, you could just drill all the way through, but I thought I would look better using the jack nuts. For the roof rack, I just drilled through it and used an eyebolt but you could use jack nuts here too if you didn’t want the eyebolt sticking all the way through. Just attach the clip to the front eye bolt on the bumper and attach to the roof rack using the turnbuckles tighten down and that’s it! In the picture you see a spring too, but I would not recommend it, I thought it would keep the tension and be easy to disconnect the cables when I wanted to open the hood. I was wrong, they don’t keep enough tension, but also don’t stretch enough for me to undo the clips, so I would just use the turn buckles; I will be removing the springs in my setup by the way.
All in all, I like them, and they work to keep the limbs from smashing into windshield, plus I would be lying if I said they don’t just plain look cool too! :surfer:


Nice mod! Your 4Runner makes me :jaw drop:
 
The glare is not there, the lights work great. I am happy with them.

As for the spot you told me about, I found it no problem. Great campsite, but the girlfriend did not approve, nor did she approve any other spot after we drove around for a while! too many bugs she said. We ended up not camping at all and driving all the way home, I was pissed.

Funny I have to quote on this one, but make a few comments... first off, keep the girlfriend in the car til you got a good fire going, then bring her str8 to the fire, most of the bugs should be gone by then... maybe that will help with the girlfriend camping issue,

Thanks for the write up on the limb risers, I now have a bumper I can attach them too, so I may be doing this one before spring.

The seat covers are bad $$ (oops, I left out an "a") and I was wondering, somebody mentioned he has his seat down too much to buy these, Do they get in the way when you fold the seats down?

I know you could prob solve that problem by removing the back seats altogether and just folding down the seatbacks and leaving them down like several friends of mine do, but I need my backseat and cant do that yet, what do you think?
 
Funny I have to quote on this one, but make a few comments... first off, keep the girlfriend in the car til you got a good fire going, then bring her str8 to the fire, most of the bugs should be gone by then... maybe that will help with the girlfriend camping issue,

Thanks for the write up on the limb risers, I now have a bumper I can attach them too, so I may be doing this one before spring.

The seat covers are bad $$ (oops, I left out an "a") and I was wondering, somebody mentioned he has his seat down too much to buy these, Do they get in the way when you fold the seats down?

I know you could prob solve that problem by removing the back seats altogether and just folding down the seatbacks and leaving them down like several friends of mine do, but I need my backseat and cant do that yet, what do you think?

The seat covers stick out a bit into the leg room of the rear passenger area, I rarely have passengers, and when I do,no one has really complained very much. They usually compliment my seat covers and start rooting around in all the pockets!

Also, I can still fold down the rear seat even with the covers on and all the pockets. Although, when the seat is down you cant access all the pockets as easlily, that would be the only downside.
 
Hey JS - nice truck man. I have to get some of those seat covers! How is the fit on the seat backs and bottoms? Pretty good fit or are they sloppy?
My little monkeys have trashed my interior and I need something my 3 year old can kick while he's in his car seat. Think these can hold up to toddler size feet of fury?
 
Hey JS - nice truck man. I have to get some of those seat covers! How is the fit on the seat backs and bottoms? Pretty good fit or are they sloppy?
My little monkeys have trashed my interior and I need something my 3 year old can kick while he's in his car seat. Think these can hold up to toddler size feet of fury?

The fit is good, I guess the pics dont do the covers justice. But these seat covers are VERY adjustable, with so many velcro attahchments. They will fit most bucket seats very nicely.
 
The material used in construction of the seat covers is very robust. Mine held up well to dog claws and gear bouncing around back there.
 
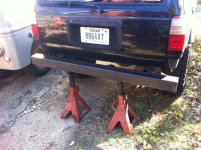
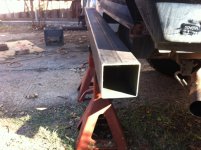
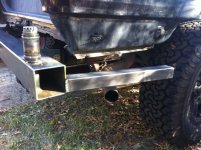
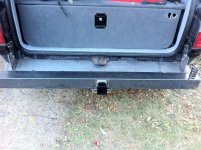
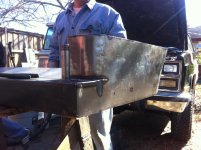
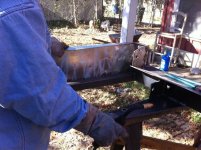
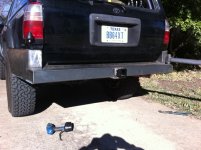
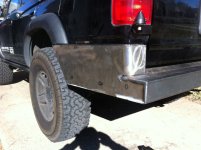
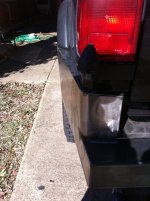
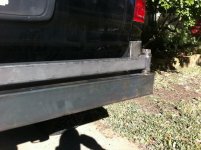
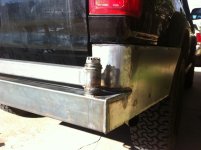
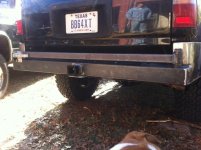
Custom rear bumper

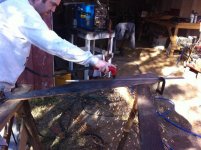
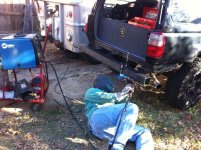
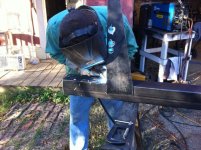
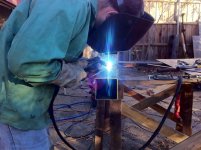
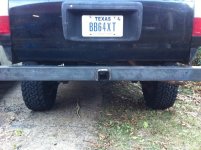
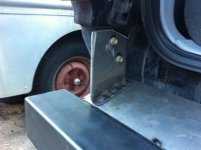
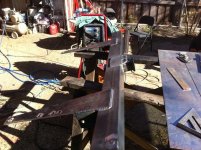
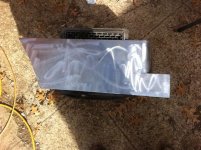
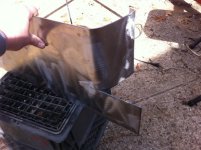
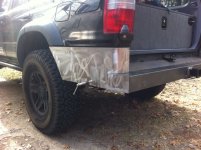
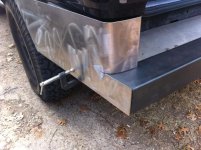
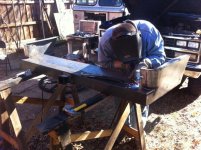
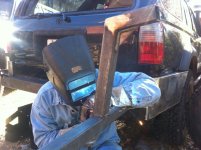
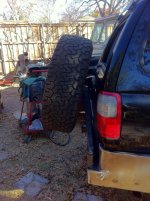
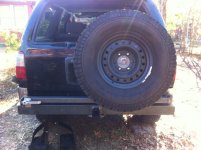
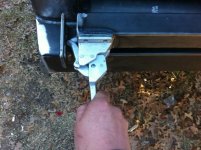
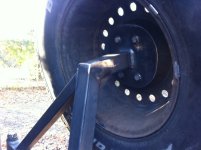
Yesterday my brother and I got started on a rear bumper. I am planing a tire carrier and jerry can holders as well for it. Progress is slow when you are building and designing at the same time, so bear with me, this project may take a couple of weeks to complete, especially since I am scheduled to work the next seven days straight. Here are the first pictures, the bumper may look very crude and simple at this point but that's how they all start! :) When its done it will be really cool, and very functional!
 

Attachments

  • 1.jpg
    1.jpg
    62.6 KB · Views: 5,132
  • 2.JPG
    2.JPG
    134.2 KB · Views: 5,146
  • 3.jpg
    3.jpg
    56.4 KB · Views: 5,134
  • 4.jpg
    4.jpg
    68.5 KB · Views: 5,131
  • 5.jpg
    5.jpg
    63.2 KB · Views: 5,144
  • 6.jpg
    6.jpg
    52 KB · Views: 5,123
  • 8.jpg
    8.jpg
    53.9 KB · Views: 5,112
  • 9.JPG
    9.JPG
    93.7 KB · Views: 5,810
Last edited:
more pictures
 

Attachments

  • 10.jpg
    10.jpg
    57.6 KB · Views: 5,074
  • 11.jpg
    11.jpg
    62.4 KB · Views: 5,074
  • 12.jpg
    12.jpg
    65.8 KB · Views: 5,062
Last edited:
UPDATE 12/12/10.

Well sorry for dragging out this rear bumper build, but I had to work the last 7 days, no time for fabrication. But, today was pretty good, we got a lot done on the bumper, actually most of the bumper fabrication is done, just need to finish welding it up and a few small things here and there. My brother and I got the tire swing arm started today, and I plan to get complete it tomorrow. We will see how things go.

Heres some pictures from today, and the progress thus far.
 

Attachments

  • 1.jpg
    1.jpg
    61 KB · Views: 4,856
  • 2.JPG
    2.JPG
    132.3 KB · Views: 4,907
  • 3.JPG
    3.JPG
    132.8 KB · Views: 4,916
  • 4.jpg
    4.jpg
    54.5 KB · Views: 4,842
  • 5.jpg
    5.jpg
    62.9 KB · Views: 4,849
  • 6.JPG
    6.JPG
    131.5 KB · Views: 6,671
  • 7.jpg
    7.jpg
    61.2 KB · Views: 4,845
  • 8.JPG
    8.JPG
    133.7 KB · Views: 4,933
Last edited:
UPDATE 12/12/10, more pictures
 

Attachments

  • 9.JPG
    9.JPG
    115.9 KB · Views: 4,909
  • 10.JPG
    10.JPG
    83.8 KB · Views: 4,837
  • 11.jpg
    11.jpg
    55.3 KB · Views: 4,842
  • 12.JPG
    12.JPG
    106.1 KB · Views: 4,897
Last edited:
12/13/10 Update.

My brother and I got more work done today on the bumper and tire carrier. I should have more to update this coming weekend, and hopefully have it finished on Sunday. Thats probably a stretch, it will probably be the weekend after when I finally get it painted and all. Anyways, let me know what you guys think.

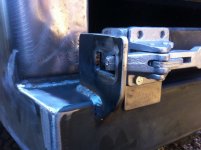
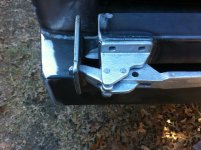
By the way, on the drivers side of the bumper, I will have two jerry cans mounted there, we started on fabricating them today but I didn't get any pics. The other things left are, weld on some tabs for the D-Rings, finish welding in some areas that are only spot welded, finish the jerry can holders, figure out where to mount the license plate and light, grind and sand... more grinding and sanding and then prime and paint. I will be painting it with truck bed coating to match my front bumper.
 

Attachments

  • 1.JPG
    1.JPG
    128.5 KB · Views: 4,859
  • 2.JPG
    2.JPG
    132.4 KB · Views: 4,867
  • 5.JPG
    5.JPG
    119.1 KB · Views: 4,870
  • 6.jpg
    6.jpg
    59.6 KB · Views: 4,793
  • 7.JPG
    7.JPG
    105.4 KB · Views: 4,852
  • 8.JPG
    8.JPG
    121.5 KB · Views: 4,868
  • 9.jpg
    9.jpg
    54.1 KB · Views: 4,815
  • 10.JPG
    10.JPG
    101.5 KB · Views: 4,842
Last edited:

Members online

Forum statistics

Threads
278,316
Messages
3,554,120
Members
248,016
Latest member
Advally Service

Trending content

Back
Top