June 2010 T4ROTM - harper7

Gary, do you plan on installing a dual battery set-up? :hungry:

If so, where would you put the 2nd battery? The area where your compressor is looks ideal! :thumb3:

Mike :artist2:
 
Are you going to wire up a pressure switch or a manual one?
I have a 110/150 pressure switch on the tank and I'm also putting a on/off master switch in the truck.Came with a 170/200 pressure switch but the horn switches are rated at 170 max so I switched it to a 110/150 .
Now trying to research/decide if I should wire the switches to always hot or key switched hot.I put in a 7 circuit Painless fuse box last night with 3 hot and 4 key switched circuits. Anybody's opinions? Probably always hot.
Gary, do you plan on installing a dual battery set-up? :hungry:

If so, where would you put the 2nd battery? The area where your compressor is looks ideal! :thumb3:

Mike :artist2:
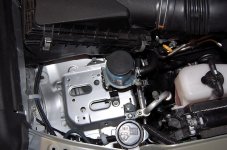
Definitely installing a second battery but it's already set up for one in front of the airbox on that side.Just need to relocate the Power steering res. inboard 2-3 inches with a fabbed ss bracket and shorten the hoses. Also a new bracket for the AC line hold down..
Has the bracket and hold down holes already.

Some European Prados come with a 2 battery option for extreme cold climates.I've been checking out the Prado forums lately. Funny , they have some of the same complaints/likes we have, as the 2010 Prados are a new Gen. like the 5th Gen. 4Runners.
 

Attachments

  • Picture.jpg
    Picture.jpg
    73.5 KB · Views: 9,229
Last edited:
Gary, the 2010 FJ's engine compartment suffers from the same condition! :ak472:

Mike :artist2:

Suffers from what condition?
The 2010 FJ and 4runner engine compartments are almost identical.
I'd call it a blessing that we have so much more room under the hood. Real easy to relocate the power steering res.with new bracket.Earlier Gens had to put the 2nd battery where I have the compressor and tank.

They relocated the windshield washer bottle forward and down on the 5ths so it's going to be harder for the design of a aftermarket front bumper like ARB/Shrockworks though.
 
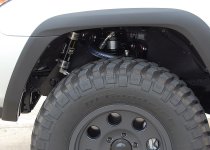
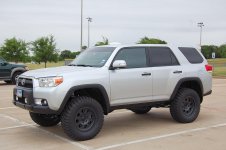
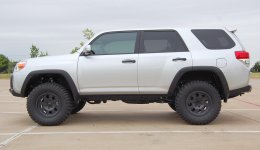
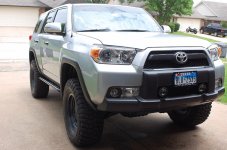
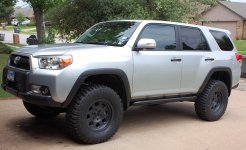
I finally installed my Icon suspension yesterday .Rides like a dream as I just drove it a couple of hundred miles today.I couldn't imagine it to feel any better.Hard to describe,it just floats thru bumps but is still firm on handling. No more brake dive or front end lifting up when flooring it from a standstill like before.

I have it set up for a 2.5 inch lift in the front and 1.5 inch lift in the rear with the Sway a Way coils for a 2.5/1.5 lift and a 1 inch rake front to back.

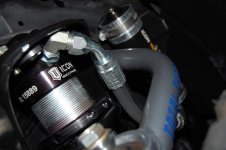
I had a couple of fitting issues with the bracket for the remote resevoir on the pass. side and the sway bar relocate blocks made it rub . Nothing that couldn't be over come ,just slowed me down. I'll call Icon with some pics tomorrow so they can make the adjustments as this is the first 5th Limited to get a CO lift and has different sways then the TE's.

It took me a good 7-8 hours for the install but alot of that was taking off the stock X-Reas and all the hydraulic lines for it.I got them off without losing a drop of fluid as I know where the check valves for them are now.I had put on the Total Chaos Upper Control Arms a couple of weeks ago.

Next up is the Shrockworks sliders. Talked to Jim on Friday...They are built and at powdercoat , supposed to ship next week!

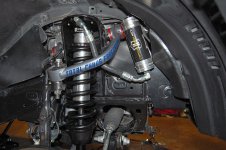
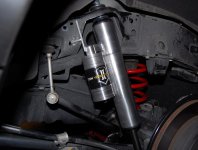
Here are some pics.These are the Icon long travel front coil overs with Remote Res. and the rears are the long travel Piggyback shocks with SAW coils.

 

Attachments

  • Picture 014.jpg
    Picture 014.jpg
    133 KB · Views: 9,133
  • Picture 021.jpg
    Picture 021.jpg
    97.2 KB · Views: 8,996
  • Picture 033.jpg
    Picture 033.jpg
    101.3 KB · Views: 8,989
  • Picture 034.jpg
    Picture 034.jpg
    90.6 KB · Views: 28,964
  • Picture 032.jpg
    Picture 032.jpg
    62.4 KB · Views: 31,812
Last edited:
Looks great Harper! I agree with your choice on the one inch rake, it keeps the lines flowing.

But in that first picture, the UCA looks like it is resting on the res line... any clearance problems there?
 
Thanks for all the comments! If anyone needs Suspension installed in the DFW area,pm me.
super sick... will you add a BL when one comes available to put 35's?

35's????lol Probabably need to change the gearing in the rear end with this engine.It will be awhile as I'm lovin the my 33's!

Looks great Harper! I agree with your choice on the one inch rake, it keeps the lines flowing.

But in that first picture, the UCA looks like it is resting on the res line... any clearance problems there?
Just an optical illusion with the UCA's. They come way out and no clearance problems there at all. Here is a better pic I just shot.
 

Attachments

  • Picture.jpg
    Picture.jpg
    123.7 KB · Views: 8,797
harper, that looks AWESOME!!!!!

I talked to Jim at Shrockworks also on Friday, told me the same thing, they just sent them to Powdercoat. I can't Wait!!
 
harper, that looks AWESOME!!!!!

I talked to Jim at Shrockworks also on Friday, told me the same thing, they just sent them to Powdercoat. I can't Wait!!

Do you guys know if they are making any for stock, or are these all filled orders...I guess I could call, but just wondering if he mentioned anything?
 
^ I didn't ask. Probably be best to call. I know that Schrockworks stuff is usually built to order, but I'm sure there will be a huge demand for these, so who knows.

Nathan
 
harper. looks very cool.

hows the handling on road. does it ride stiffer and handle better on the road compared to xreas? I dont plan on doing any major offroading, but it would be nice to handle close to a infiniti g35 and bmw
 
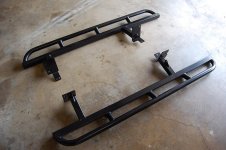
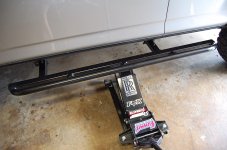
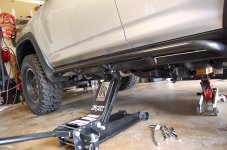
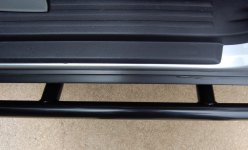
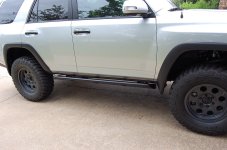
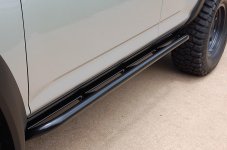
I finally recieved my Shrockworks Sliders this morning. Took awhile but as expected the quality is first rate! Love em!These will only fit TE's unless you remove or modify your rocker panels. The rockers are in the way on the Limited/SR5's.

They fit near perfect and was an easy install as they are bolt on.It took me less then 30 minutes. I carefully balanced and lifted them into place with my floor jack. Be very careful as these are heavy at over 50 lbs each and will take a toe or two if you let it fall on them!!

On the drivers side you have to take the outboard bolts loose for the gas tank skid plate and then the bolt for the gas tank strap.Support the gas tank as I noticed it start to drop as I backed off the bolt. The rear leg of the slider gets sandwiched in between the strap and the frame.
Pass. side bolts right up and is real easy.
Here are some pics.
 

Attachments

  • Picture 008.jpg
    Picture 008.jpg
    107.5 KB · Views: 7,377
  • Picture 013.jpg
    Picture 013.jpg
    103.7 KB · Views: 7,316
  • Picture 015.jpg
    Picture 015.jpg
    119.1 KB · Views: 7,359
  • Picture 032.jpg
    Picture 032.jpg
    90.2 KB · Views: 7,382
Here are a few more pics with the Shrockworks Sliders!
 

Attachments

  • Picture 025.jpg
    Picture 025.jpg
    115.5 KB · Views: 7,348
  • Picture 042.jpg
    Picture 042.jpg
    83.9 KB · Views: 7,282
  • Picture 053.jpg
    Picture 053.jpg
    136.2 KB · Views: 7,432
  • Picture 041.jpg
    Picture 041.jpg
    126 KB · Views: 8,377
Well done my friend - It really finishes it off nicely! I definitely want them now - just don't know what I am going to do about my limited's rocker trim...
 
Harper, could you take a picture while standing adjacent to the rear tire and facing the front tire and with the front door about 6 inches open so that we can assess the functionality of the sliders as a step? I hope that made sense.

I know they're not meant as steps, but just curious...

Thanks and looks amazing!
 

Members online

Forum statistics

Threads
278,315
Messages
3,554,104
Members
248,016
Latest member
Advally Service

Trending content

Back
Top