koltlt 97 sr5 build thread

Negative on using it for the ecu. Check out BigFishAllDay's thread, it's got a ton of good info. Iirc he put an elocker in an '01. There's a link in the stuff I gave you. Seems he used an ecu...
Anyway, it's a good place to start.


Prayed the axle with chassis saver.


My friend making it happen for me.


Bilstein 5100 shock that rusted through removed.


Yup? Torching near the gas tank. Shhhhh


Driver side removed. Because why not do both sides !


Passenger side removed. The side that rusted through.


Hopefully I won't end up having to do what you did. I was peaking underneath of the '02 I just bought and the upper rear shock mounts are pretty disgusting looking. I took a big flat blade screwdriver and a hammer and gave each some pretty good blows around where the shock mounts and it seems solid, so hopefully it doesn't get any worse.
 
Top mount on the round cross member is impossible to completely remove it unless removing the whole body which is a no no. The replacement part will have to be slightly modified and welded from bottom. How ever everything is basically ready for welding. Good tip on removing old weld. Is to cut into with a small wheel cut. Make sure to NOT CUT INTO THE FRAME. Then get out a air chisel and you'll be amazed how it will pop of the old weld/metal. And you'll be left with just little be of grinding to do. Grinding down a weld is very very hard vs regular steel. Thanks to my friend he took care of it.


Alright boys and girl. UPDATE

Primed and painted before the shock mounts gets welded. Because it will be impossible to reach some areas with a brush after the mounts are welded.


Test fit


Best believe it. It fits exactly in the same original spot. Only thing is we had to cut back the front part of the mount facing the front of the truck. The section that goes on top of the round cross member. But no big deal. My friend cut back the old mount as far as possible. And trimmed back the replacement one and it sits very nicely.


This was the hardest part to weld for my friend. The way the mount goes on the tube. It creates a big gap. The original mount is welded from too before the body goes on. But no big deal. He filled it in pretty solid.


The driver side.


Yea I was thinking the same. What kinda winch you running? Im curious if people run it on one battery without issue

Sorry this came so late. ..problem with my medicine and couldnt sleep,then pain through the roof out new into the hospital.

I run a smitty xc10k rated with a wireless control which I love! If you look at my story I used my winch for 2 hours straight on a single battery when in late June we ran into 6 feet of snow for almost 2 miles....

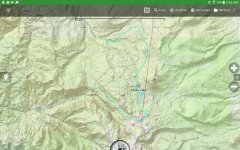
My winch isn't the fastest and even took it down to the last wrap where your not supposed to but had to due to limited strapping. Love my xc and now have a set of Maxx trax and started going out by myself. It's difficult when your..life is difficult and no one can understand, but I force myself. I record my ventures so my son can see them. I do always send my dad my route such as the picture below. It's a 6 hour route with 41 miles offroad!..
Any one in salem ever want to go I'm game, but please bare with me :( (most dont)

tempFileForShare_2016-11-09-07-33-28.jpg
 

Attachments

  • tempFileForShare_2016-11-09-07-33-28.jpg
    tempFileForShare_2016-11-09-07-33-28.jpg
    138.1 KB · Views: 1,219
Really enjoyed this thread. Great to see somebody putting the effort into keeping one on the road. Also, you're doing all the stuff I want to do-- locker, 5 speed, rust repair. And you've done it really, really well.:artist2:
Bookmarked.
 
Painted.


My goal after it's set up. To put grease or just fluid film that I have in a gallon, in the cracks or tight areas. This way it will keep water and moisture out. Anywhere there has been engine oil or geese on a car after a long period of times. There is just no rust.
 
So I got my elocker harness from 12voltguy. The price was a lot cheaper then low range harness. And the quality is truly amazing. I used their thanksgiving coupon so I saved a little. But they offer free shipping.

When you order. The switch is priced separately. And fully customizable. I went with green because I love green lol. This one is 2x2 size.


Oem plugs. Just plugs right into the elocker.


so a lot has happened.. installed my new winch. Before installing i took it apart and cleaned out the cheap grease they use and replaced it with synthetic mobil. Heard it is much easier to free spool in colder weather with better grease. Also there really wasn't that much of old grease in there to begin with. It is pretty much self explanatory and forward. You remove the gears and put it back as you removed it. I recommend taking pics to back track your self. *not sure if the photos are in proper order*

start by removing the allen key bolts


You also need to remove the allen key bolt that holds the handle in. If you forget to remove it the casing wont come apart from the gears


notice the nipple on the bottom, this sits inside the gear and when turned, it free spools or engages the winch.


pulled the case of


inside the winch


back to the gears


Dont loose this washer !


Cleaned the parts with this in this, and blew it with air


You can see, not much grease
 
All gears greased up, after cleaning


I then added electrical grease to all the electrical terminals!


I can tell you right now, that if you have savage offroad bumper, and smittybilt x2o. You will need to trim the front grill or otherwise relocate the solenoid box. I relocated mine, thus had to make some new wires to extend it. Used very heavy duty 2g wires. And moved the solenoid right next to the battery. Fits perfectly and its easy accessible.


Got these new battery terminals from sierra. I think they are awesome because you can attach many wires to it. Can even get a longer bolt if needed


Here is the top view of the terminals installed and everything hooked up, also upgraded the ground wire from battery to chassis.


I know, i have a lot lol. I have 1 bussman 100amp fuse box, 1 bluesea 100amp fuse box, a 5 channel amp, and the winch.

Welded the TC gusset


and the money shot


also installed new head unit that has 3 rca outputs for my 5 channel amp. Used a 9 wire to simply tap into the toyota harness speaker wires ( eliminates the need of running new wires to speakers) and even all the wire colors are identical. So i have 1 amp powering my 4 door speakers "kickers" and 1 10" JL sub.


While i had this apart, i installed new OEM inner wheel bearing seals. The old ones, "OEM", were id say about 6-8 months old. And they were worn out and you can see water/rust inside. I can assure, who ever wheels that the seal wears out fast.

I also installed new brake pads, new lower shock bolts....

also swapped my front diff with a 4.30 because just recently i swapped my elocker axle in.

I am currently waiting on ICON to make/ship me new custom rear CDC shocks. I ordered them the same exact specs as the toytec rear extended boss shocks. Which they recommend for the toytec superflex coils.

extended 24"
collapsed 16-1/2"

so currently the truck is sitting without rear shocks :(.... next thing is to install my elocker harness/switch

 
So i bedlined more of my truck to help againts rocks and rust. There were few surface rust, mostly around spot welds. Fixed it and used monstaliner to go over everything. Will look perfect with my 2nd new savage rear bumper.


also got a new oem vent replacement on the driver side
 
So i bedlined more of my truck to help againts rocks and rust. There were few surface rust, mostly around spot welds. Fixed it and used monstaliner to go over everything. Will look perfect with my 2nd new savage rear bumper.


also got a new oem vent replacement on the driver side
Monstaliner is good stuff, I'm on task to do whole underneath and complete body in it. Its a long project I'm pecking away at.
 
took the tape of, i think it looks good. Still drying!


also cleaned up the rear hatch lock... it was all rusty, so its going to look good now.

Elocker is installed and working ill take pics of that soon.
 
WAITING TODAY FOR MY REAR ICON 2.5 CDC TO COME!!

in the mean time...... ill keep short and simple since i get no love anyways lol...

my 2nd rear savage bumper powder coated and ready to go!


Everything mounted back up. Was very easy as the swingout was already assembled prior to the first bumper.


Notice the plate welded under the hitch. Extra reinforcement


Savage offroad transmission and transfercase skid plates. Powder coated also


This bolt is the biggest pain in the..... to tighten !!


My front RatProducts skid plate. The back part will have to get cut of in order to bolt to the savage skid plate, they share the same holes. Everything will be perfect. I prefer my front skid plate as it is one piece.


With the aftermarket bumper. The rear vent is not fully covered. So it is easy for dirt, water and other stuff to enter this area. I sprayed Fluid Film everywhere.


New OEM rear vent, and $1 sponge from home depot as a filter that will stop some water and mud from going inside. Also sprayed Fluid Film on the sponge and inside the plastic to repel water!


Rock sliders welded back on

Rock sliders welded back on, this time with plate


so i routed my front diff breather like this. Using this existing bracket, which i dont know what it is for but the hose fits perfectly.


I dont know why people only extend the rear axle breather. If you have a elocker, there is a breather coming from the actuator it self. Im holding the small hose. It originally has little rubber breather. But im going to extend it to the gas cap. Just need a metal 1/8 coupling.


rear axle breather extended


Rear shocks installed


Members online

Forum statistics

Threads
278,309
Messages
3,554,071
Members
248,016
Latest member
Advally Service

Trending content

Back
Top