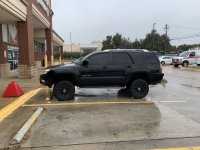
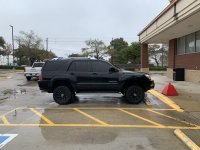
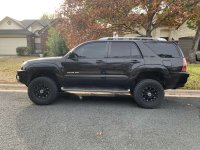
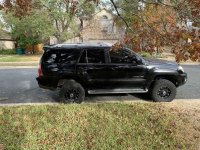
Locked Up's 4Runner

I got both front sunroof drains cleared.
It has rained since then and I didn't find any wet spots so I think I'm good there.

Somehow the PO had cracked the fuse box cover/base.
So that got replaced as well.

I'm now trying to track down a Bank 2 Lean condition (P0174).
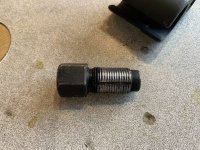
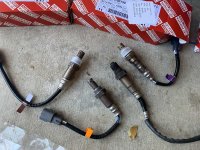
I also replaced the driver side O2 sensor ... so both fronts are new.
(Side note, thread chaser is < thread tap. Just FYI)

I have the rear sensors too but have not put them in.

Cleaned the MAF.

Also replaced the PCV valve, PCV hoses and a few misc bits of hardware and clips.

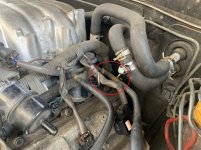
I'm thinking it might be a vac leak since I did replace a few brackets under the hood.
Maybe I popped off a hose or bumped a brittle one?

That or a fuel injector.
Ugh.

Time to bust out the smoke tester I guess.
 

Attachments
  • IMG_4701.jpg
    IMG_4701.jpg
    105.5 KB · Views: 1,156
  • IMG_4707.jpg
    IMG_4707.jpg
    132.1 KB · Views: 1,164
  • IMG_4687.jpg
    IMG_4687.jpg
    132.8 KB · Views: 1,155
Last edited:
Did a smoke test today and couldn't find any major leaks.... but I did find a few Evap hoses that need some love, so those are getting replaced.

During the smoke test I did see the slightest amount , and I mean super slight, coming out from near the TB/Intake connection. I tightened that up and noticed the intake housing is looking a little ragged. Might order a new one to be safe.

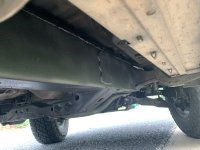
I also noticed that the fuel line to the passenger side must have had a leak at some point and the PO patched it.
You can see it in the back of this pic (please ignore the missing evap lines). That would technically be going to "Bank 2" so I might replace it when I do the injectors if I can figure out the part numbers! lol
 

Attachments

  • IMG_4710.jpg
    IMG_4710.jpg
    121.9 KB · Views: 1,095
Had to go out of town and I need an inspection before the end of the month. So I had to drop it off at a shop.

Of course the battery was dead so dropped in a new 27F-DLG because it has more CCA.

Anyway, glad I brought it to the shop because I was about to try to change the injectors to solve my P0174.
Turns out it was a broken ground wire to the O2 sensor. They repaired the break and no CEL now.

While it was there I had them do a bunch of stuff so that I can get some miles on it before inspection.

Needed a Timing belt service so I told them to change out pretty much everything "while they were in there"...
Belts, Cam & Crank Seals, Idler, Adjusters, tensioners, Thermostat, water & oil pumps, Harmonic balancer, Alternator
& Cooling Assembly Bracket.

Also needed 2 power steering hoses.

Don't ask how much it all was.... but it runs like a champ now.

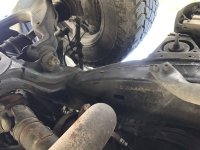
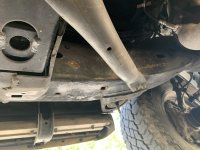
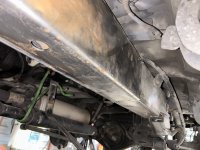
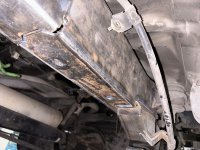
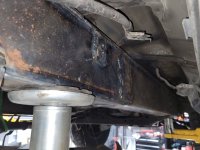
After it passes inspection.... next up will be to address the spots in the frame which I am planning on going overkill with, as in SafeTCaps.

Then I need to do something about the actuator leak. Thinking about an FJ case.... is that crazy?

After that I am thinking about leveling it out. I don't like the rake but not sure it's wise to go up on the Bilsteins in the front for added lift. So either I need to go big money up front or lower the rear an inch... which I don't really want to do. Hmmmmm.
 
Last edited:
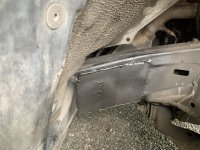
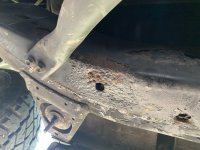
Reference frame rust. The V8 AC condenser drains right on top of the frame rail, passenger side coming through the firewall, a 90 degree down hose. This hose drips condensate right on top of the frame rail, the condensate runs down to a spot on the frame under the passenger side front door where it stops and drips on the ground. At that point it rusts a hole in the frame. you might want to get a hose barb connection and some hose and run the hose to a location away from the frame, I took mine to the passenger side wheel well and clamped it there. I had a rusted hole a foot long on the bottom of the frame there, driver side clean.
 
Reference frame rust. The V8 AC condenser drains right on top of the frame rail, passenger side coming through the firewall, a 90 degree down hose. This hose drips condensate right on top of the frame rail, the condensate runs down to a spot on the frame under the passenger side front door where it stops and drips on the ground. At that point it rusts a hole in the frame. you might want to get a hose barb connection and some hose and run the hose to a location away from the frame, I took mine to the passenger side wheel well and clamped it there. I had a rusted hole a foot long on the bottom of the frame there, driver side clean.

Good info!

Mine is only really bad on the passenger side up front and in the area you describe. I'll try to find the drain and move it and take pictures for reference for others.
 
Last edited:
I got all the SafeTCap parts ordered.

Went with 200, 201 & 202 on both sides as well as some fish plates and gussets.

I don't think it will need them all, but the shop I am using is far away and I didn't want to have to make a second trip/order.


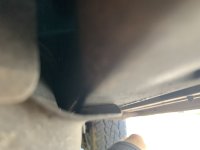
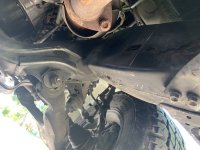
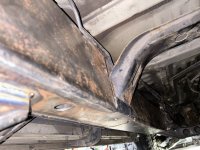
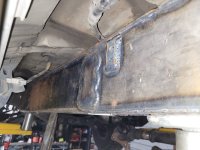
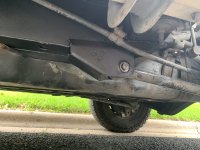
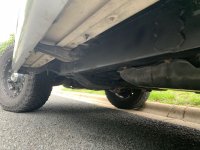
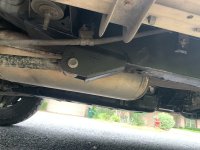
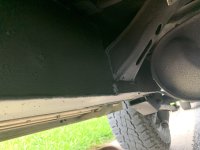
Some before shots:
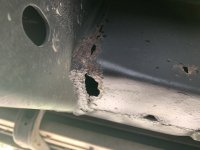
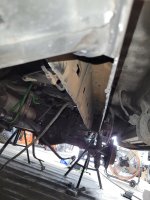
This is everything I can find (and I am looking hard) on the driver side.
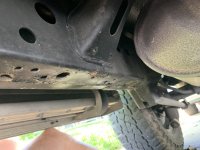
3rd picture is down the gas tank side and it looks clean.
The outside (outboard side) looks immaculate everywhere. It's just the inner (inboard) side.
 

Attachments

  • IMG_4989.jpg
    IMG_4989.jpg
    132.3 KB · Views: 715
  • IMG_4990.jpg
    IMG_4990.jpg
    123.5 KB · Views: 710
  • IMG_4992.jpg
    IMG_4992.jpg
    112.3 KB · Views: 673
Last edited:
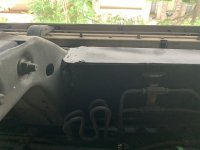
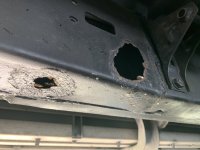
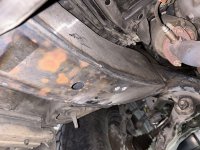
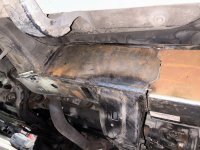
Pass side is worse and the photos make it look horrible...but still not like the catastrophic stuff I see on the web... and again the outside (outboard side) looks immaculate. very strange.

I think even on this side the 202 parts are overkill but that is my goal.

I never want to do this again (and if I have to I will re-frame it).
 

Attachments

  • IMG_4994.jpg
    IMG_4994.jpg
    124.2 KB · Views: 748
  • IMG_4995.jpg
    IMG_4995.jpg
    125.1 KB · Views: 715
  • IMG_4996.jpg
    IMG_4996.jpg
    114.6 KB · Views: 707
  • IMG_4997.jpg
    IMG_4997.jpg
    125.4 KB · Views: 670
  • IMG_4998.jpg
    IMG_4998.jpg
    127.1 KB · Views: 676
Last edited:
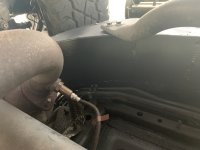
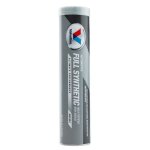
Got the front & rear driveshafts lubed up today @ 215,674
(Had the typical clunking)

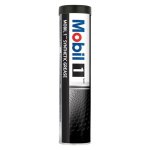
Opted for Valvoline with Moly for u-joints and Mobil 1 synthetic for the slips.

Seems to have solved it.:reddance:


Dropping off tomorrow at my local 4x4 shop for the Saftcap install.
I'll share pics when I get them!
 

Attachments

  • Mobil 1.jpg
    Mobil 1.jpg
    35.9 KB · Views: 647
  • Valvoline.jpg
    Valvoline.jpg
    32.5 KB · Views: 644
The shop was backed up but getting to me now.

Driver side was very clean inside except for the very bottom.
Passenger side will look worse inside but hopefully not too far up.
I guess as thick as these caps are it doesn't matter.... not gonna go anywhere now!

Will share pics from pass side when I get them.
 

Attachments

  • WZRV8948.jpg
    WZRV8948.jpg
    128.8 KB · Views: 380
  • IMG_0594.jpg
    IMG_0594.jpg
    127 KB · Views: 344
  • IMG_0595.jpg
    IMG_0595.jpg
    129.2 KB · Views: 353
  • IMG_0596.jpg
    IMG_0596.jpg
    123.9 KB · Views: 339
  • IMG_0597.jpg
    IMG_0597.jpg
    126.1 KB · Views: 342
  • IMG_0598.jpg
    IMG_0598.jpg
    127.1 KB · Views: 369
  • PEUF1268.jpg
    PEUF1268.jpg
    132.8 KB · Views: 281
  • SWMT3194.jpg
    SWMT3194.jpg
    123.4 KB · Views: 268
Last edited:
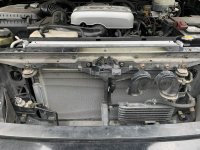
Got it back on 5/13/24 from Krawltex but forgot to update.

Frame is STOUT.
 

Attachments

  • IMG_5343.jpg
    IMG_5343.jpg
    126.5 KB · Views: 291
  • IMG_5344.jpg
    IMG_5344.jpg
    128.1 KB · Views: 278
  • IMG_5345.jpg
    IMG_5345.jpg
    128.9 KB · Views: 260
  • IMG_5346.jpg
    IMG_5346.jpg
    131 KB · Views: 261
  • IMG_5348.jpg
    IMG_5348.jpg
    128.6 KB · Views: 294
  • IMG_5351.jpg
    IMG_5351.jpg
    117.8 KB · Views: 263
  • IMG_5352.jpg
    IMG_5352.jpg
    116.3 KB · Views: 285
  • IMG_5353.jpg
    IMG_5353.jpg
    125.6 KB · Views: 291
Unfortunately, on the way to Krawltex I noticed that it was running hot.
I was running a Bluetooth code scanner with live data.

So I brought it from one shop to another... back to Bearden Automotive.
Since they just did a bunch of engine work I just want to make sure it's not something they did.

Bearden traced it to the Radiator.
Said it looked like the PO had used some stop leak and it probably clogged it up. This explains the overheating that PO mentioned.
It had hot & cold spots so that got replaced along with the cap. Pretty happy to have this sorted out.
 

Attachments

  • IMG_5355.jpg
    IMG_5355.jpg
    129 KB · Views: 428
While it was there I asked them about the no heat on the Passenger side that I had noticed last winter and forgot about.
They poked around and said the Air Mix servo isn't working so I will order one of those after I verify. Hopefully that is it and nothing to do with a clogged heater core from the dang stop leak used by PO.

Additional shot of Engine bay because I forgot to post after I added the new intake assembly and new MAF so here they are.

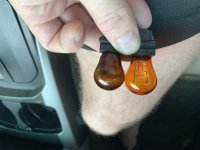
And the passenger front turn signal went out and was causing the fast blink.
So swapped this out too.
 

Attachments

  • IMG_5356.jpg
    IMG_5356.jpg
    128.9 KB · Views: 456
  • IMG_5357.jpg
    IMG_5357.jpg
    118.8 KB · Views: 433
2 super exciting updates:
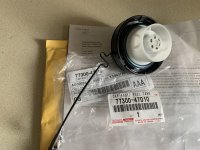
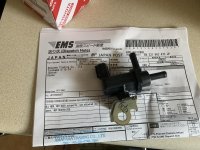
New gas cap and purge solenoid.

I know.
I'm excited too... :eyebrows:

Had a P0442 code and it was just the gas cap, but I had already ordered the solenoid so on it goes.


Fun stuff coming tomorrow.
 

Attachments

  • IMG_5615.jpg
    IMG_5615.jpg
    124.6 KB · Views: 383
  • IMG_5690.jpg
    IMG_5690.jpg
    132 KB · Views: 399
Last edited:
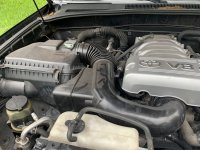
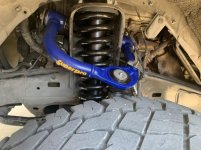
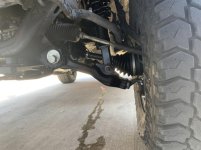
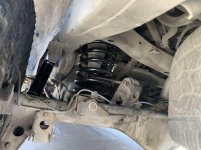
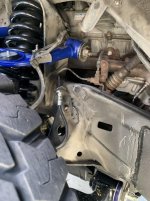
Got most of the front end redone....
8/9/2024
216,253
Powerstop Front Pads & Rotors - Amazon
Powerstop Rear Pads & Rotors - Amazon
VastAuto Hub Grease Caps - Amazon
Detroit Driver Front Wheel Bearing - Amazon
Geometry Correction UCAs - SuperPro
LCA Kit - SuperPro
Sway bar Drop - Amazon
Dobinsons 1-3.5" IMS Coilovers (+100lbs/black) - Exit Offroad
Dobinsons C59-675V Variable Long travel coils (black) - Exit Offroad
Dobinsons IMS59-50701 Shocks - Exit Offroad
Extended Stainless Kevlar Teflon (maybe some Unobtanium too) Brake lines Front & Rear (smoked black) - YotaMafia
OEM 5th Gen CV Axles (43430-60082) - Joe Joe
OEM Differential Mounts lower x2 - Partsourq
OEM Differential Mounts upper x2 - Partsourq
OEM Support assy front diff (5238060012) - Partsourq
OEM Support assy front diff (5238060021) - Partsourq
Alignment and install of above parts - Krawltex Motorsports

I opted for the 3.5" setting and extra 100lbs because I have a winch & bumper planned ... but it is sitting too high.
I get some nice vibrations under acceleration and when turning.

So, I think I will try to lower the front this weekend about 1" to let it settle in.
After the winch/bumper I will adjust it back up if need be.

Before the Dobinsons My front measurements were ~22" hub center to fender and rear was ~23".
Now they are all around 24".
 

Attachments

  • IMG_5693.jpg
    IMG_5693.jpg
    72.7 KB · Views: 376
  • IMG_5694.jpg
    IMG_5694.jpg
    104.6 KB · Views: 337
  • IMG_5695.jpg
    IMG_5695.jpg
    88.5 KB · Views: 346
  • IMG_5698.jpg
    IMG_5698.jpg
    104.3 KB · Views: 356
  • IMG_5699.jpg
    IMG_5699.jpg
    108.4 KB · Views: 365
  • Document (5).jpg
    Document (5).jpg
    128 KB · Views: 331
Last edited:
Have not been driving this much and forgot to update!

12-12-24
216,565 miles
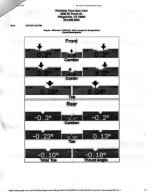
I added shorter rear springs (Dobinsons C59-325 Rear Coils ) and lowered the front quite a bit.

No more vibrations and rides great.

Based on my measurements the front is at around 3.5" and the rear around 2.5".
I do a have a slight driver side lean like everyone else.
So I may grab a shim for the rear to help with that.

Up next, I am looking at doing a manual T-case swap. Been doing a lot of research on what all will need to happen, but long term I thin it is a better solution than replacing an actuator. In order to help with shifter routing I am looking at a 1/2" body lift as well. I know it's not "necessary" but I think the extra room will help keep the cut out size down a bit. I also ordered a full set of replacement OEM body mounts & a new OEM transmission mount. Not because it "needs them", but because "while we are in there". :D
 

Attachments

  • IMG_6248.jpg
    IMG_6248.jpg
    123.2 KB · Views: 335
  • IMG_6249.jpg
    IMG_6249.jpg
    122.1 KB · Views: 337
  • IMG_6242.jpg
    IMG_6242.jpg
    130.7 KB · Views: 380
  • IMG_6243.jpg
    IMG_6243.jpg
    130.4 KB · Views: 334
  • alignment12-11-24.jpg
    alignment12-11-24.jpg
    122.6 KB · Views: 290
Last edited:
So what is the plan to get it dirty?

The current plan is just to get it 100% fully functional ... and comfy enough for road trips.

This is going to be used for my business to go to events.
(I make parts for RC Crawlers: Welcome to Locked Up RC - Scale Performance Parts)
Some of the events require a little bit of 4wd ... but all of the events require a good highway trip.
So dependable>off-road prowess


I won't be looking to put it on tons or 37s or anything.
As much as I don't like the wheels it has right now, I will probably ride out these 31s until I need to replace them. Then I'll look at new wheels & 32s or 33s just to fill out the wheel wells. Unless I find some great deal on some take offs.


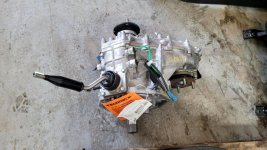
Next step is going to be a manual t-case swap.
My actuator is leaking and I have a little rear main seal leak.
So while we are doing the t-case we will so the rear main seal, torque convertor seal & transmission mount. Will probably do new driveshafts as well unless I can get a deal on getting mine re-tubed.

Case has been sourced and it only had 30K on it.
So hoping to get that going this week.

After that it should be mechanically sound and I can start messing with creature comforts. Stereo, dash, seats, lights, exhaust, etc. Probably will do sliders and a front bumper too. Not saying it won't be "more capable" than now down the road but first things first.
 

Attachments

  • 6103_1429503_03_web.jpg
    6103_1429503_03_web.jpg
    72 KB · Views: 218
Last edited:
Done a bunch to the Runner in the past couple of months but have not been updating!

On 2/14 my Daily Driver was totaled in a grocery store parking lot incident. Kid came out of nowhere and crashed into me. So the 4Runner has become my main transportation. Luckily I work from home! BUt ..this means all the things I have been putting off have gone into express mode.

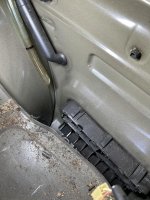
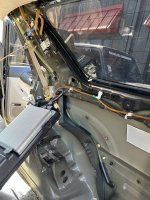
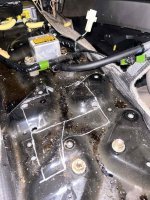
I had already asked the dealer to clear the drain lines but something wasn't right. hopefully this helps ... right?
 

Attachments

  • IMG_1146.jpg
    IMG_1146.jpg
    127.6 KB · Views: 181
  • IMG_1148.jpg
    IMG_1148.jpg
    129.6 KB · Views: 184
2/28/25 Update
Runner was with Krawltex getting the manual T-case slapped in.
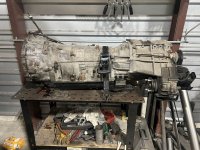
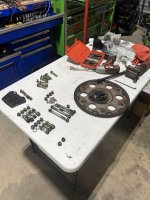
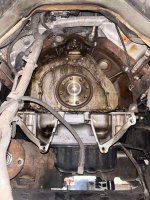
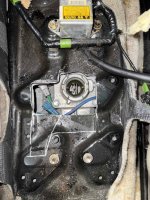
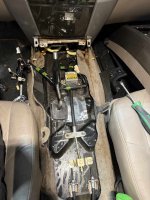
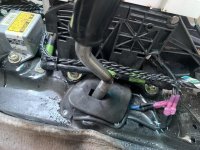
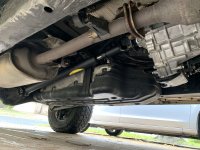
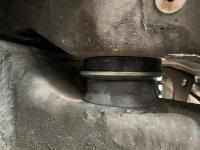
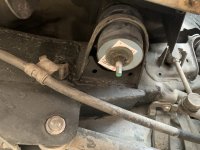
I know it isn't "that difficult" to bolt in, but I no longer have access to a welder to modify the shifter. The rear main seal was also leaking so they replaced that. I also had them replace ALL the body mounts with OEM parts and do a 1/2" body lift to help with the shifter fab.
They also ordered & put in new driveshafts from Tom Woods.
So this was just a little more work than I wanted to do in the driveway to then drive it to them for just the shifter fab. Anyway.... photo dump and please don't judge me on how nasty it was....I already cleaned it up!
 

Attachments

  • IMG_1111.jpg
    IMG_1111.jpg
    131 KB · Views: 181
  • IMG_1114.jpg
    IMG_1114.jpg
    131.8 KB · Views: 189
  • IMG_1115.jpg
    IMG_1115.jpg
    130.8 KB · Views: 173
  • IMG_1110.jpg
    IMG_1110.jpg
    128.8 KB · Views: 182
  • IMG_5316.jpg
    IMG_5316.jpg
    132.3 KB · Views: 199
  • IMG_5317.jpg
    IMG_5317.jpg
    128.5 KB · Views: 202
  • IMG_6731.jpg
    IMG_6731.jpg
    131.1 KB · Views: 175
Last edited:
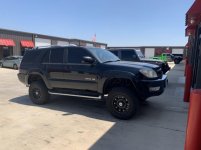
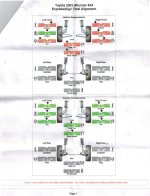
More from 2/28.
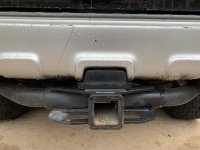
The body lift is really only noticeable at the hitch and so slight that I'm the only one that will probably see it.

Might try to remedy that when I modify the hitch for a bigger spare time.


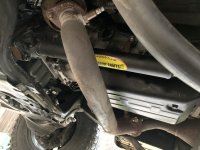
FYI, the front driveshaft would have fit but since everything has over 200K on it I went ahead and replaced it.
 

Attachments

  • IMG_6868.jpg
    IMG_6868.jpg
    129.8 KB · Views: 182
  • IMG_6869.jpg
    IMG_6869.jpg
    125 KB · Views: 187
  • IMG_6870.jpg
    IMG_6870.jpg
    123.9 KB · Views: 190
  • IMG_6873.jpg
    IMG_6873.jpg
    124.4 KB · Views: 179
  • IMG_6871.jpg
    IMG_6871.jpg
    127.5 KB · Views: 183

Members online

Forum statistics

Threads
278,307
Messages
3,554,056
Members
248,016
Latest member
Advally Service

Trending content

Back
Top