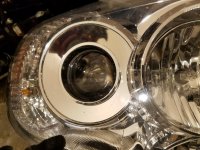
Mini Morimoto RetroQuik Bi-Xenon Projector Swap for '06+ Headlamps

The 4.0 is a different level that the Acme RetroQuick. Much sharper cutoff, and wider. Here is a lousy picture with the 4500K 55W 4.0 Left, and 4500K 35W Acme Right:


The RetroQuick brackets are already cut out for a large projector to fit in them, and the 4.0 doesn't line up to areas where there is usable material. I didn't take pictures of the brackets I made, but luckily for you, I have a leak I need to reseal, so I should be able to take them apart this weekend and take pictures as a template. Basically you just need the top and bottom pieces of the stock bracket (has 2 or three tabs on the bottom that fit onto the headlight housing)

I reused the Acme's in my fiancee's accord, so here is a 4500K 35W Retroquik vs 1998 Honda accord headlight for comparison


I'll get pictures of the bracket I made this weekend when I tear the one side back apart to re-seal it

Damn. I have the ACME D2S but that 4.0 is so nice... the 4.0 can't work with the retroquick bracket I have either right?

This going to make me spend more money.
 
Damn. I have the ACME D2S but that 4.0 is so nice... the 4.0 can't work with the retroquick bracket I have either right?

This going to make me spend more money.

Right, the retroquick brackets won't work with the 4.0, but you can cut up the stock bracket and make it work, which is what I did.
 
The 4.0 is a different level that the Acme RetroQuick. Much sharper cutoff, and wider. Here is a lousy picture with the 4500K 55W 4.0 Left, and 4500K 35W Acme Right:

The RetroQuick brackets are already cut out for a large projector to fit in them, and the 4.0 doesn't line up to areas where there is usable material. I didn't take pictures of the brackets I made, but luckily for you, I have a leak I need to reseal, so I should be able to take them apart this weekend and take pictures as a template. Basically you just need the top and bottom pieces of the stock bracket (has 2 or three tabs on the bottom that fit onto the headlight housing)

I reused the Acme's in my fiancee's accord, so here is a 4500K 35W Retroquik vs 1998 Honda accord headlight for comparison

I'll get pictures of the bracket I made this weekend when I tear the one side back apart to re-seal it

Thanks Turbo!

Looking forward to your pics.

I was leaning towards an H11 bulb in the stock projectors for now, with a plan to do the projector swap in the spring, but your description is making me think I should just order the projectors now and do it all in one shot.
 
No mods to the headlight housing or projector, just cutting up the stock projector's mounting plate, drilling holes in the right spot, and bolting it all together.

I have to tear one back apart this weekend, and I'll take pictures of how I made everything fit.

i wonder if you did what i did when i did my rx-afs projectors. i have a thread here too.
 
Right, the retroquick brackets won't work with the 4.0, but you can cut up the stock bracket and make it work, which is what I did.

Perfect timing on this thread revival. I had bought everything needed back a few years ago for a complete retrofit, even had a spare set of OEM lights I popped open to black out, but ending up losing interest and selling it all off. Now, looks like TRS has much better projectors anyway so time to get back on it.

As usual, I'm getting deep in my research in trying to figure out the best time/money investment to performance ratio for this one. Leaning heavily towards these new MD2S 4.0 as well, they look killer from the output pics i've seen online and would like to stay with the D2S bulbs for OEM bulb compatibility.

I was going to purchase the closeout retroquick brackets as well (just b/c) but may not given your feedback and easier method.

I do wonder how the "off-brand" Hella G5 type (ebay, aliexpress, etc) projectors compare to the TRS 4.0s though given that they're roughly half price and have VERY similar output. According to the guys over at HIDPlanet, the Hella G5 were the "inspiration," at minimum close cousins, to the 4.0s. I'm all about my bang for the buck but do know TRS have great products. Any opinions?
 
Here are the photos from this weekend.
First, on the OEM H11 projector, there is a plate sandwiched between the lens and the reflector housing, that has the cutoff slot cut into it. It's the plate that bolts to the zinc-plated philips head screws in this image:


I cut the bottom out like this:


And the top like this:


I used tin-snips like these to cut the metal, then straightened the plates back out using a hammer against my garage floor. Quick and dirty, but it works.

https://static.grainger.com/rp/s/is/image/Grainger/10F608_AS01?$zmmain$

Drilled holes in the correct locations of the plate for the 4.0s, and bolted my D2S 4.0 3" projectors to them. After that, just drill a 1/4" (ish) hole in the back of the headlight housing to pass the bi-xenon solenoid wires through, reseal the housing, mount the rest of the HID hardware (relays, ballasts) and reinstall into the truck.


Make sure you re-aim the headlights once you have them installed. Good luck everyone!
 
Here are the photos from this weekend.
First, on the OEM H11 projector, there is a plate sandwiched between the lens and the reflector housing, that has the cutoff slot cut into it. It's the plate that bolts to the zinc-plated philips head screws in this image:


I cut the bottom out like this:


And the top like this:


I used tin-snips like these to cut the metal, then straightened the plates back out using a hammer against my garage floor. Quick and dirty, but it works.

https://static.grainger.com/rp/s/is/image/Grainger/10F608_AS01?$zmmain$

Drilled holes in the correct locations of the plate for the 4.0s, and bolted my D2S 4.0 3" projectors to them. After that, just drill a 1/4" (ish) hole in the back of the headlight housing to pass the bi-xenon solenoid wires through, reseal the housing, mount the rest of the HID hardware (relays, ballasts) and reinstall into the truck.


Make sure you re-aim the headlights once you have them installed. Good luck everyone!
not bad, good work, at least you havent permanently mount it with jb weld
 
Here are the photos from this weekend.
First, on the OEM H11 projector, there is a plate sandwiched between the lens and the reflector housing, that has the cutoff slot cut into it. It's the plate that bolts to the zinc-plated philips head screws in this image:


I used tin-snips like these to cut the metal, then straightened the plates back out using a hammer against my garage floor. Quick and dirty, but it works.


Drilled holes in the correct locations of the plate for the 4.0s, and bolted my D2S 4.0 3" projectors to them. After that, just drill a 1/4" (ish) hole in the back of the headlight housing to pass the bi-xenon solenoid wires through, reseal the housing, mount the rest of the HID hardware (relays, ballasts) and reinstall into the truck.


Make sure you re-aim the headlights once you have them installed. Good luck everyone!

Very nice! Thanks for the follow up with photos. This seems very much more doable and straight forward now with pics. So to confirm these are 3" lens and only required the cutting noted above, didn't need to widen the shrouds opening or anything?
 
Very nice! Thanks for the follow up with photos. This seems very much more doable and straight forward now with pics. So to confirm these are 3" lens and only required the cutting noted above, didn't need to widen the shrouds opening or anything?

I used aftermarket housings, so your results may vary.
Passenger side fit 100%, driver side was pointing way off to the left, to correct it I had to add shims to one side of the projector to aim it rightward, and it wound up hitting the plastic headlight surround around the lens.

I took a dremel with a sanding drum to bevel the inside edge of the surround (the part people black out) without affecting the visible side, and it fits no problem now. OEM housings should have no problem at all.

EDIT: And yes, this is with the 3" lens
 
Here are the photos from this weekend.
First, on the OEM H11 projector, there is a plate sandwiched between the lens and the reflector housing, that has the cutoff slot cut into it. It's the plate that bolts to the zinc-plated philips head screws in this image:

http://i181.photobucket.com/albums/x299/wildhippie666/20161203_144035_zpsj2ukbl2d.jpg

I cut the bottom out like this:
http://i181.photobucket.com/albums/x299/wildhippie666/20161203_143715_zpslnmlvxs7.jpg

And the top like this:
http://i181.photobucket.com/albums/x299/wildhippie666/20161203_143701_zpsi33g8ny9.jpg


I used tin-snips like these to cut the metal, then straightened the plates back out using a hammer against my garage floor. Quick and dirty, but it works.

https://static.grainger.com/rp/s/is/image/Grainger/10F608_AS01?$zmmain$

Drilled holes in the correct locations of the plate for the 4.0s, and bolted my D2S 4.0 3" projectors to them. After that, just drill a 1/4" (ish) hole in the back of the headlight housing to pass the bi-xenon solenoid wires through, reseal the housing, mount the rest of the HID hardware (relays, ballasts) and reinstall into the truck.


Make sure you re-aim the headlights once you have them installed. Good luck everyone!


Decided to attempt this Sunday before our Colorado trip in a few days and it was a complete failure. I found it nearly impossible to determine precisely where to cut and where to drill the holes. My lens was pretty badly misaligned from the factory before I even opened the housings so even getting it perfect would leave it poorly centered.

Upon opening the housings turn signal snapped off along with both alignment tabs. Then once the cutoff plate is trimmed I'm trying to line it up to drill holes and realize you have to perfectly align the X, Y and Z axis freehand with no reference point since the housing isn't lined up to begin with. Basically just trial and error putting the shroud/lens on and checking for alignment.

Tried my best aligning it, but even the best attempt was more misaligned and it's also set back about 3/4" like someone posted about previously. At this point I resorted to drilling into the main housing and using small standoffs directly to it. The housing material is very delicate, crumbled and immediately broke off once attached, further ruining the housings.

In the end, even if I managed to perfectly center it with a fairly precise plate by eyeballing it and using hand snips, the OEM housing is horribly misaglined still so it wouldn't work. Gave up late Sunday night and ordered a pair of TYC replacement headlights assemblies with 2nd day ship. Of course FedEx is closed so now they won't arrive till after trip departure. Shouldn't have ever touched these housings, especially before a trip, at this point I'm scrambling to find a housing or cutoff plate before the trip :( (Yes I know, my fault for risking my only headlights)
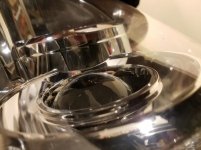
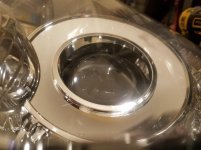
First Two pics:
Closest I could get it aligned. It definitely sat further down in there than stock, would need to come about 3/4" forward to be flush.

3rd Pic:
Untouched OEM Toyota Pass side projector/shroud alignment. This is how they came from the factory!
 

Attachments

  • 20161225_215833.jpg
    20161225_215833.jpg
    122.4 KB · Views: 565
  • 20161225_215851.jpg
    20161225_215851.jpg
    119.1 KB · Views: 595
  • 20161225_215923.jpg
    20161225_215923.jpg
    137.9 KB · Views: 581
Here are the photos from this weekend.
First, on the OEM H11 projector, there is a plate sandwiched between the lens and the reflector housing, that has the cutoff slot cut into it. It's the plate that bolts to the zinc-plated philips head screws in this image:


I cut the bottom out like this:


And the top like this:


I used tin-snips like these to cut the metal, then straightened the plates back out using a hammer against my garage floor. Quick and dirty, but it works.

https://static.grainger.com/rp/s/is/image/Grainger/10F608_AS01?$zmmain$

Drilled holes in the correct locations of the plate for the 4.0s, and bolted my D2S 4.0 3" projectors to them. After that, just drill a 1/4" (ish) hole in the back of the headlight housing to pass the bi-xenon solenoid wires through, reseal the housing, mount the rest of the HID hardware (relays, ballasts) and reinstall into the truck.


Make sure you re-aim the headlights once you have them installed. Good luck everyone!

Do you have any pictures of the final product? I'd like to see how the 3" projectors look behind the shroud. Thanks.:thumb:
 
Do you have any pictures of the final product? I'd like to see how the 3" projectors look behind the shroud. Thanks.:thumb:

I just went outside to get some photos, but between the black housings and the overcast skies here at work, they came out terribly.
I got one great picture, but it had my work badge perfectly in focus in the reflection, so that's a no-go...

I'll get some for you guys tonight. I think they came out well, maybe 1/8" or less off center and perfectly level. I guess I just got lucky compared to randomtask16


Morimoto D2S 4.0 3" Lens
Morimoto 4500K bulbs
Morimoto 50W XB55 Ballast
Custom cut mounting plates made from OEM projector shields as previously shown
Morimoto dual relay harness
Cheapest eBay blacked out housings


Morimoto D2S 4.0 3" Lens
Morimoto 4500K bulbs
Morimoto 50W XB55 Ballast
Custom cut mounting plates made from OEM projector shields as previously shown
Morimoto dual relay harness
Cheapest eBay blacked out housings

nice stuff, lets see how well these housing hold up, i have seen some other guys housing melted.


Morimoto D2S 4.0 3" Lens
Morimoto 4500K bulbs
Morimoto 50W XB55 Ballast
Custom cut mounting plates made from OEM projector shields as previously shown
Morimoto dual relay harness
Cheapest eBay blacked out housings

That looks good! How do you like the output of the D2S 4.0 projectors?
 
nice stuff, lets see how well these housing hold up, i have seen some other guys housing melted.
So far so good, I just road tripped from Atlanta to Allentown, PA to NYC to Toms River NJ to Strasburg, VA to Atlanta (about 25 hours driving in 4 days) without any issue with the housings. The only fault I've seen so far was my own, I tried to lamin-x them myself, and pulled some of the UV coating off of one of the clear plastic lenses while trying.


That looks good! How do you like the output of the D2S 4.0 projectors?
The output is simply ridiculous. I had to use some spacer washers on one of my mounting plates to get one of them pointed straight ahead to match the high beam. eBay housing, so I can't complain too much.

With everything aimed properly, it's awesome. With the high beams on, so the Bi-xenon projectors with shields actuated for high beam, plus the factory high beams, it's just amazing.
 
It was starting to get light out as I was taking these, but here are some example photos.
1: Tooling around my neighborhood:


2: Low beams in neighborhood


3: High beams in neighborhood


4: Low beams on road


5: High beams on road (notice tree straight ahead, way far away, clearly illuminated)
 
It was starting to get light out as I was taking these, but here are some example photos.
1: Tooling around my neighborhood:


2: Low beams in neighborhood


3: High beams in neighborhood


4: Low beams on road


5: High beams on road (notice tree straight ahead, way far away, clearly illuminated)
nice pics, the auto setting usally change the color of the hid bulb that is being used.
 
I can't believe how good the output is on these mini D2S 4.0s. TRS has come a long way with them.

I think I will offer these for the retrofit group buy I'll be posting soon! Stoked to build some lights!
 

Members online

Forum statistics

Threads
278,315
Messages
3,554,130
Members
248,016
Latest member
Advally Service

Trending content

Back
Top