My 94 Runna!

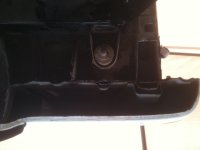
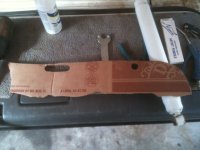
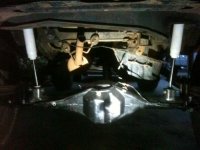
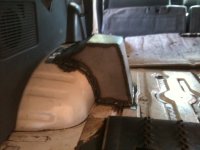
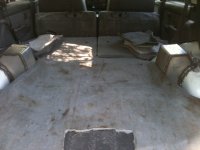
Here you go Nate. Here's the underside shot and the template I made. I made the plugs out of some scrap 16g I had laying around. It definitely would have been easier to make the cap pieces out of 22g but I like to use scrap metal whenever possible and well,my yard is a little cleaner now ;) I think the sheet metal on these Yotas are 22g, 22g is definitely easier to make pieces out of but can be a real pain to weld. The welder I'm using is a 6 year old Lincoln 215 Power Mig,and I'm using some .024 wire. I found with the .024 wire it's much easier to weld thin sheet metal without too much frustration and burn through. I find myself wishing I had 2 welders though! One for sheet metal and another for structural stuff. I find myself being lazy about changing out rollers and wire between projects! hahaha.
 

Attachments

  • download.jpg
    download.jpg
    62.5 KB · Views: 465
  • template.jpg
    template.jpg
    103.7 KB · Views: 459
Last edited:
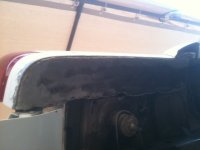
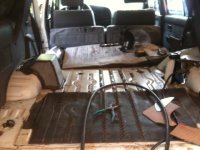
I have both sides welded in and ready for a little Bondo on the radiused edge.
 

Attachments

  • cap.jpg
    cap.jpg
    75.5 KB · Views: 445
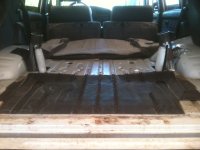
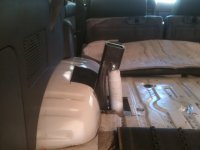
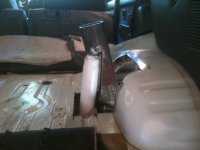
Shock towers. These are Rancho 5036 they are 36" long. I have 14" of shock shaft with 7" of up and down travel set in this mounting position. I made these towers out 2"x3" 1/4" wall I had laying around from an old project. My main concern was to keep the towers as close to the frame and hugged into the fender well area as possible in order to conserve as much cargo space as possible. The towers are cut at a 12* angle on the bases and welded to the top of the frame rails.

They still need to be trimmed down on the tops. When I'm done they will be about 4 inches shorter,and of course I still need to bend up some sheet metal to wrap it with. I'm on the fence about how I'm gonna wrap it though. I'm not sure if I want to weld the new piece of fender well around it or have it removable with sheet metal screws. Seeing how this truck is constantly evolving I'd hate to have to cut everything out when I change my mind on things.
 

Attachments

  • shx.jpg
    shx.jpg
    105.9 KB · Views: 478
  • shxl.jpg
    shxl.jpg
    89.6 KB · Views: 460
  • shxr.jpg
    shxr.jpg
    93 KB · Views: 469
Last edited:
Thanks, it looks a bit funky now that I have the tail gate back on. At least until I get a bumper made up to fill the space. It would be cool if the tail gate could be cut up to the same elevation. I think that would look 100x cleaner and it would be easier to fab up a simple bumper too.
 
Quick update. I bought a FROR kit that allows me to put Tacoma front brakes on my solid axle. I chose to go with rotors and calipers from a 1996 truck. Benefits are I get the width of IFS rear with the ease of a "hat" style rotor so its a snap to work on, 2 bolts to take the calipers off and bam rotors slip off.

To sum it all up, better scrub radius,no janky aluminum wheel spacers, better braking with larger calipers and vented rotors and well... It just looks cool too :)
 
47c12178-3b37-5d97.jpg
. I'm still in 2wheel drive cause i been so busy with work, but I had to go out in it today! My to do list is install the duals that are on the work bench at the moment and get some deivelines made I just placed the order for the Radesigns triple sticks so when those get here I'll be fired up. I also have the TG long travel driveshaft so I'll be dropping that off with my rear shaft once I install the duals. I decided to lengthen my front shaft myself with some schedule 40 pipe since I don't do any high speed 4wheeling.
 
Here's a pic of the underside.

good idea but you welded it up so when you flex the shock bushings are going to bind and limit flex somewhat. Worst case you bend or break the shock shaft. I am not so eager to cut my floors up, so ive been talking to brian @ 4wheelunderground. He finally got his one ton toyota brackets done and under body coilover mounts done as well. At the very least im going with his rear coilover mounts.

Coilover mount
 
IDK maybe... the only real problem I see is the way I welded the shock mount on top of the axle. I should have welded it so the bolt eyes are facing the other direction so it allows it to pivot but we'll see. They're cheap Rancho's with a lifetime guarantee,so I'll get to test how true that guarantee is. I'll probably change that before my first real shakedown trip though.

The last thing I need is to go out and have trail carnage when the wife and daughter are with me. The way my wife see's it, for all the time/$ I spend on this Runner it better damn well perform flawlessly!! Women will never understand.

Those coils look nice though, I bet it will drive real nice on the road with those.
 
Shock tower cover

I got one side done today. I spent about 3 hours this afternoon slapping this together. I used 20g sheet some cardboard for templates and a SUPER CRAPPY Harbor Freight sheet metal brake that I will return immediately after I'm done with the passenger side.:fro:

I'm not 100% happy with the box but I'm gonna cover it with some new grey carpet so WTF.
 

Attachments

  • cover.jpg
    cover.jpg
    119.5 KB · Views: 508
  • tower.jpg
    tower.jpg
    102 KB · Views: 511
Finished the other side today now I need to source some grey carpet on the cheap.
 

Attachments

  • g.jpg
    g.jpg
    109.8 KB · Views: 516
47c12178-f999-1214.jpg
47c12178-f9a8-3257.jpg

I installed the ARB compressor today on the firewall above the intake manifold today. I made sure to leave enough room to take the valve cover off for future adjustments.
 
47c12178-faed-bae7.jpg


Even though it's STILL only 2 wheel drive I had to test out the locker! Here's a poser shot! I'm totally happywith the flex this runner has. I still had about 1.5" of up travel in the shock and the leaf spring was just slightly negative. Now I need to order some bump stops and weld em in.
 

Members online

Forum statistics

Threads
278,309
Messages
3,554,075
Members
248,016
Latest member
Advally Service

Trending content

Back
Top