NateMob's "DD" Build

BEAST! All i can say anymore about this rig! Looks bad ass man

THANKS! Seriously, thanks a ton and this truck is proving to be very fun to drive, wheel, build, and even clean. It has come a long way in the past 16 months.

So many awesome pics.

Freakin' loving the photos man.

I feel like Toyota should resell the third gen and just use your photos for marketing material! :thumb:

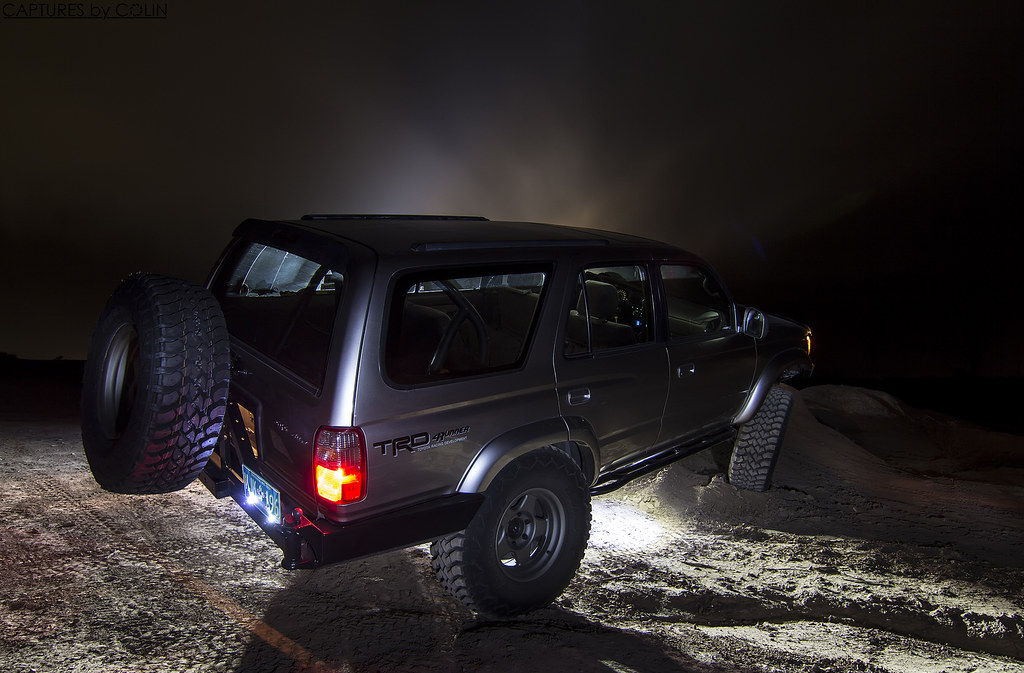
Your lighting (and coincidentally shadows) are amazing!

Thanks fellas, most of the really awesome shots in here aren't from my own camera, but a close friend's rather. I'm really lucky to have him take so many incredible shots. :photo:

haha yeah I'm working on my last semester to get my label of smartness so i can supposedly succeed in life haha. Also working and then I've picked up a couple other hobbies that have been taking all my time away. I've been getting back into my truck a little as the warm weather is finally coming back. I seriously WANT the same armor set up you have. I just have to pull the trigger and get her done lol!

Well congratulations on the achievement and getting some time with your truck again, keep me posted on your armor situation and if you have any questions about anything let me know!

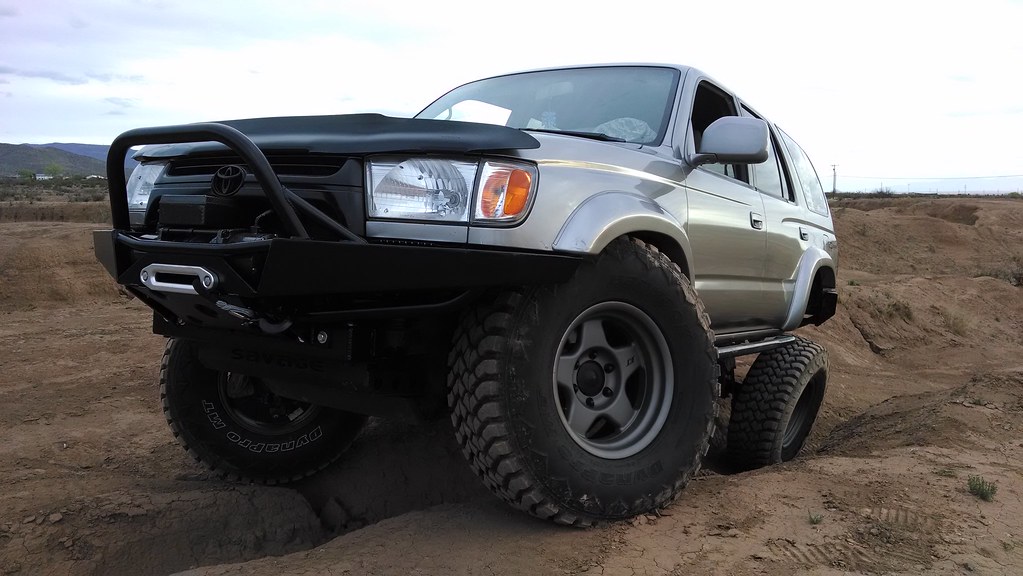
damn that some bad ass front flex.
what suspension is up there again? sway bar?
HOW DO YOU DO IT hahaha

Thanks dude, I love the flex too! My current and more than likely final suspension setup is as follows.

Front:
Extended Travel DR/Icon coilovers
King 14" 700lb springs
Icon Tubular Uniball UCAs
No Sway Bar

Rear:
Lexus Coils, 8.25 and 8.75 wraps. (Pass. and Driver)
Factory cone bump stop cut way down.
Wheeler's SuperBumps on 4" drop brackets.
Sway-A-Way Racerunner 4th Gen 4Runner shocks
Custom Upper and Lower Links with Flex joints
Sway Bar with front sway bar end links (longer to allow more flex)

The only thing i am looking at adding to the front and rear are limit straps to keep everything in check.


I just joined t4r.org, and have been reading through your build for the last couple days! I feel like I'd be stealing If I took away so much Information and inspiration without giving something back so here goes! OUTFREAKIN STANDING! I really like the look of the rig, the quality of the thread,and Collin shoots amazing pics! I always wondered how those guys in the magazines did it all- Now I know! such a good job man! Thanks for sharing it all with us and Stay safe during your deployment!:thanks:

Awesome first post if i do say so myself, i am honored! I have really enjoyed the truck and building it up, I am going to miss it like crazy while i am gone. And thank you very much for the well wishes. :usa:


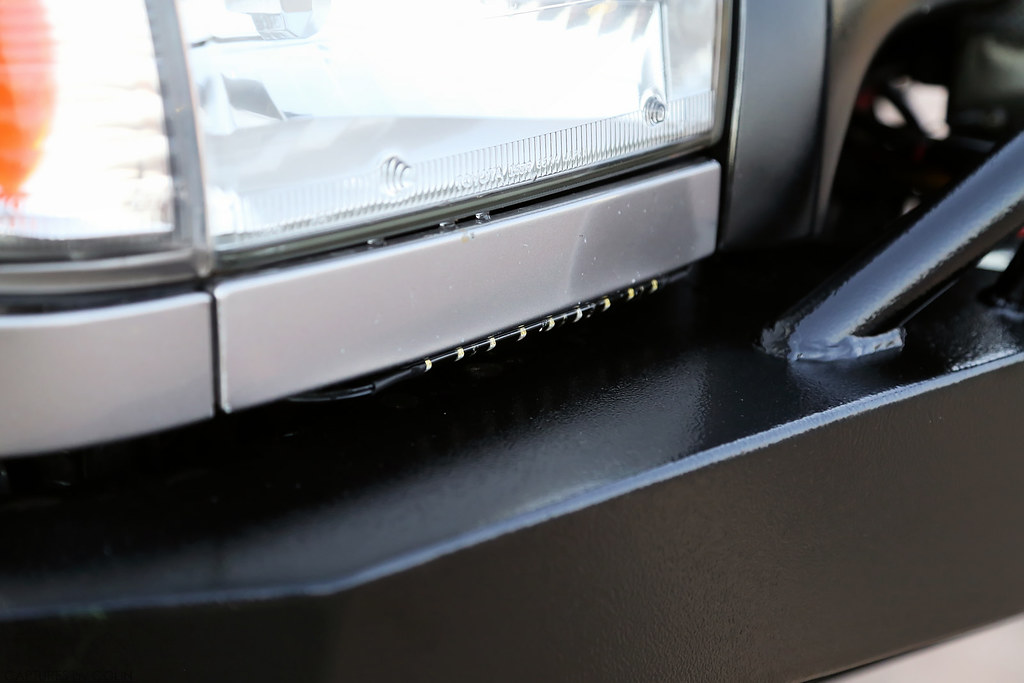
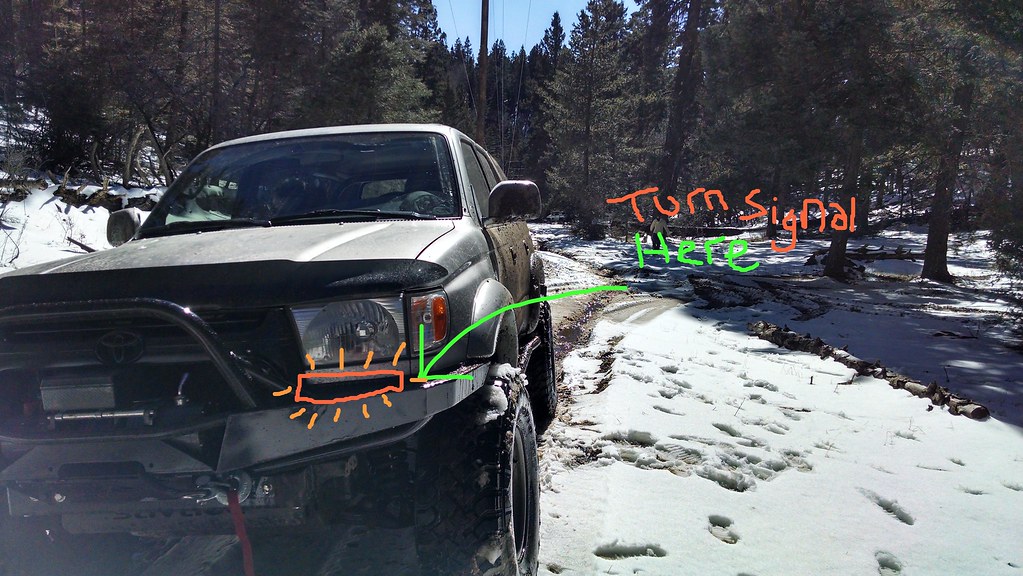
I knew when i ordered the AOR bumper i wanted no turn signal cutouts for a smooth look for the front end. But i didnt want to copy [MENTION=67615]Dirtco[/MENTION] or [MENTION=34852]crazydubman[/MENTION], nor did i want to cut up my parking lights. So i put on my thinking cap for a different way to do my turns.

I have a 1/2" body lift that left a small gap in the front where the bumper meets the body, I decided i wanted some thing inconspicuous to fill that space for my turn signals. I ordered some 6" waterproof Amber LED strips from oznium and tapped them into the original wiring harness.

The factory filler piece has a perpendicular lip on the bottom thats about an inch wide that runs the full length of the panel, i put it in my vise and bent it to about a 65* angle, taped it off and painted it semi gloss black to keep things incognito. Once the bumper was on i adjusted the angle so i had about an even 3/8" gap from the bumper and stepped back to admire my work. I hate wiring so even something as simple as this i felt accomplished not tearing anything up in the process. I am pretty happy with how they turned out, i dont think they look tacky since they are fairly hidden and they work as i hoped. They blink.

5616c54a-6405-4d6b-925c-b4f5e8cc58f7 by natemob7, on Flickr

<iframe width="853" height="480" src="//www.youtube.com/embed/jWn6QrvWRNc" frameborder="0" allowfullscreen></iframe>
 
Last edited:
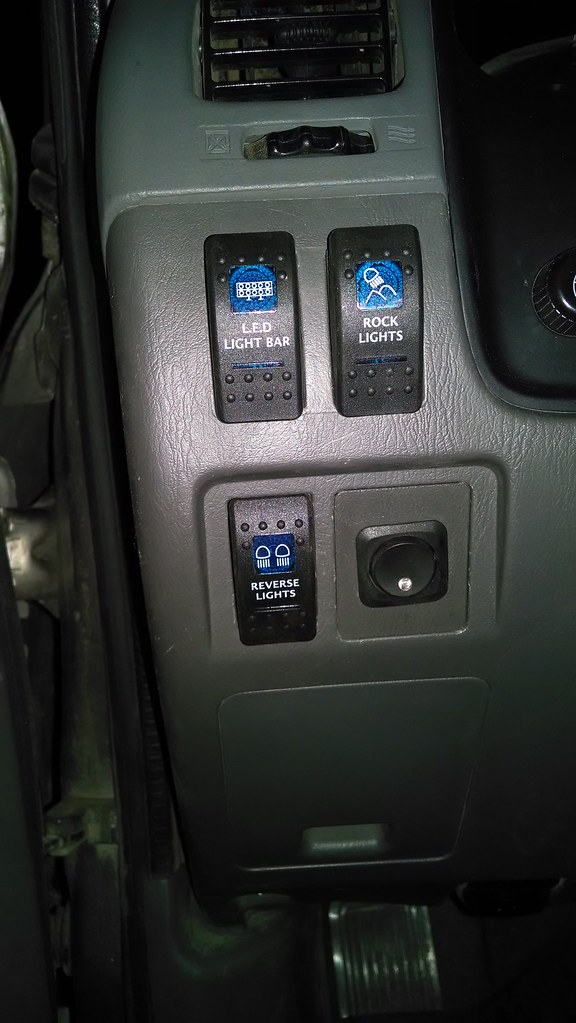
Been working on some electrical upgrades lately, not the most fun projects for me but things turned out good. Added some cheap eBay lights i bought a couple months back, wired them to a Carling switch in a factory blank spot. I liked them back there for backing up, camp lights, and of course any ******* that decides to ride my ass while i am cruising in the right lane.


Untitled by natemob7, on Flickr


Untitled by natemob7, on Flickr


Untitled by natemob7, on Flickr

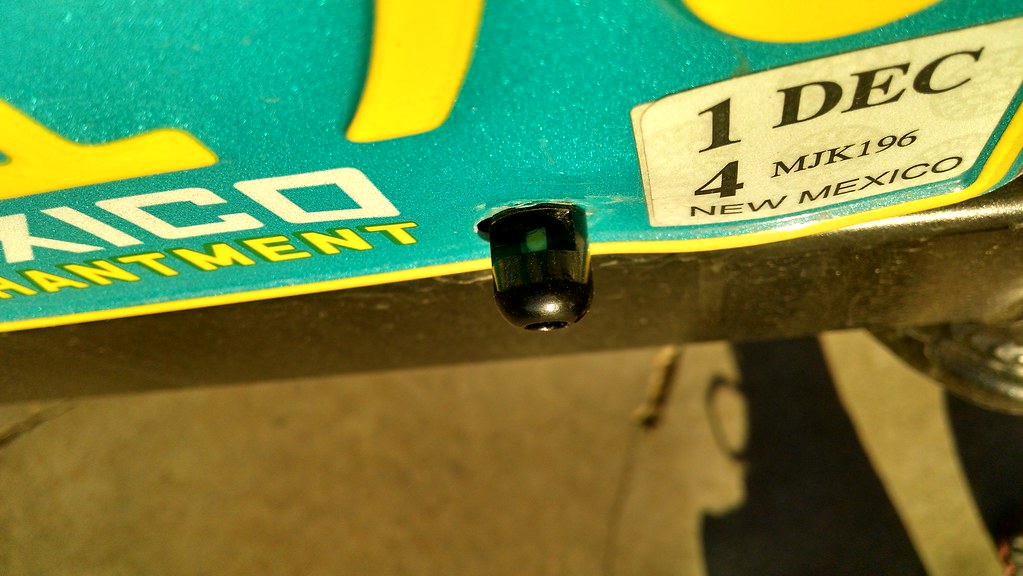
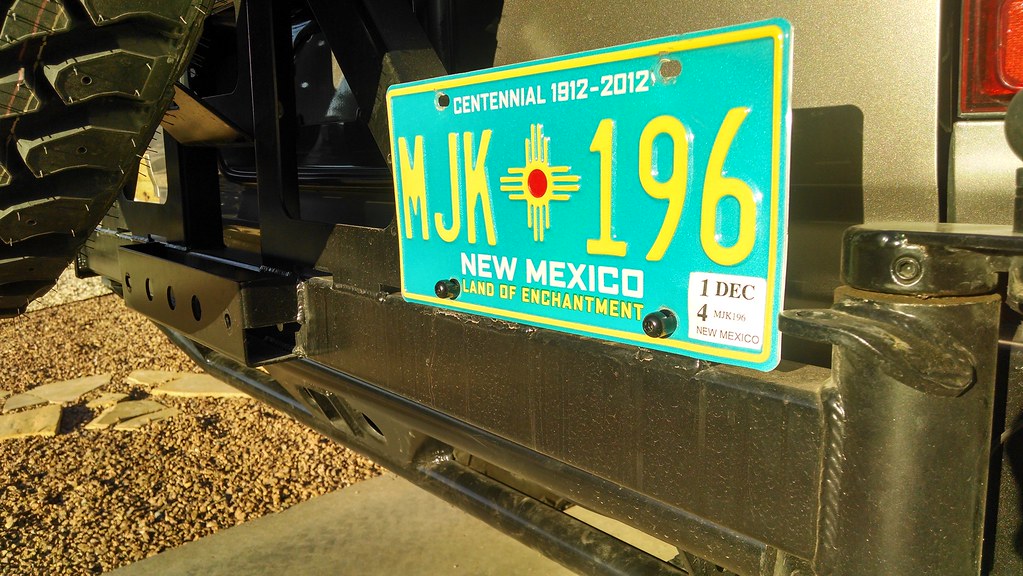
I've been riding dirty for the last year without a license plate light, CBI failed to send me one initially, I didnt realize until looking [MENTION=58830]JWaldz[/MENTION] truck that it was supposed to come with a cheap little light that was apparently very low quality. I had seen these bolts that have LEDs in the heads of them on motorcycles and cleaned up hot rods in the past, i thought they would be perfect to get me legal and still keep a nice and clean look. I got these from Oznium, the quality is excellent and i would recommend them to anyone looking to do the same.


Untitled by natemob7, on Flickr


Untitled by natemob7, on Flickr


22 by natemob7, on Flickr
 
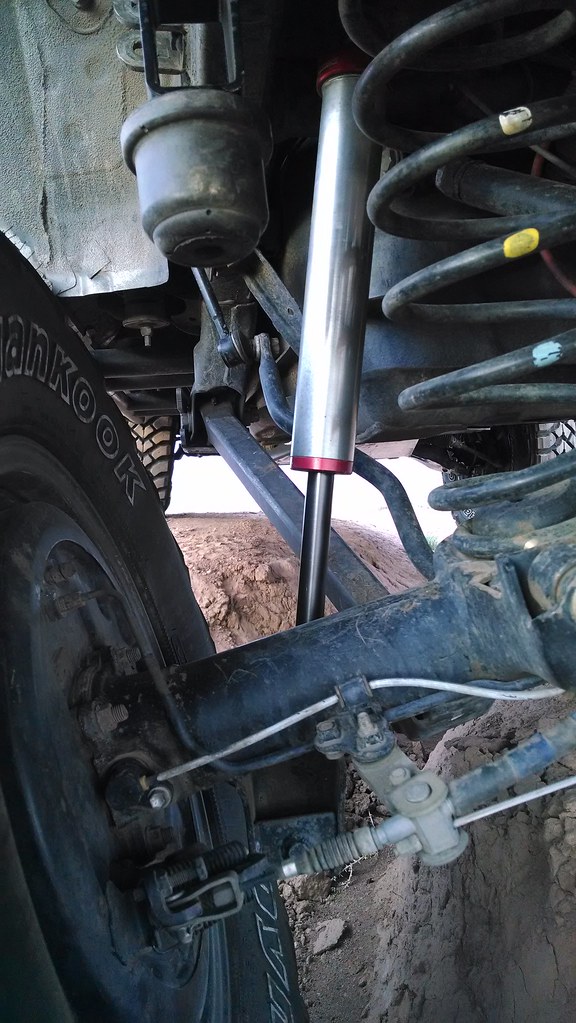
New Shocks! I scored a badass set of Sway-a-Ways from [MENTION=34852]crazydubman[/MENTION] that were on his wife's truck, they happen to be the same shock that he runs on his own truck. A good quality set of shocks were the final piece to my suspension puzzle, after ditching the 5150s I can finally say that my rear setup is capable of keeping up with my front end. I cleaned the bodies up with some scotchbrite and lightweight oil and they look new. These bad boys have a spherical ball lower mount that bolts right on and has a 7/8" shaft! It's beef to the max.

These are built and sold for 4th and 5th Gen 4Runners, and also the FJ Cruiser.

THEY FIT WITHOUT MODIFICATION.

I can confirm that THIS shock requires no top mount drilling or special bushings to function properly. There is a serious lack in quality rear shock options marketed towards the 3rd Gens and i hope that this at least opens another option up to those looking for something that doesn't require an adaptor (PITA) and are running a taller lift that can benefit from the longer length of the SAWs. I dropped my bumpstops a little to keep my tires off my flares and bumper and to keep from blowing out and bottoming the shocks. :reddance:


Untitled by natemob7, on Flickr


Untitled by natemob7, on Flickr
 
Really glad you are digging the shocks. Definitely was a surprise and kind of a winding road to discovery for myself too. Also looks like you took care of the front flairs and fenders like mine too. Looks great and really allows that tire to stuff in there nice.

Digging the updates and can't wait for the new goods to show up. :frog:
 
looks like your the guy to ask this question> is it true that pimpin aint easy?:pimp: lol nice little detail on the lights,where did you find them? and as always the flex porn is good to see.
 
Last edited:
lol, your rear sway bar links hate you :D

Nice updates!

Yes, yes they do. I am constantly worried they are going to snap. Thanks buddy.

So far do you like this option better than our outboarded shocks?

I messed up the angle of the shocks when i welded the upper mounts to the frame so they were never perfect. And i would get some pops and noise from them as the suspension cycled top to bottom. So that was my own fault. I wanted new shocks and wanted to go back to the stock location so thats why i made the switch, the shocks feel great on and off road though so i dont miss my 5150s the slightest.

Really glad you are digging the shocks. Definitely was a surprise and kind of a winding road to discovery for myself too. Also looks like you took care of the front flairs and fenders like mine too. Looks great and really allows that tire to stuff in there nice.

Digging the updates and can't wait for the new goods to show up. :frog:

Thanks Todd, and yeah the shocks are working out great. And the flare/fender trimming isn't done yet but its getting there. Ive got the rubbing controlled for everything except when tires are straight and fully stuffed they rub the inside of the flare and fender with the outside edges of the tread blocks. I need to trim about an inch and i could jump this beast without any rubbing!

looks like your the guy to ask this question> is it true that pimpin aint easy?:pimp: lol nice little detail on the lights,where did you find them? and as always the flex porn is good to see.

Sometimes its harder than it seems. lol :banana: Which lights are you asking about? Glad you enjoy the photos.

What travel shocks are they?

yeah and whats the model number?

They are a 9" travel shock.

Part number is 52000-108-14LT.

Here is a link to them on wheelers site
Sway-A-Way Extended Travel Rear Shock Set

They are an inch longer than the factory 4th gen shocks which are a couple inches longer than factory 3 gen rears. Factory 4th gens are about what the 5100 bilsteins are for the 3rd gen.

Thanks again Todd, these are some killer shocks and wouldn't hesitate to recommend them.
 
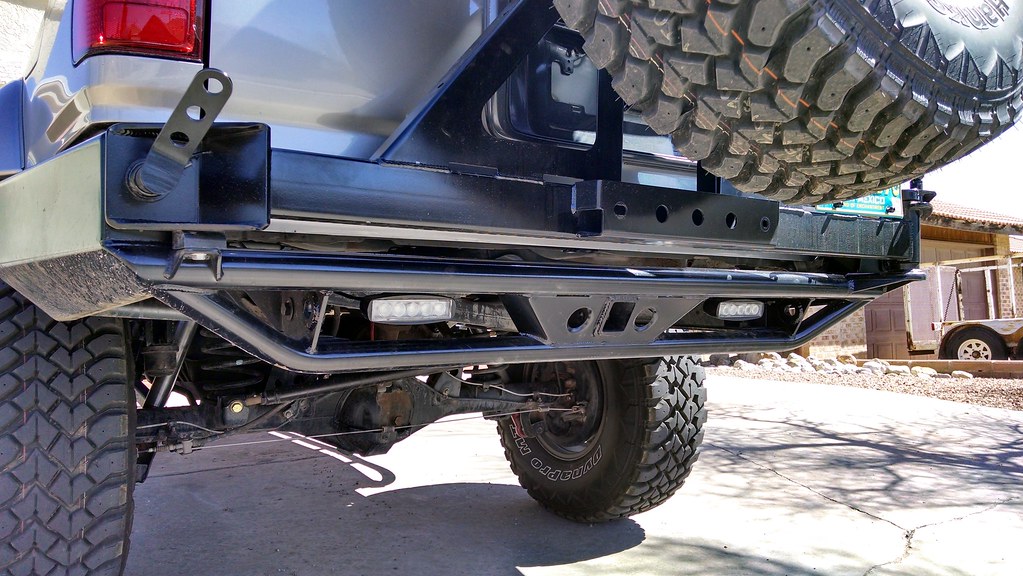
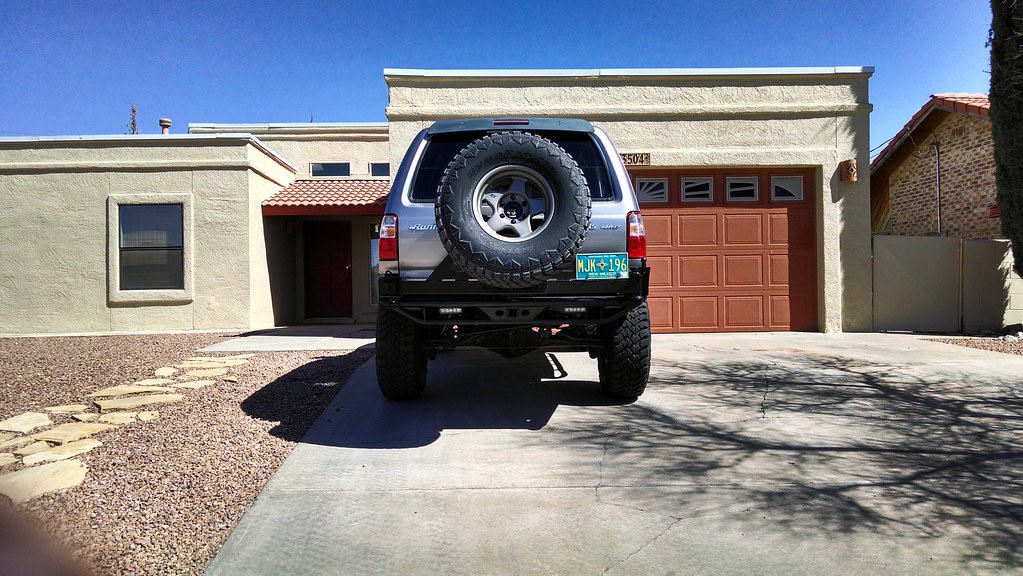
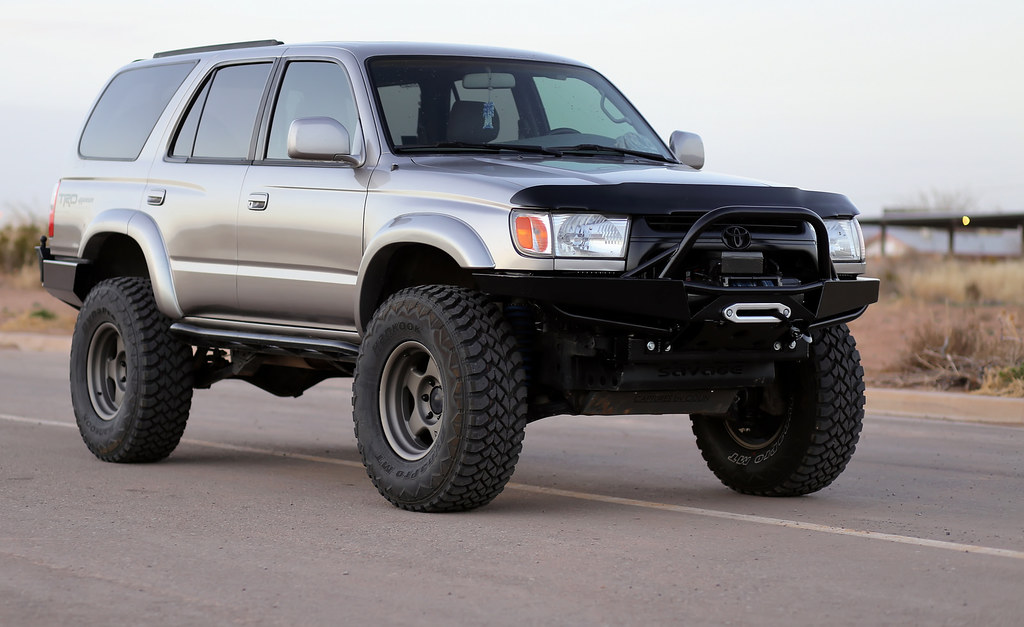
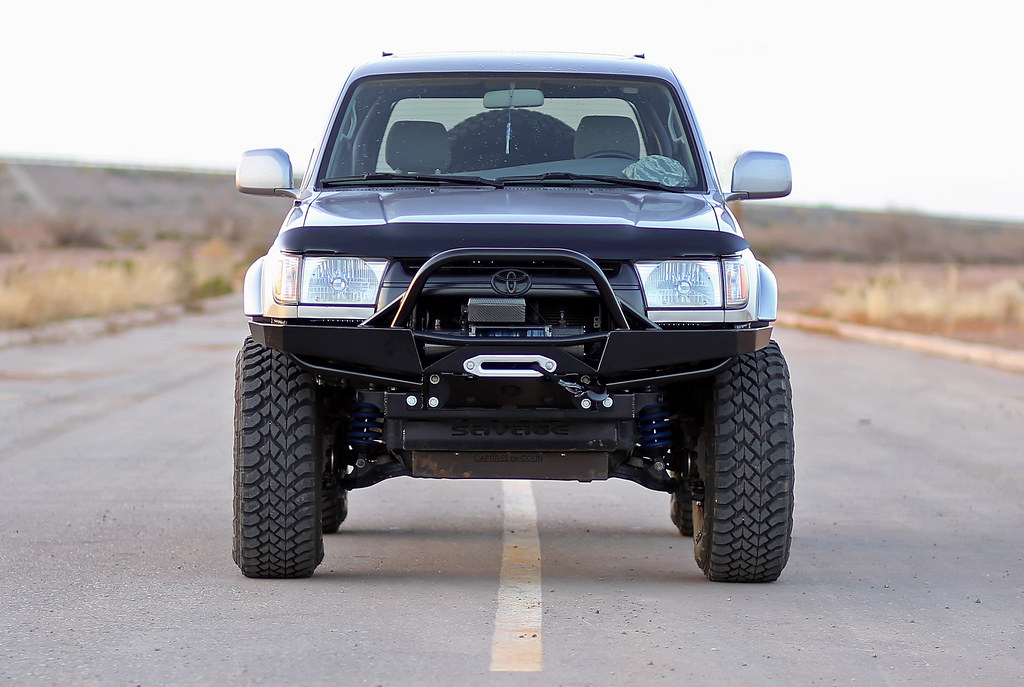
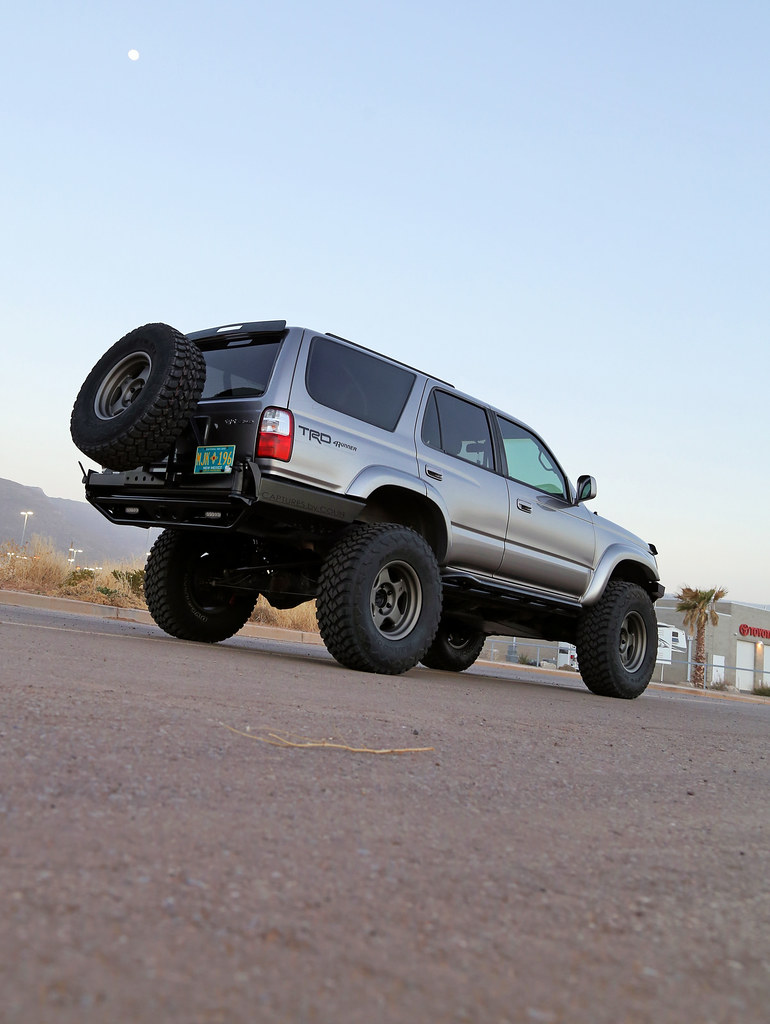
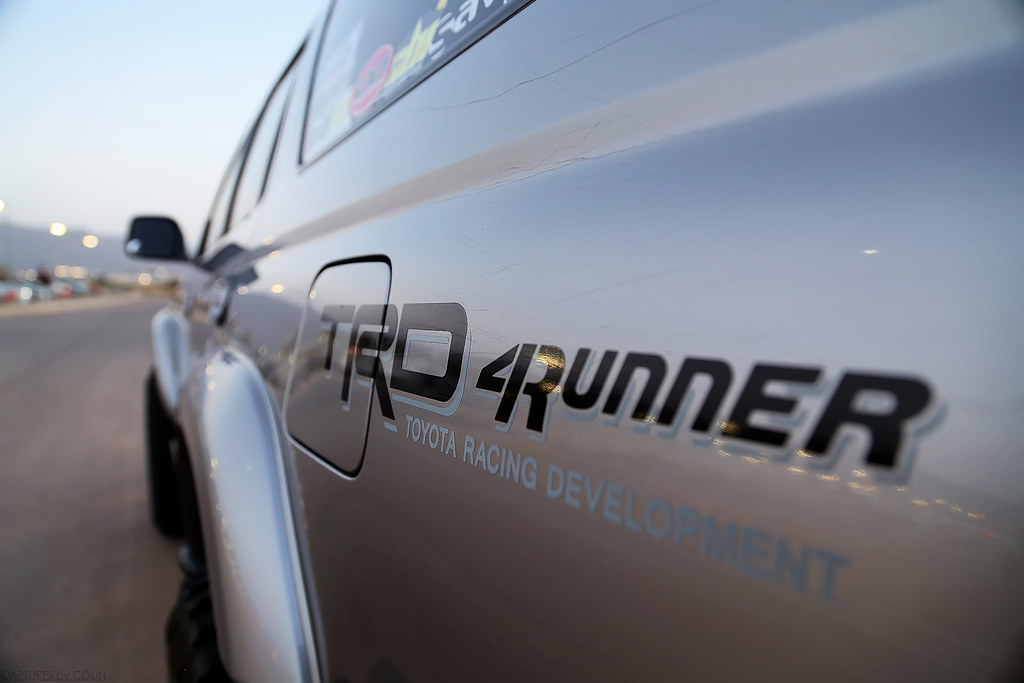
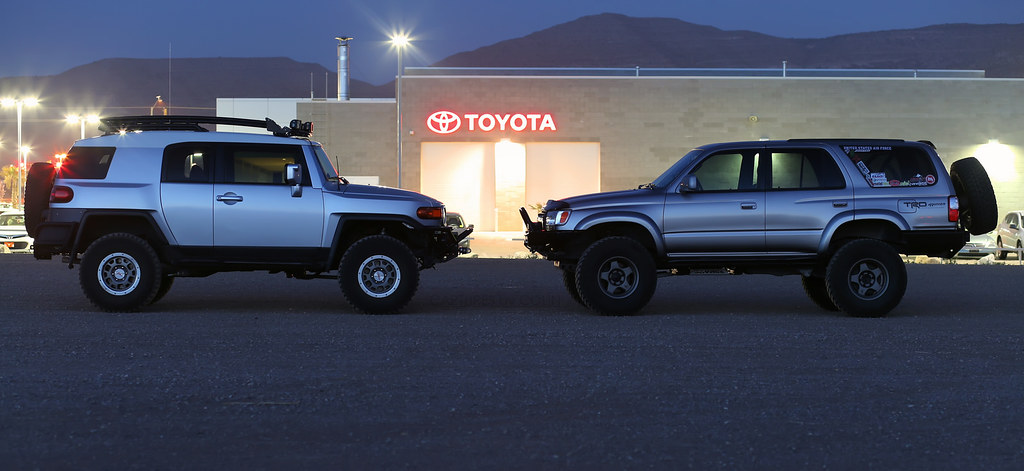
when i got the CBI i did a nice photoshoot for it, its only fair i give the [MENTION=17736]AddictedOffroad[/MENTION] bumper the same treatment.


wrinkle black by natemob7, on Flickr


quarter by natemob7, on Flickr


front by natemob7, on Flickr

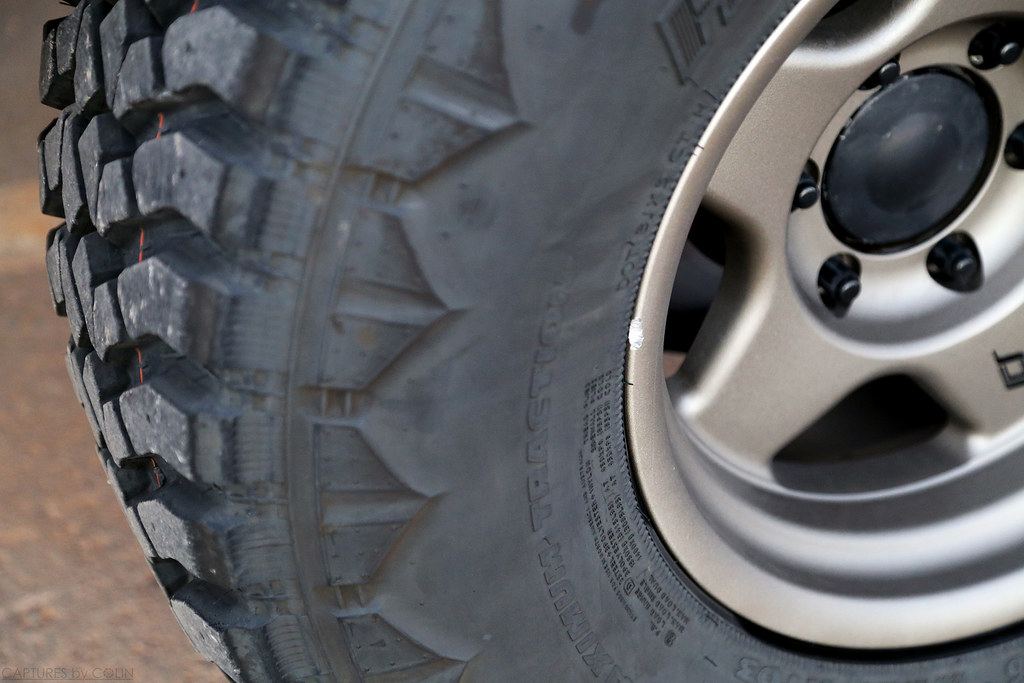
first scar on the new wheels, since this was taken the only cherry rim left is the spare.

gash by natemob7, on Flickr


rear quarter by natemob7, on Flickr

She needs a good waxing.

decal by natemob7, on Flickr


gettin paid? by natemob7, on Flickr


ass by natemob7, on Flickr
 
Last edited:
Nate, I think it looks better with the black bumpers and new rims. Excellent pics.


Out of curiosity would you recommend the savage skids or bud built now that you've owned them a bit! That's next on my list.
 
Nate, I think it looks better with the black bumpers and new rims. Excellent pics.


Out of curiosity would you recommend the savage skids or bud built now that you've owned them a bit! That's next on my list.


Thanks bud, i think it does also. I'm no Raiders fan but Silver and black just looks good together.

This isn't going to popular with a lot of people here but the budbuilt design sucks. Just because its been around a long time and its popular doesn't mean its the best. Zero reinforcement for the skidplate is causing anyone who has a BB and uses it in the rocks to have issues with it taking hits, deforming, and none of the holes lining up next time it comes off and has to go back on. One piece to cover everything means dropping that 58lb skid to perform alignments, oil changes etc... the bottom bolts are also left exposed to contact. Almost 60 lbs of plate hung from FIVE spaced out bolts doesnt add to the structural rigidity a skid needs to take hits and survive.

The Savage skid is 2 pieces to allow you to remove just the lower skid for most maintenance. That lower skid that will see most of the hits is reinforced front to back on both sides, and the bottom bolt holes are protected from rocks to keep the heads from being chewed up and snapped off. The system isn't perfect but i think its the best option out there for most. Pull up stock photos of both armors and you will see the differences.


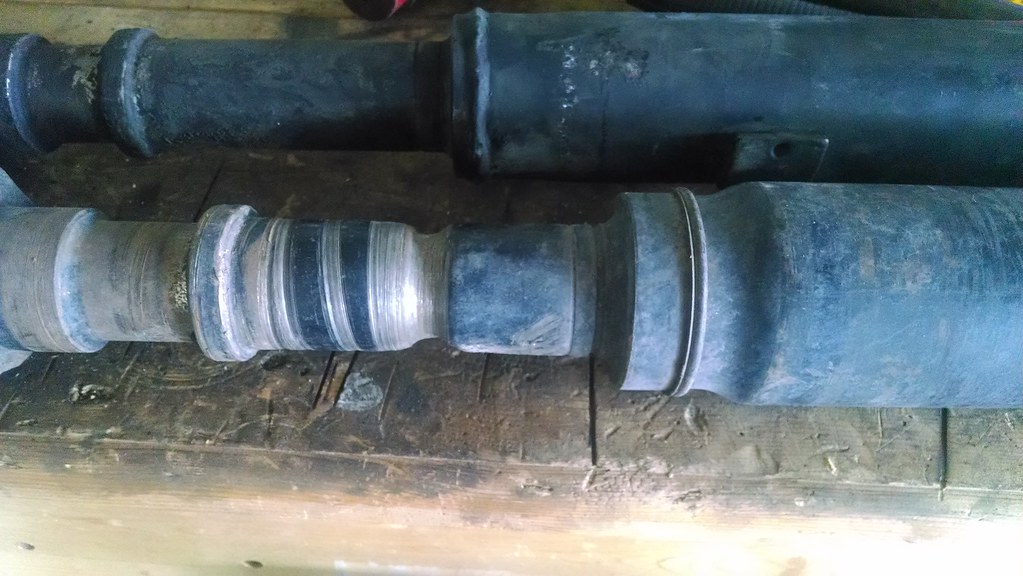
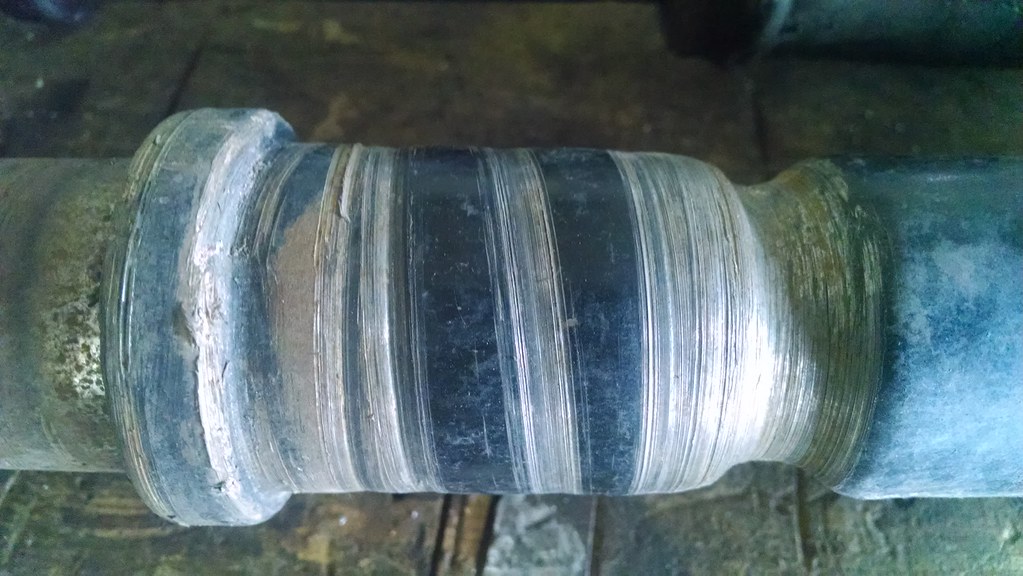
Unfortunately no skids out there protect the driveshaft. :twitch: Ive been getting some crazy vibrations at highway speeds and after having the tires rebalanced i think i found the issue.

Untitled by natemob7, on Flickr

Spinning and sitting on a rock ledge caved in the slip yoke portion of the driveshaft, judging by the candy stripe extending past, it looks like i made the climb.

Untitled by natemob7, on Flickr

Ill be getting another driveshaft built while I'm gone and plan to keep this one as a spare.
 
This isn't going to popular with a lot of people here but the budbuilt design sucks. Just because its been around a long time and its popular doesn't mean its the best. Zero reinforcement for the skidplate is causing anyone who has a BB and uses it in the rocks to have issues with it taking hits, deforming, and none of the holes lining up next time it comes off and has to go back on. One piece to cover everything means dropping that 58lb skid to perform alignments, oil changes etc... the bottom bolts are also left exposed to contact. Almost 60 lbs of plate hung from FIVE spaced out bolts doesnt add to the structural rigidity a skid needs to take hits and survive.

The Savage skid is 2 pieces to allow you to remove just the lower skid for most maintenance. That lower skid that will see most of the hits is reinforced front to back on both sides, and the bottom bolt holes are protected from rocks to keep the heads from being chewed up and snapped off. The system isn't perfect but i think its the best option out there for most. Pull up stock photos of both armors and you will see the differences.


Thanks bro. I didn't think about the separate pieces being better in that regards. I'll look at the ones from savage as I really like their products but they show $200 shipping to FL on the skids set........ Ouch.

Stay safe while deployed and thanks for your service!
 
Last edited:

Members online

Forum statistics

Threads
278,310
Messages
3,554,080
Members
248,016
Latest member
Advally Service

Trending content

Back
Top