New member - need help!!!! - p304 misfire

Hey nossliw, thanks for your detailed write up it gave me the confidence to tackle my head gasket on my 04 4Runner with 172k miles on it. I'm also in Colorado Springs and I was wondering where you took your heads to get machined?

I do not get notifications to this site, and check back time to time... I'm sure you are already done with the job, but for future work. Stan at Rocky Mountain Machine does top notch work. He is worth every penny and does not sluff on any detail.
 
Possibly a stupid question but I'll ask it:
Since the cam sprockets are torqued so tight and hard to break loose, is it really necessary to remove them from the cams? Why not just remove the main chain, unbolt the cam bearings and lift the cams (with sprockets attached) up and out?
Just curious, what am I missing?

Hmm.. I'm not sure to be honest. You may be correct in your assumption. I think it may be a bit difficult to hit that exact tooth on the main chain when setting the motor to TDC and orienting the cams properly on the head.

I bet it can be done, and maybe the only reason it hasn't been written yet, is the fact that it would take forever to write the exact directions within the manual, when they simply can say remove the VVts and chain by removing these two bolts....

Yes, they were on incredibly tight. I really thought we were going to shear the cam ;):
 
Greetings from Australia,

Just joined this forum so I could thank you for the this excellent writeup, it has helped me so much in doing this repair.

I am a mechanic by trade but havent worked as one for over 25 years, but have always worked on my own cars to stay in touch.

Recently bought a 2005 Toyota Hilux 4.0L 1GRFE with 240,000kms, all the services had been done from new, and to cut a long story short I got ripped! A day after I bought it I noticed the the coolant level in the radiator going down, and I could hear a bubbling sound coming from under the dash area(heater hoses)..alarm bells! More investigation found the coolant wouldn't flow back from the overflow tank when it cooled down, and I could see bubbles at radiator fill(yes I know I should have checked that before I bought it, but the seller seemed so nice so I didn't do the checks). To confirm I did a compression test, and yes number 2 cylinder(front cylinder, right hand bank) was down at 140 psi, all the others were about 170 psi. Then ran compressed air down the compression tester hose on this suspect cylinder and watched the bubbles come up through the radiator fill, so leaking/blown HG confirmed!

So did some internet research and found your writeup, excellent! Australian 1GRFE engines are a little different in the sump. They are a 2 piece sump. the main alloy sump and a smaller steel sump below the front half of the main sump. To get to those 4 bolts attaching the sump to the timing cover requires the lower sump to be removed. You only have about an inch or so clearance from the bottom sump to the cross member/sway bar/power steer rack and front differential. The Toyota manual says you have to remove the sway bar, power steer rack and front diff! Are they kidding! So I cheated and undid the engine mount bolts and jacked the engine up 3 inches. That way I was able to drop the sump 4 inchs, but I couldn't remove it from under the front of the engine until I got my hand and a 10mm spanner in to remove the 3 bolts holding the oil pickup on. Once I removed the pickup all good I was able to get the sump out and get to the 4 timing cover bolts! Saved myself a days work I reakon!

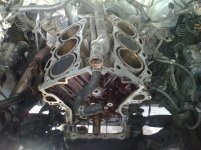
Once the heads were off I could see where the HG gasket was leaking. Put a straight edge on the heads, they were perfect, no warpage at all! So I cleaned them up with wet and dry sandpaper. No need to get them shaved.

A complete genuine Engine gasket set from Toyota was going set me back about $700!!! And that was without new Head bolts! WE really get ripped off by the Stealerships down here in OZ. So I bought a set off Cnsautoparts in the states. The brand is Eristic from Taiwan, hope they are ok? Price was about $160 USD, and shipping about another $40 USD. With our dollar about 73cents on the US dollar it worked out about $250 AUD. Not too bad. The Head Gaskets are MLS where the original Toyota ones on the car look like composite, so hopefully they are better.

In regards to the special Bihex tool to get the Head bolts off. I just used a normal single hex(allen head) 10mm socket (but a good brand, they are made from S2 steel). It worked fine!

Heads are back on, but am now waiting for the timing chain to arrive (decided to change it while I'm there, it does have 240,000 kms on the engine). I will do another writeup with pics when I'm done, and hopefully all goes well.

cheers for now

 
Last edited:
Greetings from Australia,

Just joined this forum so I could thank you for the this excellent writeup, it has helped me so much in doing this repair.

I am a mechanic by trade but havent worked as one for over 25 years, but have always worked on my own cars to stay in touch.

Recently bought a 2005 Toyota Hilux 4.0L 1GRFE with 240,000kms, all the services had been done from new, and to cut a long story short I got ripped! A day after I bought it I noticed the the coolant level in the radiator going down, and I could hear a bubbling sound coming from under the dash area(heater hoses)..alarm bells! More investigation found the coolant wouldn't flow back from the overflow tank when it cooled down, and I could see bubbles at radiator fill(yes I know I should have checked that before I bought it, but the seller seemed so nice so I didn't do the checks). To confirm I did a compression test, and yes number 2 cylinder(front cylinder, right hand bank) was down at 140 psi, all the others were about 170 psi. Then ran compressed air down the compression tester hose on this suspect cylinder and watched the bubbles come up through the radiator fill, so blown HG confirmed!

So did some internet research and found your writeup, excellent! Australian 1GRFE engines are a little different in the sump. They are a 2 piece sump. the main alloy sump and a smaller steel sump below the front half of the main sump. To get to those 4 bolts attaching the sump to the timing cover requires the lower sump to be removed. You only have about an inch or so clearance from the bottom sump to the cross member/sway bar/power steer rack and front differential. The Toyota manual says you have to remove the sway bar, power steer rack and front diff! Are they kidding! So I cheated and undid the engine mount bolts and jacked the engine up 3 inches. That way I was able to drop the sump 4 inchs, but I couldn't remove it from under the front of the engine until I got my hand and a 10mm spanner in to remove the 3 bolts holding the oil pickup on. Once I removed the pickup all good I was able to get the sump out and get to the 4 timing cover bolts! Saved myself a days work I reakon!

Once the heads were off I could see where the HG gasket was leaking. Put a straight edge on the heads, they were perfect, no warpage at all! So I cleaned the up with wet and dry sandpaper. No need to get them shaved.

A complete genuine Engine gasket set from Toyota was going set me back about $700!!! And that was without new Head bolts! WE really get ripped off by the Stealerships down here in OZ. So I bought a set off Cnsautoparts in the states. The brand is Eristic from Taiwan, hope they are ok? Price was about $160 USD, and shipping about another $40 USD. With our dollar about 73cents on the US dollar it worked out about $250 AUD. Not too bad. The Head Gaskets are MLS where the original Toyota ones on the car look like composite, so hopefully they are better.

In regards to the special Bihex tool to get the Head bolts off. I just used a normal single hex(allen head) 10mm socket (but a good brand, they are made from S2 steel). It worked fine!

Heads are back on, but am now waiting for the timing chain to arrive (decided to change it while I'm there, it does have 240,000 kms on the engine). I will do another writeup with pics when I'm done, and hopefully all goes well.

cheers for now

Great info! Shoot I think you could get a good deal on a set of Cometic gaskets down there for that motor cheaper than the other, but I could be wrong...

700... wow...what does a motor run down there? 70,000?:redface:

Interested in seeing that 2 piece sump. I agree when I first read the manual I thought they were hi off their rocker to pull all of that. Pulling the motor would be much easier and efficient. About as bad as AUDI or FORD 6.0 cab removals.

Best of luck on it bud. I agree a single hex tool can be used, I was a bit paranoid if it "didn't" work and I had to drill out head studs... I have had to do this on fractured studs before and its almost worthwhile to start over with anew short block IMO.
 
Gday!

Well the Hilux is all up and running beautifully! I am one very happy person. She started first go as soon as I cranked the motor! Have been flat out since so hence my delay to get back on here and post my results.

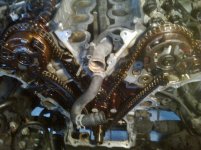
The rebuild went pretty much as expected, actually it was faster than pulling it apart as I was now quite familiar with the motor. One thing that saved time was leaving the cam sprockets on and just undoing the bearing caps and tensioner and pulling boths cams and tensioner with the chain in one lot. Easy! Putting them back on I fitted the inlet cam first, but leaving the front larger bearing cap off(you won't be able to do it with this cap on it gets in the way), then fitting the chain and exhaust cam and tensioner together(and getting the timing marks lined up), then lastly fitting the large bearing cap. Bit fiddly but I made it work. Then just repeat the doseage on the other bank. Glad I got around all that drama with those super tight sprocket bolt/nut other people have had troubles with.

Other thing to watch is putting the timing cover on, be very careful you don't pinch that bottom oil pump O ring as you slide the cover back onto the motor over the crank and sump. If you stuff it you won't have any oil pressure on startup and stuff your motor. I siliconed the O ring onto the timing cover first and let it dry for a day so it held fast. Probably why Toyota tell you to remove the sump completely first. Nip up the 4 bottom timing cover/sump bolts first before you do all the other timing cover bolts so it seals that O ring nice and tight.

I am very glad I installed a new timing chain set, the tensioners were worn quite a bit on the plastic parts, and I measured the original Toyota chain up against the new chain and the Toyota chain was about 10mm longer! So there has been some stretch! Everything was nice and tight when the chain was installed no slack at all.

Little thing, install the oil filter housing before you fit the thermostat housing, otherwise you cant get it on.

Ok here goes with my conclusions on the job in general. If I ever had to do it again I would definately pull the motor and work on it outside the car. In the long run it would be easier and possibly take less time. I wouldn't have replaced the head bolts as the originals were in great condition and it would have saved me some $. I took a bit of a risk not machining the heads even thought they checked out fine with a straight edge , and in hindsight I probably should have got them shaved just to be on the safe side. Luckily everything worked out fine. Yes definately remove the bumper makes the job much easier. And I did notice when the heads were off my cylinder bores still had the crosshatch pattern, so those 10,000km oil changes the previous owner had raved about had really paid off. And the cheapie HG set and timing chain set both seemed quite good quality, so I'm happy...time will tell if they last I guess..and that ziplock bag idea for the various parts/bolts/etc to go in, BEST IDEA EVER!!! oh and 1 last thing, remember to tighten the sump plug...lol...I did all the job then forgot to nip up the sump plug drove it this way for 2 days until I noticed a bit of oil leaking at the sump plug..I shudder to think of the disaster that would have happened had it fallen out :(

Again thanks for all your help, it would have been very difficult without your help...cheers for now
 
Last edited:
We just started putting mine back together. We didn't pull the engine or bumper, no issues, but my son and I are tall so that helps.

I ordered new Fel Pro head bolts from rockauto the last one we put in was slightly bent so we used one old one and the rest new.

I took the heads to the machine shop and while they weren't warped there were some spots out of tolerance so they milled them. When I got them back there was a small red o-ring in the bag with the studs and I'm not sure where it goes.
 
Photos

Thought I would post a few pics so you can see the 2 piece sump..bottom sump has been removed but upper sump on...Sorry pics a bit poor quality
 

Attachments

  • Photo08601 (1).jpg
    Photo08601 (1).jpg
    137.2 KB · Views: 720
  • Photo08611 (1).jpg
    Photo08611 (1).jpg
    138.5 KB · Views: 715
Last edited:
We just started putting mine back together. We didn't pull the engine or bumper, no issues, but my son and I are tall so that helps.

I ordered new Fel Pro head bolts from rockauto the last one we put in was slightly bent so we used one old one and the rest new.

I took the heads to the machine shop and while they weren't warped there were some spots out of tolerance so they milled them. When I got them back there was a small red o-ring in the bag with the studs and I'm not sure where it goes.

Good luck mate, hope the rebuild goes well for you.
 
Great info! Shoot I think you could get a good deal on a set of Cometic gaskets down there for that motor cheaper than the other, but I could be wrong...

700... wow...what does a motor run down there? 70,000?:redface:

Interested in seeing that 2 piece sump. I agree when I first read the manual I thought they were hi off their rocker to pull all of that. Pulling the motor would be much easier and efficient. About as bad as AUDI or FORD 6.0 cab removals.

Best of luck on it bud. I agree a single hex tool can be used, I was a bit paranoid if it "didn't" work and I had to drill out head studs... I have had to do this on fractured studs before and its almost worthwhile to start over with anew short block IMO.

Gday,

The only HG set I could find locally was genuine toyota, and the price was ridiculous. We pay much more for car parts down here...less competition I guess so they charge what they like. So my only other option was good old Ebay and get a set from you guys. Only downside was the postage wait...3 weeks! It has tracking on my package and I had to laugh as it travelled to 6 different states from distribution center to distribution center before it finally left the country! Item came from CNSautoparts in California then went to Illinois, so it went 1000 kms in the wrong direction from me..crazy! lol The timing chain set from Taiwan got to me in 4 days!

Yeah a reconditioned 1grfe here will set you back about $5000, and a secondhand motor from the wreckers you are looking at about $2500. Again we get ripped off over here.

I went to the Toyota dealer to try to get the Bihex socket but they don't have it, couldnt get it from any of the parts shops/tool suppliers either. So god knows how the toyota mechanics get those head studs on and off. And one from ebay from the states was going to set me back over $100..so I just used the allen head socket.

Thanks for your help again mate
 
Last edited:
Thanks for taking the time to write up your experiences and post quality pics. I am in the middle of replacing the head gasket (#6 cyl leak) on my 2004/4.0 V6 4Runner. It's amazing how much you have to take apart and tear down to get at the heads. I have got the timing chains and exhaust manifold off and just discovered the water bypass at the back of the engine. I honestly don't know how I am going to get this off. What a PITA.
 
Thanks for the excellent write-up. I'm doing a HG job now on my 2004 V6 4Runner and want to contribute.

I really had a hard time with the crankshaft bolt. I tried a 1/2 drive with a long cheater bar. It did not budge. Ended up with a sore back the next day. Then I spent $425 on a Milwaukee high-torque impact wench with a 9 amp battery. Still nothing.

Next, I got a MAPP torch and heated up the large washer (not the head of the bolt) for about 30 seconds. Put the impact wrench back on and it came right off. I think heating the washer and just using a cheater bar would have worked and I could have saved myself $425. However, I'm really impressed with this impact wrench and it has come in handy for other parts of the car.

I can't get the upper oil pan off. After reading this thread I will just leave it on.
 
Last edited:
Is this issue specific to the v6? I have a 2004 v8 and I am throwing a code on all 8 cylinders as misfires. All 8! I don't feel a rough idle and I do not feel any misfiring. Wondering if maybe it's a computer/ecu issue?
 
Thanks to everyone who contributed to this thread. The information is extremely helpful. I do have some questions about the parts you guys bought.

For the gasket kit, someone recommend Boch Toyota and someone else recommended Royal Toyota. Do these kits have the updated head gaskets? Did anyone check before installing? Fel-pro has a few sets on Rock Auto and they either say old design or new design. No other set seems to acknowledge the difference. I'm tempted to buy the Fel-pro set since I know it's the right one.

Any recommendations for timing chain sets? There's so many sets and I don't know any of the brands so I'm not sure what to get. Does anyone know of a kit number from a Toyota dealer?

****Edit: both Toyota dealers I spoke to had the updated head gaskets in the kits they offered. 11116-31011 (new) vs. 11116-31010 (old). Boch Toyota said they only replace the tensioner and water pump bolt if the chain is fine. My 4Runner has 186,000 miles so I'm going to replace the chains, tensioners and guides anyway. I'm using a Cloyes kit from RockAuto that doesn't include the sprockets.

Thanks,
Doug
 
Last edited:
This thread is a work in progress while I have time to add onto it with pics and what not….

Well, I will try to start a write up on doing the heads for a 1GRFE motor. I will upload photos and progrees as it comes back to my memory. Car is up and running and out of my hands to a happy sibling. It is very straight forward and surprisingly quick job all thing considered. We were quoted over 4k for the job by Toyota in CO Springs, after they told us we needed a new motor. When I first dug into the car I simply wanted to be educated with what tricks may be needed down the line, and is why I joined this site. I received little to no help and just figured it’s like any other motor rebuild, and was much easier than expected. Dealer quoted 22hrs of labor, I did this not being familiar with Toyota motors in well under half the time. It would take an intoxicated blindfolded inbred 22hours to do the job, so don’t feel turned away by the labor. It is not rocket science and with the correct tools, focus, good service manual, and patience anyone could do this. I have only seen one other individual do this on the entire net and post about it. He was doing a full rebuild, and after 3 different motors had a running car. \

I did not write this during the process, but from memory of doing the job post completion. Your manual will cover anything I missed.


Yup that was the wet cylinder!

Tiny little leak caused all of this!


Cleaned up and ready to install..

image6-1.jpeg~original


What a great write up. The tool tips were excellent. You certainly have a skill set that is prime. Wish I had just 10% to that.
Thanks.
 
Finally got around to finishing this on my 04 4Runner.

It has a little over 187,000 miles. Other threads discussed this, but this is how I figured out the headgaskets needed to be replaced. Back in November it started to idle rough at start up for about 10-15 seconds and then it would level out and run fine. Eventually it showed a CEL for a misfire on cylinder 2. I swapped the spark plug to another cylinder and the code came back on number 2 still. I noticed the coolant overflow tank was low so I did some searching and found threads on here that suggested it could be the headgaskets. The coolant wasn't going into the engine oil so I figured it had to be going in the cylinder and making it idle rough at startup. A camera that could see in the cylinder would have been the easiest way to see if this was true. Instead I used a leakdown tester and found air bubbles when I looked in the radiator and the pressure in cylinder 2 was in the low range. Headgaskets it is.

I don't have any pictures that are more useful than what other people posted. But I do have some advice. I had never done anything this intensive repair wise and I was still able to figure it out. Find the FSM for your model year on this forum and you'll be fine. Just make sure you have spare time to do it in case some things take longer than you expect.

I ordered the gasket kit from Boch Toyota (EB Toyota Parts) that someone else linked to. Royal Toyota in Bloomington, IN also had the set, but wanted more for it.

My 4Runner has lived most of its life in the midwest and the skid plates were ridiculously rusty. The passenger side also seemed to be much more rusty than the drivers side. I couldn't get the exhaust manifold off the passenger heads because the nuts basically crumbled. The machine shop took care of that for me. Basically spray everything with PB Blaster over several days before you get started.

I ordered a 10mm bi-hex tool from Amazon from a company called ATC I think. It came in a two-pack with the other one being an 8mm bi-hex tool. $15 total seemed better than buying from SnapOn. I've never used a bi-hex, but it seemed difficult to get the tool to fully seat in the head bolts. I had to wiggle it around a lot. Maybe that's how they all are? If you go this route, make sure the tool is fully seated in the bolt before trying to loosen or tighten it or you will strip a head bolt and hate yourself. Ask me how I know. Maybe the SnapOn tool is better for this? If I had to do it again I would go with SnapOn to be safe.

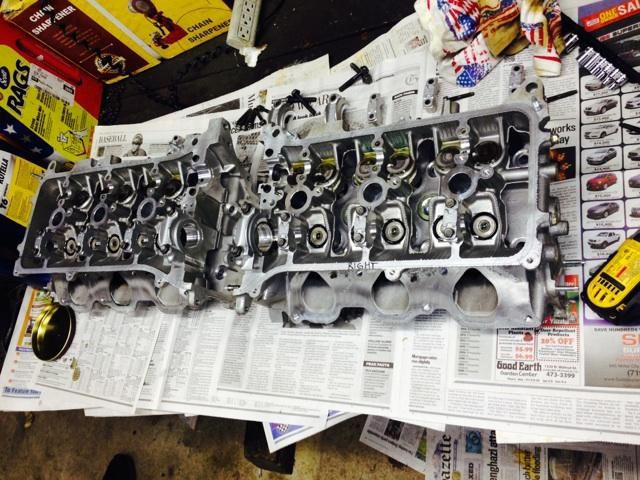
I sent my heads to a machine shop to be inspected. They turned out to be fine as is and the shop installed the valve seals and inspected all the valves for me.

I highly recommend labeling or bagging up all your nuts/bolts so you know where they go for reinstall. Ziplock bags work great for this. The connections can all really only go in one place so labeling them isn't really necessary.

Boch Toyota only recommended replacing the main chain tensioner, not the guides or chain unless they appeared damaged. Mine looked fine so I kept them and used the new tensioner.

Also - get the crank bolt off first!!! That thing was on there tight. My nice 550ft-lb pneumatic impact couldn't get it off. I bought a 1250ft-lb impact from Harbor Freight (has to have at least 700ft-lbs at that rating right???). Even that couldn't get the bolt off. Harbor Freight junk I guess. Ended up threading some bolts through the pulley into the front cover and using my 5 foot jack handle as a cheater bar. Came right off. Just save yourself some time and do it this way if you don't have a pulley holder.

Don't bother taking the cam sprockets off when removing the cam shafts. Everybody seemed to complain about how hard that was and it's not necessary. Take the camshafts, chain, and tensioner off at one time the way grantr described it. When reinstalling, fit the inlet camshaft and chain first and get the caps in place (except for the largest cap at the front). Then put the exhaust camshaft and tensioner on at the same time. Super easy to line up the timing marks. Just follow the manual for that part.

I did have one issue that I haven't seen anyone else mention. When I had everything reinstalled and started it up, I had a VSC/Trac control light and it was idling like crap. It was fine as soon as I touched the throttle, but base idle was terrible. I thought for sure I messed up lining up the main chain. The two fault codes present were P0018 Crankshaft Position - Camshaft Position Correlation Bank 2 Sensor A and a Yaw position fault. I think the yaw fault was because I had a hard time taking the wheels off after I had the battery removed. I had to put the wheels on the ground and rotate the steering wheel a few times to help break the wheels loose. I'm thinking the truck didn't like not knowing which direction the wheels had moved.

I also broke the connector on the Camshaft Timing Oil Control Valve Assembly on the bank 2 side of the engine. I replaced the valve with a new one. Not sure what effect that had in making this fault occur.

I ended up taking it to a shop and they reprogrammed the engine controller to get rid of the faults. 1.7 hours of labor to do that and check out my work to make sure I didn't miss anything else. Did anyone else have this problem? Or is just because I changed out the sensor and moved the steering wheel with the onboard computers shut down? Or did the shop just clear the codes and rip me off? Haha I honestly don't know because that was my first time going to them. I haven't taken a vehicle to any shops in my area since I moved here two years ago and they were able to get to it faster than anyone else. Either way, the truck runs great now and they said I did everything correctly hardware wise.
 
Edit: I was curious and did some digging on this forum and found some info for how to fix the yaw position fault that I had after replacing the head gaskets. Sounds like I could have just done a Zero Point Calibration with some wires or paperclips and saved some money on that part.
 
Great write up! This is the most indepth there is for this issue. Couple tips:

1. Don't break the VVT Solenoid(s) in the heads. Like djpope I broke one then just ordered two off rockauto @ $70 each.

2. The right size wrench for the cams Is crucial. And not a cheap harbor freight wrench, craftsman atleast. I broke two

3. Craftsman makes sockets for getting mostly stripped or totally rounded nuts/bolts off (link)Shopping(link)
they work great!

4. Remove the exhaust collector mounts to the block and the y pipe. Removal of front two wheels most likely necessary

5. The bi hex fits with very little tolerence. I used a rag and stuffed the bihex in the bolts and got out as much grime and caked on sludge as i could before removing. There was a couple hundreths worth of goo in each bolt cap that was keeping the tool from seating correctly

6. Cheater pipe will come in handy (I bought iron plumbing pipe at home depot and slid over my ratchet and breaker bar)

I have a question to whoever has finished!
Did you use assembly lube? engine oil? How did you prime the motor? Anyone crank the engine without spark or fuel to get oil flowing before firing? I have cleaned everything with carb cleaner and now I have zero oil on anything. I'm wondering if ishoud just use engine oil to lube everything or go buy assembly lube for cams/lifters/caps?

Also! Since I disconnected the transmission lines from the radiattor, will I need to add atf and burp the system?
 
Last edited:
Capncam - which brand bi-hex did you use? I felt like even with the new head bolts it was extremely difficult to get it fully seated and removing it was just as difficult.

I used assembly lube in the head on anything that moves. Then I added at a least a quart of oil to each head as well I think. No fogging oil on the piston liner walls though.

I had to crank several times to get it to fire. Found out I missed a connection and a grounding wire and then had to crank some more after that. I'm sure it was enough to get the oil moved around.

The engine ran like crap at first, but after driving it for a while it sorted itself out.

I don't recall anything about the transmission lines or remember losing any trans fluid so I didn't add any.
 
Might try cranking the engine without the spark plugs installed. That will get oil in to the oil passages quite well. Fuel shouldn't be an issue.
 

Members online

No members online now.

Forum statistics

Threads
278,316
Messages
3,554,112
Members
248,016
Latest member
Advally Service

Trending content

Back
Top