
You are using an out of date browser. It may not display this or other websites correctly.
You should upgrade or use an alternative browser.
You should upgrade or use an alternative browser.
nihkon's 4Runner
- Thread starter nihkon
- Start date


nihkon
Member
I hadn't actually thought about movement with them. lolLooking good man. Is there any concern with movement in those lightbar mounts? They look really close to the glass. Look good though!
But the steel is pretty stout, so I don't really see there being much play in them. I'll definitely keep an eye/ear open for it though.
Also, I forgot to post this along with the rest of the updates above...
I had picked up a new radiator quite a while ago. It's been another one of those parts that has just been taking up room in my garage as I lag on installing it. lol!
Well, I finally ordered the rest of the parts to go along with the new radiator installation. New parts from Toyota include: upper and lower hoses, thermostat, water inlet gasket, and radiator cap (new new Denso radiator didn't come with a cap.)
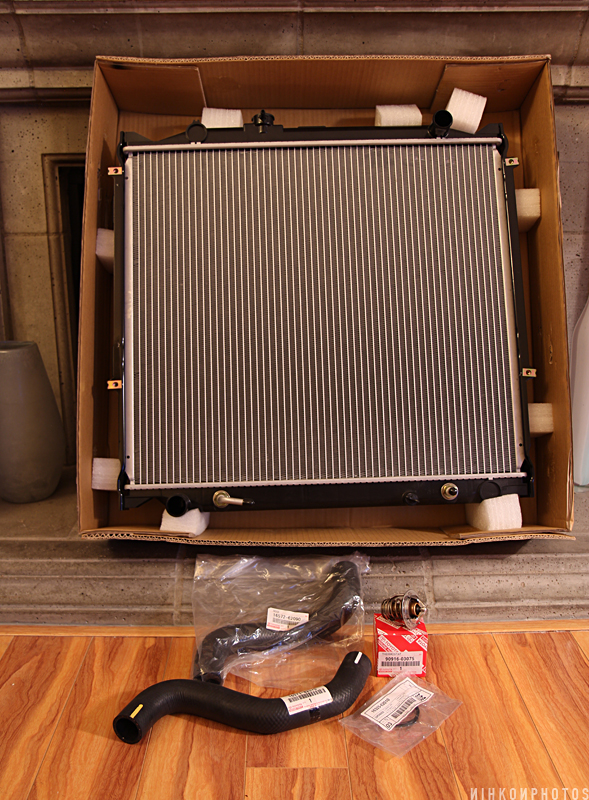
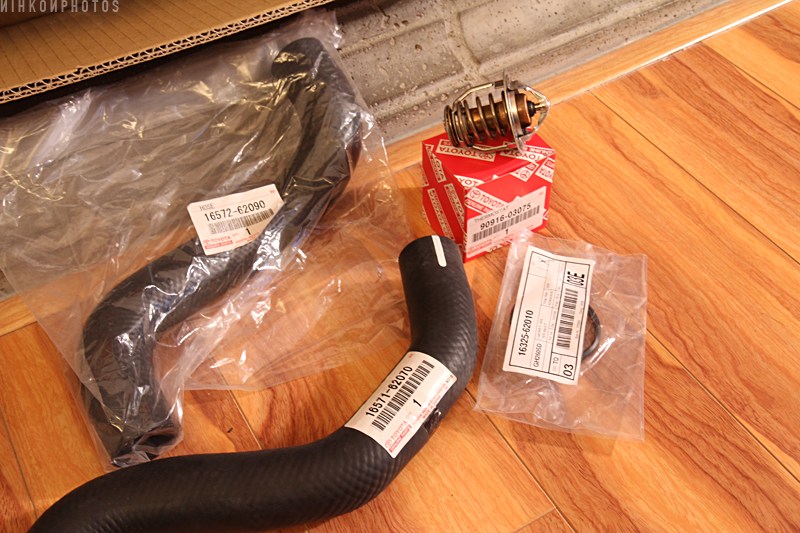
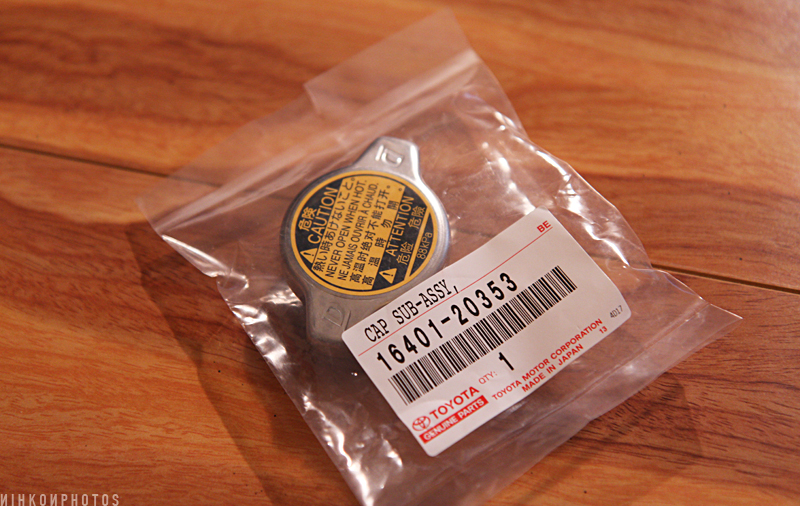
I forgot to include it in the "group shot", but here is the new radiator cap:
While I was making my order with Toyota, I decided to also get the diff. lock decal that's on the driver side door card. My current one is faded pretty badly.
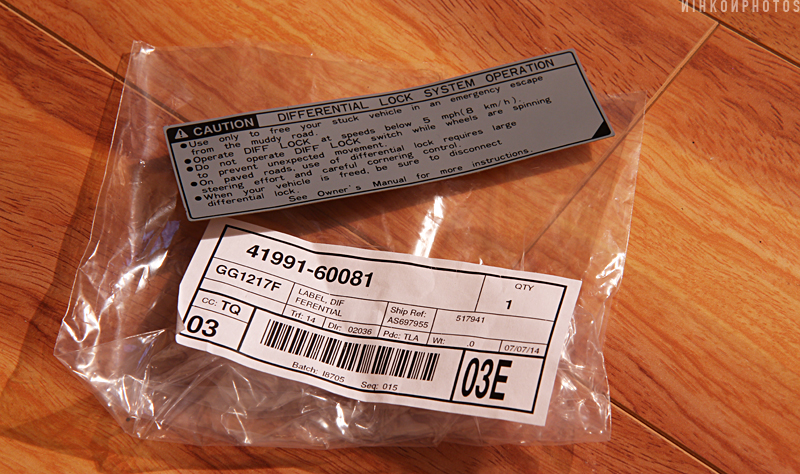
Of course, none of these parts are installed yet. lol
And for anyone that was paying attention, you might recall that I posted pics of my trans cooler a long long time ago, but never posted pics of it installed. Yup, you guessed it, that's one of the other parts still sitting in the garage. lol! I'll finally install that when the radiator goes in.

downpour11
New member
Glad you got it figured out. I'm still baffled though because we haven't had any problems with other 4runner's. [MENTION=73787]SantaCruzRunner[/MENTION] came up from Sac and I installed his and they worked just fine. The only issue we have ran into was the allen screws that mount the actual bar, some bars have different size allen's. Otherwise it mounted perfectly. I'll look into this, thanks for posting the pics!
:cheers:
Edit: [MENTION=87543]nihkon[/MENTION] After looking at your pictures and comparing them to some other customer pics I finally figured out the issue. I think you ordered a true 40" bar, rather than the 41.5" which the mounts are designed for, so your angle is going to be off. I was under the impression you had a 41.5" bar because you said you ordered the same one as me LOL. With the shorter bar, your mounts were pushed farther up the gutter rail, (towards the top of the window) where it gets skinner. This puts it too close to the top crown of the roof/window and the bar hits. A 3/4" spacer on each side would have solved it and it wouldn't have required the drilling.
If you get a chance, measure eye to eye on your lightbar and let me know if it's 40". If you end up down the road grabbing a 41.5" bar, I'm more than happy to ship you a new set of mounts for free.
:cheers:
Edit: [MENTION=87543]nihkon[/MENTION] After looking at your pictures and comparing them to some other customer pics I finally figured out the issue. I think you ordered a true 40" bar, rather than the 41.5" which the mounts are designed for, so your angle is going to be off. I was under the impression you had a 41.5" bar because you said you ordered the same one as me LOL. With the shorter bar, your mounts were pushed farther up the gutter rail, (towards the top of the window) where it gets skinner. This puts it too close to the top crown of the roof/window and the bar hits. A 3/4" spacer on each side would have solved it and it wouldn't have required the drilling.
If you get a chance, measure eye to eye on your lightbar and let me know if it's 40". If you end up down the road grabbing a 41.5" bar, I'm more than happy to ship you a new set of mounts for free.
Last edited:
nihkon
Member
Thanks dude!Cant wait to see the grille finished up, You've got a LOT of light burning ahead of you at night. With everything on how many watts are you looking at?
Great update as usual.
I hadn't really thought about how much power these things are eating up.
Rigid lists the Dually's at 20w, 1,45amp draw.
MicTuning says the light bar is 240w, 16amp draw.
Glad you got it figured out. I'm still baffled though because we haven't had any problems with other 4runner's. @SantaCruzRunner came up from Sac and I installed his and they worked just fine. The only issue we have ran into was the allen screws that mount the actual bar, some bars have different size allen's. Otherwise it mounted perfectly. I'll look into this, thanks for posting the pics!
:cheers:
Edit: @nihkon After looking at your pictures and comparing them to some other customer pics I finally figured out the issue. I think you ordered a true 40" bar, rather than the 41.5" which the mounts are designed for, so your angle is going to be off. I was under the impression you had a 41.5" bar because you said you ordered the same one as me LOL. With the shorter bar, your mounts were pushed farther up the gutter rail, (towards the top of the window) where it gets skinner. This puts it too close to the top crown of the roof/window and the bar hits. A 3/4" spacer on each side would have solved it and it wouldn't have required the drilling.
If you get a chance, measure eye to eye on your lightbar and let me know if it's 40". If you end up down the road grabbing a 41.5" bar, I'm more than happy to ship you a new set of mounts for free.
Hey Rob, thanks for continuing to think about why the brackets didn't work so well for me.
I do have the same 41.5" light bar that you have. I think it's the same at least. Either way, it's 41.5". And I installed it in the exact position that you have shown in the close-up photo in your for sale thread (with the leading edge of the bracket right at that vertical seam on the A-pillar.) I'm still confident that the angles are a little off. They're working for me though, so it's all good man. :thumb:

nihkon
Member
Wow....it's been half a year since I've updated this thread. In all honesty though, I haven't done much to it. I've just been having fun with it.
If you guys remember, I had some pretty gnarly pinstriping. A good friend of mine has gotten into automotive detailing, and he put some elbow grease into one side of my truck.
Here is the before:
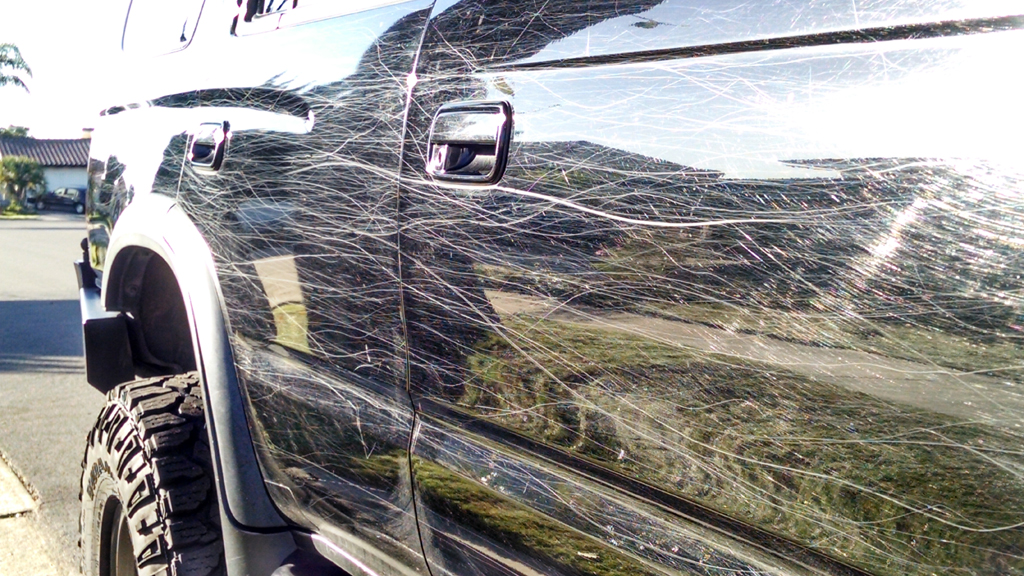
And here are a few photos from during and after he worked his magic:
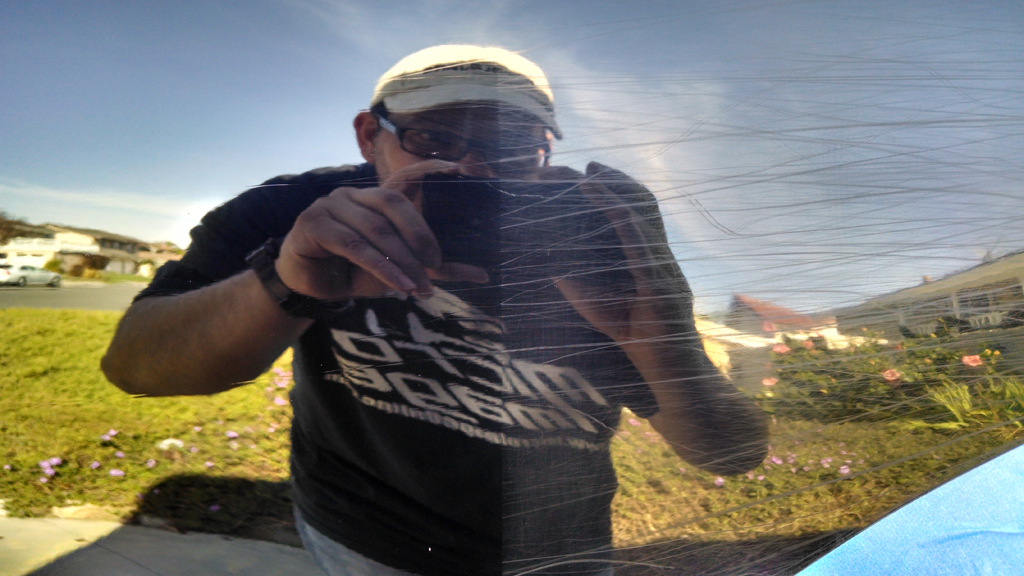
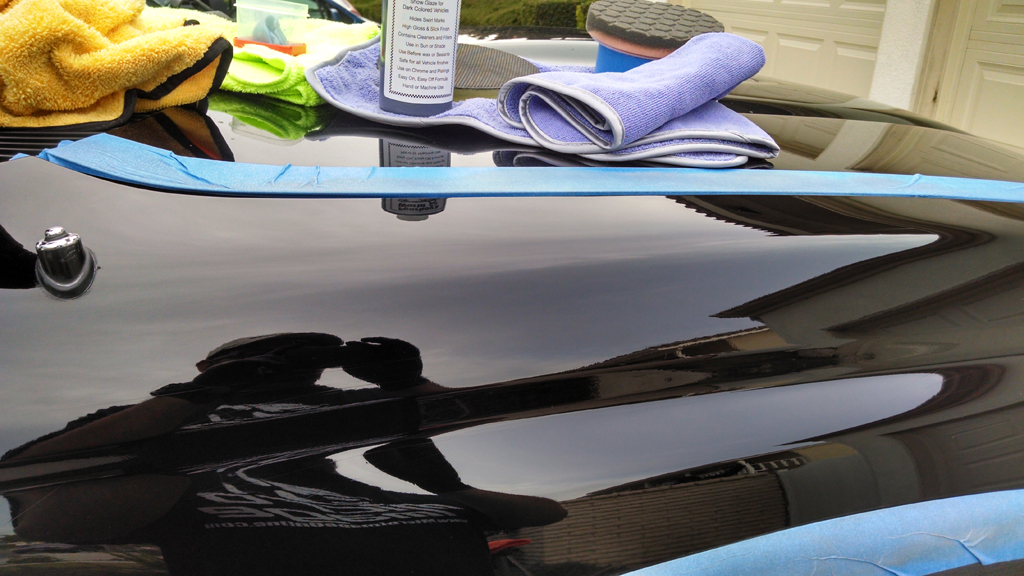
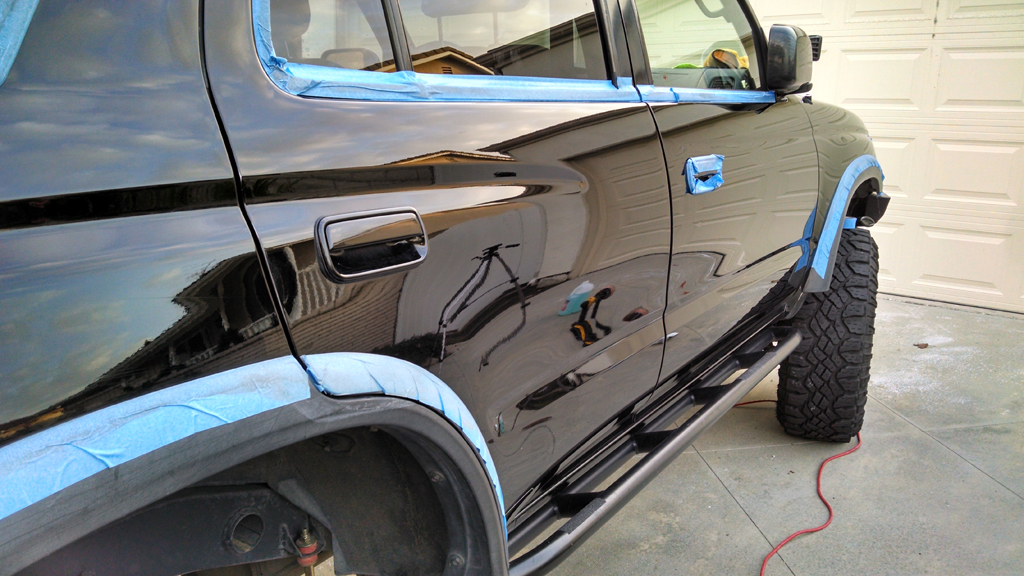
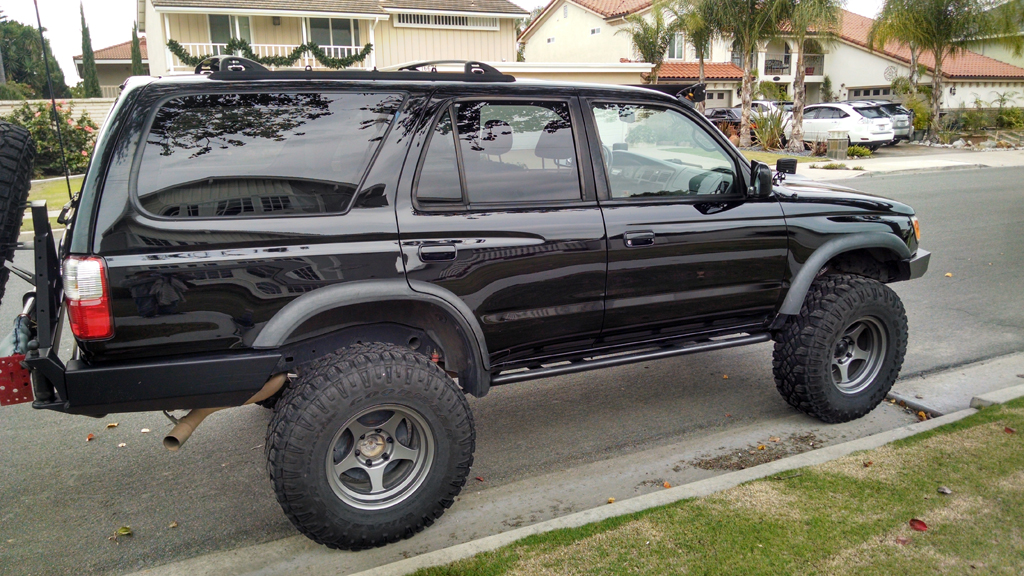
I gotta say, I'm pretty stoked at how it turned out. You can still see some light scratches. But it looks 100 times better than it did before. And it's soooo smooth. The only drawback now is that when we go wheeling, I get nasty comments from him on the walkies when I rub against shrubs or when I get too close to rocks. lol!
If you guys remember, I had some pretty gnarly pinstriping. A good friend of mine has gotten into automotive detailing, and he put some elbow grease into one side of my truck.
Here is the before:
And here are a few photos from during and after he worked his magic:
I gotta say, I'm pretty stoked at how it turned out. You can still see some light scratches. But it looks 100 times better than it did before. And it's soooo smooth. The only drawback now is that when we go wheeling, I get nasty comments from him on the walkies when I rub against shrubs or when I get too close to rocks. lol!
nihkon
Member
In other news, I hit up a local trail with my buddies this past weekend. It's the Cleghorn Trail here in Southern California. We had done this trail once before, with a guide, in dry weather. This was our first time on our own out there....and it was pouring down rain on us. It made the trail SO different to navigate. It was super fun though. Here are a few pics from this trip:


Our buddy took a slightly wrong line and ended up sliding down the notch. With a tow strap and all of our help, we were able to get him righted....but he did pop the bead on the driver/front tire. So we had to change the wheel/tire once we got to the bottom of the hill.

Cloudy view of Silverwood Lake

The muddy tires made it SO slick out there!

Some Jeep guys stopped to lend us a hand. The white Jeep had been driven off the dealership lot less than 24 hours before this. lol

Our buddy took a slightly wrong line and ended up sliding down the notch. With a tow strap and all of our help, we were able to get him righted....but he did pop the bead on the driver/front tire. So we had to change the wheel/tire once we got to the bottom of the hill.
Cloudy view of Silverwood Lake
The muddy tires made it SO slick out there!
Some Jeep guys stopped to lend us a hand. The white Jeep had been driven off the dealership lot less than 24 hours before this. lol


Unner
New member
You've got a super clean truck! I love black 4Runners. I'm amazed at how many scratches he was able to get out, it's a night and day difference. Looks like you guys had a good time at the trail. Was the only damage to that Tacoma the tire popping off the bead? In that picture it looks like he should have more damage than that...
Seeing the grille on that Tacoma also reminded me that I should be getting my "Raptor" letters for the 4Runner sometime. I'm still deciding if I want to paint them black for the stealthy look, or charcoal gray kinda like that Tacoma.
Seeing the grille on that Tacoma also reminded me that I should be getting my "Raptor" letters for the 4Runner sometime. I'm still deciding if I want to paint them black for the stealthy look, or charcoal gray kinda like that Tacoma.

Freak
New member
I just came here to tell you that I still get wet dreams about your truck once in a while..
Loving the ODL front bumper! Also, thanks for putting up pictures of all the OEM parts like the diff lock decals and all that. I've been planning to buy all of these "it's all in the small details" parts.
Loving the ODL front bumper! Also, thanks for putting up pictures of all the OEM parts like the diff lock decals and all that. I've been planning to buy all of these "it's all in the small details" parts.

4Running Daily
New member
PM me this detailing guys info :spy:

sn0wrunner
New member
Yeah looks great! Makes me want to get mine detailed come May or June.

Herculean T4R
New member
awesome looking truck!!

BrianSD_42
New member
Truck looks awesome man.
Let me know next time you are interested in a trail run. I'd like to check that trail out. Never been.
Let me know next time you are interested in a trail run. I'd like to check that trail out. Never been.

infamousRNR
Senior Member
[MENTION=65101]BrianSD_42[/MENTION]
Please more info on the detailing!!!
My goodness that's impressive..
Did he clay bar first? Brand of wax? Any special tips or tricks this guy did? Rotation/rotary wax wheel with polishing pad?
Always been trolling your build and just like everyone else, I'm drooling still
Please more info on the detailing!!!
My goodness that's impressive..
Did he clay bar first? Brand of wax? Any special tips or tricks this guy did? Rotation/rotary wax wheel with polishing pad?
Always been trolling your build and just like everyone else, I'm drooling still
BrianSD_42
New member
@BrianSD_42
Please more info on the detailing!!!
This is not my build thread lol. You can find mine via the link in my signature.
I didn't detail his car but I agree it looks great.
These 4Runners , at least in black came with a good amount of clear coat. I assume he used a combination of a buffer, Ultimate Compound and then Wax.
Last edited:

nihkon
Member
Thanks dude! It makes the truck feel new again! You should do it!geez thats a killer job on the detail. I really should do that to my truck haha.
trail also looks like a blast! I could go for some mud, all we have up here is snow!
The mud was pretty fun. I got it up over my windshield and onto the roof a few times. lol
Thanks!You've got a super clean truck! I love black 4Runners. I'm amazed at how many scratches he was able to get out, it's a night and day difference. Looks like you guys had a good time at the trail. Was the only damage to that Tacoma the tire popping off the bead? In that picture it looks like he should have more damage than that...
Seeing the grille on that Tacoma also reminded me that I should be getting my "Raptor" letters for the 4Runner sometime. I'm still deciding if I want to paint them black for the stealthy look, or charcoal gray kinda like that Tacoma.
Other than popping the bead on the tire, the Tacoma also went home with a few scratches along the side of the truck that was against the dirt, along with a bit of a dent in the rocker panel and lose front fender flare/much guard. Nothing too bad considering what he got himself into.
I'd vote for keeping it black and stealthy. The ones on the Tacoma above area actually white. They really stand out in real life.
lmao! Thanks man.I just came here to tell you that I still get wet dreams about your truck once in a while..
Loving the ODL front bumper! Also, thanks for putting up pictures of all the OEM parts like the diff lock decals and all that. I've been planning to buy all of these "it's all in the small details" parts.
Get the parts while you can dude. Who knows how long this stuff will be available. Getting oem parts for my 23 year old CRX is a pain in the ass!
Will do Connor. :rockon:PM me this detailing guys info :spy:
Thanks! Do it! Do it! Do it!Yeah looks great! Makes me want to get mine detailed come May or June.
I know everyone says that the scratches are a badge of honor and all that...which is cool and all...but man, a shiny truck is sure nice to look at!
Thanks! :thumb3:awesome looking truck!!
Thanks Brian. I'll let ya know next time I hit the dirt. Do you know the San Diego trails pretty well? My buddy (the white 1st gen Tacoma in some of my photos) lives down there, so I already have an excuse to make the trip down there.Truck looks awesome man.
Let me know next time you are interested in a trail run. I'd like to check that trail out. Never been.
Not too shabby huh!@BrianSD_42
Please more info on the detailing!!!
My goodness that's impressive..
Did he clay bar first? Brand of wax? Any special tips or tricks this guy did? Rotation/rotary wax wheel with polishing pad?
Always been trolling your build and just like everyone else, I'm drooling still
I'll post up my buddy's detailing info in the next post.
Thanks dude! Glad to hear people are liking it.You have a hell of a sexy truck there. The last few pictures of your truck with all the lights on and the two white trucks behind it, That was some very cool sexy looking rig.
nihkon
Member
Here's my buddy's rundown of what he did to with my truck so far:These 4Runners , at least in black came with a good amount of clear coat. I assume he used a combination of a buffer, Ultimate Compound and then Wax.
Lil_Gravey said:After receiving a fairly "clean" truck, next up were the following steps:
Detailing is done one section at a time (i.e., a door, followed by another door, fender, etc)
- Rinseless wash - One section at a time to ensure a clean surface.
-- Products:
---- Optimum No Rinse (ONR) diluted as per instructions for rinseless wash
---- Microfiber (MF) towels (good ones) for washing and others for drying
- Clay bar treatment - to remove any above surface contaminants
-- Products:
---- Have used mainly the SmartWax clay bar (blue in color). There are cheaper alternatives
---- ONR diluted for acting as a clay bar lubricant.
---- MF towels to ensure a dry surface
- Compound step - To remove the paint defects (scratches and such). # of passes depends on the panel being worked
-- Products:
---- Portercable (PC) Dual Action (DA) polisher
---- Hexlogic Orange pad (medium -heavy cut foam pad)
---- Meguiar's M105 Compound
---- MF towels to wipe of residue as you move along
- Polish step - To further enhance the surface, and to remove any marring left by the compound step
-- Products:
---- PC DA
---- Hexlogic White pad (heavy polish foam pad)
---- Meguair's M205 Polish
---- MF towels
---- NOTE: This polish step was skipped due to the nature of the off road vehicle being worked on. Knowing it was going to be getting scratched again, it was decided to focus on removing the lighter scratches, reducing the deeper scratches, and then moving on to the glazing step)
- Glaze Step: To add some "filler" for the some of the scratches left behind. This improves the look of the surface
-- Products:
---- PC DA
---- Hexlogic Blue pad (glaze foam pad)
---- Poorboys World Black Hole
---- MF towels (better than what is used in prior steps)
- Wax Step - This provides some protection from the elements. Helps with making washing easier too
-- Products:
---- Foam applicator pad. (yellow foam, MF pad, whatever will lay down the coat of wax evenly without scratching)
---- Poorboys World Liquid Blue Natty
---- MF Towels (even better/softer)
No special tricks. Just some patience and decent technique. No rotary tool used (well, in some smaller spots I use the Meguiar's DA Power System attached to a drill. This is sort of a "forced rotation" DA system)
Last edited:




Similar threads


- Replies
- 9
- Views
- 4K


