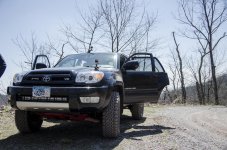
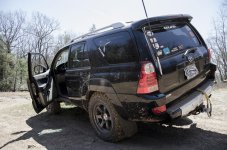
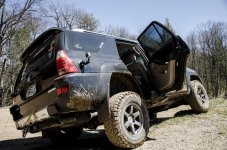
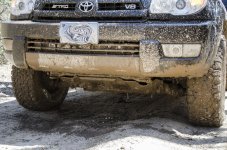
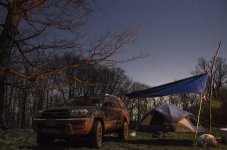
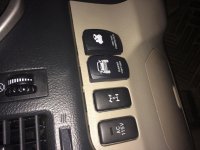
Not-So-Krazy Build Thread! (Picture Heavy!!)

Do you have any regrets going with that size vs going with a 285? In the market for a new tire right now and I really want to go with 285 but don't want to do the body mount chop.

 
She's a real beaut Clark. Good job man. Like seeing fellow members doing their own work also.
1xpxj
1xpjb
 
Do you have any regrets going with that size vs going with a 285? In the market for a new tire right now and I really want to go with 285 but don't want to do the body mount chop.

Nope, not at all. From the start I wasn't trying to make this thing a trail rig or anything crazy. I still DD it and use it for long road trips, so 33s would have caused my mileage to suffer more than it has already. I also didn't want to have to get in to chopping the body mount and likely replacing UCAs. I searched around and found that 275s were basically a perfect fit, so I went with them and I am so glad I did.

If your concern is clearance and stuff, honestly, having 32s, a lift, and being a careful driver/picking your own line correctly can get you almost anywhere.
 
She's a real beaut Clark. Good job man. Like seeing fellow members doing their own work also.
1xpxj
1xpjb

Thanks! I really loved doing my own work. It was tough, but fun. Helped me learn way more about cars in general which is always super useful.
 
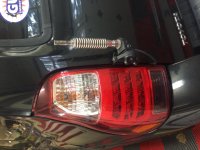
Could you post a close up picture of where/how you mounted your Comet RS720? No hurry. Thanks!
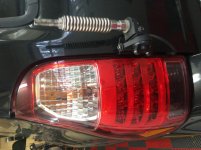
Here is a closer picture of the mount itself. So the mount is simply a hard clamp on to the trunk hatch and it is extremely solid. I then used a FireRing on the bottom for my coax cable, followed by a heavy duty spring and quick disconnect. I park in garages and other low areas a fair amount and the quick disconnect is the greatest thing ever. I then have a 3' Firestik. The antenna is not on right now because I am parked in the garage doing some fabrication for the compressor. Hope this helps!

CB Mount 1.jpg
CB Mount 2.jpg
 

Attachments

  • CB Mount 1.jpg
    CB Mount 1.jpg
    135.9 KB · Views: 1,396
  • CB Mount 2.jpg
    CB Mount 2.jpg
    135.2 KB · Views: 1,373
Compressor almost ready!

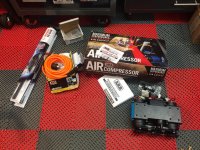
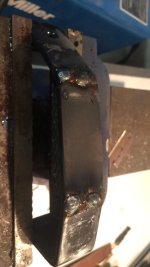
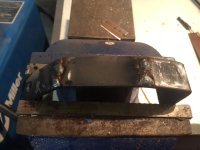
So today was a busy day! Almost have the mount for the ARB Twin compressor figured out and I actually did my first welds ever today! It was a lot of fun. Be warned, the welds are not pretty. But I ground them down a bit and painted them so they look a bit better. We drilled the holes for the mounting and now I'm just taking a break until tomorrow as I was in the garage for like 3-4 hours already. Gonna let the paint dry and pick it back up tomorrow.

Also gonna replace the windshield wipers and hopefully replace some worn out stickers on my rear window tomorrow too!

Goodies :D
Compressor + Pump Up + Wipers.jpg

Welds (Don't kill me :laugh: )
Welds 1.jpg
Welds 2.jpg
 

Attachments

  • Compressor + Pump Up + Wipers.jpg
    Compressor + Pump Up + Wipers.jpg
    149.9 KB · Views: 1,380
  • Welds 1.jpg
    Welds 1.jpg
    69.2 KB · Views: 1,361
  • Welds 2.jpg
    Welds 2.jpg
    128.1 KB · Views: 1,384
Compressor Installed!

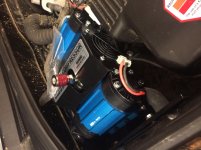
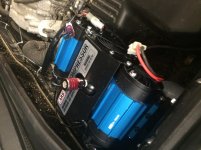
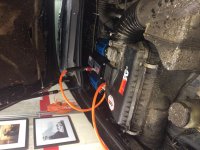
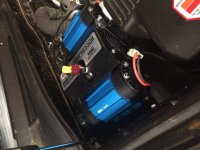
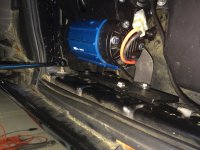
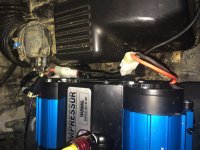
Finally got the compressor installed! Man this thing is heavy as all hell and an absolute beast. Really pleased with the quality and I am extremely happy with the performance I have seen. The bracket started as a bracket from Bandiworld aka Leroy from the FJ forum. He makes mounts for these compressor for FJs and 5th gens I think. I reached out and asked him if he made a mount for 4th gens and he said it shouldn't be too difficult. So he whipped me one up and sent it my way.

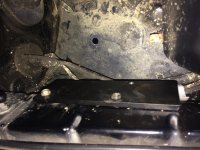
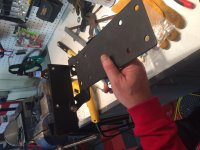
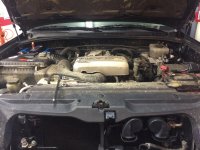
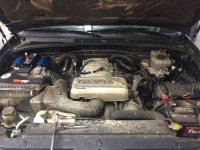
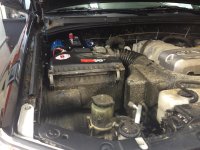
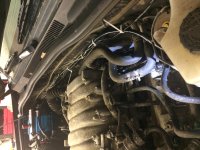
Unfortunately, the mount seemed to be based off a 4th Gen 4Runner that has a factory metal plate by the airbox and more pre-drilled and tapped holes on the fender wall. He was an amazing seller and offered me a full refund plus shipping and stuff, but I said screw it, I'm gonna make this sucker fit. So that's what I was doing for the past two days. I shortened the bracket considerably, rebent the metal, rewelded it, and then drilled some holes to bolt everything in to place. So here are some pictures in progress and the final outcome!


These first two photos show the drop bracket I made with a thick plate of aluminum. Initially the bracket was meant to bolt in to the fender sidewall right where the top of the plate is mounted, but that would leave the compressor far too high and the hood would never close. So as we shortened the overall mounting bracket, we made a "drop bracket" for the side mounts and it came out pretty great.
Picture 1.jpg
Picture 2.jpg

Here are just some more photos of the compressor and mounting.
Picture 3.jpg
Picture 4.jpg

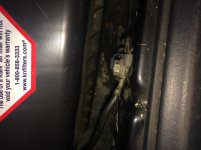
I had to relocate the ground wire for the MAF.
Picture 5.jpg

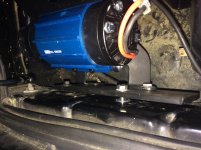
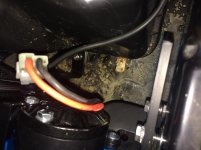
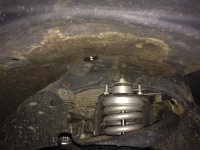
And some more photos of the mounting. Here you can see how I bolted up through the fender well.
Picture 6.jpg
Picture 7.jpg
Picture 8.jpg
 

Attachments

  • Picture 1.jpg
    Picture 1.jpg
    134.3 KB · Views: 1,355
  • Picture 2.jpg
    Picture 2.jpg
    126.8 KB · Views: 1,343
  • Picture 3.jpg
    Picture 3.jpg
    132 KB · Views: 1,327
  • Picture 4.jpg
    Picture 4.jpg
    135.5 KB · Views: 1,313
  • Picture 5.jpg
    Picture 5.jpg
    130.1 KB · Views: 1,326
  • Picture 6.jpg
    Picture 6.jpg
    128.2 KB · Views: 1,329
  • Picture 7.jpg
    Picture 7.jpg
    132.3 KB · Views: 1,334
  • Picture 8.jpg
    Picture 8.jpg
    134.5 KB · Views: 1,348
Compressor Part 2!

Here are more photos of the compressor installation process and some of my thought process while going through it.

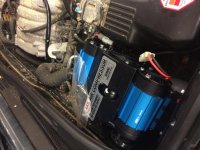
Here are just some more overall shots of how it looks in the engine bay. Pretty low profile and pretty good looking if I do say so myself :D
Picture 9.jpg
Picture 10.jpg

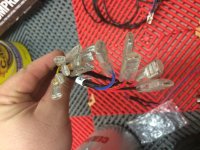
When I was looking at the wiring harness, I did not realize that this thing comes prewired for front and rear air lockers too! That means that while everything is already done for you, boy oh boy are there a lot of unused connections when you don't have them. I don't have any air lockers installed (yet :D ) so I just tucked all the excess out of the way and taped everything up.
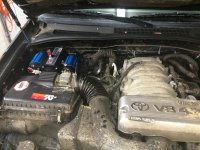
Picture 11.jpg

More photos of the mounting and how it sits.
Picture 12.jpg
Picture 13.jpg
Picture 15.jpg

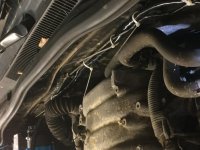
And these last two photos show how I ran the wiring harness across the engine bay. The primary wiring harness for power was the perfect length once ziptied up and out of the way. There was a ton of excess on the switch harness though, but it is a much thinner wire and easier to hide.
Picture 16.jpg
Picture 17.jpg
 

Attachments

  • Picture 9.jpg
    Picture 9.jpg
    136.1 KB · Views: 1,298
  • Picture 10.jpg
    Picture 10.jpg
    138.1 KB · Views: 1,312
  • Picture 11.jpg
    Picture 11.jpg
    137.1 KB · Views: 1,316
  • Picture 12.jpg
    Picture 12.jpg
    139 KB · Views: 1,302
  • Picture 13.jpg
    Picture 13.jpg
    136 KB · Views: 1,302
  • Picture 15.jpg
    Picture 15.jpg
    132.5 KB · Views: 1,336
  • Picture 16.jpg
    Picture 16.jpg
    137.3 KB · Views: 1,300
  • Picture 17.jpg
    Picture 17.jpg
    129.8 KB · Views: 1,317
Compressor Part 3!

And here are the last photos of the compressor install. I tried it out a bit and got to see how it performs and so far I am very happy with it!

Picture 18.jpg
Picture 19.jpg
Picture 20.jpg

And here you can see the clearance with the airbox. This spot was meant for this twin compressor :D
Picture 231.jpg

And last but not least, I replaced the included switch with a Contura V from OTRATTW to match the rest of the switches I have in my 4Runner. Hope you all enjoyed!
 

Attachments

  • Picture 18.jpg
    Picture 18.jpg
    137.6 KB · Views: 1,308
  • Picture 19.jpg
    Picture 19.jpg
    130.3 KB · Views: 1,329
  • Picture 20.jpg
    Picture 20.jpg
    133.1 KB · Views: 1,321
  • Picture 231.jpg
    Picture 231.jpg
    136.9 KB · Views: 1,313
  • Picture 22.jpg
    Picture 22.jpg
    133.2 KB · Views: 1,316
National Luna Single Battery Monitor

So quick little addition today. Now that I am adding multiple accessories, especially the twin compressor, I began looking at ways to monitor my battery health a little more closely. I just wanted to be able to quickly look at the status of the battery and know whether we are good to go or have a serious problem. This is especially relevant with my camping trips. I want to be able to run some lights or accessories for a little bit and then have the alarm go off to let me know that I should run the car for a bit.

That led me to the National Luna Single Battery Monitor. I don't have any plans to get a dual battery setup in the future cause I never really see myself needing it. I am looking in to throwing a bigger battery in the stock battery location, but for now, it does its job and I don't need anything crazy (yet... :D ) I found a nice little spot for it that is out of the way and easily viewable when getting in to the car or looking in the window. Pretty cool product and excited to see how it can help me with managing my time in late night camping setups lol.
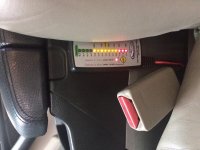
Battery Monitor.jpg
 

Attachments

  • Battery Monitor.jpg
    Battery Monitor.jpg
    134 KB · Views: 1,256
Decals and LED Strips

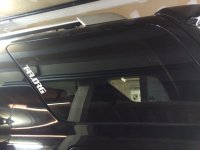
Got rid of a bunch of old stickers and put on a bunch of new ones, including some T4R decals. Really like the look of them. Got a large one for the back and two small ones, one for either side of the rear windows.

Decal 1.jpg
Decal 2.jpg

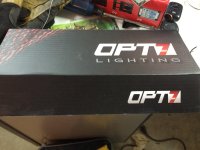
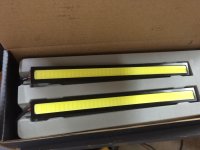
I also started to miss the courtesy lights provided by my now-removed running boards. I decided to pick up some LED strip things from OPT7. Really easy to install, and the adhesive on the back is crazy solid/strong! They are easy to stick under the rocker panel and give off some nice light for people getting in the car. Overall happy with them. Wish the wiring was a bit thicker though, but it didn't cause any problems. Hopefully going to snap some output pictures over the next few days.

LED Strip 1.jpg
LED Strip 2.jpg

Next up is likely going to be some stealth mounted reverse/camping work lights in the rear :D
 

Attachments

  • Decal 1.jpg
    Decal 1.jpg
    123.1 KB · Views: 1,231
  • Decal 2.jpg
    Decal 2.jpg
    128.9 KB · Views: 1,264
  • LED Strip 1.jpg
    LED Strip 1.jpg
    129.7 KB · Views: 1,230
  • LED Strip 2.jpg
    LED Strip 2.jpg
    128.5 KB · Views: 1,255
Enjoyed reading through your thread! Love the idea of some small led lights in various locations. I always take whatever vehicle I own at the time out on the beach at the NC coast & something like those would really come in handy when youre out there in the dark. Keep us updated on the progress and maybe some instructions.
 
Enjoyed reading through your thread! Love the idea of some small led lights in various locations. I always take whatever vehicle I own at the time out on the beach at the NC coast & something like those would really come in handy when youre out there in the dark. Keep us updated on the progress and maybe some instructions.

Yea they are pretty handy. I wired mine up to come on with the doors opening/unlocking the car and they work great. Only thing I am not a fun of is the wiring. The wiring on the strips is incredibly thin, making it a bit of a pain to work with.
 
RCI Metalworks Sliders!

So I have been saving up for a while now, and it is finally happening. I researched a number of options for rock sliders, and while everyone has their brand loyalty, I have been really happy with the skids from RCI so far, so I figured I would pick up their rock sliders too. I really wanted something bolt-on as opposed to welded.

I do more overlanding than rock crawling, so these will offer some nice protection without being permanent or costing a crazy amount more for DOM. RCI seems to make great products and I called with a number of questions and they answered them without making me feel rushed or anything.

I got them powdercoated but I should have them in 3-4 weeks and installed hopefully a week or two after that! Super stoked!!!
 
120k!

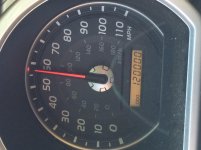
Quick little update. Just hit 120,000 on the ol' odometer the other day! Hoping for at least another 120k out of this baby! :whoo: (And before anyone says, I know I shouldn't have done this while driving, but I didn't crash or kill anyone, so everything's all fine and dandy :D )

120K.jpg

Also, RCI sliders should be here tomorrow! Unfortunately I won't be able to install them for a while though.
 

Attachments

  • 120K.jpg
    120K.jpg
    120.9 KB · Views: 942
Camping!

Finally all packed up for a trip to GWNF! Heading out with some buddies for a bit. We are going to explore the trails, chill by Skidmore Lake and eventually end up at Flagpole Knob for some camping. Then off to Big Levels the next day for some more off-roading fun!

If anyone has any suggestions within GWNF for places to visit, trails to hit, or anything else, let me know ASAP!

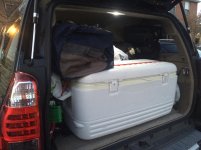
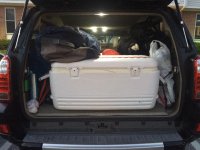
The game of Tetris that is my trunk:
Packing 1.jpg
Packing 2.jpg
 

Attachments

  • Packing 1.jpg
    Packing 1.jpg
    134 KB · Views: 917
  • Packing 2.jpg
    Packing 2.jpg
    135.4 KB · Views: 931
George Washington National Forest

Had an absolutely awesome weekend of camping with my buddies. Great weather, unbelievable silence, and a night sky that was straight out of painting. Couldn't have asked for a better weekend.

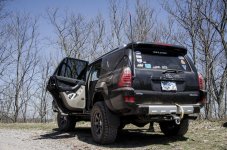
Got a lot of off-roading in and hit the mud pits hard haha! The 4Runner was a beast and handled everything like a champ. Hit a very deep mud pit wayyyyy too slow and thought we were stuck and screwed, but nope! The KO2s plus liberal use of the V8's power got me right through it with a fresh coat of mud!

Here are some pics! Shot a lot of footage as well and I am currently working on putting that together in to a nice video over the next few weeks!

_DSC6133.jpg

_DSC6135.jpg

_DSC6467.jpg

_DSC6472.jpg

_DSC6480.jpg

_DSC8997.jpg
 

Attachments

  • _DSC6133.jpg
    _DSC6133.jpg
    136.5 KB · Views: 977
  • _DSC6135.jpg
    _DSC6135.jpg
    140.1 KB · Views: 962
  • _DSC6467.jpg
    _DSC6467.jpg
    140.4 KB · Views: 950
  • _DSC6472.jpg
    _DSC6472.jpg
    137.8 KB · Views: 963
  • _DSC6480.jpg
    _DSC6480.jpg
    138.4 KB · Views: 973
  • _DSC8997.jpg
    _DSC8997.jpg
    136.2 KB · Views: 965

Members online

Forum statistics

Threads
278,316
Messages
3,554,113
Members
248,016
Latest member
Advally Service

Trending content

Back
Top