Not-So-Krazy Build Thread! (Picture Heavy!!)

RCI Sliders Installed!

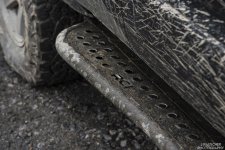
Finally had some time to get the sliders on. They are absolutely awesome. Extremely beefy and I love the look of them all mounted up. Perfectly clear the rear door and everything looks extremely high quality. Ended up getting the top tread plate and them powder coated and it was definitely the way to go (in my opinion).

Mounting was super simple with some help and all of the hardware was provided and really great. There are some holes blocked by the fuel tank, but I ended up shaving the bolt a hair and made it fit on the drivers side with about 1/2" of clearance to the gas tank. Should add just a bit more support and rigidity.

All in all, super pumped about them!

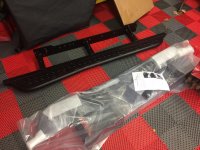
Pic of the sliders just out of the box.
Sliders1.jpg

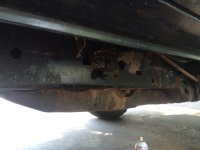
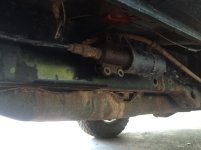
Getting the old XREAS off of the frame rails. Kind of a pain in the butt with 13 years of rust working against me. Some PB blaster and a lot of curse words later got them off. Gotta take off the the pumps and then the brackets behind them.
Sliders 2.jpg
Sliders3.jpg

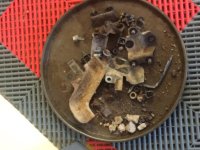
Some of the crap that was torn out.
Sliders4.jpg

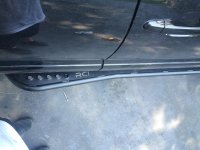
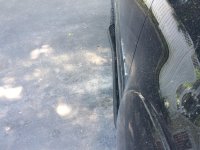
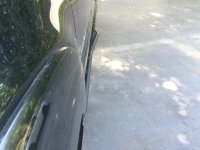
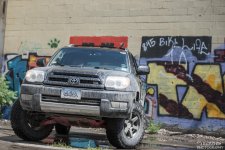
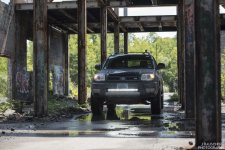
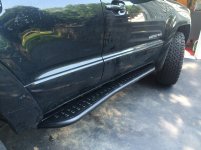
And here are some shots of the sliders mounted up. Freakin love them. Also included some profile shots. They hug the body very nicely.
Sliders5.jpg
Sliders6.jpg
Sliders7.jpg
Sliders8.jpg

Up next, replacing that damn JBL sub that's been rattling like crazy!

 

Attachments

  • Sliders1.jpg
    Sliders1.jpg
    141 KB · Views: 847
  • Sliders 2.jpg
    Sliders 2.jpg
    126.6 KB · Views: 869
  • Sliders3.jpg
    Sliders3.jpg
    124.4 KB · Views: 872
  • Sliders4.jpg
    Sliders4.jpg
    129.4 KB · Views: 872
  • Sliders5.jpg
    Sliders5.jpg
    135 KB · Views: 863
  • Sliders6.jpg
    Sliders6.jpg
    134.3 KB · Views: 847
  • Sliders7.jpg
    Sliders7.jpg
    133.5 KB · Views: 870
  • Sliders8.jpg
    Sliders8.jpg
    127.2 KB · Views: 865
Rattling JBL Sub Replaced

13 years later and the stock JBL subwoofer on my '03 Limited was rattling during almost every song I played. It was driving me absolutely crazy and it sounded really awful and shitty. So I decided to fix that!

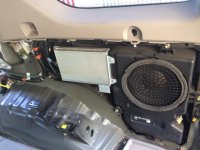
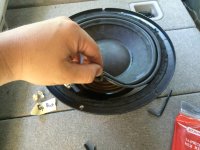
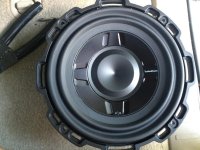
I ended up purchasing a Rockford Fostage P3SD2-8. It is an 8", 2Ohm, Dual Voice Coil subwoofer. Shallow mount as well. Perfect replacement for a stock blown sub. Wiring is a breeze. There are stock 4 wires (2 Positive, 2 Negative) and 4 slots (2 Positive, 2 Negative) on the new Fosgate. Cut off the old connectors, strip wire, reconnect. Incredibly simple. Getting to the sub is the hardest part!

Here are some pics:

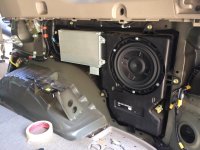
Getting to the sub was a pain, but it was well worth it.
Sub1.jpg
Sub2.jpg

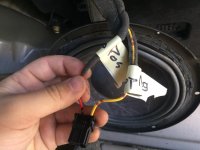
If anyone is doing this, I HIGHLY recommend taping/labeling the wires before cutting off the old connectors. Keeps it simple and keeps you from accidentally crossing a wire!
Sub3.jpg

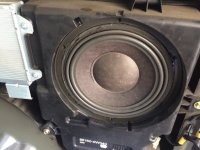
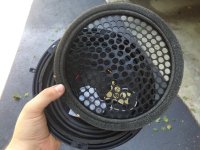
The old JBL was completely ripped...
Sub4.jpg

In with the new!
Sub5.jpg
Sub6.jpg

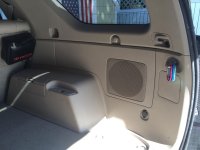
All buttoned up.
Sub7.jpg

All of the old garbage from the JBL that was thrown away.
Sub8.jpg
 

Attachments

  • Sub1.jpg
    Sub1.jpg
    133.2 KB · Views: 833
  • Sub2.jpg
    Sub2.jpg
    134.8 KB · Views: 841
  • Sub3.jpg
    Sub3.jpg
    127.6 KB · Views: 832
  • Sub4.jpg
    Sub4.jpg
    135.3 KB · Views: 835
  • Sub5.jpg
    Sub5.jpg
    135.2 KB · Views: 841
  • Sub6.jpg
    Sub6.jpg
    130.4 KB · Views: 840
  • Sub7.jpg
    Sub7.jpg
    133.9 KB · Views: 837
  • Sub8.jpg
    Sub8.jpg
    136.6 KB · Views: 808
Had an absolutely awesome weekend of camping with my buddies. Great weather, unbelievable silence, and a night sky that was straight out of painting. Couldn't have asked for a better weekend.

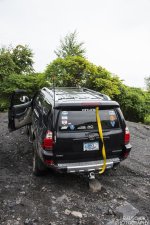
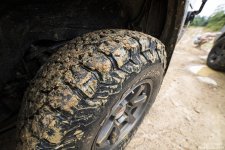
Got a lot of off-roading in and hit the mud pits hard haha! The 4Runner was a beast and handled everything like a champ. Hit a very deep mud pit wayyyyy too slow and thought we were stuck and screwed, but nope! The KO2s plus liberal use of the V8's power got me right through it with a fresh coat of mud!

Here are some pics! Shot a lot of footage as well and I am currently working on putting that together in to a nice video over the next few weeks!

View attachment 200697

View attachment 200698

View attachment 200699

View attachment 200700

View attachment 200701

View attachment 200702

Looks like a fun trip. Also a little tip at least what I have experienced.. . .maybe crack the rear window and throw the tow strap in there. Reason being and I saw you are the same, the back is full of stuff, and the last thing you want to do when stuck or at a bad angle is open the rear hatch to pull your strap out.
Just some friendly advice. Other than that the pictures look great and jealous of your sliders man
 
Looks like a fun trip. Also a little tip at least what I have experienced.. . .maybe crack the rear window and throw the tow strap in there. Reason being and I saw you are the same, the back is full of stuff, and the last thing you want to do when stuck or at a bad angle is open the rear hatch to pull your strap out.
Just some friendly advice. Other than that the pictures look great and jealous of your sliders man

Yea it was a fantastic trip. Went with a few of my buddies and it was a great way to close our university careers.

Thanks for the tip too! That's actually a great idea. I never really thought about having to open the trunk to get to it, especially on an awkward angle. I'll put it in the rear window next time! Thanks :thumb3:
 
I never really thought about having to open the trunk to get to it, especially on an awkward angle. I'll put it in the rear window next time! Thanks :thumb3:

Yeah we had the problem when the guy we were wheeling with mounted his winch solenoid control in an awkward location. He stated it didn't feel awkward standing in my driveway on a flat surface. But it was later found out to be a poor location when he was up to his grill in a creek bed full of snakes and hidden in the corner of his fog light hole. (picture a tall man sprawled across his hood with arm up to his elbow digging around in the creek trying to hook up his controller to his winch).

Anyways enough preaching. . .more pictures next time!
 
Yeah we had the problem when the guy we were wheeling with mounted his winch solenoid control in an awkward location. He stated it didn't feel awkward standing in my driveway on a flat surface. But it was later found out to be a poor location when he was up to his grill in a creek bed full of snakes and hidden in the corner of his fog light hole. (picture a tall man sprawled across his hood with arm up to his elbow digging around in the creek trying to hook up his controller to his winch).

Anyways enough preaching. . .more pictures next time!

Oh jeez. That sounds like a mess and a half haha. I'll definitely keep all of that in mind next time!

And I'll definitely be taking more pictures next time too!!
 
Krayziekid,

How does the new Fosgate sub sound within the stock enclosure? I'm assuming that you used the factory amp with the new sub?

Did you notice any improvement in sound quality or bass response with the new subwoofer? Mine isn't blown but was looking for a bit more punch from it and was thinking that this might be a way to boost the quality a bit.

Thanks and btw, the photos look awesome!

metramm
 
Krayziekid,

How does the new Fosgate sub sound within the stock enclosure? I'm assuming that you used the factory amp with the new sub?

Did you notice any improvement in sound quality or bass response with the new subwoofer? Mine isn't blown but was looking for a bit more punch from it and was thinking that this might be a way to boost the quality a bit.

Thanks and btw, the photos look awesome!

metramm

I think it sounds great honestly. I didn't need a massive sound increase or thumping bass, and I think this is the perfect solution when paired with the stock amp. The stock amp drives it fine. The bass is definitely there, and it has a nice deep sound to it, so I'm happy.

I can't really give a fair comparison because mine has been blown and rattling for so long that I don't really remember the sound back in its "prime." However, I am very happy with this new one for sure. If I crank the volume on some bass-heavy songs, I definitely notice a louder and deeper rumble than before. Hope this helps!
 
Spare Tire

Finally finally finally got my spare tire down after fighting it for a few days. What a pain in the ass. The spare hadn't been dropped in years, and now that I have changed tire size, I wanted a true full size spare.

Well after a lot of PB blaster on the spring/coil thing, a bit of hammering, and a ton of WD40 on the wire, it came down! Not very smoothly, but I used plenty of WD40 on the wire and brought it up and down a few times. The cable is in surprisingly good shape with just a minuscule kink in it. Barely noticeable and doesn't impede performance.

Now I just need to mount my new tire on to the stock rim and crank it back up there to see if it will fit!
 
Spare Tire and Bearings

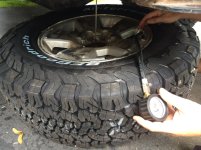
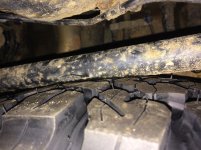
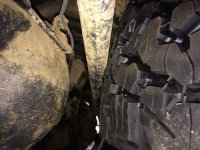
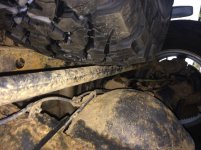
Got the spare tire down, swapped the tire, and got it back up. I aired down to 20psi but unfortunately it still barely touches the track bar. I am trying to figure out the best solution. It doesn't put any pressure on the track bar, but it does touch it. I am going to fiddle with it again, but I am considering putting it on the 4runner and taking one of my slightly worn ones and using that as my spare since it should fit. If anyone has any better ideas, let me know. Here are some pics:

Spare Tire .5.jpg
Spare Tire 1.jpg
Spare Tire 2.jpg
Spare Tire 3.jpg

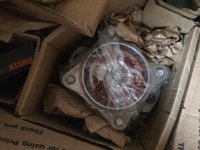
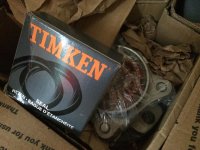
And I got my new bearings in from [MENTION=99491]Bumper2Bumper Auto[/MENTION]! Really needed them and cannot wait to get them in. They look super high quality and I can't for that front end roar from my old bearings to go away! Thanks!
 

Attachments

  • Spare Tire .5.jpg
    Spare Tire .5.jpg
    137.2 KB · Views: 649
  • Spare Tire 1.jpg
    Spare Tire 1.jpg
    136.9 KB · Views: 651
  • Spare Tire 2.jpg
    Spare Tire 2.jpg
    137.5 KB · Views: 645
  • Spare Tire 3.jpg
    Spare Tire 3.jpg
    136.2 KB · Views: 681
  • New Bearings 1.jpg
    New Bearings 1.jpg
    135.2 KB · Views: 666
  • New Bearings 2.jpg
    New Bearings 2.jpg
    137.6 KB · Views: 671
Rausch Creek 7.29.16-7.31.16

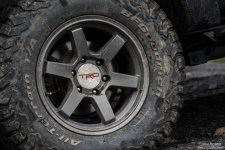
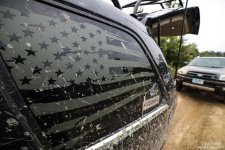
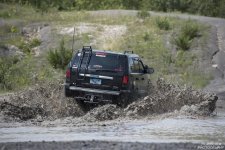
Had a lot of fun at Rausch Creek, despite the bad weather late in the day. Got hours upon hours of wheeling, but didn't take as many pictures as I normally do! So here are some fun detail shots I took, as well as a shot of my buddy's Jeep Grand Cherokee on 35s!

_JMR2755.jpg
_JMR2758.jpg
_JMR2762.jpg
_JMR2806.jpg
_JMR2811.jpg
_JMR2821.jpg
 

Attachments

  • _JMR2755.jpg
    _JMR2755.jpg
    132.7 KB · Views: 853
  • _JMR2758.jpg
    _JMR2758.jpg
    139.1 KB · Views: 848
  • _JMR2762.jpg
    _JMR2762.jpg
    139 KB · Views: 834
  • _JMR2806.jpg
    _JMR2806.jpg
    145.8 KB · Views: 835
  • _JMR2811.jpg
    _JMR2811.jpg
    142 KB · Views: 809
  • _JMR2821.jpg
    _JMR2821.jpg
    140.1 KB · Views: 820
I'm eventually going to be putting a video reel together when I get more footage from camping trips and wheeling, but in the mean time, I felt like this little clip was too good not to post lol.

Getting a little flexy and a little bouncy in the mud at Rausch Creek. Let's just say I am glad I had some rock sliders, and I am super surprised at the amount of flex that I am getting in this video! Enjoy!

 
Last edited:
Had a lot of fun at Rausch Creek, despite the bad weather late in the day. Got hours upon hours of wheeling, but didn't take as many pictures as I normally do! So here are some fun detail shots I took, as well as a shot of my buddy's Jeep Grand Cherokee on 35s!

View attachment 213755
View attachment 213756
View attachment 213757
View attachment 213758
View attachment 213759
View attachment 213760
Dang I want that American flag decal on all my windows!

live action!!
 
Quarry Exploring

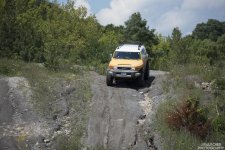
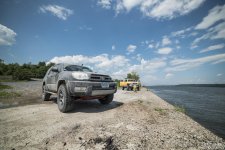
4x4Ever. It's truly amazing the places you'll find off the beaten path. Got to explore an quarry and some buildings today and had an absolute blast. Met a lot of friendly people on the trails on ATVs and dirtbikes and couldn't have asked for a better Saturday. Went with an FJ and a Grand Cherokee and damn it was fun.

Definitely some poser shots in here lol, but the buildings we found (after some directions by the local ATV-ers :D ) were awesome and I couldn't resist some photos with the rig.

_JMR3786.jpg

_JMR3709.jpg

_JMR3701.jpg

_JMR3600.jpg

_JMR3538.jpg

_JMR3559.jpg

_JMR3462.jpg

_JMR3354.jpg
 

Attachments

  • _JMR3786.jpg
    _JMR3786.jpg
    139.4 KB · Views: 716
  • _JMR3709.jpg
    _JMR3709.jpg
    137.9 KB · Views: 705
  • _JMR3701.jpg
    _JMR3701.jpg
    141.9 KB · Views: 706
  • _JMR3600.jpg
    _JMR3600.jpg
    139.7 KB · Views: 701
  • _JMR3538.jpg
    _JMR3538.jpg
    141.3 KB · Views: 693
  • _JMR3559.jpg
    _JMR3559.jpg
    141.9 KB · Views: 711
  • _JMR3462.jpg
    _JMR3462.jpg
    138.7 KB · Views: 694
  • _JMR3354.jpg
    _JMR3354.jpg
    129.2 KB · Views: 682
H11 -> h9

Was trying to figure out how to add some better lighting up front without going to HIDs. I currently run some LED bulbs, but I don't really think they are up to snuff when compared to normal halogens. So I did some research and found out that H9 bulbs can be modded to fit, so I figured why the hell not. I bought some H9 bulbs and just finished the mod up. I am definitely impressed with the output, but I think it will take a few night drives to really determine whether or not it is "worth it."

I did not that there are definitely some "hot spots" right underneath the projector cutoff (which I definitely need to adjust lol). I think the H9s look good though. Maybe I just never noticed the "hot spots" since my LED bulbs were never actually that bright to begin with.

Photos will hopefully happen in the next few days.
 
Bilstein 5100 adjustment and Superbumps

Took some measurements and noticed that my front end was down pretty low when compared to the rear. The rake was very noticeable and I wanted to fix it. So I did!

I bought the Toytec 3" Lift Kit that was preset at 3" up front, and the Superflix 2.5 springs in the rear. The rear always sat higher because of the added spring rate, but it was still way higher than normal.

So I decided to use the no-spring-compressor method and it was absurdly easy. Didn't take a ton of pictures because I had very limited time and needed to get this done, but I am happy to answer any questions!

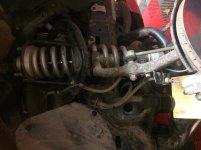
Here is a picture of the suspension. Hard to tell the difference, but now I only have about .5"-.75" of rake, which will level out when I have my usual camping gear in the rear. Perfect for me.
Suspension1.jpg

While I was doing that I decided to swap out to the Wheeler Offroad SuperBumpstops. All in all super easy to swap, but the factory bumpstops are a pain in the ass to get out after 13 years of NE rust. I used a pipe wrench, but even that wasn't foolproof. Got the driver side bumpstop in no problem after I got the old bumpstop out. Passenger side was not as kind. Factory bumpstop made it out 10 turns before the bolt completely sheared off. Was coming out fine and then it just broke. Son of a *****...

I was strapped for time, so I couldnt drill the bolt out. And it is a welded nut on the inside, which makes it more complicated lol. So I cleaned the hell out of the original mount using a grinder, cleaner, paper towels, etc etc etc and put some 5000PSI rated JBweld on the SuperBump and stuck in on there. Used a jack and some wood and compressed the crap out of it for 2 hours and I am letting it "cure" for 24 hours. Seems to be pretty solid so far but I'm keeping an eye on it. If it becomes a problem, I'll do the right thing and drop the LCA to drill the bolt out.

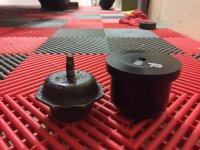
Stock vs. SuperBumps
Bumpstops1.jpg

Installed and initial JBWeld curing.
Bumpstops2.jpg

Exciting day lol...
 

Attachments

  • Suspension1.jpg
    Suspension1.jpg
    129.1 KB · Views: 572
  • Bumpstops1.jpg
    Bumpstops1.jpg
    135.9 KB · Views: 562
  • Bumpstops2.jpg
    Bumpstops2.jpg
    123.8 KB · Views: 572
Mine sheared off too. I cut a hole to get access to the welded nut, cut it off with a Sawzall, beat the remainder out with a chisel, then used a nut and lock washer to put the superbumps on.

Sent from the drivers seat of my 05 4runner.
 
Mine sheared off too. I cut a hole to get access to the welded nut, cut it off with a Sawzall, beat the remainder out with a chisel, then used a nut and lock washer to put the superbumps on.

Sent from the drivers seat of my 05 4runner.

That is my plan C if the current plan B doesn't work haha. Gotta love the rusty northeast right?
 

Members online

Forum statistics

Threads
278,316
Messages
3,554,111
Members
248,016
Latest member
Advally Service

Trending content

Back
Top