Not-So-Krazy Build Thread! (Picture Heavy!!)

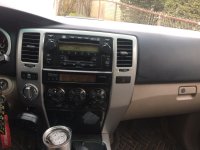
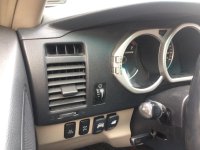
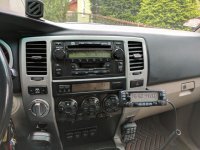
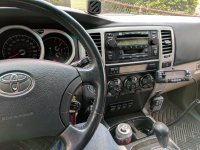
New Dashboard!

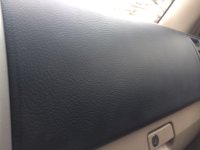
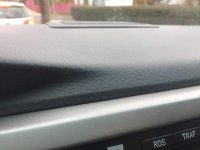
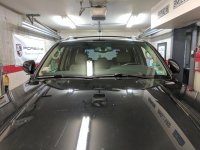
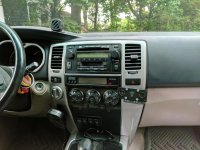
So 10 MONTHS after I initially went to my dealer and ordered the new dashboard via the warranty, I finally got the call that it was in and they were going to replace it. Made an appointment and they said it could take up to two days. Ended up taking them the full two days but it was well worth it.

Here are some pics. It seems to just be a hair lighter in terms of color than some of the existing trim, but you really can't tell unless you are really looking for it. All in all, super pumped that this was finally done. The cracks were looking awful.

Pic1.jpg

Pic2.jpg

Pic3.jpg

Pic4.jpg
 

Attachments

  • Pic1.jpg
    Pic1.jpg
    122.5 KB · Views: 556
  • Pic2.jpg
    Pic2.jpg
    129.4 KB · Views: 543
  • Pic3.jpg
    Pic3.jpg
    131.2 KB · Views: 527
  • Pic4.jpg
    Pic4.jpg
    132.5 KB · Views: 521
Hope everyone had a great Thanksgiving!

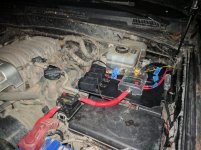
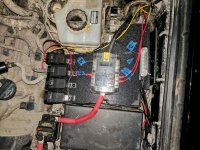
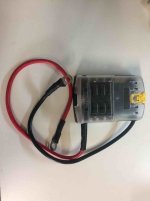
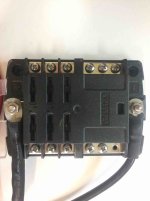
While I was spending some time with my family, my cousin (who has the beastly Grand Cherokee you can see in pics above) and I were talking and stuff. I mentioned I was planning on doing a small fuse block before I add some new accessories and he said oh I have one you can have! And what do you know he gave me a 6 fuse block w/ground bus from blue sea for free! Prewired with 8Ga leads too :D

Now I just need to get some extra wiring and a breaker to finish the job

IMG_3241.JPG

IMG_3242.JPG

IMG_3244.JPG


Sent from my iPhone using Tapatalk
 

Attachments

  • IMG_3241.JPG
    IMG_3241.JPG
    45.7 KB · Views: 457
  • IMG_3242.JPG
    IMG_3242.JPG
    55.2 KB · Views: 466
  • IMG_3244.JPG
    IMG_3244.JPG
    46.6 KB · Views: 467
Fuse Block Parts Incoming!

Received the next pieces of my fuse block wiring cleanup project! Won't be able to knock it out for a few weeks due to the holidays and crunch time at work, but I am freakin pumped! More pics will come as I get more parts and actually complete the project :D

Parts Laid Out.jpg
 

Attachments

  • Parts Laid Out.jpg
    Parts Laid Out.jpg
    136.6 KB · Views: 433
Good looking 4runner! I just ordered the level 8 mk6 wheels, can't wait!

I noticed the garage you work on the 4runner in has the free flow race deck style tiles. How is that with a car jack amd jack stands? Do the jack stands leave marks? Is a creeper easy to use on the floor? Thanks!
 
Good looking 4runner! I just ordered the level 8 mk6 wheels, can't wait!

I noticed the garage you work on the 4runner in has the free flow race deck style tiles. How is that with a car jack amd jack stands? Do the jack stands leave marks? Is a creeper easy to use on the floor? Thanks!

Hey, thanks man! You'll love the MK6s :D

The car has been fine with the jack stands on the tiles. We work on a bunch of cars in there and haven't ever really noticed any marks on the tiles. They are pretty damn sturdy. And I rarely use a creeper so I can't really comment on that, but the one time I used one it was relatively smooth. Finite movements are a bit tricky due to the ridges on the tiles, but moving across isn't bad at all.
 
I have a really simple question that really doesn't warrant its own thread, so I figured I'd post here and hope someone sees it.

I am going to install my CB soon, and I did a test fit last night of the firestik and comet RS mount. I want to put it on my trunk hatch, right by the driver side tail light. I did the test fit, but didn't full tighten down the RS720. When I closed it, it seemed to put a bit of pressure on the tail light, to the point that I feel like one wrong close and it'll crack the tail light housing. Should I simply put it higher up above the tail light? Or is the pressure a non issue? Thanks for any help!

Not sure if someone answered this question for you or not, but I just gave my coax a little more slack so that it went into the hatch just below the tail light.
 
Blue Sea Fuse Block Build

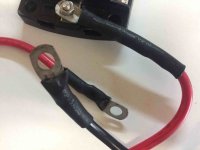
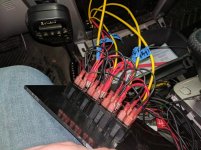
So here is the final build of my fuse block. It definitely isn't the prettiest setup on here, but it is very functional and it works, and that's all that matters to me. It took me almost two days to get everything figured out simply because I went through several mounting iterations. Overall not a fun project, but definitely worthwhile in the long run.

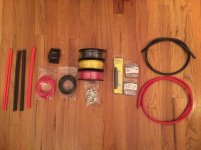
Here are the parts I used. Everything I needed was perfect so I wouldn't change anything here. The only thing I would add would be a nice heat gun if you want to use and bend the ABS mounting plastic. A hair dryer will not cut it. You need some serious heat to bend this stuff and make it easy to work with. Invest in a nice heat gun. Other than that, the parts worked great and it was just about taking the time to put it all together.
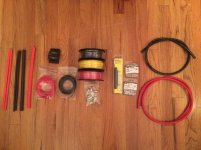
Parts Laid Out.jpg

In order to mount this, I needed some mounting points. These two holes on the fender wall were my primary side mount. I then made a large leg that connected to the left side of the tray I made so it would be supported on both sides.
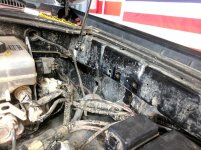
Build1.jpg

This is the tray I made and me testing some fitting. I was trying to figure out how to mount everything and use those side holes. I ended up making a small 90 degree drop bracket that I bolted to the tray.
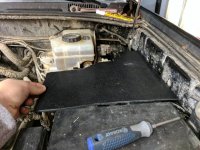
Build2.jpg

I was getting incredibly frustrated with the mounting, so I didn't take a lot of photos. And my phone died and I forgot my charger, so here is the end result.

You can see in the photos below that I made some changes in the design. The right side has the drop bracket bolted to the fender wall. The left side has the leg hidden under the tray. The relays on the left actually screw through the tray and the leg below, mounting it very securely on that side. I tried to do the same thing on the right side but the screws didnt want to bite. So I decided to just bolt it in. Not the easiest thing to remove, but I can remove it in a pinch.

You can also see the breaker mount. It is screwed on to a factory relay box that has nothing in it because I don't have those options on my Limited. That made the battery run really short and easy to manage.
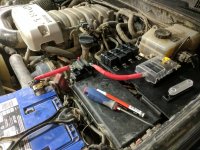
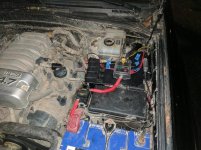
Build3.jpg
Build4.jpg
Build5.jpg
Build6.jpg

Overall, I am very happy with it. It is secure and sturdy and functional, and that is all that matters to me. I would have loved to weld a bracket and stuff for it, but I am on a tight budget and I made it work. I am sure there are things I could have done better. I have some new lights coming in so I am going to wire up the rest of the relays as they come in and put some wire loom on everything.

 

Attachments

  • Parts Laid Out.jpg
    Parts Laid Out.jpg
    136.6 KB · Views: 961
  • Build1.jpg
    Build1.jpg
    142.5 KB · Views: 962
  • Build2.jpg
    Build2.jpg
    138.8 KB · Views: 969
  • Build3.jpg
    Build3.jpg
    141.9 KB · Views: 965
  • Build4.jpg
    Build4.jpg
    138.5 KB · Views: 962
  • Build5.jpg
    Build5.jpg
    140.1 KB · Views: 956
  • Build6.jpg
    Build6.jpg
    140.5 KB · Views: 1,011
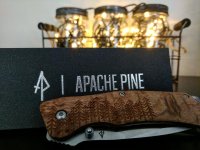
Apache Pine Knife

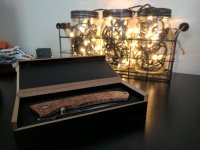
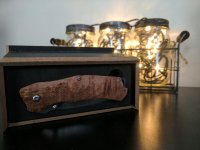
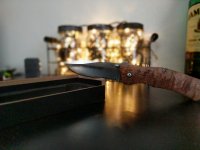
I recently broke my knife (don't ask lol) and I found this cool company called Apache Pine that makes these carved wooden knives. I thought it looked badass so I picked on up and I gotta say, I am impressed so far. Definitely going in my VEDC kit! Here are some pics and a video I made about it for funsies :D


IMG_20161223_131346.jpg

IMG_20161223_131555.jpg

IMG_20161223_211915_918.jpg

IMG_20170104_200924_689.jpg
 

Attachments

  • IMG_20161223_131346.jpg
    IMG_20161223_131346.jpg
    125.3 KB · Views: 959
  • IMG_20161223_131555.jpg
    IMG_20161223_131555.jpg
    127.7 KB · Views: 950
  • IMG_20161223_211915_918.jpg
    IMG_20161223_211915_918.jpg
    121.9 KB · Views: 947
  • IMG_20170104_200924_689.jpg
    IMG_20170104_200924_689.jpg
    135.5 KB · Views: 945
Last edited:
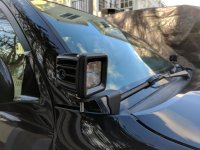
Got my CBI Ditch Brackets installed!

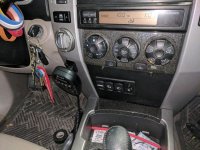
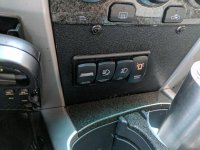
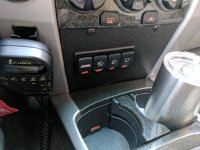
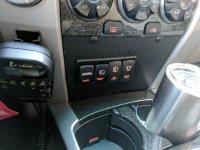
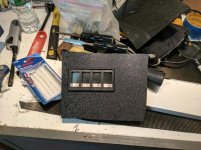
Also finished up my switch panel. Think it came out pretty good. I have switches elsewhere, but I wanted all of my lighting to be in one location. Still don't have all of the lighting installed, but that should happen when I have free time over the next few weeks. Wired everything and have to dremel the dash a bit, but all in all I am really happy with it and it looks like it was meant to be there.

The panel itself is made out of ABS plastic and slightly bent to fit the curve. Wasn't really hard to do, but it took some figuring out to make it all work.

IMG_20170114_154506.jpg

IMG_20170114_162123.jpg

IMG_20170114_210158.jpg

IMG_20170115_130856.jpg

IMG_20170115_161809.jpg

IMG_20170115_161754_1.jpg

IMG_20170115_161759.jpg
 

Attachments

  • IMG_20170114_154506.jpg
    IMG_20170114_154506.jpg
    129.4 KB · Views: 953
  • IMG_20170114_162123.jpg
    IMG_20170114_162123.jpg
    138.9 KB · Views: 901
  • IMG_20170114_210158.jpg
    IMG_20170114_210158.jpg
    138.2 KB · Views: 903
  • IMG_20170115_130856.jpg
    IMG_20170115_130856.jpg
    138.5 KB · Views: 891
  • IMG_20170115_161809.jpg
    IMG_20170115_161809.jpg
    136 KB · Views: 902
  • IMG_20170115_161754_1.jpg
    IMG_20170115_161754_1.jpg
    135.3 KB · Views: 928
  • IMG_20170115_161759.jpg
    IMG_20170115_161759.jpg
    132.2 KB · Views: 935
Lighting Upgrades!

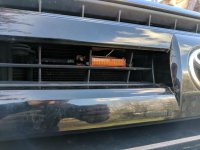
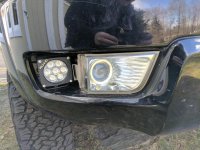
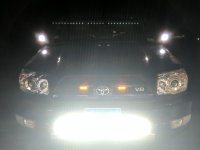
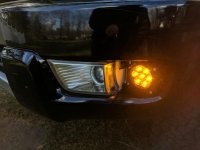
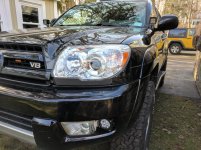
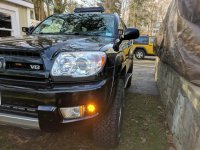
Recently upped my light game with some new lights! Took almost all weekend to get them all in, wired, and ready to go, but it was definitely worth it. Really happy with how it all came out!

The lights added are:

-OZ USA Hyperspots on CBI Ditch Brackets

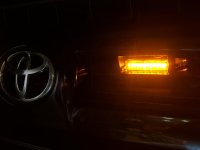
-Marker Lights in the grille

-Run-D Amber LED Fog Lights where old turn signals used to be

Only thing left to do is to make a front fascia/cover for the amber fog lights so they look a bit more factory! Here are some pics!

IMG_20170129_112344.jpg

IMG_20170129_112420.jpg

IMG_20170129_112350.jpg

IMG_20170128_221033_284.jpg

IMG_20170129_112629.jpg

IMG_20170129_112432.jpg

IMG_20170129_112635.jpg
 

Attachments

  • IMG_20170129_112344.jpg
    IMG_20170129_112344.jpg
    124.5 KB · Views: 945
  • IMG_20170129_112420.jpg
    IMG_20170129_112420.jpg
    127.6 KB · Views: 915
  • IMG_20170129_112350.jpg
    IMG_20170129_112350.jpg
    134.3 KB · Views: 908
  • IMG_20170128_221033_284.jpg
    IMG_20170128_221033_284.jpg
    149.8 KB · Views: 915
  • IMG_20170129_112629.jpg
    IMG_20170129_112629.jpg
    121.3 KB · Views: 913
  • IMG_20170129_112432.jpg
    IMG_20170129_112432.jpg
    141.1 KB · Views: 892
  • IMG_20170129_112635.jpg
    IMG_20170129_112635.jpg
    140 KB · Views: 883
Filmed a rig tour!

Rotated my tires with the rearward cross. Super easy to do by myself lol. Finally finished up all of the work I think I needed to do and then BAM, leaking CV....

:wtf:

It's the name of the game I guess. Now I just need to fix that up and finish up the planning I am doing for a long term road trip through Canada. Hopefully that'll happen in a few months! :D

In the meantime, here are some photos that I thought were pretty cool and a tour of my own rig I did for funsies. Would love to hear some feedback cause I'm always trying to improve my filming and editing!

IMG_20170128_001302.jpg

IMG_20170204_184833_575.jpg

IMG_20170207_094503_087.jpg


Attachments

  • IMG_20170128_001302.jpg
    IMG_20170128_001302.jpg
    95.8 KB · Views: 1,079
  • IMG_20170204_184833_575.jpg
    IMG_20170204_184833_575.jpg
    139 KB · Views: 856
  • IMG_20170207_094503_087.jpg
    IMG_20170207_094503_087.jpg
    138 KB · Views: 870
Last edited:
Recently upped my light game ...
238131d1486513832-not-so-krazy-build-thread-picture-heavy-img_20170128_001302.jpg
-Marker Lights in the grille

Hi Krayziekid, I like the look of these marker lights. I'm considering using possibly a few of them on each side next to my headlights as daytime running lights, to work like the DRL/turn signals on the 5th-gen 4Runners and 2nd-gen Tacoma's (examples below). However, I don't know how bright they actually are.

How visible are yours during the day compared to the ones on the 5th-gens and the second-gen tacomas like these below?
Do you think 2 of them on the left and two on the right would be as visible as those below?

Thanks in advance.

fsdslkqP_Ir0WQ62-U1a9RqpLEh4rJium_LX0m1D_6tYslozEGZqolI8gbaIEWXTmJodWvSTyFuDxcnF5qM-a73Ubc31Zar1KiFVjlvq1kNAoDhtVTrC21lNO-5Dcf3G4AtDbgFh1W5_pTjzqZc3tXmeFBF1MwxLCSjW6dYlA28M8GcLQ_xH6wUCYhProPEWIsV1643EDsDfpuUxGvxNa1kD1_TE9WgdZ_M3Pe7OIvBtWtVrMeZP7fSmlgOa_1Uf5hnl84PdpafqvQjQAqIfJ8q-l8tgiRDnyBuxFvjS9_Vb_lID4Iz7ukSxIkPYW7VniyAW7SZ4Oxj3r23d4CH_1uS6iXpS44lpIZzFBhyUcBPI45FogCLF9RHhZeHdkXzmkVQ4KPoQPkQx5BgsW1K8_s8Ejz1F8nNFRtjXL9u3UsQ9C2xjx7xC4qaJsMby4b8zsulKw-Vq5x48AhLtTvPVNmg2o7LgoB9am_XTsCWISJXgBQI20mpmwdXNtwY32e_5ZjZIXabMzLywHhEdicshIR7VIB7ulJDhox6r-yGSutK0UIDxjOtU-e_RTmq6goZhDL--NyuLAqWnA88-HtVlPCE5oynk5HNLePGM7J4ZRe-u2Jqj5DwG=w570-h759-no


A2F-HS2psrRnPUkIo-UfpWZGywrLVBmoMm7vD5AcCS2i35sPTlygWJoViHexnACED2MJTdAwk6ZucHfw0_vXQGyNUGJteZ-VqrwIBGcSDhB3wFjaiSUpal1ksp05yTFEuhB0dJAGErs5Ms-QBAhT1gcLu30GZL8aLbCUB9ePHuBTA3-xqG_53ZiiZeRgmSIkEyFNTfloNaFc9Xqy0auPGF_XC7bVJLx8BZLHGrdUrHA9lyyHP9uPl_osJh6GZqSgmnXbrZT5Ja-KJrK7RStSHkpxKc5Y_FpMaQ1mNBexSFQEhJDtK23aSlecQwOSZXDIZX31bwob8rk_YGhqPdKrf4sRj1YFYIBN_a88bmX1Xg1bORe4TianxyRobhZ-v0KPqq5_GmOP9f9uQFZ4NLY4wwGTW8yio7iX9QvsVXWeVi8YSNkN0zyrmQpur_wwPydSxEw1rxd8Kk3PcP9TBtiOshogY-gof2WXNQhN_VYZ_5blMlXWNttl5upLpp2WzMX9bg0JUhZGSaRllrSDfwPx3nxcoxkkaevD5bZXwBnVO3OBau_OyU82L9tXBOW610lLLCbJfb--i6hvfXVwr5wUIgO-Fc-SVaIsSjWc2UKULpVCSxPyUcMb=w1018-h759-no
 
Hi Krayziekid, I like the look of these marker lights. I'm considering using possibly a few of them on each side next to my headlights as daytime running lights, to work like the DRL/turn signals on the 5th-gen 4Runners and 2nd-gen Tacoma's (examples below). However, I don't know how bright they actually are.

How visible are yours during the day compared to the ones on the 5th-gens and the second-gen tacomas like these below?
Do you think 2 of them on the left and two on the right would be as visible as those below?

Thanks in advance.

fsdslkqP_Ir0WQ62-U1a9RqpLEh4rJium_LX0m1D_6tYslozEGZqolI8gbaIEWXTmJodWvSTyFuDxcnF5qM-a73Ubc31Zar1KiFVjlvq1kNAoDhtVTrC21lNO-5Dcf3G4AtDbgFh1W5_pTjzqZc3tXmeFBF1MwxLCSjW6dYlA28M8GcLQ_xH6wUCYhProPEWIsV1643EDsDfpuUxGvxNa1kD1_TE9WgdZ_M3Pe7OIvBtWtVrMeZP7fSmlgOa_1Uf5hnl84PdpafqvQjQAqIfJ8q-l8tgiRDnyBuxFvjS9_Vb_lID4Iz7ukSxIkPYW7VniyAW7SZ4Oxj3r23d4CH_1uS6iXpS44lpIZzFBhyUcBPI45FogCLF9RHhZeHdkXzmkVQ4KPoQPkQx5BgsW1K8_s8Ejz1F8nNFRtjXL9u3UsQ9C2xjx7xC4qaJsMby4b8zsulKw-Vq5x48AhLtTvPVNmg2o7LgoB9am_XTsCWISJXgBQI20mpmwdXNtwY32e_5ZjZIXabMzLywHhEdicshIR7VIB7ulJDhox6r-yGSutK0UIDxjOtU-e_RTmq6goZhDL--NyuLAqWnA88-HtVlPCE5oynk5HNLePGM7J4ZRe-u2Jqj5DwG=w570-h759-no


A2F-HS2psrRnPUkIo-UfpWZGywrLVBmoMm7vD5AcCS2i35sPTlygWJoViHexnACED2MJTdAwk6ZucHfw0_vXQGyNUGJteZ-VqrwIBGcSDhB3wFjaiSUpal1ksp05yTFEuhB0dJAGErs5Ms-QBAhT1gcLu30GZL8aLbCUB9ePHuBTA3-xqG_53ZiiZeRgmSIkEyFNTfloNaFc9Xqy0auPGF_XC7bVJLx8BZLHGrdUrHA9lyyHP9uPl_osJh6GZqSgmnXbrZT5Ja-KJrK7RStSHkpxKc5Y_FpMaQ1mNBexSFQEhJDtK23aSlecQwOSZXDIZX31bwob8rk_YGhqPdKrf4sRj1YFYIBN_a88bmX1Xg1bORe4TianxyRobhZ-v0KPqq5_GmOP9f9uQFZ4NLY4wwGTW8yio7iX9QvsVXWeVi8YSNkN0zyrmQpur_wwPydSxEw1rxd8Kk3PcP9TBtiOshogY-gof2WXNQhN_VYZ_5blMlXWNttl5upLpp2WzMX9bg0JUhZGSaRllrSDfwPx3nxcoxkkaevD5bZXwBnVO3OBau_OyU82L9tXBOW610lLLCbJfb--i6hvfXVwr5wUIgO-Fc-SVaIsSjWc2UKULpVCSxPyUcMb=w1018-h759-no

Hey man,

So they aren't incredibly bright, but they are certainly noticeable from head on. To be perfectly honest, no, I don't think two sets on the left and two on the right will put out the same amount of light. These are just small LEDs that aren't really meant to be blinkers or draw a significant amount of power. Hell, the wiring that comes of off it is like 22ga or something crazy thin. A lot of people wire them to their parking lights and just be done with it. If you want to use them as blinkers, I'm not 100% sure I can help you with that. Sorry!
 
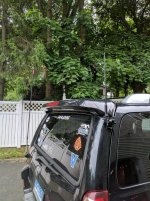
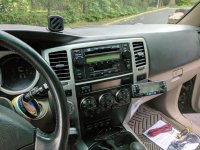
Haven't updated this in a while, but I just installed my ham radio in to the 4Runner. Wasn't gonna pull the trigger on this for a while, but hamvention was a weekend or two ago and I got a hell of a deal on this Icom 2730a. Super happy with it and can't wait to take it out on the roads and trails and make some contacts!

1.jpg

2.jpg

3.jpg

4.jpg

5.jpg
 

Attachments

  • 1.jpg
    1.jpg
    135.5 KB · Views: 676
  • 2.jpg
    2.jpg
    144.6 KB · Views: 677
  • 3.jpg
    3.jpg
    138.9 KB · Views: 675
  • 4.jpg
    4.jpg
    134 KB · Views: 746
  • 5.jpg
    5.jpg
    138.3 KB · Views: 728
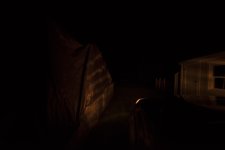
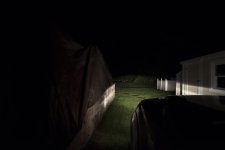
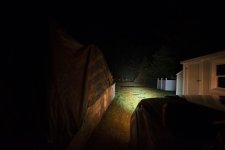
Also, I've been asked a few times if I could do a comparison between some of the lights I have on the rig. Finally had my DSLR with me last night so I could do a real comparison.

All of these shots were taken on my Nikon D750 at 14mm. F/2.8, ISO1250, 1/30s. Tried to get it fairly close to what my eye was actually seeing. Not perfect, but definitely close.
Standard Daytime Running Lights + Marker Lights
DRLs.jpg

Low Beams
Low Beams.jpg

High Beams
High Beams.jpg

Windshield Hyperspots w/Amber Cover (DRLs too)
DRLs + Markers.jpg

Amber Fog Lights in bumper (DRLs too)
Amber Fogs.jpg

Bumper LED Light Bar (DRLs too)
Light Bar.jpg

All Aux lights (DRLs too)
All Lights.jpg
 

Attachments

  • Low Beams.jpg
    Low Beams.jpg
    65.8 KB · Views: 700
  • High Beams.jpg
    High Beams.jpg
    72.7 KB · Views: 714
  • DRLs.jpg
    DRLs.jpg
    45.9 KB · Views: 725
  • DRLs + Markers.jpg
    DRLs + Markers.jpg
    48.6 KB · Views: 704
  • Amber Fogs.jpg
    Amber Fogs.jpg
    78 KB · Views: 726
  • Light Bar.jpg
    Light Bar.jpg
    72.2 KB · Views: 715
  • All Lights.jpg
    All Lights.jpg
    85.6 KB · Views: 713
Sweet build you've got! Getting some ideas for my rig too like the panel under the HVAC display.
Just wondering, is the sub swap relatively easy to do, wiring wise? Can't find much info on this, and i'm having the same issue you had with the rattling..
 
Sweet build you've got! Getting some ideas for my rig too like the panel under the HVAC display.

Just wondering, is the sub swap relatively easy to do, wiring wise? Can't find much info on this, and i'm having the same issue you had with the rattling..

Haha thanks! I freakin love that switch panel.

And wiring wise, it could not be easier to swap that sub. I don't know which sub you are going with, but if you do the same sub I did, it is literally just getting to the sub box (the hardest part), unscrewing the sub, snipping the connectors off, stripping the wire and putting a new female spade connector on it, and then plugging it back in. I highly recommend it and it is super easy. No need to mod the sub box either like with other subs that people have swapped.

And you can always test the sub and make sure you wired it correctly before putting it all back together. Do it!
 

Members online

Forum statistics

Threads
278,316
Messages
3,554,109
Members
248,016
Latest member
Advally Service

Trending content

Back
Top