Oil Change 5th Gen: How To- LOTS of PICS!

I don't like changing a hot engines oil because I usually end up getting said oil on my skin.

I once overheard a fleet maintenance manager argue with a mechanic to start the engine for 1 min to suspend any sludge before an oil change. My takeaway after having seen the inside of some high mileage engines is that baked on crud can only be physically removed.

My normal practice is to change it the morning after it ran the day before or else in the evening after it ran in the morning. Ambient temps from 70 - 90 F.

I don't think engines have "feelings". They don't change their inanimate state by anything other than off to on, to cold, to fast, to hot, to hot + to dirty = death.
 
Personally I prefer to let it cool for an hour or so before attempting to touch any hot drain plugs or oil filters. Also gives the oil that is up in the engine time to drip down into the pan for draining.

Especially with this thin 0w20 oil, I really don't think it makes that much difference if it is cold or hot, the oil is thin enough to drain well either way.

On my other vehicles that take a heavier grade of oil, yes I make sure they are warm. But I have changed the 4Runner completely cold a couple times. Drained out fine, just takes a little longer.
 
Last edited:
Excellent thread. One of the best I've seen. Thank you for the considerable time and effort that you put into this.

But my God, my God. What the hell was the genius (idiot?) thinking who designed this oil change system. Nothing like needlessly complicating one of the most basic and essential maintenance requirements.


I couldn't agree more !!!!!

I had an '07 4R that took maybe 1/2hr to pull into the garage, drain the oil, change the filter and clean up.
Anyone who has had an '07 or similar knows just how much nicer that one was than the '14. I won't go into the entire list of benefits of the '07.

This '14 POS is miserable to change oil on. Some moron really wasn't thinking when designing this one.
If I had known the issues and items that Toyota has cheapened on the '14, I never would have bought it......and I thought I had done enough homework---dah :redbrick:
 
Well I'm no longer an oil change virgin on this beast. While there was plenty of lube it was a bit rough and some things were too tight. :frisky:

But enough with the metaphors... First of all great write up by Antman and a must read for those wanting to spend some quality time with their ride. Second let me say, as an engineer and reasonable mechanic, there is a very special place in hell for the automotive engineer at Toyota who signed off of this design and procedure. Hopefully he spends all of eternity with basic tools and overtightened cartridges doing oil changes on his design! :flame:

Anyhow my notes and issues roughly in order:

  • At least in Edmonton the best deal on oil is the Toyota brand. Gateway was reasonable and the cheapest on the filter cartridge kit, they even threw in the little oil pan drain plug washer. About $50 tax in for 7L & filter.

  • Do yourself a favor and *do not* buy the 'Fram' branded 65-67mm oil filter wrench socket from Crappy Tire or elsewhere. Take a bit of time and get a true 64mm from online or try finding one somewhere in town. I had no luck with Napa, Partsource, PrincessAuto, or anywhere else open on Sunday (more on this later). :gun6:

  • I had no issues with the tabs on the stock forward skid plate so left them alone.

  • The oil pan drain plug washer can get a bit stuck to the pan. Needed a little coaxing to flip off.

  • The item that turned this pleasant, late Sunday AM, diversion into a bit of a nightmare was the dammed cartridge housing. If they were going to have this reuseable housing why have a 64mm, 14 side, disposable style filter grip? Why not something more standard and with a nice way of applying torque.

    Anyhow this whole thing is very susceptible to being overtightened and if it is stuck, because it is not disposable, you cannot go medieval on it with a wrench or screwdriver puncture to get some solid leverage. The 2 size, tapered "Fram" socket I was referring to earlier kept camming out and was not really biting much on the 64/65mm flats. Thus I took about 3h calling and driving around on Sunday to try and find a true 64mm; no luck. I came home with and assortment of wrenches and "universal" (read useless) sockets.

    Before going to work with the wrenches I took a hacksaw to the 65-67mm "Fram" and very carefully cut off about 0.5cm to lose most of the 67mm and have it seat better on the 64mm flats. It still slipped but it was now becoming apparent this was in part due to the last stealership (Mayfield, never buying there again) monkeys who had worked on it. It was over tightened. The metal tab that keeps it from vibrating off was about 30 degrees past the nub. Possibly a true 64mm would have had enough grip to break it loose but it was no go with anything I had or could get ahold of.

    Amongst the filter wrenches I had grabbed while trying to find a true 64mm was a smaller one with reasonably short handles from Princess Auto. First I took off that metal spring tab that holds the housing from rotating past the nub (didn't want it in the way or to damage it). After many minutes of teasing and trying to find a reasonable grip on the housing that would not slip, gouge, or snap things off I finally broke it loose. After that my modified Fram was good enough to keep it going.

  • After the above when I put the the housing back on I just got the tab past the retaining nub and pretty much left it at that. It's probably not quite 18ft/lbs (backed it off a bit after seeing where 18 put it position wise) but "hand snug".

  • The Canadian model has no oil change service counter to reset. Don't know why.
 
Great write up, thanks. The bad news is that I just went from the easiest oil change I could imagine (on my 4Gen V6 where I would crawl under the vehicle do drain the oil, change the filter which was accessible from under the hood, refill the engine with oil and be done in under 15 minutes) to a most complicated oil change I've come across (well, maybe Lexus LFA is more complicated but I don't think I'll ever be doing those). The good news is that I'll only have to be doing oil changes every 10000 miles and the 5Gen uses the same oil filter as my IS350 so I won't have to stock two different filters.
 
Warming engine up before oil change is done in order to stir up possible sediment and particles. Little to do with viscosity.
 
Take heed on Antman's early advise as to jotting down notes (like torque values; especially if your anal in its application, like me) or you make sure you can access T4R.org BEFORE you start to change your oil. You never know when the site will be down. :doh: Finishing up my oil change this morning (day 2), now that I've verified torque values.
 
Plastic panel plug

Where can I get the plastic panel plug for the front panel? Do I have to get it from Toyota? Any idea the cost? Why in the world would they just not use a bolt like the rest in the first place.
 
Question for those with skids, does the access door on the RCIs (or other vendors) provide enough clearance to comfortably drain the oil and change the filter without it getting everywhere? Due to the type of off-roading I do, I won't have a huge need for skids. However, if it speeds up the process, I might consider getting an aluminum front plate.

Keep in mind that I have yet to change the oil in my wife's new 14 SR5. Just by looking at the access door in the picture, it seems like it might be cramped.

Thanks for any info, and awesome thread!
 
Second let me say, as an engineer and reasonable mechanic, there is a very special place in hell for the automotive engineer at Toyota who signed off of this design and procedure. Hopefully he spends all of eternity with basic tools and overtightened cartridges doing oil changes on his design! :flame:

[/LIST]

Amen to that!

Without Antman's thread on this I would still be on my creeper looking at the underside of my T4R saying WTF!
 
This thread is WAY to indepth and drawn out. Here is the correct oil change procedure.

1. get in your 4 runner and get her started up.
2. wait a minute or 2 for the oil pressure to come up and everything gets a nice fresh coating of oil.
3. Take it for a quick test drive
4. while on the test drive stop at your local automotive repair facility and ask them to change to oil.
5. Then pay them the small fee they are asking to perform the service. after all you did drink their free coffee and used their Wi-Fi
6. Enjoy your drive back to your house. feel free to take a few less traveled detours.
7. Also feel free to mock any of your neighbors if you see them laying on their back making a mess in their driveway while trying to save 20 bucks. Just know they will likely make a mess inside their truck to while transporting the used oil to a local waste oil facility.
 
Access Oil Filter Without Removing Skid Plate

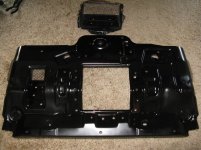
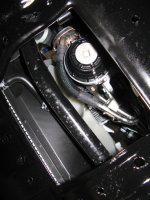
I'm Just gonna throw this out there for the mechanical guys who change their own oil on a regular basis. Having to remove the skid plate EVERY time you change the oil filter can be a hassle if you don't have a lift in your garage. So I made a slight modification to my skid plate in order to access the filter canister with the skid plate in place. At my first oil change, I removed the skid plate and completed the oil and filter change. Before I reinstalled the skid plate, I drilled out the 16 spot welds holding the air dam to the center of the skid plate. Once this was done, I found surface rust between the bottom of the skid plate and the lip of the air dam. This was a perfect opportunity to undercoat the skid plate and the seal the exposed metal. Please note the pictures below, nothing is affected by removing the wire mesh air dam from the skid plate except now you can easily access your oil filter without removing the plate. Maybe I could sell this idea to Toyota ???
 

Attachments

  • Skid Plate 001.jpg
    Skid Plate 001.jpg
    137.3 KB · Views: 1,343
  • Skid Plate 003.jpg
    Skid Plate 003.jpg
    133.8 KB · Views: 1,616
I'm Just gonna throw this out there for the mechanical guys who change their own oil on a regular basis. Having to remove the skid plate EVERY time you change the oil filter can be a hassle if you don't have a lift in your garage. So I made a slight modification to my skid plate in order to access the filter canister with the skid plate in place. At my first oil change, I removed the skid plate and completed the oil and filter change. Before I reinstalled the skid plate, I drilled out the 16 spot welds holding the air dam to the center of the skid plate. Once this was done, I found surface rust between the bottom of the skid plate and the lip of the air dam. This was a perfect opportunity to undercoat the skid plate and the seal the exposed metal. Please note the pictures below, nothing is affected by removing the wire mesh air dam from the skid plate except now you can easily access your oil filter without removing the plate. Maybe I could sell this idea to Toyota ???

Very nice! You beat me to it....

Was gonna try that with nutserts inserted in the drilled out spot welds to reattach the air dam and/or take out a little more and fabricate something that can be removed easier than the whole skid.
I've only got 900 miles on my beast so my mod will be awhile.

Nice Job!
 
Please note the pictures below, nothing is affected by removing the wire mesh air dam from the skid plate except now you can easily access your oil filter without removing the plate. Maybe I could sell this idea to Toyota ???

I like your idea in some ways. Bet the dealer lube techs would love it, but wonder how air flow is affected with the air dam gone?

I'd bet a buck that in an engine warranty situation Toyota would dishonor the claim.
 
Thank you [MENTION=65614]Antman[/MENTION]! This thread saved me some time today. I can't believe what a pain in the ass these 5th gens are to change oil. At least you already had it figured out.

This should be a sticky!
 
64mm oil wrench

I had a hard time finding a good quality 64mm oil filter wrench. When I attempted my first oil change, I purchased an oil filter wrench from the dealer (not the actual Toyota tool, just a standard wrench). It kept on slipping. For my second oil change, I went to NAPA and found the perfect tool, NAPA part number 77-3152. Just under $30.00 (not the cheapest solution I'm sure).

Cheers,

John
 
Most excellent write-up [MENTION=65614]Antman[/MENTION]!!!!!

Finally got done with the "free" factory oil changes, was nice to refer back to this thread to see what I was going to be up against. I see what you mean about those tabs, I lopped off those babies straight away.................

Very much appreciate your efforts, thank you!
 

Members online

No members online now.

Forum statistics

Threads
278,315
Messages
3,554,125
Members
248,016
Latest member
Advally Service

Trending content

Back
Top