Papabeach's Mod Thread

GL4 for the win! Shifts way better. The Amsoil product is great and so is redline MT90.

GL5 won’t hurt it but it will make it shift worse. Only hypoid gears need GL5. Helical gears in trans and tcase can use it or GL4 happily.

I have been running Redline MT90 for years and been happy. With my recent crawl box woes my rear transmission seal failed and I ran the tranny dry and am sure I roasted some bearings…I have done two short interval fluid changes (with Redline) in hopes of cleaning things up and hoping I might salvage some impending disaster. (I have a bearing noise on cold starts that goes away when you step on the clutch and comes back when you take your foot off. After driving around for a bit it goes away). Maybe I will run this GL5 for a month or so then switch to the Amsoil GL4 and see if anything changes. I actually thought things shifted nicer after replacing with GL5 but perhaps that’s because the other stuff was dirty, though it was still somewhat clear. Time will tell…Hopefully my bearing noise goes away!!! If I need to rebuild my tranny I need to start looking for a shop. I know Marlin has a good reputation but their turn around is terrible…I would have to source a spare transmission to send them just to make this make sense…hoping I can find something local if I need to go this route.
 
Not super exciting but I wanted to be able to measure voltage when using the rear aux plug while camping to make sure I don’t drain the battery. Found this nice 3D printed rear power panel that came pretty-wired…too easy to say now. I simply wife’s to the existing factory wiring…not expecting any high current draw here. Too easy!

Rear Power Panel | Drew Aufhammer 3D Printing

Might need to try this with my rig? Great idea especially when spending days out in the woods!
 
I have been running Redline MT90 for years and been happy. With my recent crawl box woes my rear transmission seal failed and I ran the tranny dry and am sure I roasted some bearings…I have done two short interval fluid changes (with Redline) in hopes of cleaning things up and hoping I might salvage some impending disaster. (I have a bearing noise on cold starts that goes away when you step on the clutch and comes back when you take your foot off. After driving around for a bit it goes away). Maybe I will run this GL5 for a month or so then switch to the Amsoil GL4 and see if anything changes. I actually thought things shifted nicer after replacing with GL5 but perhaps that’s because the other stuff was dirty, though it was still somewhat clear. Time will tell…Hopefully my bearing noise goes away!!! If I need to rebuild my tranny I need to start looking for a shop. I know Marlin has a good reputation but their turn around is terrible…I would have to source a spare transmission to send them just to make this make sense…hoping I can find something local if I need to go this route.

I have a good transmission rebuild guy up in my area. He just did mine.
 
I have a good transmission rebuild guy up in my area. He just did mine.

Lots of questions…Would you mind telling me what all was replaced and ballpark cost? Did you notice much of a difference after putting it back in? What led you to having it rebuilt?
 
I actually thought things shifted nicer after replacing with GL5 but perhaps that’s because the other stuff was dirty, though it was still somewhat clear. Time will tell…
If the shifting is good with the GL5 in there, just keep it. It will be *slightly* better for the gears and bearings. If you have any synchro issues, go back to the GL4 fluid.

Subarus and my Alltrac have to use a GL5 fluid in the manual transmissions - they share fluid between hypoid angle drives/differentials and the synchros... So it is done all the time. (I just use regular Valvoline 75w90 GL5 in those, changed often)

-Charlie
 
Last minute Tune Ups for camping season!

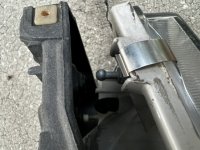
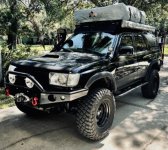
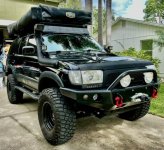
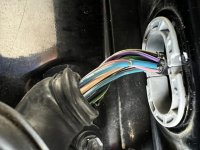
The Front Runner RTT quick release mounts paid off! 10 min install with the help of a friend this year. No adjustment needed. Simply incredible! Getting things aired out, batteries charged/replaced and getting excited. Fixed my drivers headlight housing where the pivot ball had popped out of its 20 year old plastic holder. Simply removed lamp/housing from vehicle, popped plastic clip out, placed over pivot ball and clipped back into housing. We will see how long this lasts. I also spent waaaay too much time trying to figure out why my third brake light wasn’t working. Found one cracked wire along the way in the infamous rear hatch area. Low and behold…I am an idiot. It is a third brake light not tail light! Once I tossed a dumbbell on the brake pedal I magically had current and simply needed a new bulb which I had laying around. Really felt dumb with this one…but I did find the one cracked wire and repaired it so it wasn’t all for nothing. 1st trip is next weekend!
 

Attachments

  • 46C9F07E-86C0-46CF-BD87-7C131711532A.jpeg
    46C9F07E-86C0-46CF-BD87-7C131711532A.jpeg
    98.6 KB · Views: 555
  • D867304F-B687-4A84-A7F9-EA1CA03BCF7A.jpeg
    D867304F-B687-4A84-A7F9-EA1CA03BCF7A.jpeg
    99.3 KB · Views: 577
  • DB1CAA08-1E22-4447-9C83-0CF802A376FB.jpg
    DB1CAA08-1E22-4447-9C83-0CF802A376FB.jpg
    94.5 KB · Views: 566
The Front Runner RTT quick release mounts paid off! 10 min install with the help of a friend this year. No adjustment needed. Simply incredible! Getting things aired out, batteries charged/replaced and getting excited. Fixed my drivers headlight housing where the pivot ball had popped out of its 20 year old plastic holder. Simply removed lamp/housing from vehicle, popped plastic clip out, placed over pivot ball and clipped back into housing. We will see how long this lasts. I also spent waaaay too much time trying to figure out why my third brake light wasn’t working. Found one cracked wire along the way in the infamous rear hatch area. Low and behold…I am an idiot. It is a third brake light not tail light! Once I tossed a dumbbell on the brake pedal I magically had current and simply needed a new bulb which I had laying around. Really felt dumb with this one…but I did find the one cracked wire and repaired it so it wasn’t all for nothing. 1st trip is next weekend!


Bra your truck is clean. Really like what you have done to your truck. Basically I’m in the process of what you already done with the truck. I’m just waiting patiently for my truck to come back to me and I can start putting all my parts on so I can enjoy it. Because I didn’t have my truck for a month, I will probably just enjoy it for maybe 2 weeks, then get dirty and start installing. Good job and thank you for your documentation, that’s why I am subbed to your build.


Sent from my iPad using Tapatalk
 
Big upgrade in shade coming!


Oh 270. I was looking into a different brand and the mounting of the awning would have to be high and I wouldn’t be able to install the L side of the tent because the awning would be blocking the hole for the poles.


Sent from my iPhone using Tapatalk
 
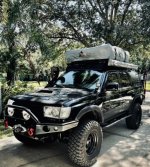
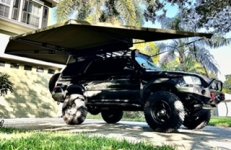
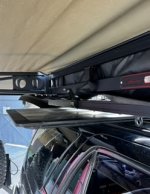
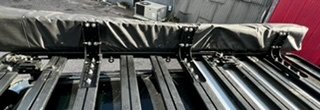
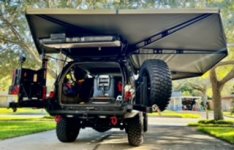
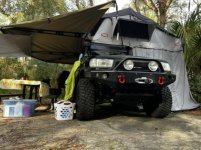
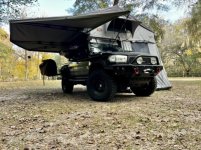
Bush Company 270XT Max awning install on a custom Front Runner roof rack. Pretty excited I can access my table under the rack and still open the hatch! Shade for days!!!
 

Attachments

  • 32AFE3FF-2B93-4CE7-8782-1DFFE7EBE469.jpeg
    32AFE3FF-2B93-4CE7-8782-1DFFE7EBE469.jpeg
    42.3 KB · Views: 583
  • F9E8DB10-1CD3-4BF2-8431-756C124C035F.jpeg
    F9E8DB10-1CD3-4BF2-8431-756C124C035F.jpeg
    31.6 KB · Views: 571
  • 5745F23C-0EB3-4BE4-9C17-537BC456FE1B.jpeg
    5745F23C-0EB3-4BE4-9C17-537BC456FE1B.jpeg
    22 KB · Views: 566
  • 29AF6E1A-A475-4554-B8E1-6D5622A3ED4A.jpeg
    29AF6E1A-A475-4554-B8E1-6D5622A3ED4A.jpeg
    34.1 KB · Views: 590
Last edited:
Bush Company 270XT Max awning install on a custom Front Runner roof rack. Pretty excited I can access my table under the rack and still open the hatch! Shade for days!!!


Did you source this locally or from South Africa?


Sent from my iPad using Tapatalk
 
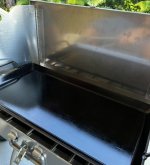
Loving the new awning! Gray to Black!!!! Woohoo. Thumbs up for a new Partner Steel Stove and freshly seasoned griddle.
 

Attachments

  • 72478D5A-B6DB-4F29-9B14-D36BC82D1A0E.jpg
    72478D5A-B6DB-4F29-9B14-D36BC82D1A0E.jpg
    80.4 KB · Views: 436
  • 1CB6AAFC-F1BB-448D-852A-E01ACDC6E39B.jpg
    1CB6AAFC-F1BB-448D-852A-E01ACDC6E39B.jpg
    75.2 KB · Views: 448
  • 54A06823-A170-422D-B4EA-D75C8839A8B0.jpg
    54A06823-A170-422D-B4EA-D75C8839A8B0.jpg
    60 KB · Views: 415
  • F384A73E-06B7-4393-BC51-9541300C1EFE.jpeg
    F384A73E-06B7-4393-BC51-9541300C1EFE.jpeg
    101 KB · Views: 410
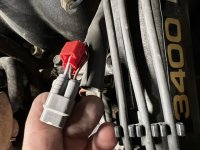
Finally got my first P0325 code for one of the knock sensors. I couldn’t hear any knocking and it only happened above 30MPH while driving and wasn’t reproducible revving the motor on the driveway after clearing the code. I already run high octane (sc’d) and had hoped I got a bad tank but it has been with me for multiple fill ups. It really sucks when the computer pulls timing and dumps gas….total dog. Had to stay out of boost and accelerate really slow.

So…rather than a half day of taking the supercharger and everything else off to replace the sensors and wire harness I jumped the wires and l hope for the best. Anybody done this and had a bad outcome? Hopefully I am not covering up a real problem…
 

Attachments

  • 6EABA670-1D70-43F0-8B5F-333F3F9D4EEB.jpeg
    6EABA670-1D70-43F0-8B5F-333F3F9D4EEB.jpeg
    92.9 KB · Views: 314
Been a busy camping season…finally gave up and paid for some help with maitenance. I like to do my own work but it is what it is…
-new rear wheel cylinders (both were leaking)
-new drums
-new shoes
-right rear passenger wheel bearing and inner/outer seals
-topped off diff fluid
-flushed the brakes

Life is good! Feel silly to have put this off and glad to have paid for it…had some drinks and watched some Olympics!
 

Attachments

  • 57549EF7-78BE-43EB-A996-67E7823A3F38.jpg
    57549EF7-78BE-43EB-A996-67E7823A3F38.jpg
    73.2 KB · Views: 255
Last edited:

Members online

No members online now.

Forum statistics

Threads
278,306
Messages
3,554,045
Members
248,016
Latest member
Advally Service

Trending content

Back
Top