Project 88 restore

Awesome Work Sir! looks great you planning to put stripes back on? I painted mine and stripes make it look MUCH better.

No stripes or factory graphics are in the future as of right now. I like the truck as it is, clean…Blue and black with chrome trim.

I will have more pics up soon, once I get some more finish work done. I have been driving it as my daily driver now so, the work has slowed down on the truck due to lack of time:(:
 
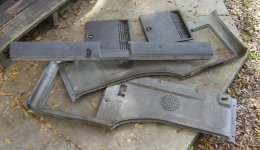
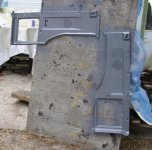
I have been doing some interior work on the truck, refinishing all the plastic panels and such. I am going with SR5 cloth seats with vinyl flooring.
I am redoing the rear speakers at this time too, I will have some more pics tomorrow of the work:)
 

Attachments

  • rear panel refinish 1.jpg
    rear panel refinish 1.jpg
    140.6 KB · Views: 4,530
  • rear panel refinish 2.jpg
    rear panel refinish 2.jpg
    123 KB · Views: 4,450
  • rear panel refinish 4.jpg
    rear panel refinish 4.jpg
    134.2 KB · Views: 4,468
Great work! That's a REAL restoration there! Hey I posted a dash removal "How to" over on my resto post, hope it helps...keep up the great work!
 
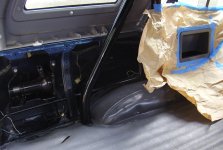
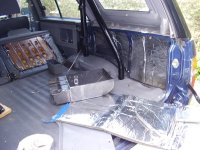
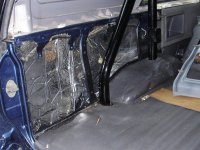
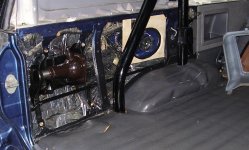
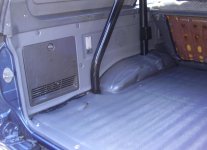
I finished the back right side of the truck today, here is some info and a few pics of the work....
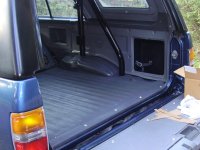
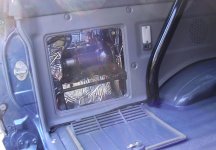
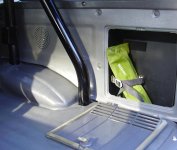
I went to the junk yard this morning and salvaged two 2nd Gen plastic stow compartments. My 88 did not have any and I do not think the 4Runner came with them until the 1990s. I wanted a clean dry place to stow away the factory tool kit and other small items this is why I retro fitted the 2nd Gen plastic compartments.

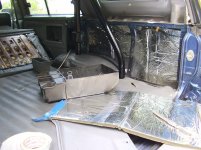
If you have been fallowing this thread you know I had a spray in bed liner sprayed throughout the entire inside of the truck before putting back in the interior. I did this to keep things clean, less susceptible to rust, and also as a sound dampening.

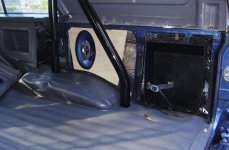
I added some more sound dampening using a light weight, Mylar faced & backed, high density foam product inside the bed sides. Once all that was installed I made a new speaker mount for the right side 6x9 Pioneer speaker.
After fitting the speaker into place I reinstalled the newly painted factory panel and trim using all stainless steel fastners....here are all the pics.

 

Attachments

  • Back interior restro 2.jpg
    Back interior restro 2.jpg
    135.4 KB · Views: 4,563
  • Back interior restro 3.jpg
    Back interior restro 3.jpg
    137.8 KB · Views: 5,245
  • Back interior restro 4.jpg
    Back interior restro 4.jpg
    133.5 KB · Views: 6,910
  • Back interior restro 5.jpg
    Back interior restro 5.jpg
    131.7 KB · Views: 10,377
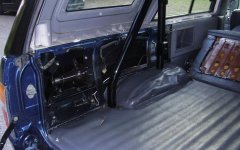
Tomorrow I will do the left side pretty much the same way as the right. I already restored all the original jack and tire removal tools and put them back in place. I have to remove them to insolate with the Mylar foam. The speaker mount will be a bit more challenging on this side because the tire falls steel crank rod rests across the wheel housing.
 

Attachments

  • Back interior restro 1.jpg
    Back interior restro 1.jpg
    138.5 KB · Views: 4,703
Its still looking good. Through in a couple of woofers.

I have my jack stowed away under the drivers side rear seat. The bottom folds up and forward. do the 1st gens have this too?
 
Its still looking good. Through in a couple of woofers.

I have my jack stowed away under the drivers side rear seat. The bottom folds up and forward. do the 1st gens have this too?

The 6x9s punch well enough for me:)

The first Gens have the jack and tire fall steel rod stowed in the left rear near the tail light (see my last pic) the jack tool kit is stowed on the right side.
 
Impressive! A few questions if I may:

1) Did that cargo doofer just bolt right in or did you do a lot of modification? how much did you pay for it? (Prices up here are wicked high)

2) Where did you get the sound deadener? Is it from a music store or constuction place
 
Impressive! A few questions if I may:

1) Did that cargo doofer just bolt right in or did you do a lot of modification? how much did you pay for it? (Prices up here are wicked high)

2) Where did you get the sound deadener? Is it from a music store or constuction place

They install very easy into a first Gen. I will take a nice pic of the part it's self showing how it installs. Since I put in the insulation I had to trim them a bit.
I paid only $5 for them but, I also have a very good relationship with my local salvage yard. You could expect to pay in the $20 or more range for them.

The stuff came from a company that sound proofs and insolates the sleeper cabs of large over the road semi trucks.
The stuff weighs nothing but, works great. It is also used as a thermal insulation.
I had the stuff leftover from when I did my S2000 with it. I did not pay anything for it, everything I got from the installers was cut offs and thrown away.
 
I thought I recognized that stuff .I worked for Freightliner for 16 years until they closed up and went south of the border.You wouldn't believe what they throw away.That was a great idea using the 2nd gen stow compartments.I think it's time for a trip to the local pull a part.Have you got your seats yet.The 2nd gen sr5 seat will fit with very little work.If you're interested let me know and I'll post the link with pics.Great looking 4runner keep us posted.
 
The SR5 seats in the back of the truck now are from the donor truck that the rear clip came from, they are first Gen 1988 SR5 seats. The front seats that I have coming are from an 89 eXtra Cab SR5 pickup. The seats are a match and I do think they will bolt right in. If I have an issue with the install I will post up for help:)

I finished off the left side speaker install today, here are a few pics. The steel rod for the tire fall fits fine now with this speaker mount.
I will have some finish pics of the back as soon as I install the carpet backs of the rear seats:)
 

Attachments

  • Back interior restro 6.jpg
    Back interior restro 6.jpg
    136.8 KB · Views: 4,402
  • Back interior restro 7.jpg
    Back interior restro 7.jpg
    141.3 KB · Views: 6,675
Last edited:
I used a set of middle of the road Pioneer 6X9 quad axle speakers in the rear of the truck. The factory openings are only 5" round so, what I did was to be sure that the 2 tweeters and mid range speakers were right at the factory speaker opening. The tweeters are 1" each and the midrange is 2 1/4" The 6X9 speaker is set 1" back away from the opening so there is plenty of air space for the woofer to push sound without obstruction. The speakers have a nice rich sound and the bass response with all the insulation behind the speakers is very good.
Up front is a set of 4” Memphis Audio components with a pretty large cross over. These speakers are in the moderate to high end class range of speakers. I used these up front because I wanted something that would perform well at only a 4” size.
I am still using the Sony Xplode head unit that came with the truck, it works well and I am surprised on how nice the sound is.
My future plans are to replace it with a Clarion 7” DVD, CD, Navi head unit. I think that the Navigation setup will look really cool in the dash.
 
Last edited:
More pics
 

Attachments

  • Back interior restro 8.jpg
    Back interior restro 8.jpg
    131.6 KB · Views: 4,538
  • Back interior restro 9.jpg
    Back interior restro 9.jpg
    134.1 KB · Views: 6,356
  • Back interior restro 10.jpg
    Back interior restro 10.jpg
    124.3 KB · Views: 5,740
Puddy dad I can't believe you didn't paint the access door to match the rest of the rear plastic! I tried to use the factory 5 inch but seem slike they need something extra as they don't work with just -+ wires going to them...Guess 6x9 are in my future as well.

Did the 4 inch speakers bolt right in on the dash?
 
I ran out of paint and I just found out the color is no longer being made:sobbing:

My photo skills are not very good so most pics are over exposed. That is why the doors look out of place. In the true light, the color I used is pretty much a perfect match to the interior. The darker gray accent trim of the topper molding and door look good together in person.
I may have some paint mixed to do the doors
 
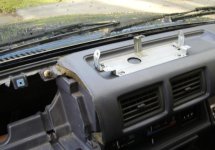
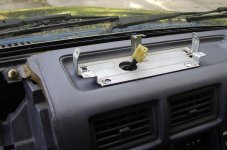
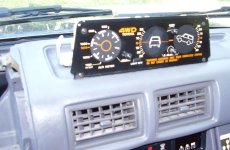
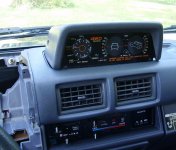
I installed the tilt gauge yesterday using an unorthodox method….Industrial Velcro LOL
I just did not feel good about removing a 21 year old dash pad that was already in fragile condition.
I used a high speed die grinder to cut the welds on the mounting studs then, removed them. I placed the mounting bracket on the dash then marked off the place I thought it should be then, drilled a hole for the wire.
The setup looks good and seems to be securely mounted. I may move it back about an 1/8 inch, I think that would make it perfect…..
 

Attachments

  • Tilt gauge install 1.jpg
    Tilt gauge install 1.jpg
    124.6 KB · Views: 3,383
  • Tilt gauge install 2.jpg
    Tilt gauge install 2.jpg
    130.2 KB · Views: 3,370
  • Tilt gauge install 3.jpg
    Tilt gauge install 3.jpg
    130 KB · Views: 3,492
  • Tilt gauge install 4.jpg
    Tilt gauge install 4.jpg
    118 KB · Views: 3,336
  • Tilt gauge install 5.jpg
    Tilt gauge install 5.jpg
    132.1 KB · Views: 3,547

Members online

Forum statistics

Threads
278,309
Messages
3,554,070
Members
248,016
Latest member
Advally Service

Trending content

Back
Top