Rahll's 98 SR5 4wd Build

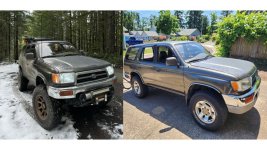
You are adding scenarios that are not ours. We used the same exact wheel.. not a similar one. So the measurements are still accurate. You are arguing a point we all know.

Can you ship me a wheel/tire so I can see how this compares to where I'm at then?
 
Can you ship me a wheel/tire so I can see how this compares to where I'm at then?

You're dense.

How about I just put the stock suspension back on for you and measure to wheel center and get you the "exact same dimensions" I already told you just so you can sleep at night?!?

Are you just trying to get your post count up?!?!
 
You're dense.

How about I just put the stock suspension back on for you and measure to wheel center and get you the "exact same dimensions" I already told you just so you can sleep at night?!?

Are you just trying to get your post count up?!?!

That wouldn't work either though, because at this point everyone's 20+ year old stock suspension is at different heights. Then you have to factor in that different model years came at different heights as well. Are you starting to see why a center of hub to fender measurement is preferred? I can reiterate why it's the preferred method and more accurate than ground to fender height if you like. I'm disappointed you resorted to name calling, but not surprised.
 
That wouldn't work either though, because at this point everyone's 20+ year old stock suspension is at different heights. Then you have to factor in that different model years came at different heights as well. Are you starting to see why a center of hub to fender measurement is preferred? I can reiterate why it's the preferred method and more accurate than ground to fender height if you like. I'm disappointed you resorted to name calling, but not surprised.

Name calling, I could have called you worse than dense!.. sorry you're sensitive.

Go lift yours and report it the "proper" way.. Sheesh.
 
Name calling, I could have called you worse than dense!.. sorry you're sensitive.

Go lift yours and report it the "proper" way.. Sheesh.

If it will make you feel better then have at it bud. I'm sure it's nothing I haven't heard before from a person behind a keyboard :deadhorse:
 
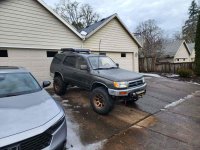
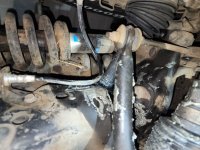
Got a cheap rack from Harbor Freight to hold farmers jack, some off-brand maxtracks, shovel, etc. Everything was feeling pretty wrapped up for the time being until felt some clunking last week and..... CV's toast. Not super surprised since it was working hard without a diff drop yet during the ice storm.

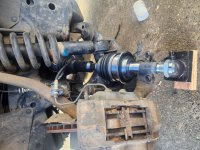
Decided to run the trakmotive extended CV's. They'll be in this week. Found some older threads about them with some mostly good reviews and some people saying they had to try a couple before they worked. We'll see how mine turn out.

Also got supplies for all gear oil changes, and an ARB breather kit for them as well. And a grease gun for driveshaft greasing. After that, pretty much all maintenance should be wrapped up and ready to enjoy it for a while until the next thing comes up.
 

Attachments

  • STANCE WITH RACK.jpg
    STANCE WITH RACK.jpg
    125 KB · Views: 1,020
  • CV boot explosion.jpg
    CV boot explosion.jpg
    118.8 KB · Views: 1,034
Got a cheap rack from Harbor Freight to hold farmers jack, some off-brand maxtracks, shovel, etc. Everything was feeling pretty wrapped up for the time being until felt some clunking last week and..... CV's toast. Not super surprised since it was working hard without a diff drop yet during the ice storm.

Decided to run the trakmotive extended CV's. They'll be in this week. Found some older threads about them with some mostly good reviews and some people saying they had to try a couple before they worked. We'll see how mine turn out.

Also got supplies for all gear oil changes, and an ARB breather kit for them as well. And a grease gun for driveshaft greasing. After that, pretty much all maintenance should be wrapped up and ready to enjoy it for a while until the next thing comes up.

Common experience with the cv's i think especially after a lift. I bought mine and the guy had just put some cheap rough country lift on it, about a week after i got it home the cv's were throwing grease everywhere. Diff drop's seem to be a contentious subject, I just installed the trakmotive cv's and hoping they're gonna hold out without needing a diff drop. i've read lot's of positive reports on them.
 
Decided to run the trakmotive extended CV's. They'll be in this week. Found some older threads about them with some mostly good reviews and some people saying they had to try a couple before they worked. We'll see how mine turn out.

Went the same route after mine kept tearing post lift. They’re a breeze to install. I pounded on em for ages with a dead blow and they didn’t want to go in. The telescoping portion would absorb the blow. If you have a buddy handy have them try and compress it as much as possible while you whack on it. I didn’t have a buddy and was able to just heave it in manually. Can’t really explain but if you give em a good shove they’ll go right in. Gettin them off is a little trickier than OEM but you can knock the dust cover off with a prybar and that’ll give you a good little ledge to pry from. I installed mine then immediately had to do the needle bearing. Save yourself the hassle and order the ECGS clamshell and do it it at the same time
 
Passenger side CV is in. No needle bearing on this side to worry about. I like the idea of the ECGS mod so I'm gonna wait to do the other side until I can get the bushing. This job went pretty smoothly, just took my time with the axle seal and getting it seated just right, on the inner lip depth.

The CV definitely needed to be replaced, but the clicking sound that made me investigate still remains... Further investigation revealed that its coming from the rear, not the front. I still only have factory panhard bar without eimkeith kit (planned). Could this be the culprit? It's not really correlated with drive to the wheels, more with changes in momentum like turns and bumps.
 

Attachments

  • XTT CV.jpg
    XTT CV.jpg
    121.2 KB · Views: 952
Clicking in rear was just a loose sway bar end link. Pretty best case scenario to have been alerted to the cv early and the culprit only being something easy.

Did atf with Valvoline multi-vehicle giga chad synthetic, running great so far, even had a small grind on hills resolve itself after.

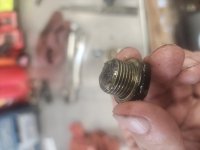
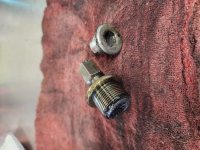
Went to change gear oils, front diff bottom allen bolt completely stripped. Gonna return to that after I get a new bolt to replace it with.

Almost caught up with my current set of parts/fluids!
 
Remember, pull the filler plug before the drain plug! If the drain plug comes out, great. If the filler plug doesn't come out, that drain plug just screwed you over, so to speak. Besides, if the drain plug is stripped out, what are the chances the filler plug is? Pretty good?

Pat☺
 
Looking good! Helps that Anthracite is the sexiest color ;)

If you plan on keeping the basket (looks like a Rola Clone) you may benefit
by fabbing up some feet out of angle iron and bypassing the oem crossbars.
Mine is a decade old now and haven't had any issues whatsoever.

https://www.toyota-4runner.org/1712516-post226.html

Lots has changed since then, but the basket is still going strong.
keep it up!
 
Dealt with my stripped diff bolts today, gonna put on my breather tomorrow! I'm not sure how long its been since diffs and transfer case have had their oil replaced. Generally no sparkles but oil was definitely dirty. Small metal residue on each magnetic drain bolt but doesn't seem too concerning.
 

Attachments

  • 20240325_151519.jpg
    20240325_151519.jpg
    91.2 KB · Views: 858
  • 20240325_125205.jpg
    20240325_125205.jpg
    126.7 KB · Views: 856
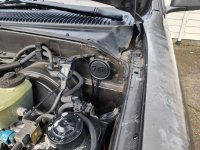
Here's where I ended up running the rear diff breather. Not sure if the ARB kit was fully worth the 70$ but happy with how it turned out. FYI the kit comes with enough fittings to run two breather tubes, not all 4. I just hooked up rear diff for now.

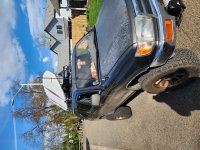
I also changed up my roof rack set up, and I'm really liking the new setup. It had been a short enough time for me to return my harbor freight rack (which was actually pretty nice just didn't fit my needs), and picked up a used Yakima Skinny Warrior for my driver side, and Yakima Bow Down kayak mounts for my passenger side. My board is 13 feet long and doesn't fit inside the truck. The bow down actually works surprisingly well and I was driving highway speed with no issues. The skinny warrior length is definitely better if you carry traction boards and a farm jack like I do, compared to the harbor freight rack. The traction boards actually sit all the way inside the basket with room to spare for gas cans.
 

Attachments

  • 20240326_104715.jpg
    20240326_104715.jpg
    124.2 KB · Views: 833
  • 20240329_161915.jpg
    20240329_161915.jpg
    125.3 KB · Views: 824
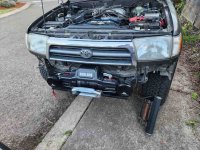
Super excited for the new winch. My homemade grandpa warn winch did save me 2x, but I wanted a little bit more peace of mind. Install was crazy easy. Also excited for this weekend, I am picking up a factory e locker setup from a wrecked 4runner. Going the method of changing both front and rear to the other truck's 4.30 gears and locker. I know I just did a bunch of differential stuff, but I've been keeping an eye out for a decent looking locker set up near me, and one finally came along so I'm sending it. Wish me luck!
 

Attachments

  • 20240502_195913.jpg
    20240502_195913.jpg
    125.4 KB · Views: 585
Hi everyone, I wasn't able to post for a while, but the work has continued. Since last post, I have completed:
- E locker retrofit from 3rd gen, with front and rear differentials at 4:30. Built my own harness from scratch with brand new connectors from toyota. Also did ECGS clamshell mod on front diff, new front axle seals, and added in a second trakmotiv extended CV axle for matching set up front
- Sherpa matterhorn sport rack, with 2 large 23zero boxes, 23zero awning, then mounted my old high lift and knockoff max tracks
- Trail gear rock sliders: never welded before but got some basic lessons and tried my hand welding them myself since they were on sale for cheap. Got my first flat from a rock within a month of installing them, and got to use the high lift jack for real, and learned that those things really benefit from the occassional hose down with WD40
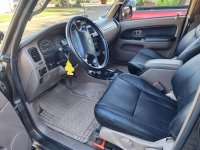
- Re-upholstered driver side lower seat for 70$ said and done with ebay foam and leather, with a cheap set of hog rings and pliers

Current list to work on
- Wire locker ecu to dash light for indicator
- replace injectors, got a set of metal style injectors off facebook marketplace and had them rebuilt by injector masters, I can post pre and post rebuild data sheet
- panhard correction kit (now that I can do basic welds)
 
Lets start with the locker update

My truck did not come with the factory e locker, and I have been shopping around for different options on what would work best for my budget and driving. My original plan was to go with a yukon grizzly for the rear, but I called 3 local shops that were able to work on installing lockers in 3rd members, and even if I bought the locker, and removed the third member, they were quoting 2k-3k just for labor on install.

I picked up a front and rear axle swap from a guy on facebook marketplace that for 1k, that had the ecu and a harness. Harness ended up being completely wrong, so I had to build my own. I liked this plan because I got the benefit of both the locker and a gear ratio change from 4.10 to 4.30 in all one swoop.

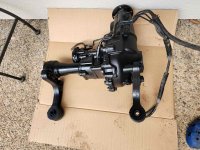
It had some surface rust so I wire brushed down both units and painted them.

Then replaced front axle seals, and ECGS needle bearing. I bought both tools they offer to help the job, and it was very easy since I did it while the new front diff was still removed from the truck. I used Timmy's video and the diagram he showed to build my own harness, with brand new connectors from toyota, the part numbers for which are listed on the same wiring diagram.

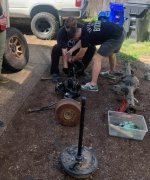
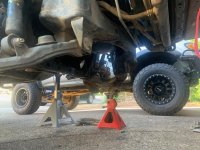
I was able to swap the front diff, popped out the trakmotive axle with just a big heave, and finessed the diff out without having to use any tricks to improve clearance to fit it out. It sucked putting back in this way. It took a couple tries to configure the wires right because the pin layouts are not super intuitive on the direction facing if you have no original harness to work with.

Finally, got my actuator noises after chipping away at this job for a long time. Replaced the gear oil with 75-90 conventional. Bought new bolts for all drain and fill plugs from toyota. I decided not to worry about routing the breather to the front diff since the factory location is already high enough for what I need.

Said and done, this took about 1300$ and a lot of work to do myself, but I'm happy I was able to save a couple thousand $ and complete the process.

 

Attachments

  • Rear axle.jpg
    Rear axle.jpg
    75.3 KB · Views: 409
  • Painted front diff.jpg
    Painted front diff.jpg
    129.9 KB · Views: 404
  • missing front diff.jpg
    missing front diff.jpg
    123.7 KB · Views: 399
Next, the update on front driver seat

I ordered some cheap materials from ebay to get this job done, and I am pleasantly surprised to how everything has turned out. Pretty easy to DIY with some cheap hog rings and pliers. My only gripe with this, is that the stitch pattern on the new "leather" is different from the current seats, but I'm also not 100% sure that the seat leather I have is factory either.

Driver Bottom Seat Foam Cushion For Toyota 4Runner 1996-2002 Base limited SR5 | eBay
Seat foam

Real Leather Car Front Driver Seat Bottom Cover Replace Pad For 4Runner 1996 97 | eBay
Seat leather
 

Attachments

  • New seat leather and interior.jpg
    New seat leather and interior.jpg
    123.8 KB · Views: 406

Members online

Forum statistics

Threads
278,316
Messages
3,554,110
Members
248,016
Latest member
Advally Service

Trending content

Back
Top