Cymon
New member
Let me start this by saying that I have learned a lot from this forum and found its members to be very helpful (when asked the correct way). I decided to do this write-up for the non-mechanically inclined, “I have never worked on my car before” 4runner owner, which I was before today. Yes I used a kit, yes I could have saved money doing it with the parts that are found on some of the mod links I’ve listed below, but being a modification virgin I wanted to make sure it was done right, with the right pieces the first time.
Background:
I have never worked on a car before. I am handy with tools, and do build things, but have not done much more then change flat tires before on my cars. I did put my 1987 Ford Escort’s air intake manifold back together with just duct tape when I was stranded in College Park after a football game and it got me home (but that’s another story). As many of you know being a part of this forum starts to fuel an addiction and I was starting to get the itch to make the vehicle “mine”. So after reading the posts about the rear differential when submerged and experiencing more flooded streets then I’ve ever seen now living in South Florida I figured this is one that I could try. After doing the research I know I most likely don’t need this mod, but I’d rather be safe then sorry, and most trails in Florida seem to have water in/around them in some fashion. I am the type of person who would try and avoid water crossings if possible, but still I want to be and the vehicle to be prepared if there are no other options.
Acknowledgements:
I could not have done this mod without the wonderful write-ups and information provided by [MENTION=96409]Canazes9[/MENTION], @Okki, [MENTION=103267]Saker[/MENTION], [MENTION=3442]Boyds4Runner[/MENTION], [MENTION=115572]DesertCanyons[/MENTION], and [MENTION=129593]MTN4RNR[/MENTION] on the threads below along with their build threads. (There were also many other helpful contributions, too many to continue listing here)
Previous Threads & Links Used To Complete Mod:
“Rear Differential Complete”
http://www.toyota-4runner.org/5th-gen-t4rs/150158-rear-diff-breather-mod-complete.html
“Breather Mod- All Tied Into One”
http://www.toyota-4runner.org/5th-gen-t4rs/114057-breather-mod-all-tied-into-one.html
You Tube ARB Install (edit: when the installer is talking torque specs he is means 30in/lbs of torque not 30ft/lbs).
https://www.youtube.com/watch?v=v5FDbks-R1g
Equipment Used:
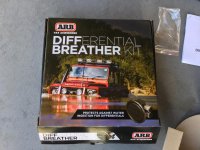
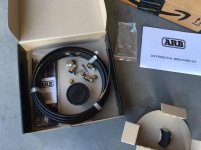
ARB Breather Install Kit
Phillips Screwdriver
14 mm or adjustable wrench
Cordless Drill (if mounting with self-tapping screws included in kit)
Pocket Knife/Utility Knife
Time:
1 – 2 Hours (Depends on if you have a 3.5 year old helper or not)
Without further adieu, the Breather Mod for Dummies!
Background:
I have never worked on a car before. I am handy with tools, and do build things, but have not done much more then change flat tires before on my cars. I did put my 1987 Ford Escort’s air intake manifold back together with just duct tape when I was stranded in College Park after a football game and it got me home (but that’s another story). As many of you know being a part of this forum starts to fuel an addiction and I was starting to get the itch to make the vehicle “mine”. So after reading the posts about the rear differential when submerged and experiencing more flooded streets then I’ve ever seen now living in South Florida I figured this is one that I could try. After doing the research I know I most likely don’t need this mod, but I’d rather be safe then sorry, and most trails in Florida seem to have water in/around them in some fashion. I am the type of person who would try and avoid water crossings if possible, but still I want to be and the vehicle to be prepared if there are no other options.
Acknowledgements:
I could not have done this mod without the wonderful write-ups and information provided by [MENTION=96409]Canazes9[/MENTION], @Okki, [MENTION=103267]Saker[/MENTION], [MENTION=3442]Boyds4Runner[/MENTION], [MENTION=115572]DesertCanyons[/MENTION], and [MENTION=129593]MTN4RNR[/MENTION] on the threads below along with their build threads. (There were also many other helpful contributions, too many to continue listing here)
Previous Threads & Links Used To Complete Mod:
“Rear Differential Complete”
http://www.toyota-4runner.org/5th-gen-t4rs/150158-rear-diff-breather-mod-complete.html
“Breather Mod- All Tied Into One”
http://www.toyota-4runner.org/5th-gen-t4rs/114057-breather-mod-all-tied-into-one.html
You Tube ARB Install (edit: when the installer is talking torque specs he is means 30in/lbs of torque not 30ft/lbs).
https://www.youtube.com/watch?v=v5FDbks-R1g
Equipment Used:
ARB Breather Install Kit
Phillips Screwdriver
14 mm or adjustable wrench
Cordless Drill (if mounting with self-tapping screws included in kit)
Pocket Knife/Utility Knife
Time:
1 – 2 Hours (Depends on if you have a 3.5 year old helper or not)
Without further adieu, the Breather Mod for Dummies!
Last edited: