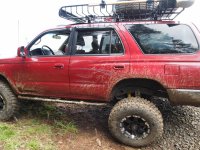
Ripcord's 2002 Sport Ed. Version 2.0

The latch, and the actual tire mount as well from what I can see. The tire mount is where the weld broke on mine.

I always imagined breaking a CV would be a dramatic event, with grease and metal flying about, but they go quietly. Just a little crunch like stepping on a coke can. It'll be cool to check out that diesel swapped 80 series too. I was at Scott's house (SGT Taco) before he left and a guy stopped by who had a 40th anniversary edition with the same swap as your Dad. It was strange hearing a Toyota make those kinds of noises.

Let's try and run a trail together. I'd really like to get on Trifecta (or any part of it) this year. I'm going to avoid Kanes and 7 mile because I ran them both the last two trips.

Yes definitely, I was going to say the same thing. I would prefer to have at least 1 locker for doing all of trifecta, but I'm sure once I am there and in the heat of it I will just do it anyway :banana:
 
Yeah the ass end is way to high isn't it? haha. I have a CBI swingout, another 315 duratrac, and a spare wheel coming. Once I see how it sits, I may swap springs at Toytec in denver on the drive out..

Not sure if you were referring to toytecs superflex but my experience with them have been great. I know lift heights will vary with the superflex but in my case, measuring from center hub to fender i get exactly 3.25" with about 150-200lbs of tools in the cargo area. Unloaded im just under 3.4". When i had my 890s i had exactly 22.75" unloaded & 22.5" with 150-200lbs (I take my ride height measurements parked in the same place with 3/4 to full tank of gas using a yard long level for consistency).

Just sharing my experience bc i'd imagine with a steel bumper and a tire carrier the superflex may not do too well over time. I have a set of 861s that i got about the same time i got the superflex just incase i wanted more rake. I still plan to install my 861s to compare to the superflex but havent gotten around to it. My front end sits right at 22.63 and would prefer 1 to 1.25" rake vs the half inch rake i currently have.
 
Thanks man! How is Colorado so far? Im going to be moving there in August. Cannot flipping wait!

I've been so busy and inactive recently that I completely missed that, but you'll enjoy it here! Definitely let me know if you need anything/ help moving, I'll be in Highlands Ranch until mid/late August.

Also, see you in Moab soon!

Dope, you're moving to CO? What part? We'll need to wheel together, obviously.

Also missed that you moved out here! Exciting!
 
Cargo Box Build

|May 14, 2016|

I had a great cargo box in my last 4Runner, a feature I was desperately missing. That one had some shortcomings though, and I was never 100% satisfied with the build quality. Since Moab was coming up, it was a good time to get it done. I built this one almost exactly like the last one, just cleaner and straighter.

Parts/Cost:
$21.12: 4'x8' x 1/2" MDF
$19.98: 6'x8' gray space rug
$16.52: Knape & Vogt 8" HD drawer slides
$14.98 Bostitch HD Staple gun
$8.99: Wall mounted bottle opener
$6.54: (x2) 6" turnbuckles
$6.50: Maglight mounts
$5.91: (x3) Handles
$4.71: Pair of lockable latches
$3.99: Spray Paint
$3.31: Deck screws
$2.58: Pair of hinges
$2.48: (x2) eye hooks
$2.08: Wood Glue
$1.00: (x2) S-hooks
$0.52: (x2) 3" long screws


Tools:
-Jigsaw
-Drill
-Sander
-Tape measure
-Staple gun (with LOTS of heavy duty staples)

Time:
From arriving home with the stuff to a painted and carpeted box was about 7 hours.

Procedure:

Measuring.
<a data-flickr-embed="true" href="https://www.flickr.com/photos/149794382@N06/35128337410/in/album-72157685365200766/" title="20160514-IMG_1512"><img src="https://c1.staticflickr.com/5/4214/35128337410_1bff5e9434_b.jpg" width="1024" height="576" alt="20160514-IMG_1512"></a><script async src="//embedr.flickr.com/assets/client-code.js" charset="utf-8"></script>


The plans for the new one:

<a data-flickr-embed="true" href="https://www.flickr.com/photos/149794382@N06/35394055492/in/dateposted-public/" title="Cargo Box"><img src="https://c1.staticflickr.com/5/4212/35394055492_cbe08b54db_b.jpg" width="1024" height="701" alt="Cargo Box"></a><script async src="//embedr.flickr.com/assets/client-code.js" charset="utf-8"></script>


Materials:

<a data-flickr-embed="true" href="https://www.flickr.com/photos/149794382@N06/35514638845/in/album-72157685365200766/" title="20160514-IMG_1514"><img src="https://c1.staticflickr.com/5/4232/35514638845_53b2ae5a7c_b.jpg" width="1024" height="768" alt="20160514-IMG_1514"></a><script async src="//embedr.flickr.com/assets/client-code.js" charset="utf-8"></script>


Shapes marked:

<a data-flickr-embed="true" href="https://www.flickr.com/photos/149794382@N06/35514629995/in/album-72157685365200766/" title="20160514-IMG_1515"><img src="https://c1.staticflickr.com/5/4285/35514629995_702671544c_b.jpg" width="1024" height="768" alt="20160514-IMG_1515"></a><script async src="//embedr.flickr.com/assets/client-code.js" charset="utf-8"></script>


Letting the wood glue set a bit before I started drilling.

<a data-flickr-embed="true" href="https://www.flickr.com/photos/149794382@N06/35383815701/in/album-72157685365200766/" title="20160514-IMG_1517"><img src="https://c1.staticflickr.com/5/4266/35383815701_cb78ec5790_b.jpg" width="1024" height="768" alt="20160514-IMG_1517"></a><script async src="//embedr.flickr.com/assets/client-code.js" charset="utf-8"></script>

<a data-flickr-embed="true" href="https://www.flickr.com/photos/149794382@N06/35475362036/in/album-72157685365200766/" title="20160514-IMG_1519"><img src="https://c1.staticflickr.com/5/4241/35475362036_a7599871c3_b.jpg" width="1024" height="768" alt="20160514-IMG_1519"></a><script async src="//embedr.flickr.com/assets/client-code.js" charset="utf-8"></script>


Front going on.

<a data-flickr-embed="true" href="https://www.flickr.com/photos/149794382@N06/34673302964/in/album-72157685365200766/" title="20160514-IMG_1520"><img src="https://c1.staticflickr.com/5/4218/34673302964_f81485159b_b.jpg" width="1024" height="768" alt="20160514-IMG_1520"></a><script async src="//embedr.flickr.com/assets/client-code.js" charset="utf-8"></script>


Cutting out the access hole for the stock cargo area.

<a data-flickr-embed="true" href="https://www.flickr.com/photos/149794382@N06/34673298954/in/album-72157685365200766/" title="20160514-IMG_1522"><img src="https://c1.staticflickr.com/5/4238/34673298954_3616ef3e4a_b.jpg" width="1024" height="768" alt="20160514-IMG_1522"></a><script async src="//embedr.flickr.com/assets/client-code.js" charset="utf-8"></script>


Painting, I used a cream color this time.

<a data-flickr-embed="true" href="https://www.flickr.com/photos/149794382@N06/35514604745/in/album-72157685365200766/" title="20160515-IMG_1523"><img src="https://c1.staticflickr.com/5/4286/35514604745_078389ea3a_b.jpg" width="1024" height="768" alt="20160515-IMG_1523"></a><script async src="//embedr.flickr.com/assets/client-code.js" charset="utf-8"></script>


Starting carpet.

<a data-flickr-embed="true" href="https://www.flickr.com/photos/149794382@N06/35514597735/in/album-72157685365200766/" title="20160515-IMG_1541"><img src="https://c1.staticflickr.com/5/4218/35514597735_f3a10e8514_b.jpg" width="1024" height="768" alt="20160515-IMG_1541"></a><script async src="//embedr.flickr.com/assets/client-code.js" charset="utf-8"></script>

<a data-flickr-embed="true" href="https://www.flickr.com/photos/149794382@N06/35128303820/in/album-72157685365200766/" title="20160515-IMG_1542"><img src="https://c1.staticflickr.com/5/4282/35128303820_bf733fd835_b.jpg" width="1024" height="768" alt="20160515-IMG_1542"></a><script async src="//embedr.flickr.com/assets/client-code.js" charset="utf-8"></script>


Getting the sliders for the drawer mocked up.

<a data-flickr-embed="true" href="https://www.flickr.com/photos/149794382@N06/35128299820/in/album-72157685365200766/" title="20160515-IMG_1545"><img src="https://c1.staticflickr.com/5/4209/35128299820_f7337f59b0_b.jpg" width="1024" height="683" alt="20160515-IMG_1545"></a><script async src="//embedr.flickr.com/assets/client-code.js" charset="utf-8"></script>
 
Last edited:
Cargo Box Build - Completed!

Here is the final product!

I think the cream colored paint I used adds a subtle cleanness to it, glad I went with that.

<a data-flickr-embed="true" href="https://www.flickr.com/photos/149794382@N06/35383782171/in/album-72157685365200766/" title="20160516-IMG_1546"><img src="https://c1.staticflickr.com/5/4284/35383782171_4a36b4ed63_b.jpg" width="1024" height="768" alt="20160516-IMG_1546"></a><script async src="//embedr.flickr.com/assets/client-code.js" charset="utf-8"></script>

<a data-flickr-embed="true" href="https://www.flickr.com/photos/149794382@N06/35128293630/in/album-72157685365200766/" title="20160516-IMG_1547"><img src="https://c1.staticflickr.com/5/4266/35128293630_7a9476e003_b.jpg" width="576" height="1024" alt="20160516-IMG_1547"></a><script async src="//embedr.flickr.com/assets/client-code.js" charset="utf-8"></script>

<a data-flickr-embed="true" href="https://www.flickr.com/photos/149794382@N06/35128281500/in/album-72157685365200766/" title="20160516-IMG_1551"><img src="https://c1.staticflickr.com/5/4205/35128281500_6f0d002ded_b.jpg" width="1024" height="768" alt="20160516-IMG_1551"></a><script async src="//embedr.flickr.com/assets/client-code.js" charset="utf-8"></script>

<a data-flickr-embed="true" href="https://www.flickr.com/photos/149794382@N06/35475307396/in/album-72157685365200766/" title="20160516-IMG_1552"><img src="https://c1.staticflickr.com/5/4256/35475307396_d5d0e0d0fa_b.jpg" width="1024" height="768" alt="20160516-IMG_1552"></a><script async src="//embedr.flickr.com/assets/client-code.js" charset="utf-8"></script>

<a data-flickr-embed="true" href="https://www.flickr.com/photos/149794382@N06/35128266680/in/album-72157685365200766/" title="20160516-IMG_1553"><img src="https://c1.staticflickr.com/5/4211/35128266680_df1a8739c0_b.jpg" width="1024" height="640" alt="20160516-IMG_1553"></a><script async src="//embedr.flickr.com/assets/client-code.js" charset="utf-8"></script>

<a data-flickr-embed="true" href="https://www.flickr.com/photos/149794382@N06/35128256700/in/album-72157685365200766/" title="20160516-IMG_1557"><img src="https://c1.staticflickr.com/5/4237/35128256700_260eed3041_b.jpg" width="1024" height="768" alt="20160516-IMG_1557"></a><script async src="//embedr.flickr.com/assets/client-code.js" charset="utf-8"></script>

<a data-flickr-embed="true" href="https://www.flickr.com/photos/149794382@N06/34673254384/in/album-72157685365200766/" title="20160516-IMG_1558"><img src="https://c1.staticflickr.com/5/4205/34673254384_7bc1ab59f1_b.jpg" width="1024" height="768" alt="20160516-IMG_1558"></a><script async src="//embedr.flickr.com/assets/client-code.js" charset="utf-8"></script>

<a data-flickr-embed="true" href="https://www.flickr.com/photos/149794382@N06/35347452372/in/album-72157685365200766/" title="20160516-IMG_1560"><img src="https://c1.staticflickr.com/5/4280/35347452372_1fda1bf89f_b.jpg" width="1024" height="768" alt="20160516-IMG_1560"></a><script async src="//embedr.flickr.com/assets/client-code.js" charset="utf-8"></script>
 
Last edited:
Not sure if you were referring to toytecs superflex but my experience with them have been great. I know lift heights will vary with the superflex but in my case, measuring from center hub to fender i get exactly 3.25" with about 150-200lbs of tools in the cargo area. Unloaded im just under 3.4". When i had my 890s i had exactly 22.75" unloaded & 22.5" with 150-200lbs (I take my ride height measurements parked in the same place with 3/4 to full tank of gas using a yard long level for consistency).

Just sharing my experience bc i'd imagine with a steel bumper and a tire carrier the superflex may not do too well over time. I have a set of 861s that i got about the same time i got the superflex just incase i wanted more rake. I still plan to install my 861s to compare to the superflex but havent gotten around to it. My front end sits right at 22.63 and would prefer 1 to 1.25" rake vs the half inch rake i currently have.
I have heard such mixed reviews on them, and once I see how the 861's sit with a CBI on the back end I will decide if I like them. I know the superflex may not have the spring rate I would want for this much weight.

I've been so busy and inactive recently that I completely missed that, but you'll enjoy it here! Definitely let me know if you need anything/ help moving, I'll be in Highlands Ranch until mid/late August.

Also, see you in Moab soon!

Also missed that you moved out here! Exciting!
Moab this year is gonna have a damn good turnout, I am so excited!

What are you leaving Highlands Ranch for? I will definitely give you a shout when I get there.
 
Last edited:
Moab this year is gonna have a damn good turnout, I am so excited!

What are you leaving Highlands Ranch for? I will definitely give you a shout when I get there.

Absolutely! Can't wait.

Going back up to school in Fort Collins. So not too far...
 
.....well, as always, amazing attention to detail and those plans were immaculately conceptualized.


So, You win! Selling my 4Runner now. Bye :plane:


. . .
 
Looking good! Love the attention to detail, wish I spent more time doing the small stuff on my drawer system.


Sent from my iPhone using Tapatalk
 
Not sure if you were referring to toytecs superflex but my experience with them have been great. I know lift heights will vary with the superflex but in my case, measuring from center hub to fender i get exactly 3.25" with about 150-200lbs of tools in the cargo area. Unloaded im just under 3.4". When i had my 890s i had exactly 22.75" unloaded & 22.5" with 150-200lbs (I take my ride height measurements parked in the same place with 3/4 to full tank of gas using a yard long level for consistency).


Just sharing my experience bc i'd imagine with a steel bumper and a tire carrier the superflex may not do too well over time. I have a set of 861s that i got about the same time i got the superflex just incase i wanted more rake. I still plan to install my 861s to compare to the superflex but havent gotten around to it. My front end sits right at 22.63 and would prefer 1 to 1.25" rake vs the half inch rake i currently have.

I did a lot of research before I bought my superflex coils and I know what you're saying about them drooping over time and I figured by the time they start to be too soft I will hopefully have money for the ultimate thing when I wanted to do which was an icon setup. I've looked at the Land Cruiser and also ran ome 891s, but my setup in the rear I chose the superflex with a better shock to accommodate hopefully the weight because I have a solid steel bumper and when I do go somewhere I put a hundred or two hundred pounds in the rear. I've been told that the 5100s are engineered for this setup to assist in the coil life, is it true, shrug. Friends who have ran these still get great Flex and not much sag after 4 years and 40k miles.

Personally I need s soft ride, so this vehicle I couldn't use the land cruiser setup. .
 
I really dig that storage box man. Do you put much in the bod, ha.. I was going to say body cavity, but that sounds wrong.. Do you store anything in the cubby hole? When I bought my 4runner, the PO kept the trailer hitch in there. It knocked around and made exactly 1 trip in that location. The flashlight mount and the bottle cap opener are the icing on the cake. Well done!
 
I did a lot of research before I bought my superflex coils and I know what you're saying about them drooping over time and I figured by the time they start to be too soft I will hopefully have money for the ultimate thing when I wanted to do which was an icon setup. I've looked at the Land Cruiser and also ran ome 891s, but my setup in the rear I chose the superflex with a better shock to accommodate hopefully the weight because I have a solid steel bumper and when I do go somewhere I put a hundred or two hundred pounds in the rear. I've been told that the 5100s are engineered for this setup to assist in the coil life, is it true, shrug. Friends who have ran these still get great Flex and not much sag after 4 years and 40k miles.

Personally I need s soft ride, so this vehicle I couldn't use the land cruiser setup. .

I think the superflex are great. With about 200lbs it only went down about .25" and has been steady there over the last several months. The point i was making was i like having a 1-1.25" rake & i thought i was going to get closer to 3.75" unloaded with the superflex but was just under 3.5" instead. For my purposes, 3.5" unloaded & 3.25" loaded is fine bc im wanting to maintain as much of the "stock" look as possible. But if 4-ripcord is planning on a steel bumper and a tire carrier and additional gear, 861 may workout better and save him the hassle of changing springs.
 
I think the superflex are great. With about 200lbs it only went down about .25" and has been steady there over the last several months. The point i was making was i like having a 1-1.25" rake & i thought i was going to get closer to 3.75" unloaded with the superflex but was just under 3.5" instead. For my purposes, 3.5" unloaded & 3.25" loaded is fine bc im wanting to maintain as much of the "stock" look as possible. But if 4-ripcord is planning on a steel bumper and a tire carrier and additional gear, 861 may workout better and save him the hassle of changing springs.

True, I had close to 3.5" and may have had more, but I have a 33"tire where the normal spare is located which tends to bind my panhard bar. Eventually I want to do a custom swing away but that costs money, and I haven't figured out how to grow money..

Here is a picture of my 97 with 891's...
P5260841.jpg

The ride was stiffer and removal of the sway bars did help it to be smoother and flex a ton!! Unfortunately I had to get rid of it because I couldn't shift anymore..
 

Attachments

  • P5260841.jpg
    P5260841.jpg
    141.6 KB · Views: 2,738
Thanks for posting all the measurements and whatnot. Should save me a ton of time when I get to building one. Turned out sharp. Just out of curiosity how come you didn't glue down the carpet?


Sent from my iPhone using Tapatalk
 
Absolutely! Can't wait.

Going back up to school in Fort Collins. So not too far...
Hell that's even better. I have visited Loveland and Fort Collins a few times, I really like it up there. If my folks weren't in Albuquerque still, I would definitely head north of Denver.

.....well, as always, amazing attention to detail and those plans were immaculately conceptualized.


So, You win! Selling my 4Runner now. Bye :plane:


. . .
I am clearly missing the point here, that's the 3rd time you have left a comment like this. Thanks for the compliments though.

Looking good! Love the attention to detail, wish I spent more time doing the small stuff on my drawer system.

It was one of the most enjoyable projects I have done on this truck, I highly recommend it. Sweet sig pic btw.

I really dig that storage box man. Do you put much in the bod, ha.. I was going to say body cavity, but that sounds wrong.. Do you store anything in the cubby hole? When I bought my 4runner, the PO kept the trailer hitch in there. It knocked around and made exactly 1 trip in that location. The flashlight mount and the bottle cap opener are the icing on the cake. Well done!
Thanks! I usually keep a portable compressor in the drawer, until I go OBA. The rest is just random handy stuff.

Thanks for posting all the measurements and whatnot. Should save me a ton of time when I get to building one. Turned out sharp. Just out of curiosity how come you didn't glue down the carpet?
Thanks! I never wrote down the measurements on the last version, so I made sure to this time. Regarding the carpet, the staples were easier and I was able to really pull it tight and prevent loose bits and waves in the carpet.
 
Bumpers and stuff

|May 27, 2016|

Last thing before Moab is some bumpers. I will forego the normal mod write-up for more pictures instead.

-All Pro Apex front bumper
-All Pro IFS Skid
-4xInnovations rock sliders
-CBI Hybrid swing out rear bumper


===============================================


The All Pro front bumper requires modifying the frame rail as it is meant for Tacoma and not 4Runners.

Also note that without a body lift, that black AC line will be in the way and you will have to cut a notch out of the bumper to clear that line.


<a data-flickr-embed="true" href="https://www.flickr.com/photos/149794382@N06/34700402433/in/album-72157682519482244/" title="20160515-IMG_1524"><img src="https://c1.staticflickr.com/5/4282/34700402433_87b301d536_b.jpg" width="1024" height="768" alt="20160515-IMG_1524"></a><script async src="//embedr.flickr.com/assets/client-code.js" charset="utf-8"></script>


<a data-flickr-embed="true" href="https://www.flickr.com/photos/149794382@N06/35342816562/in/album-72157682519482244/" title="20160515-IMG_1531"><img src="https://c1.staticflickr.com/5/4263/35342816562_1af2676b9b_b.jpg" width="1024" height="768" alt="20160515-IMG_1531"></a><script async src="//embedr.flickr.com/assets/client-code.js" charset="utf-8"></script>


<a data-flickr-embed="true" href="https://www.flickr.com/photos/149794382@N06/34700383513/in/album-72157682519482244/" title="20160515-IMG_1533"><img src="https://c1.staticflickr.com/5/4281/34700383513_a2b63f8601_b.jpg" width="1024" height="768" alt="20160515-IMG_1533"></a><script async src="//embedr.flickr.com/assets/client-code.js" charset="utf-8"></script>


<a data-flickr-embed="true" href="https://www.flickr.com/photos/149794382@N06/34668776374/in/album-72157682519482244/" title="20160515-IMG_1532"><img src="https://c1.staticflickr.com/5/4209/34668776374_b28b40aaf9_b.jpg" width="1024" height="768" alt="20160515-IMG_1532"></a><script async src="//embedr.flickr.com/assets/client-code.js" charset="utf-8"></script>


<a data-flickr-embed="true" href="https://www.flickr.com/photos/149794382@N06/35342820812/in/album-72157682519482244/" title="20160515-IMG_1529"><img src="https://c1.staticflickr.com/5/4261/35342820812_ec29ef66e0_b.jpg" width="1024" height="768" alt="20160515-IMG_1529"></a><script async src="//embedr.flickr.com/assets/client-code.js" charset="utf-8"></script>


<a data-flickr-embed="true" href="https://www.flickr.com/photos/149794382@N06/34668771794/in/album-72157682519482244/" title="20160515-IMG_1535"><img src="https://c1.staticflickr.com/5/4229/34668771794_2909916f47_b.jpg" width="1024" height="768" alt="20160515-IMG_1535"></a><script async src="//embedr.flickr.com/assets/client-code.js" charset="utf-8"></script>


<a data-flickr-embed="true" href="https://www.flickr.com/photos/149794382@N06/34668766524/in/album-72157682519482244/" title="20160515-IMG_1543"><img src="https://c1.staticflickr.com/5/4229/34668766524_b3516e1de3_b.jpg" width="1024" height="768" alt="20160515-IMG_1543"></a><script async src="//embedr.flickr.com/assets/client-code.js" charset="utf-8"></script>


Primered.

<a data-flickr-embed="true" href="https://www.flickr.com/photos/149794382@N06/34700373433/in/album-72157682519482244/" title="20160515-IMG_1538"><img src="https://c1.staticflickr.com/5/4207/34700373433_3e0c83f53c_b.jpg" width="1024" height="576" alt="20160515-IMG_1538"></a><script async src="//embedr.flickr.com/assets/client-code.js" charset="utf-8"></script>


Painted:

EDIT: Since I get so many damn questions about the paint matching. I got paint match spray cans from a Napa Paint store for $20/can. Just give them your paint code (thundercloud metallic is 1D2).

<a data-flickr-embed="true" href="https://www.flickr.com/photos/149794382@N06/35509837795/in/album-72157682519482244/" title="20160522-IMG_1585"><img src="https://c1.staticflickr.com/5/4262/35509837795_892baa78c2_b.jpg" width="1024" height="768" alt="20160522-IMG_1585"></a><script async src="//embedr.flickr.com/assets/client-code.js" charset="utf-8"></script>


Tridon EP35 flasher relay for the LED blinkers

<a data-flickr-embed="true" href="https://www.flickr.com/photos/149794382@N06/35123493440/in/album-72157682519482244/" title="20160522-IMG_1580"><img src="https://c1.staticflickr.com/5/4242/35123493440_b36584b30d_b.jpg" width="1024" height="768" alt="20160522-IMG_1580"></a><script async src="//embedr.flickr.com/assets/client-code.js" charset="utf-8"></script>


<a data-flickr-embed="true" href="https://www.flickr.com/photos/149794382@N06/34700329493/in/album-72157682519482244/" title="20160522-IMG_1579"><img src="https://c1.staticflickr.com/5/4229/34700329493_39a7cce4e7_b.jpg" width="1024" height="1024" alt="20160522-IMG_1579"></a><script async src="//embedr.flickr.com/assets/client-code.js" charset="utf-8"></script>


Wiring the switch for the fogs

<a data-flickr-embed="true" href="https://www.flickr.com/photos/149794382@N06/34668715264/in/album-72157682519482244/" title="20160522-IMG_1582"><img src="https://c1.staticflickr.com/5/4289/34668715264_fe42c14cde_b.jpg" width="1024" height="768" alt="20160522-IMG_1582"></a><script async src="//embedr.flickr.com/assets/client-code.js" charset="utf-8"></script>


<a data-flickr-embed="true" href="https://www.flickr.com/photos/149794382@N06/35379320071/in/album-72157682519482244/" title="20160522-IMG_1583"><img src="https://c1.staticflickr.com/5/4240/35379320071_bac9534821_b.jpg" width="1024" height="768" alt="20160522-IMG_1583"></a><script async src="//embedr.flickr.com/assets/client-code.js" charset="utf-8"></script>


RigidKitDually-5.jpg
 
Last edited:
On to the rear..

<a data-flickr-embed="true" href="https://www.flickr.com/photos/149794382@N06/34700286733/in/album-72157682519482244/" title="20160524-IMG_1589"><img src="https://c1.staticflickr.com/5/4231/34700286733_4b11f8c384_b.jpg" width="1024" height="640" alt="20160524-IMG_1589"></a><script async src="//embedr.flickr.com/assets/client-code.js" charset="utf-8"></script>

<a data-flickr-embed="true" href="https://www.flickr.com/photos/149794382@N06/35509822215/in/album-72157682519482244/" title="20160524-IMG_1592"><img src="https://c1.staticflickr.com/5/4259/35509822215_36e57426fc_b.jpg" width="1024" height="768" alt="20160524-IMG_1592"></a><script async src="//embedr.flickr.com/assets/client-code.js" charset="utf-8"></script>

<a data-flickr-embed="true" href="https://www.flickr.com/photos/149794382@N06/35342711542/in/album-72157682519482244/" title="20160525-IMG_1596-HDR"><img src="https://c1.staticflickr.com/5/4212/35342711542_f81bcc89b5_b.jpg" width="1024" height="640" alt="20160525-IMG_1596-HDR"></a><script async src="//embedr.flickr.com/assets/client-code.js" charset="utf-8"></script>


Primered:

<a data-flickr-embed="true" href="https://www.flickr.com/photos/149794382@N06/34700270203/in/album-72157682519482244/" title="20160525-IMG_1601"><img src="https://c1.staticflickr.com/5/4212/34700270203_e555d5c8e2_b.jpg" width="1024" height="768" alt="20160525-IMG_1601"></a><script async src="//embedr.flickr.com/assets/client-code.js" charset="utf-8"></script>


EDIT: Since I get so many damn questions about the paint matching. I got paint match spray cans from a Napa Paint store for $20/can. Just give them your paint code (thundercloud metallic is 1D2).


<a data-flickr-embed="true" href="https://www.flickr.com/photos/149794382@N06/34700263383/in/album-72157682519482244/" title="20160527-IMG_1640"><img src="https://c1.staticflickr.com/5/4207/34700263383_d8028ba250_b.jpg" width="1024" height="768" alt="20160527-IMG_1640"></a><script async src="//embedr.flickr.com/assets/client-code.js" charset="utf-8"></script>

<a data-flickr-embed="true" href="https://www.flickr.com/photos/149794382@N06/35342690832/in/album-72157682519482244/" title="20160527-IMG_1643"><img src="https://c1.staticflickr.com/5/4282/35342690832_42e08103d0_b.jpg" width="1024" height="768" alt="20160527-IMG_1643"></a><script async src="//embedr.flickr.com/assets/client-code.js" charset="utf-8"></script>

<a data-flickr-embed="true" href="https://www.flickr.com/photos/149794382@N06/35342687602/in/album-72157682519482244/" title="20160527-IMG_1644"><img src="https://c1.staticflickr.com/5/4257/35342687602_bd16d78d83_b.jpg" width="1024" height="640" alt="20160527-IMG_1644"></a><script async src="//embedr.flickr.com/assets/client-code.js" charset="utf-8"></script>

And some sliders..

<a data-flickr-embed="true" href="https://www.flickr.com/photos/149794382@N06/35509908725/in/album-72157682519482244/" title="20160507-IMG_1510"><img src="https://c1.staticflickr.com/5/4264/35509908725_621b9265a0_b.jpg" width="1024" height="768" alt="20160507-IMG_1510"></a><script async src="//embedr.flickr.com/assets/client-code.js" charset="utf-8"></script>
 
Last edited:
Final Product!

Here it all is together!

EDIT: Since I get so many damn questions about the paint matching. I got paint match spray cans from a Napa Paint store for $20/can. Just give them your paint code (thundercloud metallic is 1D2).


<a data-flickr-embed="true" href="https://www.flickr.com/photos/149794382@N06/34656275564/in/album-72157682479241254/" title="20160527-IMG_1624-HDR"><img src="https://c1.staticflickr.com/5/4287/34656275564_79c9b3de99_b.jpg" width="1024" height="640" alt="20160527-IMG_1624-HDR"></a><script async src="//embedr.flickr.com/assets/client-code.js" charset="utf-8"></script>

<a data-flickr-embed="true" href="https://www.flickr.com/photos/149794382@N06/35215744350/in/dateposted-public/" title="20160527-IMG_1632_zpszjp6canv"><img src="https://c1.staticflickr.com/5/4163/35215744350_e8e137cc13_b.jpg" width="1024" height="640" alt="20160527-IMG_1632_zpszjp6canv"></a><script async src="//embedr.flickr.com/assets/client-code.js" charset="utf-8"></script>


UPDATE Feb 8, 2017
Fixed the bumper gap!

<a data-flickr-embed="true" href="https://www.flickr.com/photos/149794382@N06/34655952204/in/album-72157682479241254/" title="20170208-IMG_2088"><img src="https://c1.staticflickr.com/5/4231/34655952204_f0012faf36_b.jpg" width="1024" height="576" alt="20170208-IMG_2088"></a><script async src="//embedr.flickr.com/assets/client-code.js" charset="utf-8"></script>

<a data-flickr-embed="true" href="https://www.flickr.com/photos/149794382@N06/35602191725/in/dateposted-public/" title="20170620_1654101_zpsjbo9z1hf"><img src="https://c1.staticflickr.com/5/4218/35602191725_0fcf4a3734_b.jpg" width="1024" height="576" alt="20170620_1654101_zpsjbo9z1hf"></a><script async src="//embedr.flickr.com/assets/client-code.js" charset="utf-8"></script>


Compare to the bumper as it was made to see what I had to cut out and weld in order to raise the bumper.

<a data-flickr-embed="true" href="https://www.flickr.com/photos/149794382@N06/34700373433" title="20160515-IMG_1538"><img src="https://farm5.staticflickr.com/4207/34700373433_3e0c83f53c_b.jpg" width="1024" height="576" alt="20160515-IMG_1538"></a><script async src="//embedr.flickr.com/assets/client-code.js" charset="utf-8"></script>


Also note that with the bumper that high (or just if you are installing it without a body lift in the first place) you will need to cut a notch out for the AC line as mentioned in the post about the initial install. See this pic


<a data-flickr-embed="true" href="https://www.flickr.com/photos/149794382@N06/34686724093/in/album-72157682479241254/" title="18451686_1541574065862391_519321999138030348_o"><img src="https://farm5.staticflickr.com/4289/34686724093_d4894f46e4_b.jpg" width="1024" height="683" alt="18451686_1541574065862391_519321999138030348_o"></a><script async src="//embedr.flickr.com/assets/client-code.js" charset="utf-8"></script>
 
Last edited:

Members online

Forum statistics

Threads
278,312
Messages
3,554,089
Members
248,016
Latest member
Advally Service

Trending content

Back
Top