
You are using an out of date browser. It may not display this or other websites correctly.
You should upgrade or use an alternative browser.
You should upgrade or use an alternative browser.
Road Bull's 2002 SR-5 timeline.
- Thread starter Road Bull
- Start date

Road Bull
Senior Member
Rear differential breather mod comple.
I have been meaning to do this and had been putting it off for far too long. I found myself with a little bit of time to spare before I had to go to work today and managed to knock it out, go to work, come back home and tie up some loose ends.
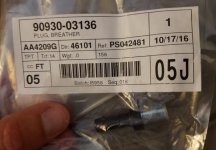
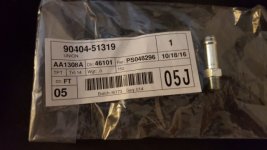
I followed the [MENTION=120071]mtbtim[/MENTION] Timmy the Toolman "Rear Differential Extended Breather Mod" video. All the part numbers are listed for easy reference.
https://www.youtube.com/watch?v=tCGMa4vng_g&list=PLPMpPriBUyJC_aXG6cIRhjv6w4heeIZJ6&index=4
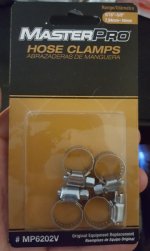
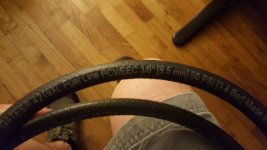
I did use 3/8 hose where Tim uses 5/16. I had already purchased the 3/8 long ago, so that's what I went with because it's not cheap. LOL.
Some helpful tips:
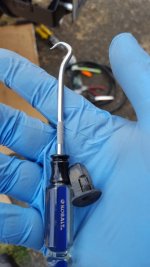
* I used a specialized pick tool to help free those little plastic clips that hold the fuel filler guard in place.
* I found, like in the video, that the bottom two plastic clips for the gas tube cover came out with some effort, but are doable. The top two can't be defeated by getting to the back and depressing the opposing corners lime the bottom two. I was prepared to write them off and destroy them.
* Just gently pull the cover away. I did and the clips stayed in place when the cover came off. This allowed me to take my time and remove them without breaking them. Someone also mentioned that you can simply use a screw to screw into the tops of these as they are also designed to be utilized in that fashion if you choose to do so.
* I would suggest trying to clean the area around your old breather before you fully remove it. Use an old toothbrush or something like that to brush away the debris to try to give yourself a clean area to install the new breather coupling. I would do this by beginning to remove the old breather and while it's still threaded, stop and clean it again. I cleaned before I remove the Breather but then found after I completely removed it that there were still a fair amount of grime at the base of the threads. By leaving the breather in before completely removing it and cleaning, you have the best chance to clean without brushing debris into the differential.
I went a little crazy with the sheathing where the hose comes in contact with other pieces of the vehicle that might wear a hole through the hose over time. I plan to keep an eye on these as suspension articulation May shift things around a bit.
I have been meaning to do this and had been putting it off for far too long. I found myself with a little bit of time to spare before I had to go to work today and managed to knock it out, go to work, come back home and tie up some loose ends.
I followed the [MENTION=120071]mtbtim[/MENTION] Timmy the Toolman "Rear Differential Extended Breather Mod" video. All the part numbers are listed for easy reference.
https://www.youtube.com/watch?v=tCGMa4vng_g&list=PLPMpPriBUyJC_aXG6cIRhjv6w4heeIZJ6&index=4
I did use 3/8 hose where Tim uses 5/16. I had already purchased the 3/8 long ago, so that's what I went with because it's not cheap. LOL.
Some helpful tips:
* I used a specialized pick tool to help free those little plastic clips that hold the fuel filler guard in place.
* I found, like in the video, that the bottom two plastic clips for the gas tube cover came out with some effort, but are doable. The top two can't be defeated by getting to the back and depressing the opposing corners lime the bottom two. I was prepared to write them off and destroy them.
* Just gently pull the cover away. I did and the clips stayed in place when the cover came off. This allowed me to take my time and remove them without breaking them. Someone also mentioned that you can simply use a screw to screw into the tops of these as they are also designed to be utilized in that fashion if you choose to do so.
* I would suggest trying to clean the area around your old breather before you fully remove it. Use an old toothbrush or something like that to brush away the debris to try to give yourself a clean area to install the new breather coupling. I would do this by beginning to remove the old breather and while it's still threaded, stop and clean it again. I cleaned before I remove the Breather but then found after I completely removed it that there were still a fair amount of grime at the base of the threads. By leaving the breather in before completely removing it and cleaning, you have the best chance to clean without brushing debris into the differential.
I went a little crazy with the sheathing where the hose comes in contact with other pieces of the vehicle that might wear a hole through the hose over time. I plan to keep an eye on these as suspension articulation May shift things around a bit.
Attachments
-
 IMG_20170821_001420.jpg87.6 KB · Views: 659
 -
 IMG_20170821_001454.jpg66.8 KB · Views: 635
 -
 IMG_20170821_001536.jpg98.4 KB · Views: 629
 -
 IMG_20170821_002020.jpg65.7 KB · Views: 641
 -
 IMG_20170820_173642.jpg109.1 KB · Views: 635
 -
 IMG_20170820_173706.jpg106.3 KB · Views: 642
 -
 IMG_20170820_173728.jpg101.3 KB · Views: 643
Last edited:
Road Bull
Senior Member
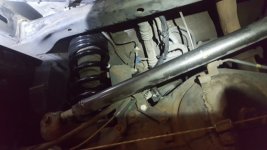
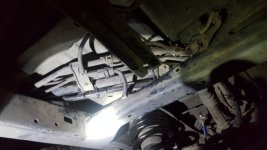
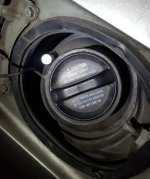
More rear differential breather mod pics.
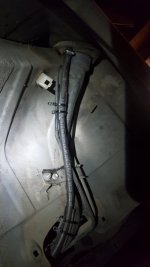
I never learn... This time of year I work over time a lot of weekends. I figured that I had enough time to knock it out before heading to work. Hahaha. Well I pretty much got it done but had to head off to work and come back and add a few more zip ties at a little bit more sheathing and put my gas filler neck guard back on. So here's some nighttime pics for your amusement.
I sort of just eyeballed how much extra hose I wanted to run. Had I thought about it a little bit more I might have jacked the truck up to let the suspension droop to see what I was working with. However I feel I gave it a fair amount that should cover most circumstances. If needed for maintenance and you knew you were going to drop the rear axle quite a bit, you could simply remove the hose from the coupler on the differential taking care to cover it up so no debris enters the differential. I suppose that's a workable solution if you needed to do anything extreme like change out springs or anything.
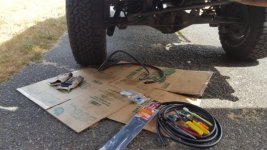
Tools I used:
* 14mm deep socket (or 14mm gear wrench) for old breather.
* 12mm gear wrench for new coupler.
* Small curved Kobalt pick. (used for depressing the retention tabs on the plastic clips that hold the fuel cover in place)
* Small screwdriver for tightening hose clamps and starting hole is fuel gasket.
* The same small razor X-ACTO style knive kit that Tim used in his video.
* A good pair of metal snipps. (great for cutting hose.)
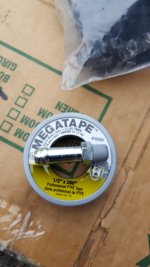
*Teflon tape.
*various length plastic zip ties.
*safety glasses. There can be lots of loose debris and dirt that falls when you're removing the fuel filler neck guard. If you're in the wrong place you could get a face full of dirt.
I never learn... This time of year I work over time a lot of weekends. I figured that I had enough time to knock it out before heading to work. Hahaha. Well I pretty much got it done but had to head off to work and come back and add a few more zip ties at a little bit more sheathing and put my gas filler neck guard back on. So here's some nighttime pics for your amusement.
I sort of just eyeballed how much extra hose I wanted to run. Had I thought about it a little bit more I might have jacked the truck up to let the suspension droop to see what I was working with. However I feel I gave it a fair amount that should cover most circumstances. If needed for maintenance and you knew you were going to drop the rear axle quite a bit, you could simply remove the hose from the coupler on the differential taking care to cover it up so no debris enters the differential. I suppose that's a workable solution if you needed to do anything extreme like change out springs or anything.
Tools I used:
* 14mm deep socket (or 14mm gear wrench) for old breather.
* 12mm gear wrench for new coupler.
* Small curved Kobalt pick. (used for depressing the retention tabs on the plastic clips that hold the fuel cover in place)
* Small screwdriver for tightening hose clamps and starting hole is fuel gasket.
* The same small razor X-ACTO style knive kit that Tim used in his video.
* A good pair of metal snipps. (great for cutting hose.)
*Teflon tape.
*various length plastic zip ties.
*safety glasses. There can be lots of loose debris and dirt that falls when you're removing the fuel filler neck guard. If you're in the wrong place you could get a face full of dirt.
Attachments
Last edited:

MattJakobs
New member
For some reason, I never knew you had a build thread but I'm happy I stumbled upon it. I'm about halfway through and will have to catch up on the second half later today.
Definitely digging the look of the Addicted more than that Shrockworks and I'd never guess that opening the hood would be such a problem with them haha.
Sub'd to see what's to come and definitely going to be borrowing a few ideas from here
Definitely digging the look of the Addicted more than that Shrockworks and I'd never guess that opening the hood would be such a problem with them haha.
Sub'd to see what's to come and definitely going to be borrowing a few ideas from here
Road Bull
Senior Member
For some reason, I never knew you had a build thread but I'm happy I stumbled upon it. I'm about halfway through and will have to catch up on the second half later today.
Definitely digging the look of the Addicted more than that Shrockworks and I'd never guess that opening the hood would be such a problem with them haha.
Sub'd to see what's to come and definitely going to be borrowing a few ideas from here
Lol. Thanks for stopping by Matthew! I didn't really do anything very exciting in the beginning. But a lot has come together in the last year or so.
I have borrowed much of my direction from quite a bit of the cool rigs on this forum. I jumped in on a Shrockworks GB early on before I did all my research. To me, their Pre-Runner design is much better than their fool hoop design. There is no reason the full hoops need to be so close to the hood and body. It was a huge PITA to get on, then I realized the design could not be used with the hood protector. I couldn't even close the hood with it. So yeah, I did more research and picked the AOR to take its place. Very happy with that switch.
Road Bull
Senior Member
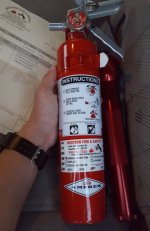
I picked up an Amerex B / C fire extinguisher today.
I have been meaning to do this for a long time. I say it's worth it to find a local supplier to find a quality extinguisher. And if possible, try to support you local businesses. Western Fire & Safety in Ballard have a great selection with good prices. I will probably go back for a larger one to keep in the cargo rear.
Now.. I just have to figure out how to mount it. I am thinking front passenger area within reach. I am just not sure what / how people are attaching their mounting hardware.
I have been meaning to do this for a long time. I say it's worth it to find a local supplier to find a quality extinguisher. And if possible, try to support you local businesses. Western Fire & Safety in Ballard have a great selection with good prices. I will probably go back for a larger one to keep in the cargo rear.
Now.. I just have to figure out how to mount it. I am thinking front passenger area within reach. I am just not sure what / how people are attaching their mounting hardware.
Attachments

theesotericone
New member
Now.. I just have to figure out how to mount it. I am thinking front passenger area within reach. I am just not sure what / how people are attaching their mounting hardware.
You know that area under the rear passenger side seat? The one that holds the factory jack and lowering tool? Those tools are useless to you now so take them out and mount it there. That's where mine is. It's out of the way enough to not bother anyone but close enough to be ready when(hopefully never) it's needed.
Road Bull
Senior Member
You know that area under the rear passenger side seat? The one that holds the factory jack and lowering tool? Those tools are useless to you now so take them out and mount it there. That's where mine is. It's out of the way enough to not bother anyone but close enough to be ready when(hopefully never) it's needed.
The space is there, but I want to keep it within arm's reach. The tree options I am looking at are passenger side front lower, either up against the center jump, or just in front of the passenger seat facing me.i just am trying to figure out just how people are anchoring them.
They come with a standard mounting bracket, but I would think you might need some sort of backing bracket or mounting hardware to make it work well.
Road Bull
Senior Member
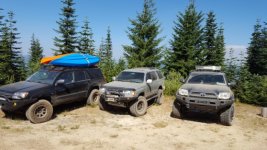
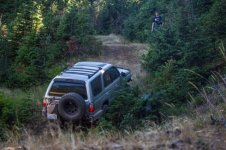
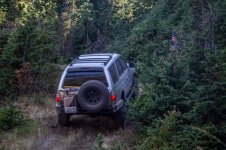
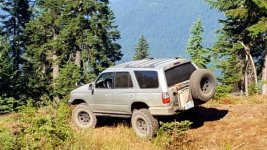
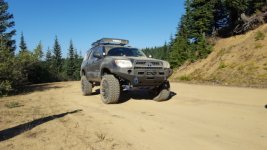
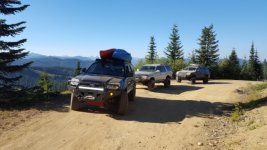
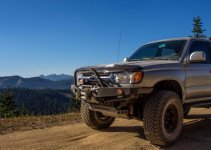
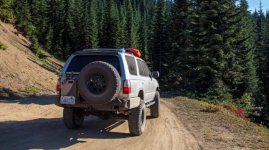
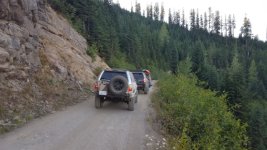
Stampede Pass 08/26/17
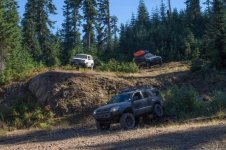
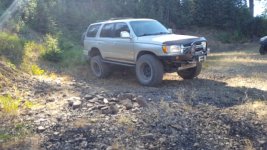
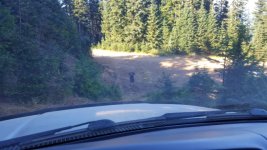
Its been a minute since I have been able to get out and enjoy some offroad in the 4runner. I met up with [MENTION=119029]NinjaOne[/MENTION] and [MENTION=125581]TrueBlue[/MENTION] from the 4runners of Washington FB page. They both had some pretty sweet 4th gens with V8s. I could tell the difference booming out East on I-90. We had a fun time exploring some trails and gooding around. I wanted to see how all the new mod would hold up offroad.
Everything was good for the most part. My wheel well plastic on the pinch weld, (that I had reshaped with a heat gun) managed to get caught and pulled to the front to buzz a bit right at the end. Think I will just snipp it out. Got some trail pinstripes... But it was fun.
Its been a minute since I have been able to get out and enjoy some offroad in the 4runner. I met up with [MENTION=119029]NinjaOne[/MENTION] and [MENTION=125581]TrueBlue[/MENTION] from the 4runners of Washington FB page. They both had some pretty sweet 4th gens with V8s. I could tell the difference booming out East on I-90. We had a fun time exploring some trails and gooding around. I wanted to see how all the new mod would hold up offroad.
Everything was good for the most part. My wheel well plastic on the pinch weld, (that I had reshaped with a heat gun) managed to get caught and pulled to the front to buzz a bit right at the end. Think I will just snipp it out. Got some trail pinstripes... But it was fun.
Attachments
-
 IMG_20170828_021101.jpg118.7 KB · Views: 549
 -
 IMG_20170828_005540.jpg134.5 KB · Views: 547
 -
 IMG_20170828_005558.jpg58.1 KB · Views: 547
 -
 IMG_20170828_021017.jpg65.2 KB · Views: 539
 -
 IMG_20170828_005711.jpg61.3 KB · Views: 554
 -
 IMG_20170828_021351.jpg113.5 KB · Views: 538
 -
 IMG_20170828_021528.jpg106.9 KB · Views: 554
Road Bull
Senior Member
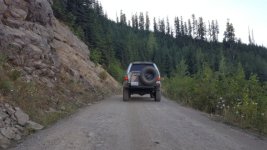
Stampede Pass 08/26/17 continued.
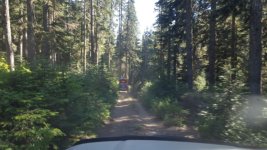
More pics. Man those trails are dusty! I want to head out and find a cool lake or river to spend some quiet time at.
More pics. Man those trails are dusty! I want to head out and find a cool lake or river to spend some quiet time at.
Attachments
-
 IMG_20170828_021438.jpg106.4 KB · Views: 573
 -
 IMG_20170828_021320.jpg94.4 KB · Views: 533
 -
 IMG_20170828_021235.jpg90.1 KB · Views: 520
 -
 IMG_20170828_005620.jpg94.2 KB · Views: 543
 -
 IMG_20170828_005633.jpg130 KB · Views: 513
 -
 IMG_20170828_020921.jpg107.5 KB · Views: 511
 -
 IMG_20170828_021152.jpg98.3 KB · Views: 518
 -
 IMG_20170828_021618.jpg122.6 KB · Views: 508
Road Bull
Senior Member
Looks like you guys had a good time. Glad you were able to use the 4Runner for what it's meant for. The PNW looks beautiful, it's on my short list of places to explore.
Yeah, it's nice to get out and take advantage of a nice day in the PNW. I work so much during summertime that it is hard to find time to enjoy summer like most normal human beings. Lol. I
It was nice to put all those mods to good use. I need to cut some of my wheel well trim, in the back of the front wells as the tires managed to catch at pull a small patch forward. Not bad, but just enough to being annoying.
Oh, and my latches for my 4X Innovations drop down table aren't doing their job. I think they got damaged in shipping, they eyeholes for the locks were bent and needed to be straightened. I didn't think that much of it, but there is enough play that the table bangs back and forth both on and offroad. I will need to get those replaced or remove the table because that will drive me crazy. I spoke to 4X, and they said that the latches should hold it tight.

Unner
New member
Yeah, it's nice to get out and take advantage of a nice day in the PNW. I work so much during summertime that it is hard to find time to enjoy summer like most normal human beings. Lol. I
It was nice to put all those mods to good use. I need to cut some of my wheel well trim, in the back of the front wells as the tires managed to catch at pull a small patch forward. Not bad, but just enough to being annoying.
Oh, and my latches for my 4X Innovations drop down table aren't doing their job. I think they got damaged in shipping, they eyeholes for the locks were bent and needed to be straightened. I didn't think that much of it, but there is enough play that the table bangs back and forth both on and offroad. I will need to get those replaced or remove the table because that will drive me crazy. I spoke to 4X, and they said that the latches should hold it tight.
I know some people have had to put a high density piece of foam or rubber where the mount is on their table to keep it from rattling. I'm not sure if that would work on the 4x one, I haven't seen exactly how they mount.
In regards to your King coilovers, can you adjust them on the truck, or do you have to pull them off to adjust? I'm thinking about switching over to Kings up front.
Road Bull
Senior Member
I know some people have had to put a high density piece of foam or rubber where the mount is on their table to keep it from rattling. I'm not sure if that would work on the 4x one, I haven't seen exactly how they mount.
In regards to your King coilovers, can you adjust them on the truck, or do you have to pull them off to adjust? I'm thinking about switching over to Kings up front.
I have been talking to Ben, and talked to Adam today. I think my issue was just bent latches in shipping. It didn't look too bad, so I just tried to bend them back, but I think that once they are replaced, that it should be good.
Kings should be able to be adjusted on the truck. They give you a punch tool to turn the collar to adjust height. They sell a wrench type tool, but it is the tool that has clearance issues and not usable in some positions. As soon as I find a place that knows what they're doing for 4x4 alignments I'll raise it up about another inch to be 23 up front and 25 in the rear. The Kings are nice though.
If you decide to order them I believe I went through total automotive performance via this forum. I would be very specific about the spring you want them to use though. Initially I thought I wanted a 650 lb spring but said if they, at King, thought I needed more to go ahead and bump it up considering I would be running the AR bumper along with steel cable winch. So they ended up sending me 600-lb Springs. So far they haven't been bad and I haven't noticed then being too soft. However I'm not tearing ass off road. If you want something specific make sure you specify that or be comfortable with them making the right choice for you.
Unner
New member
I have been talking to Ben, and talked to Adam today. I think my issue was just bent latches in shipping. It didn't look too bad, so I just tried to bend them back, but I think that once they are replaced, that it should be good.
Kings should be able to be adjusted on the truck. They give you a punch tool to turn the collar to adjust height. They sell a wrench type tool, but it is the tool that has clearance issues and not usable in some positions. As soon as I find a place that knows what they're doing for 4x4 alignments I'll raise it up about another inch to be 23 up front and 25 in the rear. The Kings are nice though.
If you decide to order them I believe I went through total automotive performance via this forum. I would be very specific about the spring you want them to use though. Initially I thought I wanted a 650 lb spring but said if they, at King, thought I needed more to go ahead and bump it up considering I would be running the AR bumper along with steel cable winch. So they ended up sending me 600-lb Springs. So far they haven't been bad and I haven't noticed then being too soft. However I'm not tearing ass off road. If you want something specific make sure you specify that or be comfortable with them making the right choice for you.
I'm sure 4x will take care of you. I've been meaning to get in touch with them about how they do tables for people with swingouts like mine and if they would be willing to sell me the parts to install one myself.
That's good to hear about the adjusting. I hadn't thought about the spring rate, but that's a good point. I'm not sure if I should go 650 or 600. I'm pretty sure my Boss coilovers are 600, and I don't know if I would want to go up to a 650lb coil. Maybe a longer 600 lb coil? I think that's what a lot of people with a lot of front weight do. a 14" 600 lb coil maybe?

sschaefer3
New member
Keep in mind a 600, 14" coil that is 3" ID, inside diameter, is very different than a 600, 14" coil that is 2.5" ID.
His kings are probably 2.5 sized for the shock and the Eibach shocks in the other set are 2.0 sized.
Not the same thing. A 2.5 body is the same at 2 physical 2.0's side by side.
His kings are probably 2.5 sized for the shock and the Eibach shocks in the other set are 2.0 sized.
Not the same thing. A 2.5 body is the same at 2 physical 2.0's side by side.
Road Bull
Senior Member
I'm sure 4x will take care of you. I've been meaning to get in touch with them about how they do tables for people with swingouts like mine and if they would be willing to sell me the parts to install one myself.
That's good to hear about the adjusting. I hadn't thought about the spring rate, but that's a good point. I'm not sure if I should go 650 or 600. I'm pretty sure my Boss coilovers are 600, and I don't know if I would want to go up to a 650lb coil. Maybe a longer 600 lb coil? I think that's what a lot of people with a lot of front weight do. a 14" 600 lb coil maybe?
Oh yeah, 4X are some cool guys. We are getting it sorted. I am getting some extra hardware, some replacement latches, as well as another set of spring loaded T-handles should I ever need them down the trail. :rain:
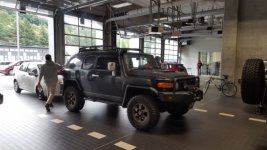
I am digging the bumper though. It got a lot of attention today when I drove through the service center at Toyota. LOL. A cool built FJ came in right behind me. The employees seemed to know him on a first name basis and informed me that it was a pretty cool supercharged FJ. I was going to have a lug stud replaced, but found out they wanted $135 labor. I declined and just got the parts.
As far as spring rate go, it seems that most go with either a 600# or a 650#. Those that get the 700# do mention quite a stiff ride. I figure that if my 600# coils begin to let me down, I will just move up to 650s. At least a fair amount of people have Kings so you should have plenty of people to talk to. Then be specific when you order. I just figured that someone over there at King has a magic weight to spring, to valving calculator that knows all. I suppose that is putting a lot of faith into trusting that someone is bothering to do that at all. LOL. For all I know someone could have just used the 600s because they were within reach. There was no communication from King once ordered through TAP. TAP only knows that they put the order in but could not provide a lot of other info once ordered. TAP did a good job at trying to answer my questions to the best of their abilities.
Attachments
Last edited:

A.Wilson013
New member
Keep in mind a 600, 14" coil that is 3" ID, inside diameter, is very different than a 600, 14" coil that is 2.5" ID.
His kings are probably 2.5 sized for the shock and the Eibach shocks in the other set are 2.0 sized.
Not the same thing. A 2.5 body is the same at 2 physical 2.0's side by side.
Aside from the size, how is a 14x600x2.5 coil different from 14x600x3 coil? I was under the impression that their ID was the only difference (and that may very well be what you're saying... as it is quite different) but shouldn't the performance characteristics of the spring be the same?
As for a 2.5 body being the same is 2 2.0's side by side... How is that? I'm probably way over-simplifying it, but two circles with a 1" radius have a combined area of quite a bit more than a circle with 2.5" radius. Something like 25% more, right? From that I would think that two 2" shocks would have ~25% more fluid, and a combined piston size ~25% larger than a 2.5.
sschaefer3
New member
Well here is a start.
https://www.acxesspring.com/coil-springs-mean-diameter.html
https://www.acxesspring.com/wire-springs-inner-diameter.html
Spring Coil Diameter | Calculating Coil Spring Diameter | Newcomb Spring
Lee Spring
Pirate4x4.Com : 4x4 and Off-Road Forum - View Single Post - Cutting Coil Springs
It is extremely complex. Inside, Outside, ID's, Wire Gauge, Material composition, standard or progressive. So many things make one coil very different than another.
The problem with internet message boards is that you have one group that is a repeater. They repost info they read somewhere, it may be correct or it may not be. Then you have the assumer. They think if it's a 3rd gen spring it the same as any other 3rd gen spring. This is not true.
Irony is that the TRD coils we use are actually 3 5/8" ID and progressive, dual rate. King, Icon, Radflo, who ever. Max out a 3rd gen application at 3" ID, strength coil, single rate.
The bottom line is that the guy with the Kings has something entirely different then the Boss Stuff. Your results will not be the same as the parts are not the same. For the assumer, they are vastly different.
https://www.acxesspring.com/coil-springs-mean-diameter.html
https://www.acxesspring.com/wire-springs-inner-diameter.html
Spring Coil Diameter | Calculating Coil Spring Diameter | Newcomb Spring
Lee Spring
Pirate4x4.Com : 4x4 and Off-Road Forum - View Single Post - Cutting Coil Springs
It is extremely complex. Inside, Outside, ID's, Wire Gauge, Material composition, standard or progressive. So many things make one coil very different than another.
The problem with internet message boards is that you have one group that is a repeater. They repost info they read somewhere, it may be correct or it may not be. Then you have the assumer. They think if it's a 3rd gen spring it the same as any other 3rd gen spring. This is not true.
Irony is that the TRD coils we use are actually 3 5/8" ID and progressive, dual rate. King, Icon, Radflo, who ever. Max out a 3rd gen application at 3" ID, strength coil, single rate.
The bottom line is that the guy with the Kings has something entirely different then the Boss Stuff. Your results will not be the same as the parts are not the same. For the assumer, they are vastly different.
sschaefer3
New member
As for a 2.5 body being the same is 2 2.0's side by side... How is that? I'm probably way over-simplifying it, but two circles with a 1" radius have a combined area of quite a bit more than a circle with 2.5" radius. Something like 25% more, right? From that I would think that two 2" shocks would have ~25% more fluid, and a combined piston size ~25% larger than a 2.5.
Some amazing fire side reading.
Radflo Suspension Technology - Shock Absorber Selection Guide
Similar threads

- Replies
- 2
- Views
- 3K

- Replies
- 0
- Views
- 347

- Replies
- 0
- Views
- 2K


Members online
Total: 4,295 (members: 7, guests: 4,288)
Forum statistics
Trending content
-

-

-
-
-
Thread 'Fixed: Dead Instrument Cluster in 2003 Toyota 4Runner (Corrosion Issue)'
- TheSpeakGeek
Replies: 9