Rock Rat's Imperial Jade Mica "Next Adventure" Build

Replace Alternator at 333K Miles

Replace Alternator
I had started to notice my alternator was not working to its fullest potential. This past week I was beginning to notice my output was steadily dropping below 12.5 even into the 11's. I performed the obvious troubleshooting steps first beginning with ensuring I still had a belt. I checked my wiring and my 120amp fuse. All looked fine. I then checked my voltage and amps at the alternator at around 2000rpm. Amps were way below the 30amp threshold.

Denso or After Market?
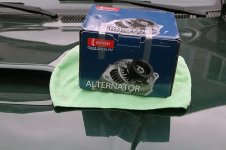
With 333K miles on the original alternator it was a no brainer for me - DENSO!

I ordered it from Camelback early in the week for $229 plus $30 for core. Ordering from Camelback gave me the reassurance that the alternator was re-manufactured by Toyota. I probably still had a little mileage left on the old one but not much I'm sure.

  • Alternator - Denso - PN#270606216084
  • Cost - $229 plus $30 for core return
  • Time - About one hour
  • Tools - basic metric sockets, 3/8 drive ratchet and one 3" extension

Removal
  1. Disconnect negative battery terminal.
  2. Remove nut and washer from external terminal and the wire.
    I purposely skip this next step here as in the FSM or Haynes - they have you disconnect the connector but it's a PITA from the side because of a lack of good leverage. See my hints and tips below.
  3. Loosen the alternator locknut, pivot bolt, nut and adjusting bolt.
  4. Push the alternator towards the engine and remove the alternator belt.
  5. Remove the alternator lock nut, bolt and pivot bolt.
  6. Gently slide the alternator out and turn on it's side with the connector facing you.
  7. Disconnect the wiring connector by pressing in on the grey tab.

HINTS and Tips
  1. Do NOT remove the battery. It's not necessary.
  2. Do not attempt to disconnect the connector until AFTER you remove all the hardware and lay it on it's side. It's much easier.
  3. With a DENSO you don't need dielectric grease it ships already installed.
  4. The easiest access to install the lock bolt and nut is from under the vehicle through the wheel well. If you have pretty good dexterity you can install everything from the top.
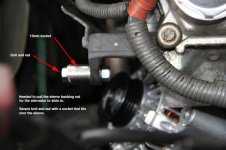
  5. I had to reset the sleeve bushing flush again so the alternator would slide in. I used a 15 mm socket, a bolt and nut. Pulled the bushing flush.

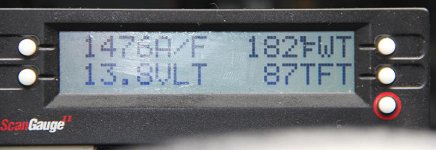
    Started it up and ran it for a while and loved seeing it back into the 13.8 and higher range again.
 

Attachments
  • T4R Alternator Voltage Reading.jpg
    T4R Alternator Voltage Reading.jpg
    46.4 KB · Views: 2,101
  • New alternator Mar 26 2016.jpg
    New alternator Mar 26 2016.jpg
    59.5 KB · Views: 2,112
  • T4R Alternator.jpg
    T4R Alternator.jpg
    61.9 KB · Views: 2,139
Last edited:
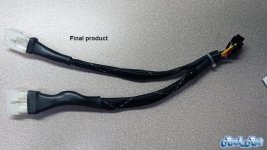
Pioneer DEH-X9600BHS Installation and Paranoid Fabrications Panel

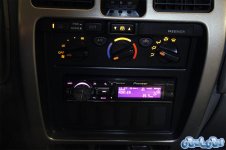
Pioneer DEH-X9600BHS Installation

Time for me to remove my double DIN antiquated radio and install my single din.

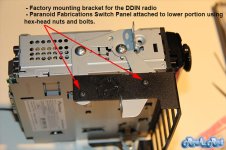
Reason for a single din: I like the "clean" unobtrusive professional look of the Paranoid Fabrications switch plate the best. It accommodates six switches.

List of Parts

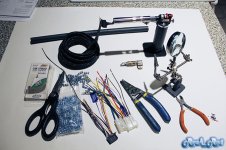
Tools Needed
  • Ratchet, extension and socket or large crosspoint screwdriver (AKA; Phillips)
  • Typical wiring tools
  • Wire strippers (I actually use a pair of Klein pro strippers)
  • Crimpers
  • Heat gun
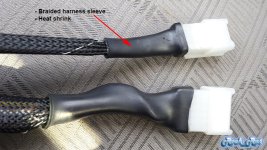
  • Braided wiring harness loom
  • Butt splices or crimpless heat shrink solder sleeves
  • Heat shrink tubing
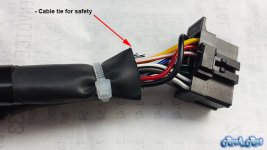
  • Cable tie

I'll do the removal and installation later on (If it's necessary??)...it's really straight forward but for all the noobs...

If you're wondering why I used solder sleeves it's only because I ran out of butt splices. If you have a choice between crimp or solder, always crimp.

I also ended up using a Steinel HG 2510 heat gun with a 9mm reflector nozzle.

Anyway, I like the way everything turned out for me. I don't have any plans of adding an aftermarket amp and will probably not re-install the factory amp using the optional Metra harness. My reception is fine without the Y adapter. I will go to the taco whip someday.

Edit: The switch panel came with hex-head bolts and nylocs in a small baggie with candy. Like all the bags of candy I get from Wheelers or wherever I threw it in the pantry in a jar. When I went to install the panel I went to Tacoma Screw (locals know this place) and picked up the hardware. It wasn't until later on that I found the hardware in the bag of candy!
 

Attachments

  • Radio_1.jpg
    Radio_1.jpg
    41.9 KB · Views: 1,824
  • Radio_2.jpg
    Radio_2.jpg
    96.3 KB · Views: 1,849
  • Radio_3.jpg
    Radio_3.jpg
    81.9 KB · Views: 1,849
  • Radio_4.jpg
    Radio_4.jpg
    70.5 KB · Views: 1,840
  • Radio_6.jpg
    Radio_6.jpg
    64.8 KB · Views: 1,856
  • Radio_5.jpg
    Radio_5.jpg
    41.3 KB · Views: 1,807
Last edited:
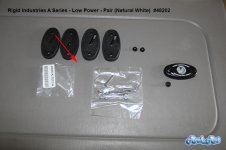
Rigid Industries A-Series Lights in Cargo Door

I've thought through what lights I wanted to add to the cargo door for additional lighting when the door is open and how I wanted them to operate.

I've seen a lot of different options on here but decided on the Rigid Industries A-Series lights. I also figured the area I would need them the most is over the camp table and the stove which will be on both the driver and passenger side.

If it's not enough light, I could always add additional lights in the center.


Installation of A-Series Lights in Cargo Door

I'll update this section later on but for now, here are the photos.
 

Attachments

  • Rigid Industries Cargo_1.jpg
    Rigid Industries Cargo_1.jpg
    48.1 KB · Views: 1,866
  • Rigid Industries Cargo_2.jpg
    Rigid Industries Cargo_2.jpg
    71.5 KB · Views: 1,833
  • Rigid Industries Cargo_3.jpg
    Rigid Industries Cargo_3.jpg
    45.7 KB · Views: 1,841
  • Rigid Industries Cargo_4.jpg
    Rigid Industries Cargo_4.jpg
    136.3 KB · Views: 1,791
  • Rigid Industries Cargo_5.jpg
    Rigid Industries Cargo_5.jpg
    64.9 KB · Views: 1,860
Installing LED Lights in Rear Cargo Door

OK now for the wiring update before I run out for the weekend.

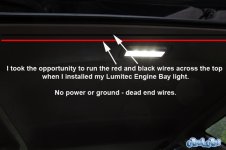
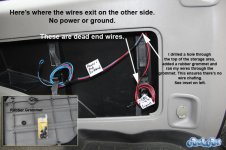
If you look through my build and my installation of the Lumitec Engine bay light, you'll see that I ran red and black 18AWG wire from the rear cargo passenger storage are across the top, through the rubber wire conduit and out the cargo hatch. Those red and black wires are "dead" and originate and end nowhere.

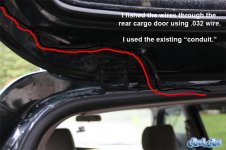
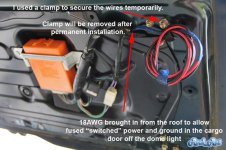
Once I installed the Lumitec light and relocated my switch to my drivers side panel I ran three more wires, red (hot), black (ground) and a blue (switched) wire across the top and into the same rear cargo area. Now I have the option of adding switched power (on, off, auto) to my cargo lights if I want, running off the same dome light fuse. Sweet.

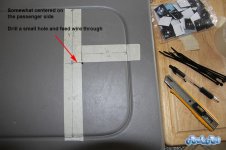
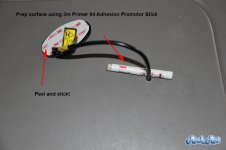
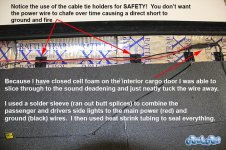
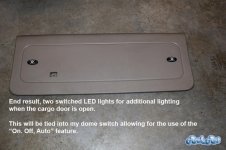
I installed the rigid industries A Series lights in the cargo panel and ran 18 AWG tinned wire from Ancor to the right side of the panel. I installed them in series, one on each side of the panel as I believe that's where I'll need them the most. Depending on the load on my circuit, (It should be minimal) I could add additional lights as needed.

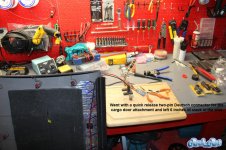
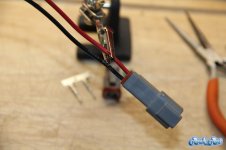
To connect the interior panel to the cargo door I decided to go with a Deutsche 2-pin connector. This allows me to easily connect/disconnect the panel should I need to go back into the cargo door for anything, such as a wiper motor, ecu etc...

The lights still aren't hooked up yet inside the vehicle because I plan on installing two or three carling style rocker switches. As always, I'm pretty methodical and don't want to rush into it yet until I know exactly what switches I want back there. I will install them above the 12V receptacle.
Here's a few pics and a somewhat decent explanation. I try to take pics on my kitchen counter for clarity but my wife is baking tons of cookies!! You'll just have to live with the mess.
 

Attachments

  • cargo door lights_2.jpg
    cargo door lights_2.jpg
    41.7 KB · Views: 1,589
  • cargo door lights_3.jpg
    cargo door lights_3.jpg
    63.4 KB · Views: 1,610
  • cargo door lights_1.jpg
    cargo door lights_1.jpg
    84.9 KB · Views: 1,598
  • cargo door lights_4.jpg
    cargo door lights_4.jpg
    68.3 KB · Views: 1,634
  • cargo door lights_5.jpg
    cargo door lights_5.jpg
    114.1 KB · Views: 1,592
  • cargo door lights_6.jpg
    cargo door lights_6.jpg
    43.5 KB · Views: 1,584
Last edited:
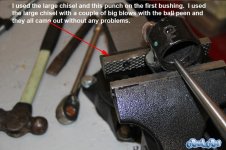
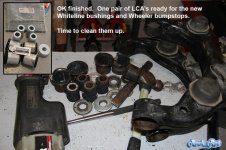
Lower Control Arm Bushing Removal - Off Vehicle

Removing the LCA Bushings (off vehicle)
As the title says this is for removing the LCA bushings with the LCA's already removed from the vehicle. (I purchased two LCA's along with two axles, spindles, and knuckles from a junk yard for my front end rebuild. I will rebuild and keep my existing components as OEM spares)

A word of caution - the first bushing I did was a PITA! I regretted ever having attempted this. However, once I got the "knack" of it, it's really quite simple.

For this process I used the following, but you can make do with whatever tools you have or rent.

Tools
  • Press
  • Vice
  • Sawzall
  • Diablo Steel Demon Carbide Tipped Blade!! Crucial!!
  • Hammer
  • Chisel
  • Butane torch
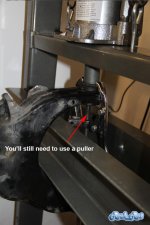
  • Puller
  • Lubrication

Steps
  • Place LCA securily in the vice.
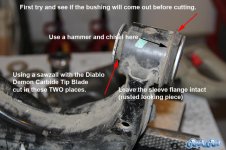
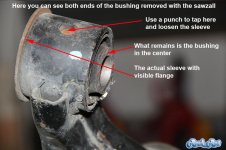
  • Cut BOTH ends off the bushing using sawzall with Diablo blade.
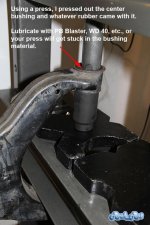
  • Using the press use plenty of lubrication and press out the center steel bushing.
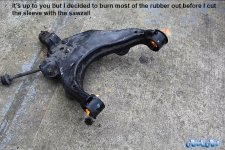
  • Torch or scrape some of the rubber off the remaining sleeve.
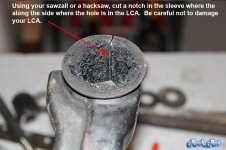
  • Using either a hacksaw or your sawzall place a cut in the sleeve.

BE CAREFUL NOT TO CUT THE LCA
  • Optional: use a punch and tap the sleeve through the hole on the LCA
  • Take a big hammer and chisel and work the sleeve out

If anyone has any other shortcuts or helpful hints and tips (only on the removal process with LCA removed from vehicle) feel free to contribute. I thought for sure I would have found this in the tutorial section.

The big question: should you just spend $170 (EACH) for new OEM LCA's with bushings or do this yourself? After this weekends experience with the first bushing I was ready to buy new. However, a little persistence and I say it's well worth the money saved if you do it yourself. I've already ordered my cam adjusters!!
 

Attachments

  • LCA Bushing Removal_1.jpg
    LCA Bushing Removal_1.jpg
    73.9 KB · Views: 1,783
  • LCA Bushing Removal_2.jpg
    LCA Bushing Removal_2.jpg
    69.9 KB · Views: 1,799
  • LCA Bushing Removal_3.jpg
    LCA Bushing Removal_3.jpg
    72.4 KB · Views: 1,751
  • LCA Bushing Removal_4.jpg
    LCA Bushing Removal_4.jpg
    60.2 KB · Views: 1,763
  • LCA Bushing Removal_5.jpg
    LCA Bushing Removal_5.jpg
    136.1 KB · Views: 1,760
  • LCA Bushing Removal_6.jpg
    LCA Bushing Removal_6.jpg
    65.9 KB · Views: 1,807
  • LCA Bushing Removal_7.jpg
    LCA Bushing Removal_7.jpg
    82.7 KB · Views: 1,788
  • LCA Bushing Removal_8.jpg
    LCA Bushing Removal_8.jpg
    86.5 KB · Views: 1,790
Last edited:
Good God Mike!!

When you set out to do something there's no messing around from you!
I'm digging everything you've been doing, the detailed write ups are great as well. I'm still open to giving a hand, or beer assistant when you install the SC,
I'll PM you my number also I wouldn't mind you taking a look at my SC and get your opinion on a couple things.
 
Nice write up. I'm currently debating if I want to buy used LCA's and replace the bushings in them and swap or just buy whole new OEM arms.
 
Nice write up. I'm currently debating if I want to buy used LCA's and replace the bushings in them and swap or just buy whole new OEM arms.

I would buy new LCA's because mine are pretty rusty. Your's are probably fine. I wouldn't want to reuse them unless they were blasted & powder coated or painted. Hence why I would buy new & forgo all of the hassle.
 
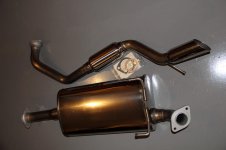
TRD Cat Back Exhaust Arrived

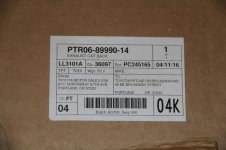
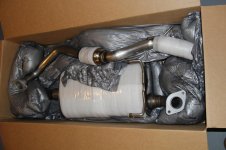
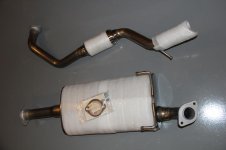
In preparation for the SC I'm opening up my exhaust first. The elusive TRD headers are on their way but I was able to get the best deal for the TRD Cat Back exhaust locally at Broadway Toyota from Brock Powell. Great guy.

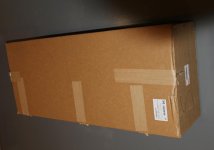
The packaging is nothing less than what you would expect from Toyota! Awesome job and I'm looking forward to installing this or having it installed by Barker Muffler and Brake in Portland. They do high performance exhaust work. They will make the flow through cat for me.
 

Attachments

  • TRD Cat Back Exhaust 001.jpg
    TRD Cat Back Exhaust 001.jpg
    35 KB · Views: 1,696
  • TRD Cat Back Exhaust 002.jpg
    TRD Cat Back Exhaust 002.jpg
    58.1 KB · Views: 1,732
  • TRD Cat Back Exhaust 003.jpg
    TRD Cat Back Exhaust 003.jpg
    64 KB · Views: 1,690
  • TRD Cat Back Exhaust 004.jpg
    TRD Cat Back Exhaust 004.jpg
    67.1 KB · Views: 1,667
  • TRD Cat Back Exhaust 005.jpg
    TRD Cat Back Exhaust 005.jpg
    38.6 KB · Views: 1,711
  • TRD Cat Back Exhaust 006.jpg
    TRD Cat Back Exhaust 006.jpg
    43.8 KB · Views: 1,769
Last edited:

Members online

Forum statistics

Threads
278,316
Messages
3,554,124
Members
248,016
Latest member
Advally Service

Trending content

Back
Top