
You are using an out of date browser. It may not display this or other websites correctly.
You should upgrade or use an alternative browser.
You should upgrade or use an alternative browser.
Scramble's "Metallica Truck" Build Thread
- Thread starter Scramble
- Start date

Scramble
New member
Man, I can't believe I still haven't seen you around the Meadowlands area yet.
I drive my 99 Limited to work almost every day. The 3rz hasn't been any where in a year & a half since the diff leak & rust repairs. Except around the block a few times. I put it away for the winter. I'm painting the bumpers this weekend & getting them back on. I have a wheelin trip on the 28th & need to get her back together & registerd & inspected. I'm under the gun.
Attachments
Last edited:

T4R2014
Elite Member
I drive my 99 Limited to work almost every day. The 3rz hasn't been any where in a year & a half since the diff leak & rust repairs. Except around the block a few times. I put it away for the winter. I'm painting the bumpers this weekend & getting them back on. I have a wheelin trip on the 28th & need to get her back together & registerd & inspected. I'm under the gun.
Even still, I'd prob notice the Limited! Starting to see a lot more around here. There's a lifted 01-02 with Land Cruiser wheels and an ARB that I always see around.
Scramble
New member
Even still, I'd prob notice the Limited! Starting to see a lot more around here. There's a lifted 01-02 with Land Cruiser wheels and an ARB that I always see around.
Ever see the lifted Sequoia? I was talking to him at a red light one day. Looks cool.
Last edited:
Scramble
New member
After removing the hitch I pulled off the front bumper so I could pressure wash the frame on the hill & let the dirt & rust out of the front. Then spray with Eastwoods internal frame coating.
This is only 3 NY winters. This bumper has 3 coats of self etching primer, 3 coats of regular primer & 3 coats.
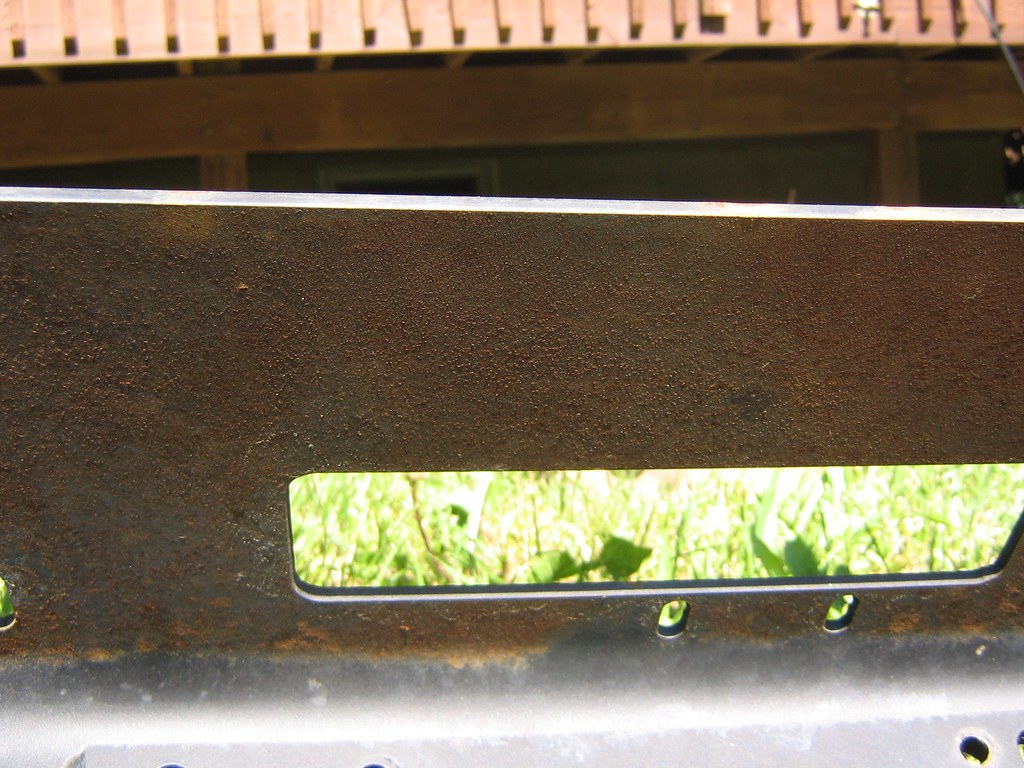 IMG_1939 by Mike Campbell, on Flickr
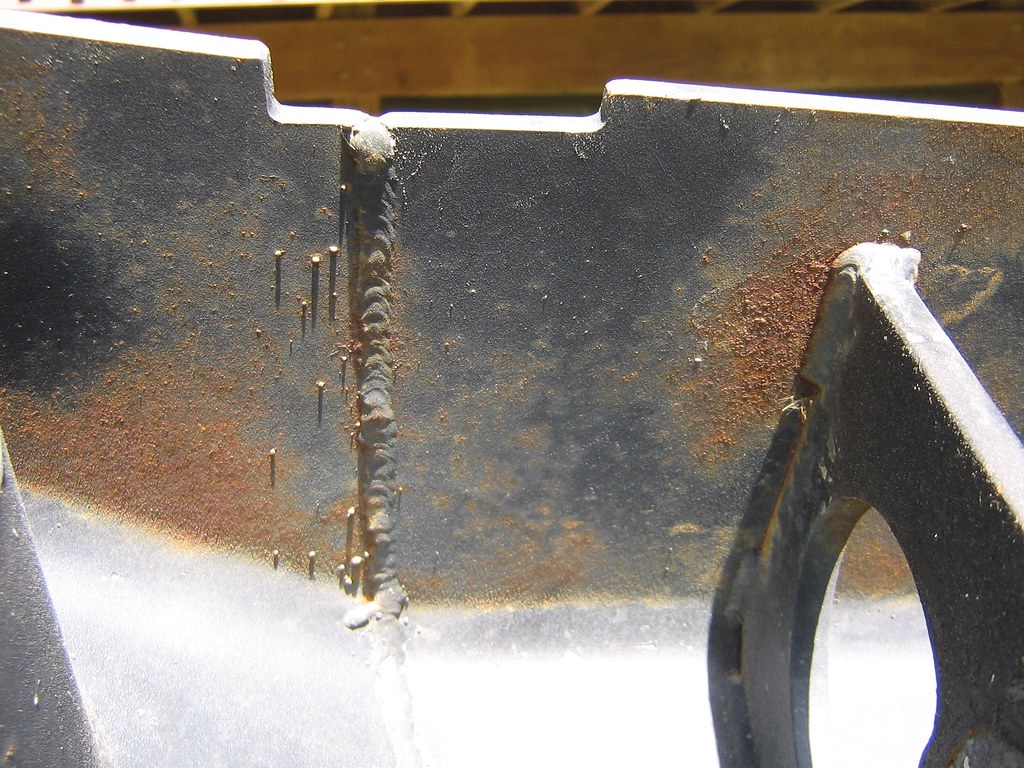 IMG_1940 by Mike Campbell, on Flickr
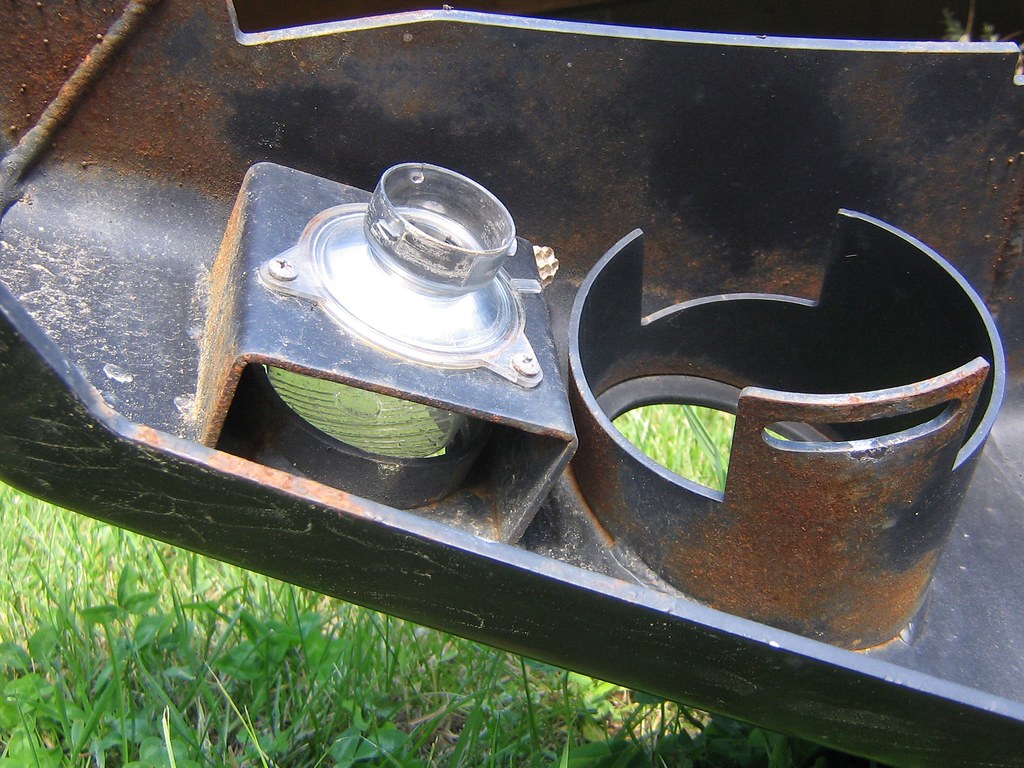 IMG_1941 by Mike Campbell, on Flickr
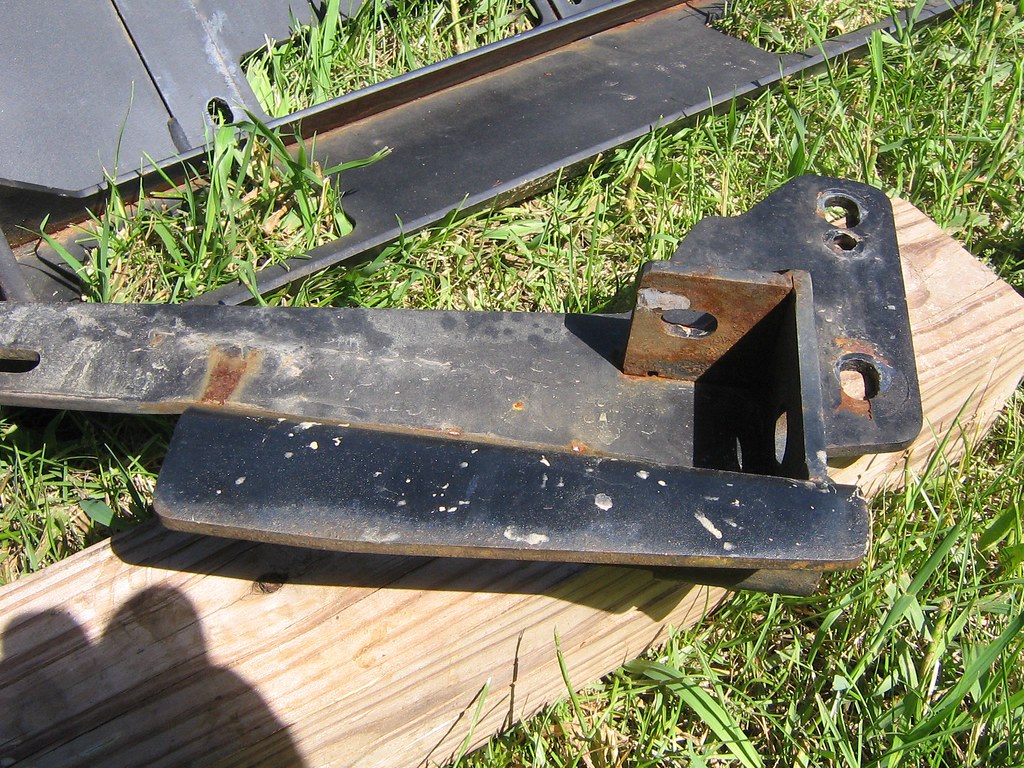 IMG_1942 by Mike Campbell, on Flickr
Hit it with some Purple Power & the pressure washer.
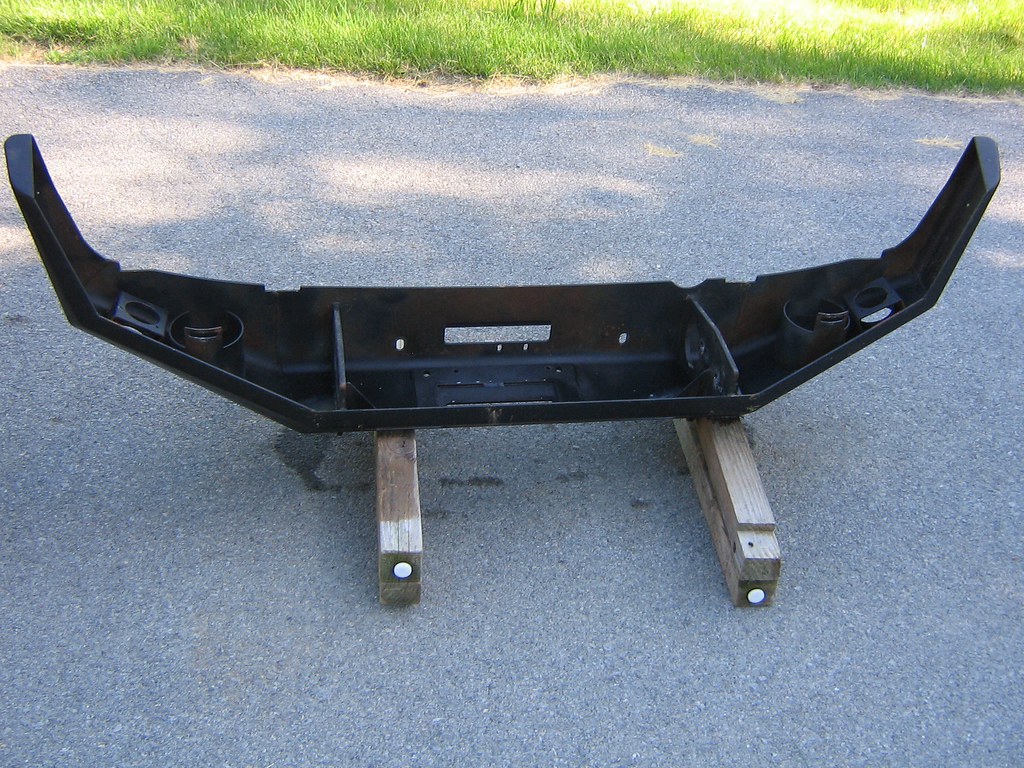 IMG_1945 by Mike Campbell, on Flickr
This is only 3 NY winters. This bumper has 3 coats of self etching primer, 3 coats of regular primer & 3 coats.
IMG_1939 by Mike Campbell, on FlickrIMG_1940 by Mike Campbell, on FlickrIMG_1941 by Mike Campbell, on FlickrIMG_1942 by Mike Campbell, on FlickrHit it with some Purple Power & the pressure washer.
IMG_1945 by Mike Campbell, on Flickr
Last edited:
Scramble
New member
Power washing inside the frame from back to front downhill.
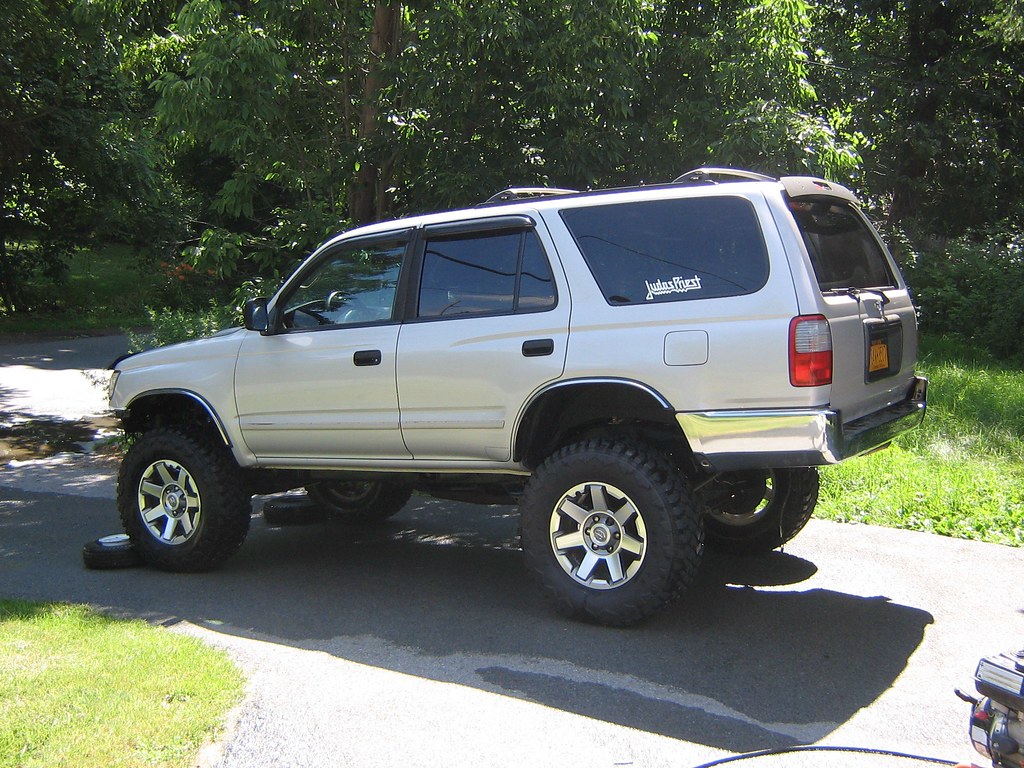 IMG_1980 by Mike Campbell, on Flickr
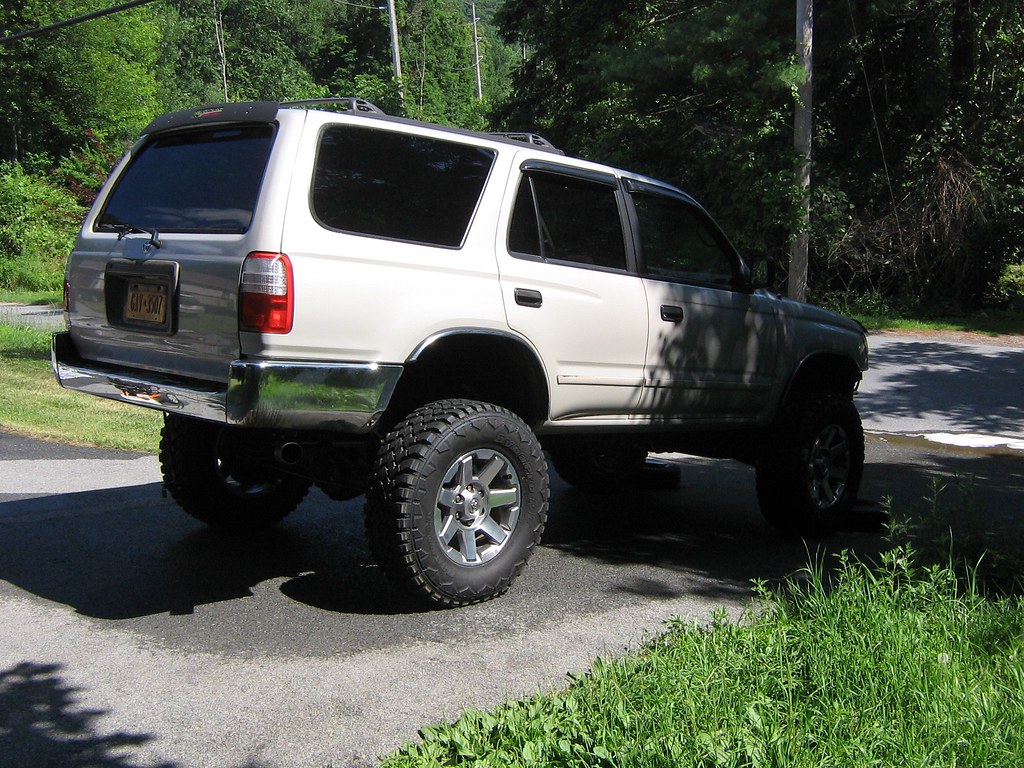 IMG_1979 by Mike Campbell, on Flickr
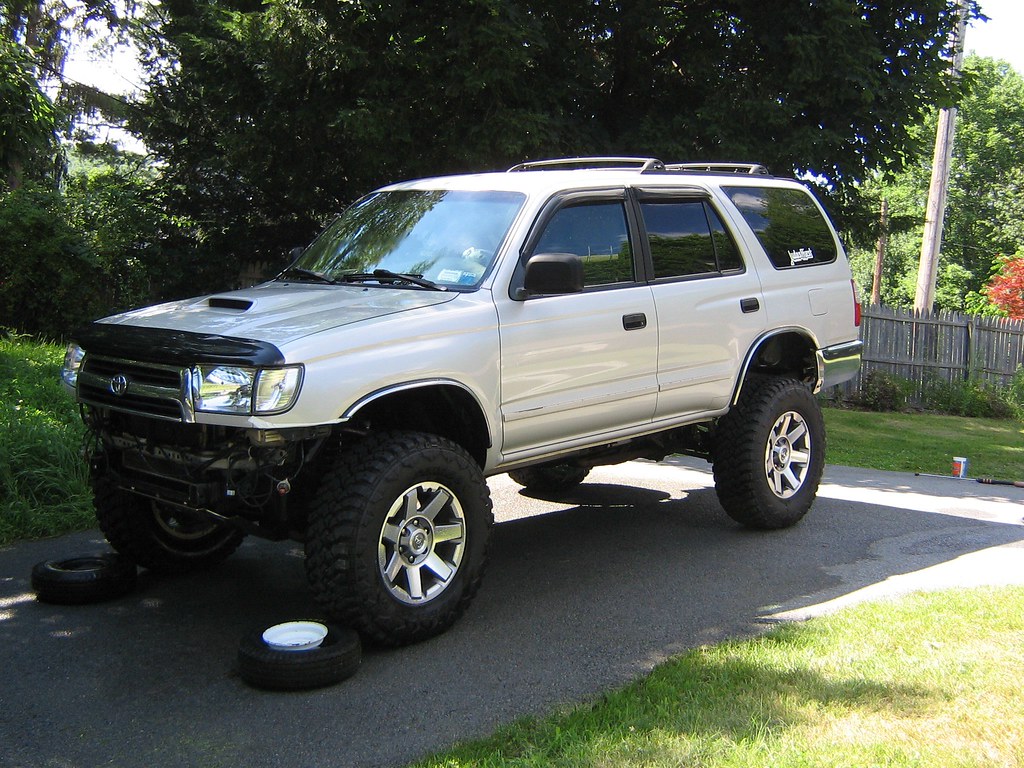 IMG_1982 by Mike Campbell, on Flickr
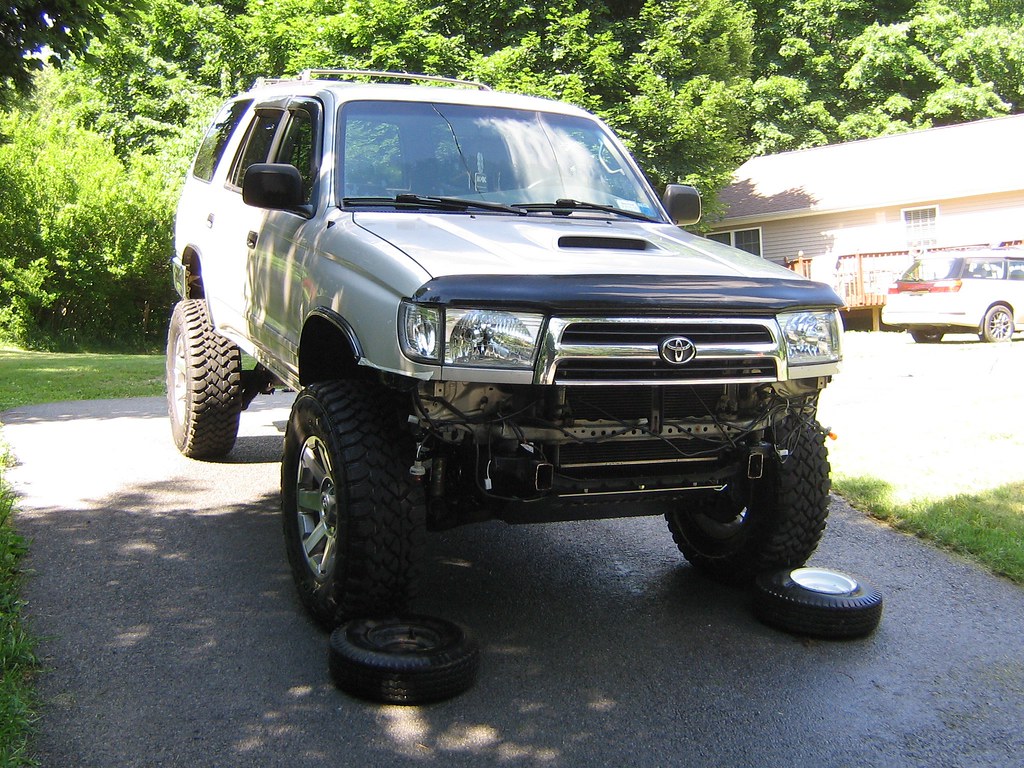 IMG_1983 by Mike Campbell, on Flickr
Frame's still solid in the front.
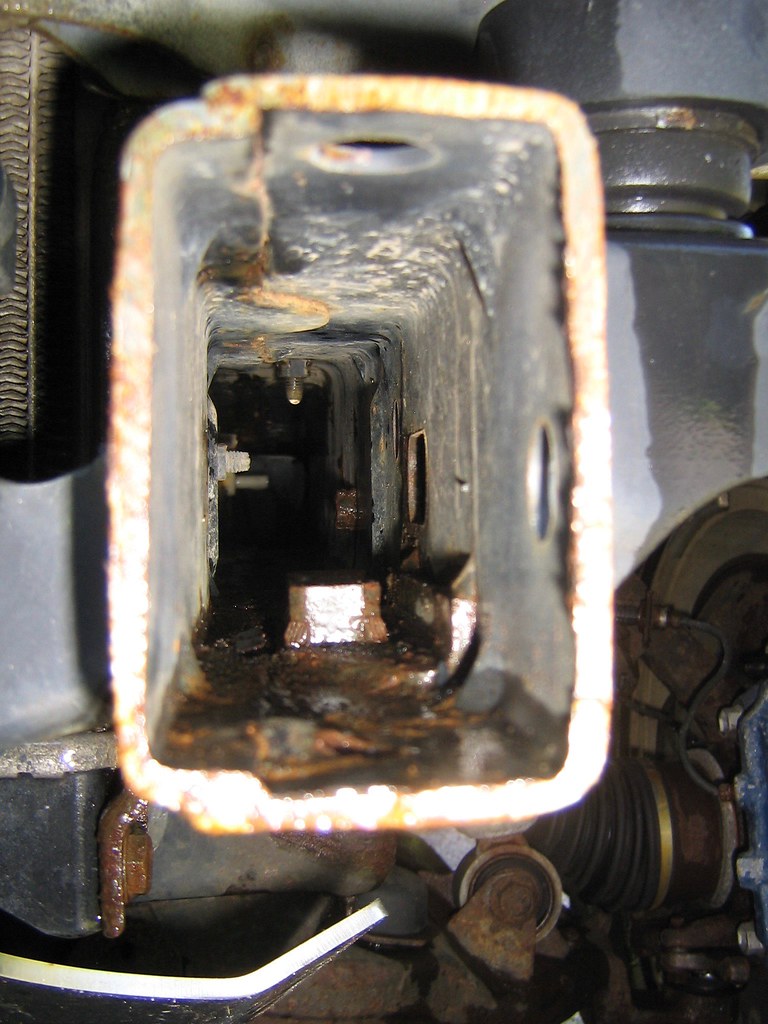 IMG_1986 by Mike Campbell, on Flickr
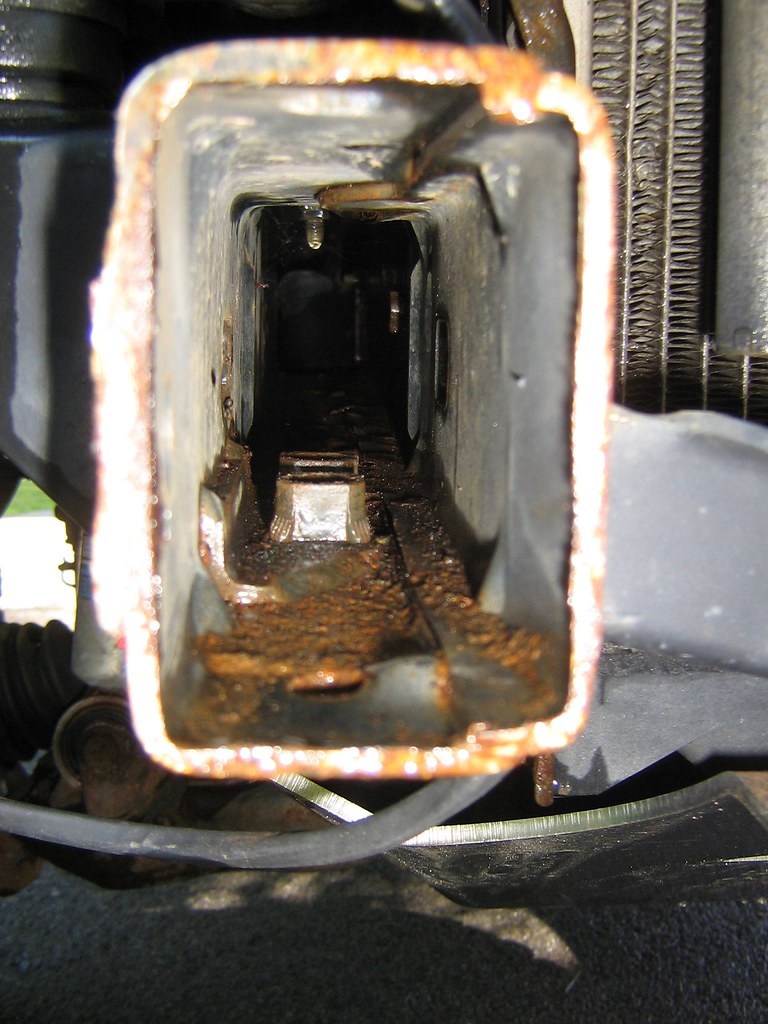 IMG_1985 by Mike Campbell, on Flickr
This is what I collected off the ground. Notice the 2 bolts that broke off the hitch.
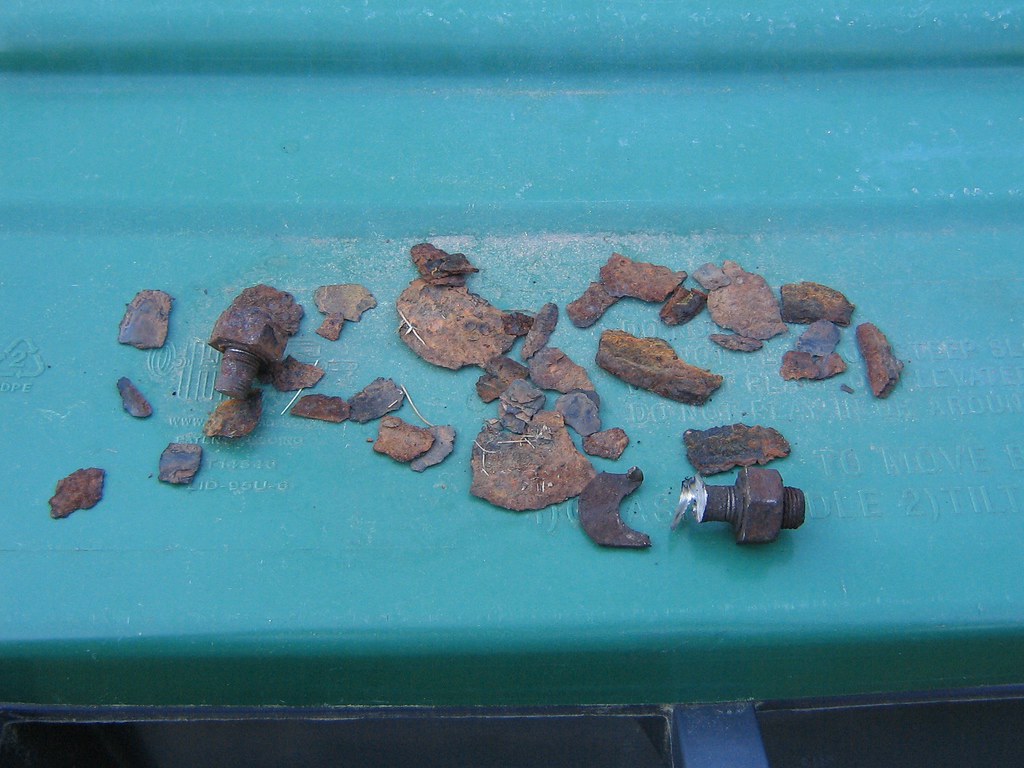 IMG_1946 by Mike Campbell, on Flickr
IMG_1980 by Mike Campbell, on FlickrIMG_1979 by Mike Campbell, on FlickrIMG_1982 by Mike Campbell, on FlickrIMG_1983 by Mike Campbell, on FlickrFrame's still solid in the front.
IMG_1986 by Mike Campbell, on FlickrIMG_1985 by Mike Campbell, on FlickrThis is what I collected off the ground. Notice the 2 bolts that broke off the hitch.
IMG_1946 by Mike Campbell, on Flickr
Last edited:
Scramble
New member
Aug 2017
After rinsing out the frame rails I moved her onto the grass & proceeded to disconnect everything to remove the axle housing. You need to disconnect the ABS lines, brake lines, parking brake, shocks, panhard bar, driveshaft and upper & lower control arms.
I put the rear up on 6 ton jack stands set on 1" plywood so they wouldn't sink into the dirt. Chocked the front wheels, put the T/C in 4Lo & the M/T in 1st gear so she wouldn't roll on me. I couldn't use the parking brake & didn't want her moving while I was under there sanding & painting the frame.
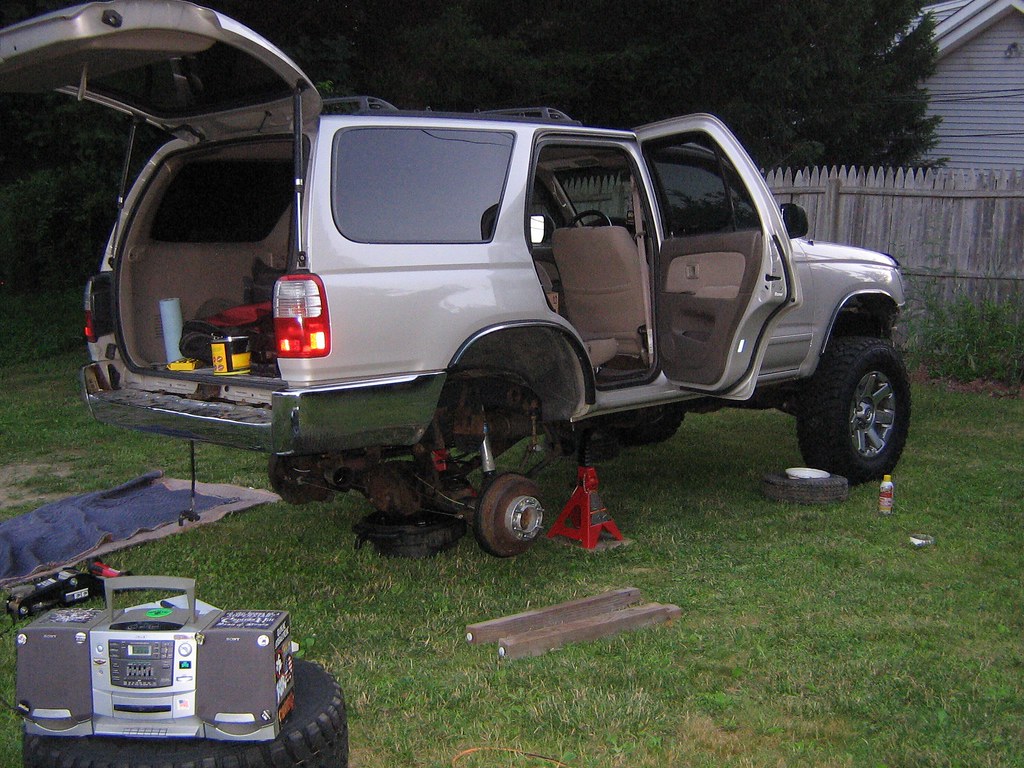 IMG_1991 by Mike Campbell, on Flickr
Pulled the wheels off & drained the diff.
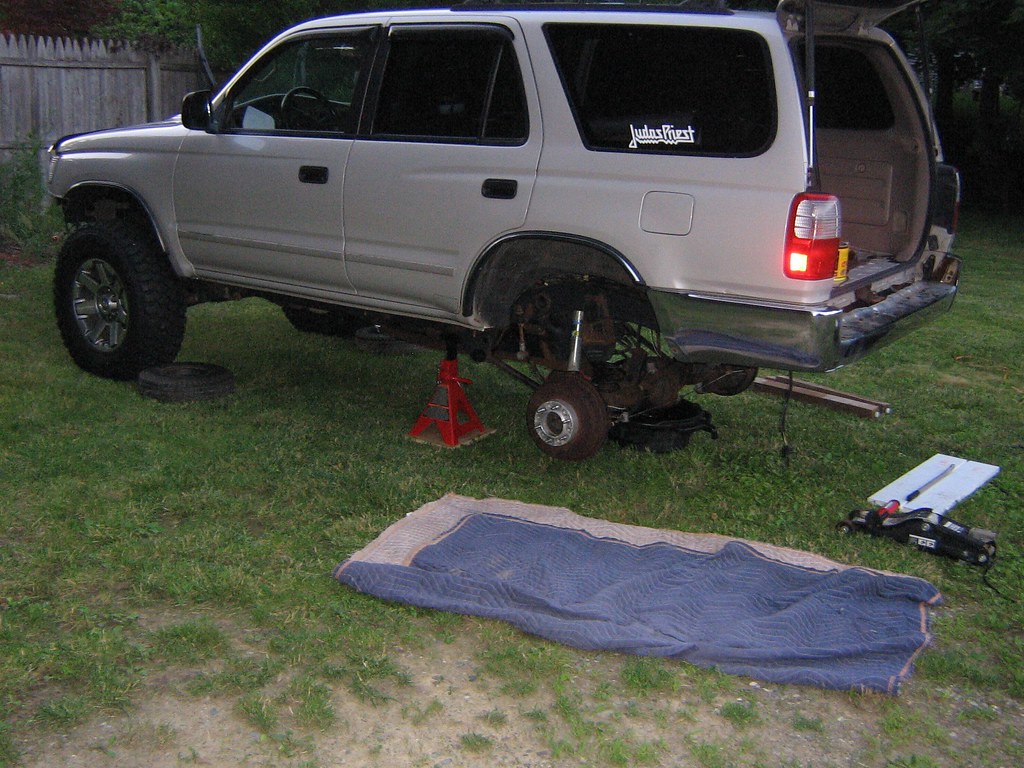 IMG_1990 by Mike Campbell, on Flickr
This is the PS rear brake, that gear oil is from a clogged breather. When I did the Ext. breather mod the leak stopped.
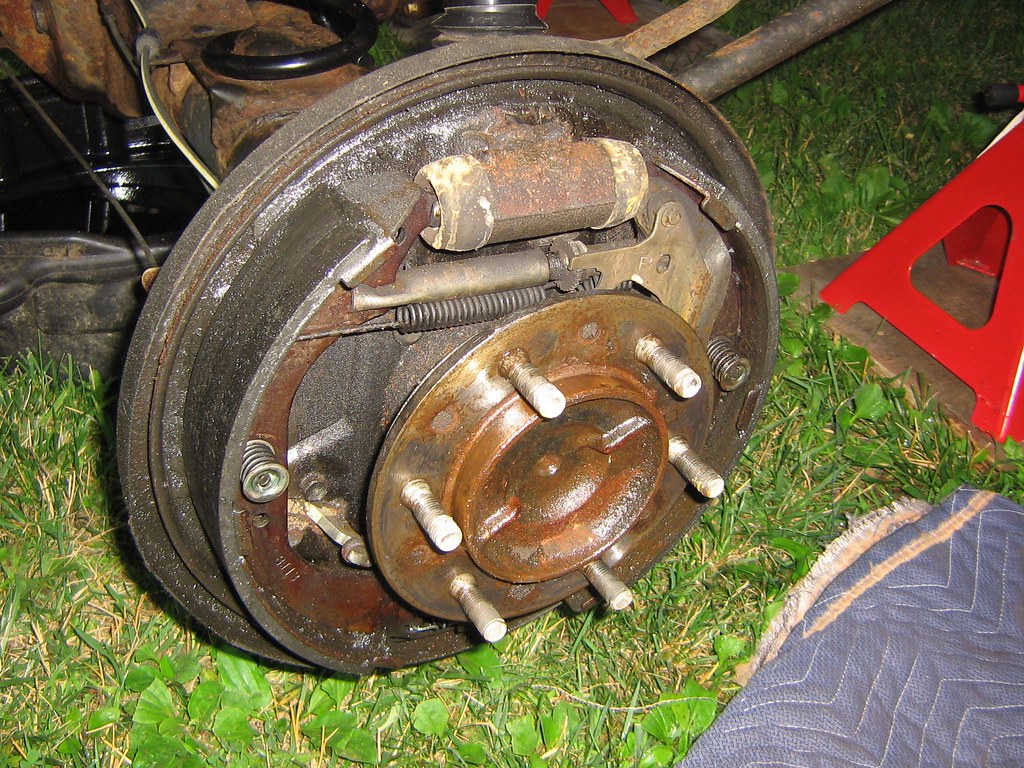 IMG_1992 by Mike Campbell, on Flickr
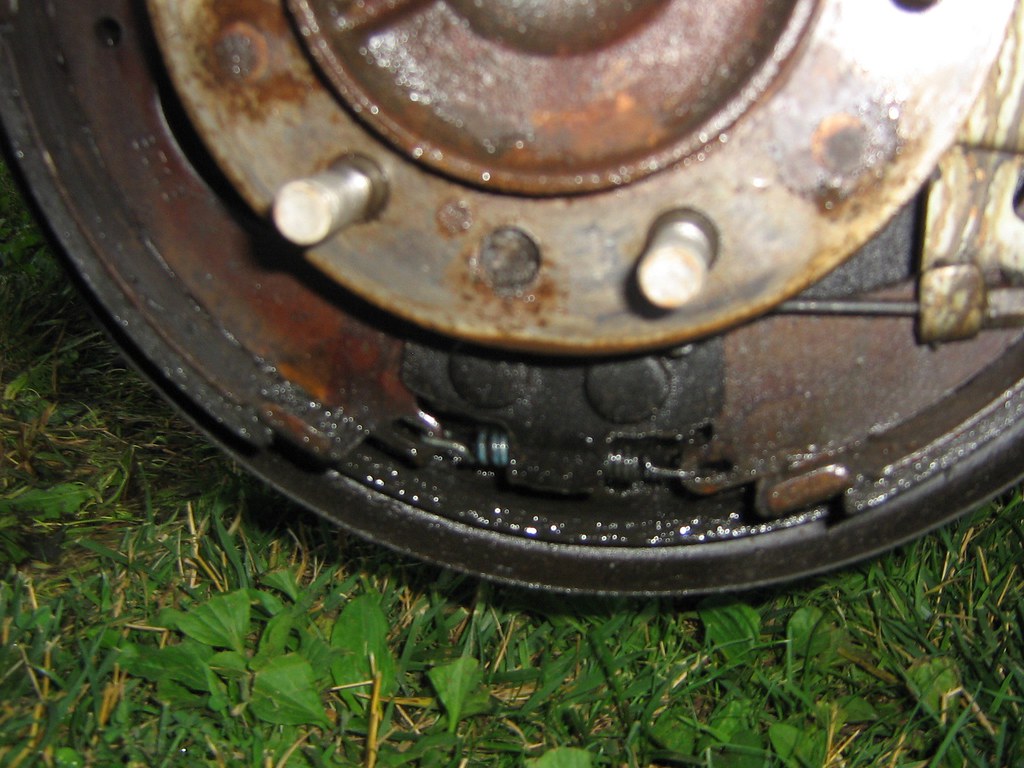 IMG_1993 by Mike Campbell, on Flickr
This is what an 18 yo original drum brake with 166k looks like.
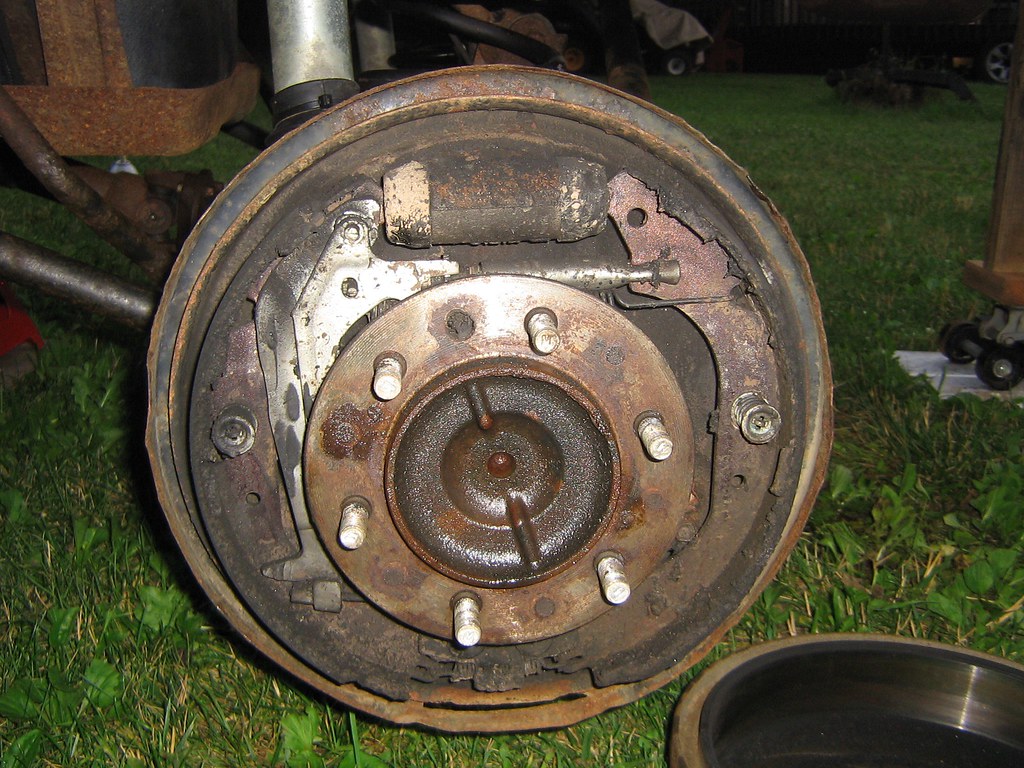 IMG_1995 by Mike Campbell, on Flickr
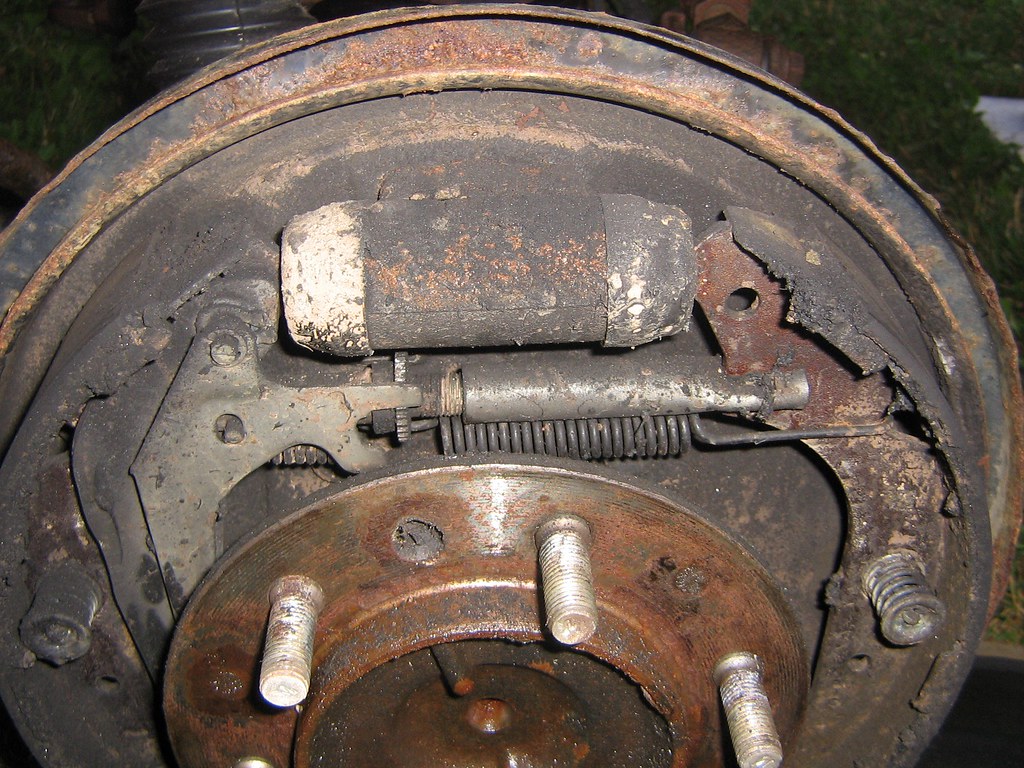 IMG_1996 by Mike Campbell, on Flickr
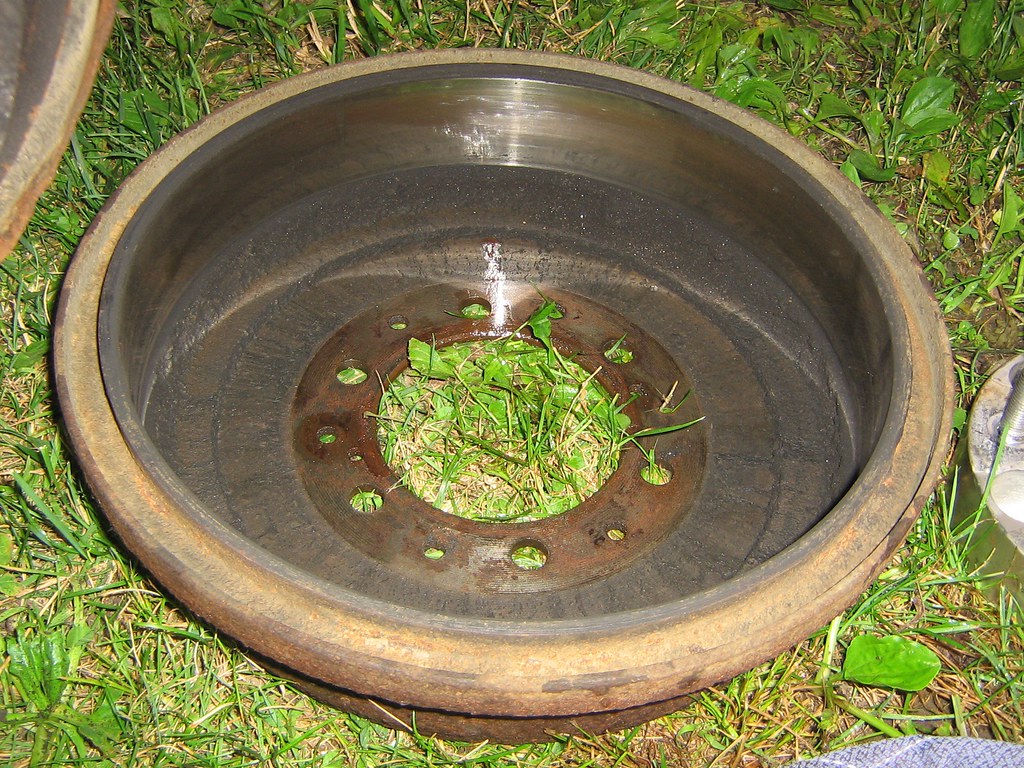 IMG_1997 by Mike Campbell, on Flickr
Housing, axles & Diff out.
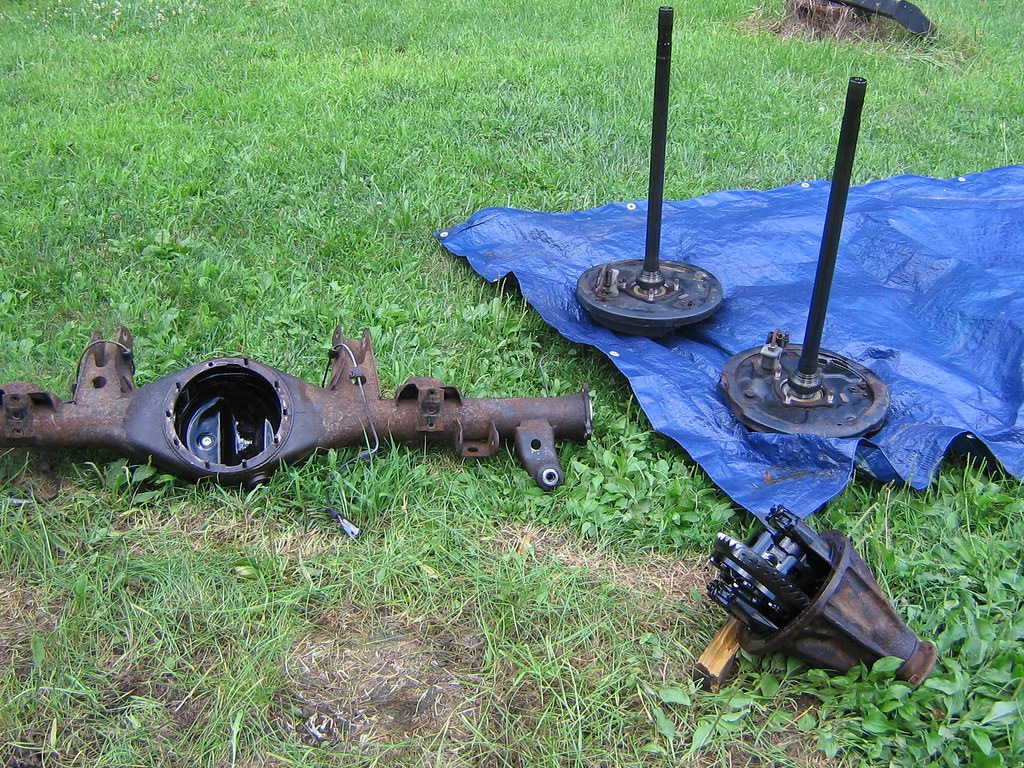 IMG_2003 by Mike Campbell, on Flickr
Factory 4.56 teeth are all perfect.
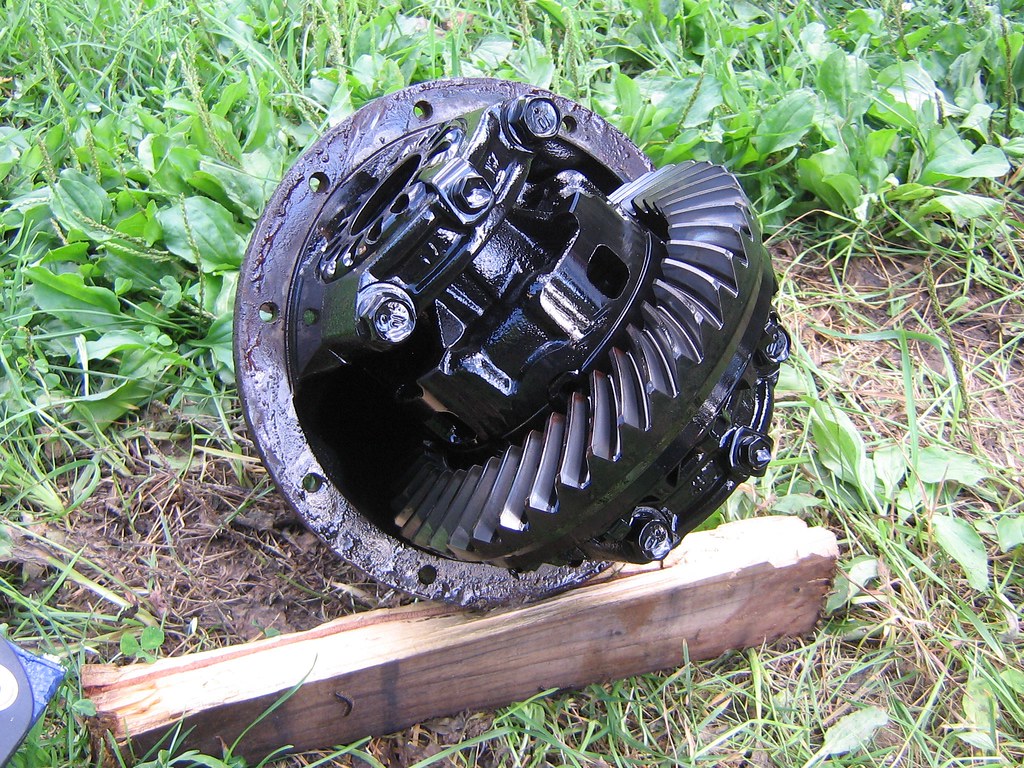 IMG_2004 by Mike Campbell, on Flickr
I pulled the 4.30's out of my new (used) e-locker housing.
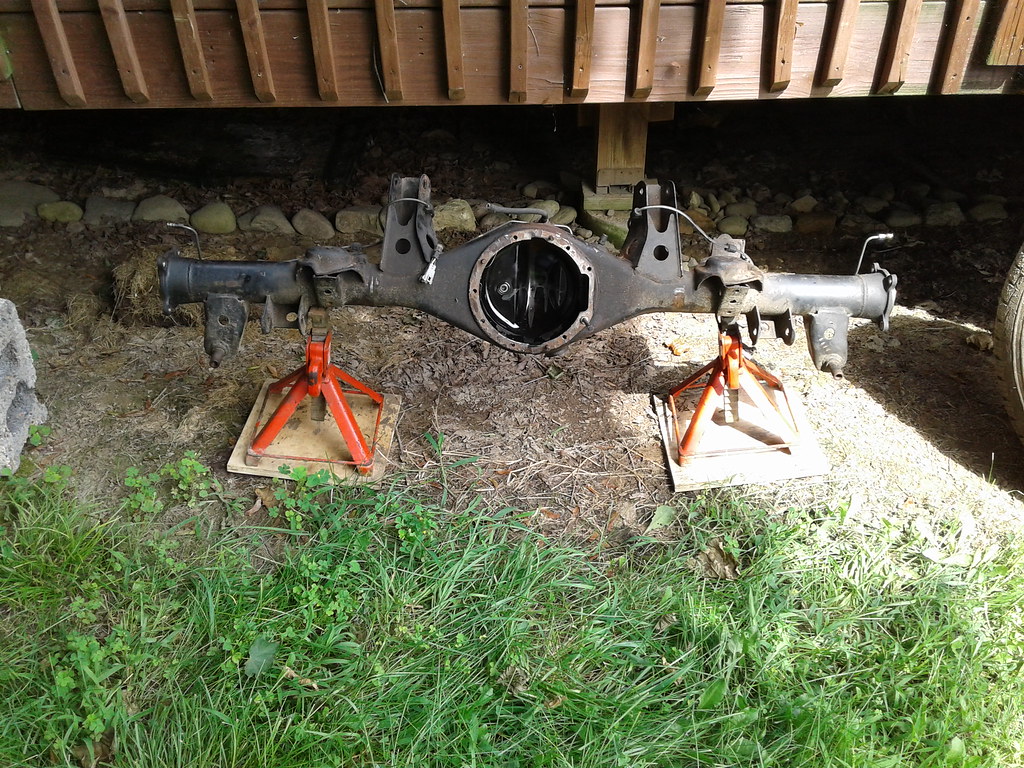 20170806_150113 by Mike Campbell, on Flickr
Left these out overnight to drain the oil. I brought these to my local diff shop to swap my 4.56's into the e-locker 3rd.
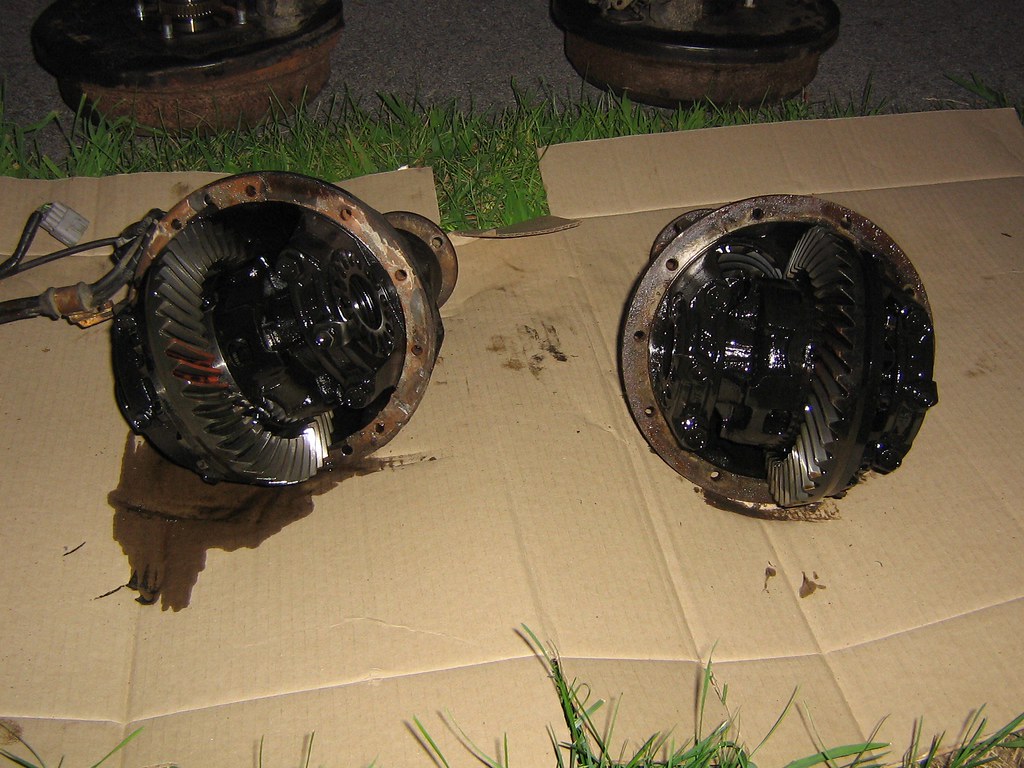 IMG_2005 by Mike Campbell, on Flickr
4.56 on the left & 4.30 on the right. The teeth on the 4.30 were perfect too.
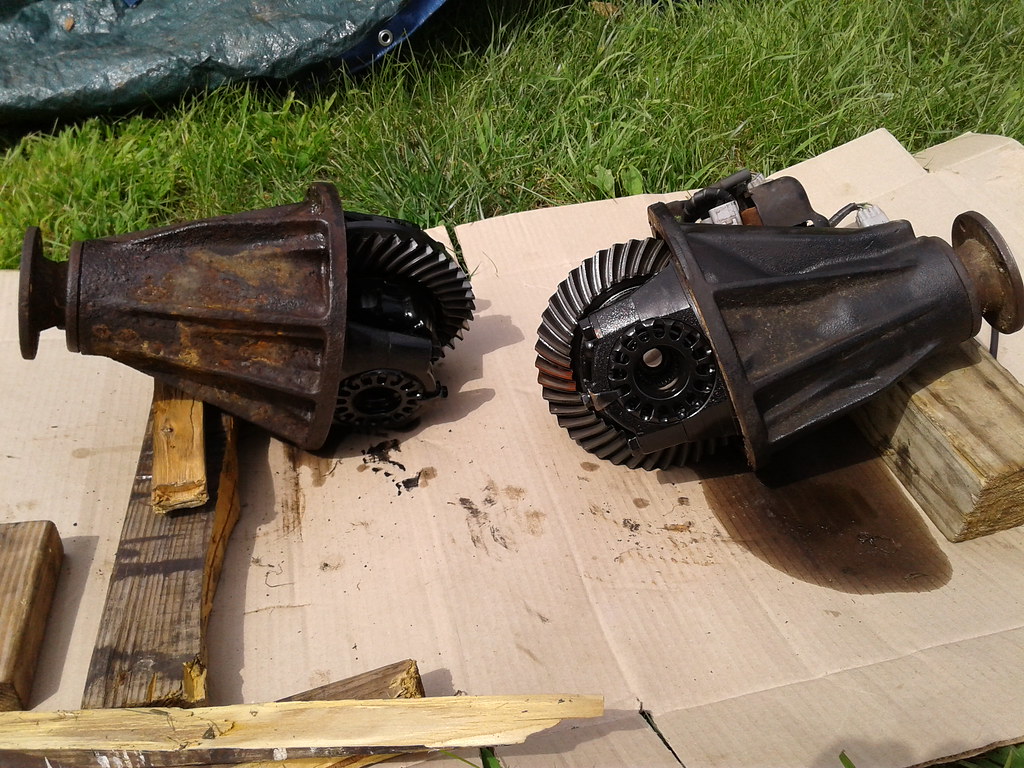 20170806_150246 by Mike Campbell, on Flickr
I rested the DS on a 4x4 piece of wood so it wouldn't rust in the grass.
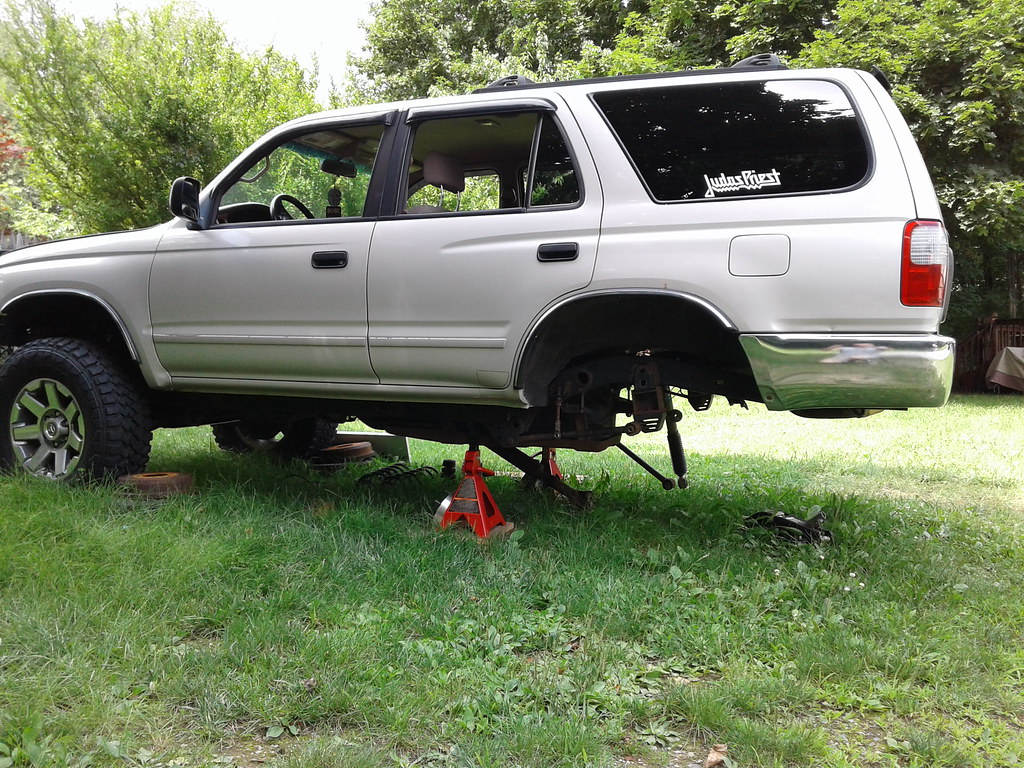 20170806_150033 by Mike Campbell, on Flickr
After rinsing out the frame rails I moved her onto the grass & proceeded to disconnect everything to remove the axle housing. You need to disconnect the ABS lines, brake lines, parking brake, shocks, panhard bar, driveshaft and upper & lower control arms.
I put the rear up on 6 ton jack stands set on 1" plywood so they wouldn't sink into the dirt. Chocked the front wheels, put the T/C in 4Lo & the M/T in 1st gear so she wouldn't roll on me. I couldn't use the parking brake & didn't want her moving while I was under there sanding & painting the frame.
IMG_1991 by Mike Campbell, on FlickrPulled the wheels off & drained the diff.
IMG_1990 by Mike Campbell, on FlickrThis is the PS rear brake, that gear oil is from a clogged breather. When I did the Ext. breather mod the leak stopped.
IMG_1992 by Mike Campbell, on FlickrIMG_1993 by Mike Campbell, on FlickrThis is what an 18 yo original drum brake with 166k looks like.
IMG_1995 by Mike Campbell, on FlickrIMG_1996 by Mike Campbell, on FlickrIMG_1997 by Mike Campbell, on FlickrHousing, axles & Diff out.
IMG_2003 by Mike Campbell, on FlickrFactory 4.56 teeth are all perfect.
IMG_2004 by Mike Campbell, on FlickrI pulled the 4.30's out of my new (used) e-locker housing.
20170806_150113 by Mike Campbell, on FlickrLeft these out overnight to drain the oil. I brought these to my local diff shop to swap my 4.56's into the e-locker 3rd.
IMG_2005 by Mike Campbell, on Flickr4.56 on the left & 4.30 on the right. The teeth on the 4.30 were perfect too.
20170806_150246 by Mike Campbell, on FlickrI rested the DS on a 4x4 piece of wood so it wouldn't rust in the grass.
20170806_150033 by Mike Campbell, on Flickr
Last edited:
Scramble
New member
Here's the diffs on their way to the trans/diff shop. Gold Coast Transmissions these guys are the best. http://www.goldsealtrans.com/ These guys have been around forever & have an amazing reputation. Just read the reviews online.
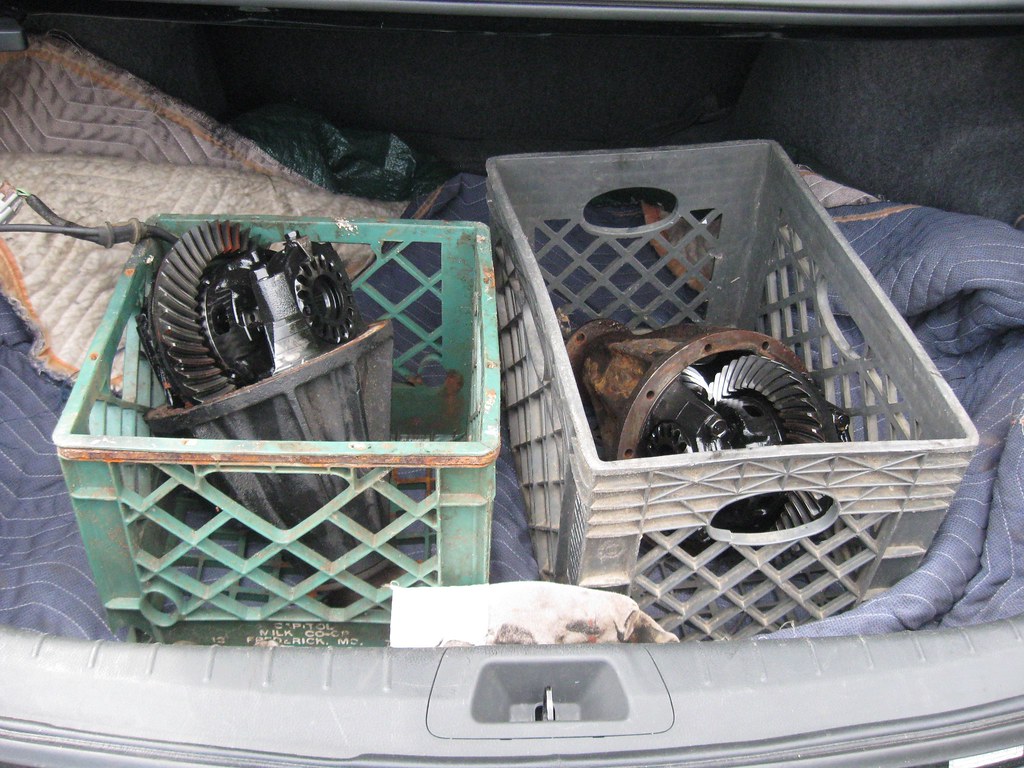 IMG_1067 by Mike Campbell, on Flickr
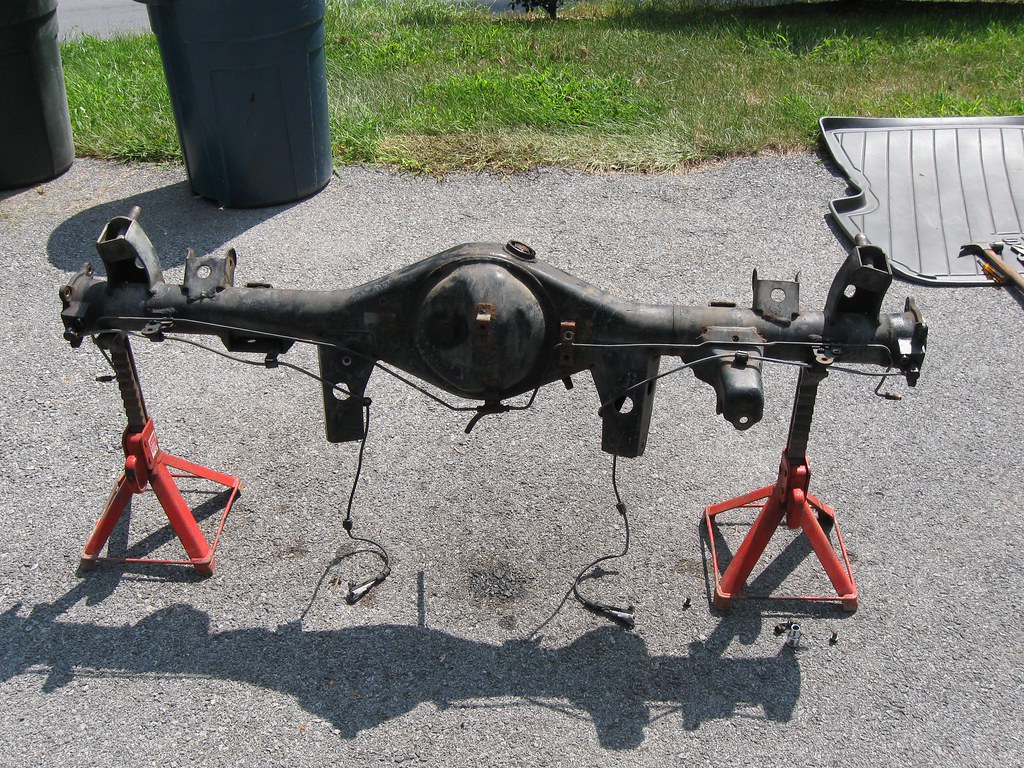
While the gears were being swapped & and a new bearing rebuild kit installed I started to clean up the housing. I couldn't get the ABS sensors out so I left them but pulled off every other bolt & bracket to get ready to sand & paint.
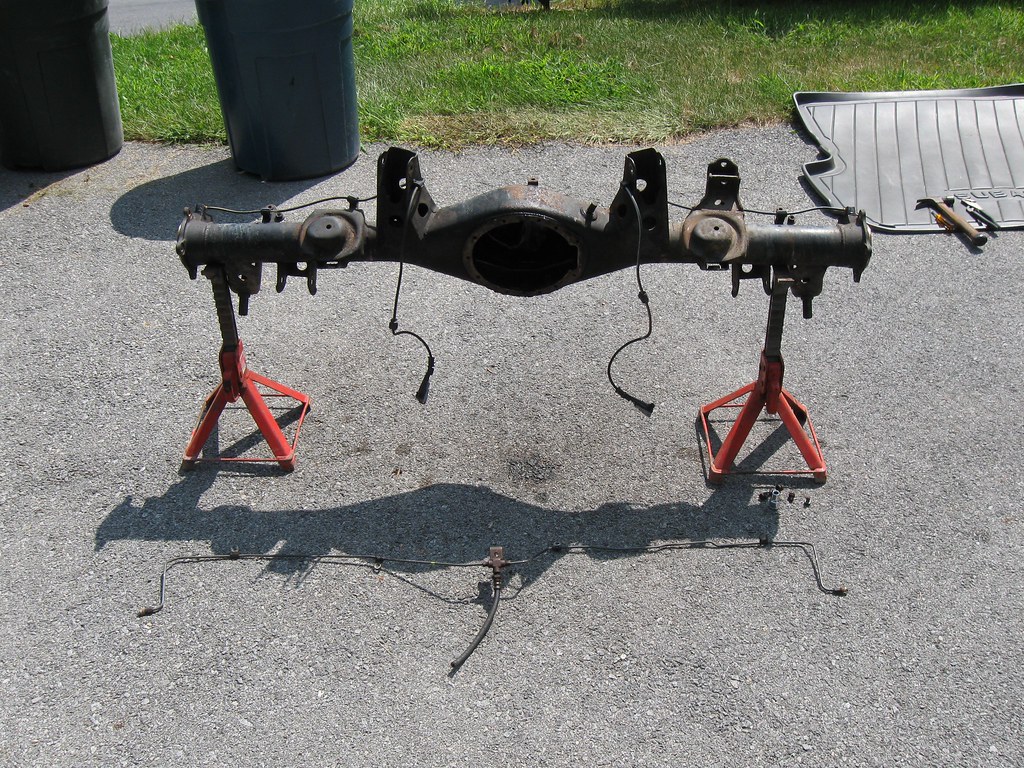 IMG_2523 by Mike Campbell, on Flickr
 IMG_2522 by Mike Campbell, on Flickr
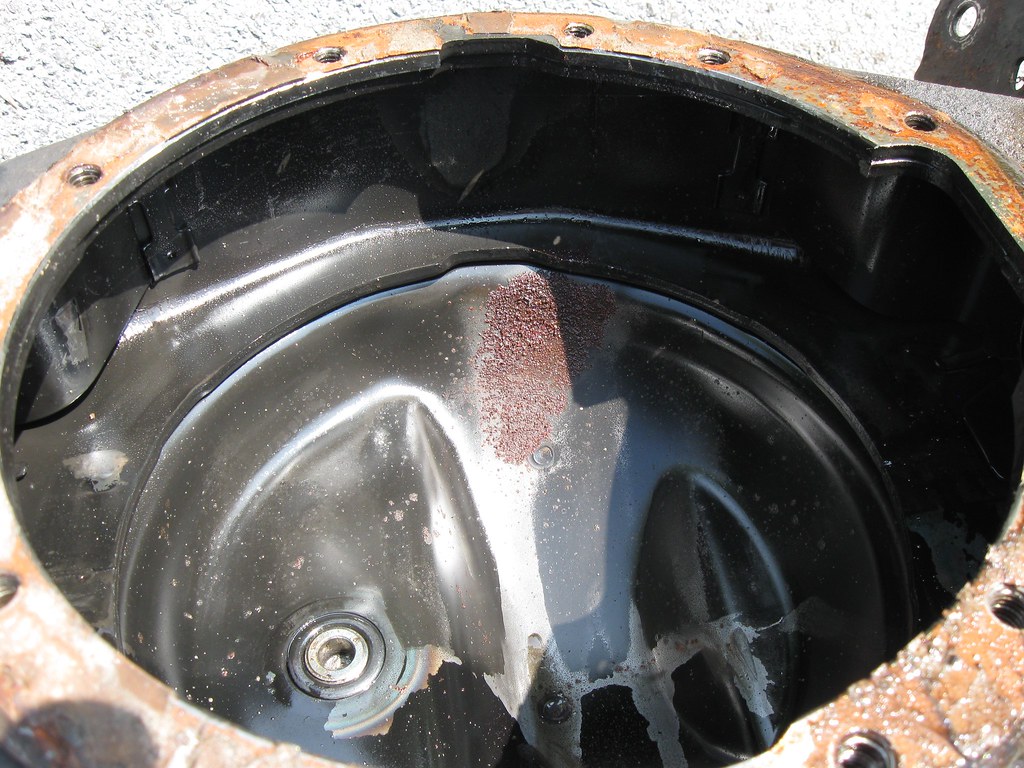
This e-locker housing came out of a 2000 Limited that was sitting for 2 years. Since the truck was originally from Cali before moving to Virginia it didn't have much rust but you can see here that there must have been some moisture in the housing.
 IMG_2524 by Mike Campbell, on Flickr
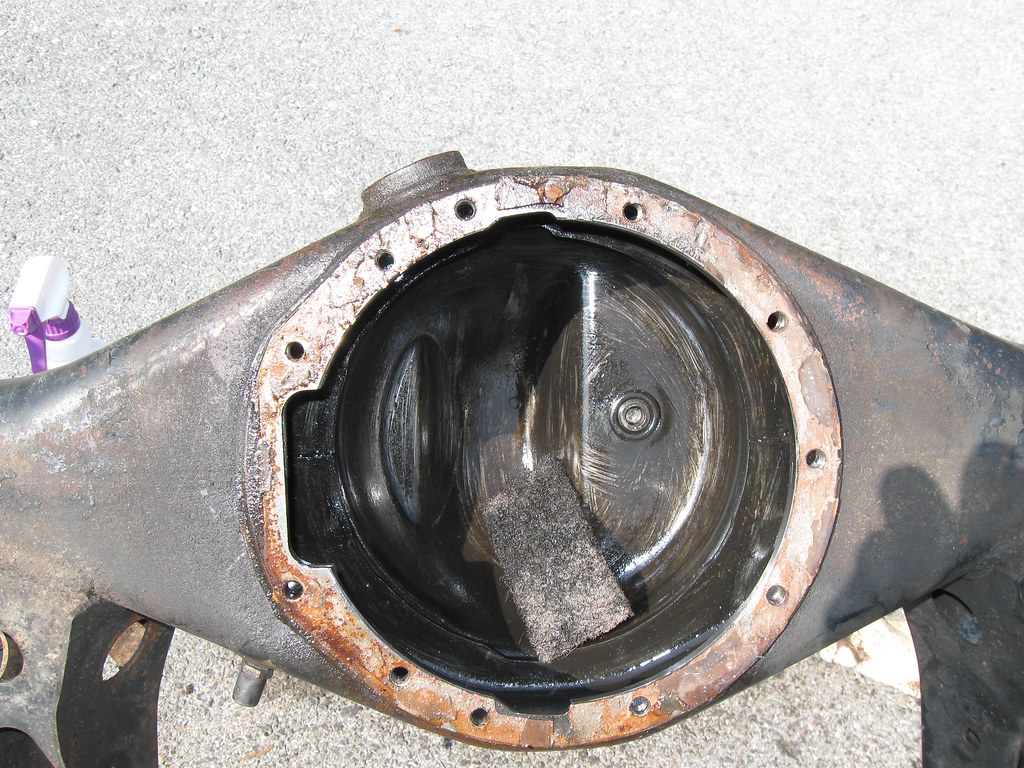
I sprayed some WD 40 on it scrubbed it with a synthetic brillo pad. I didn't want to use anything metal.
 IMG_2525 by Mike Campbell, on Flickr
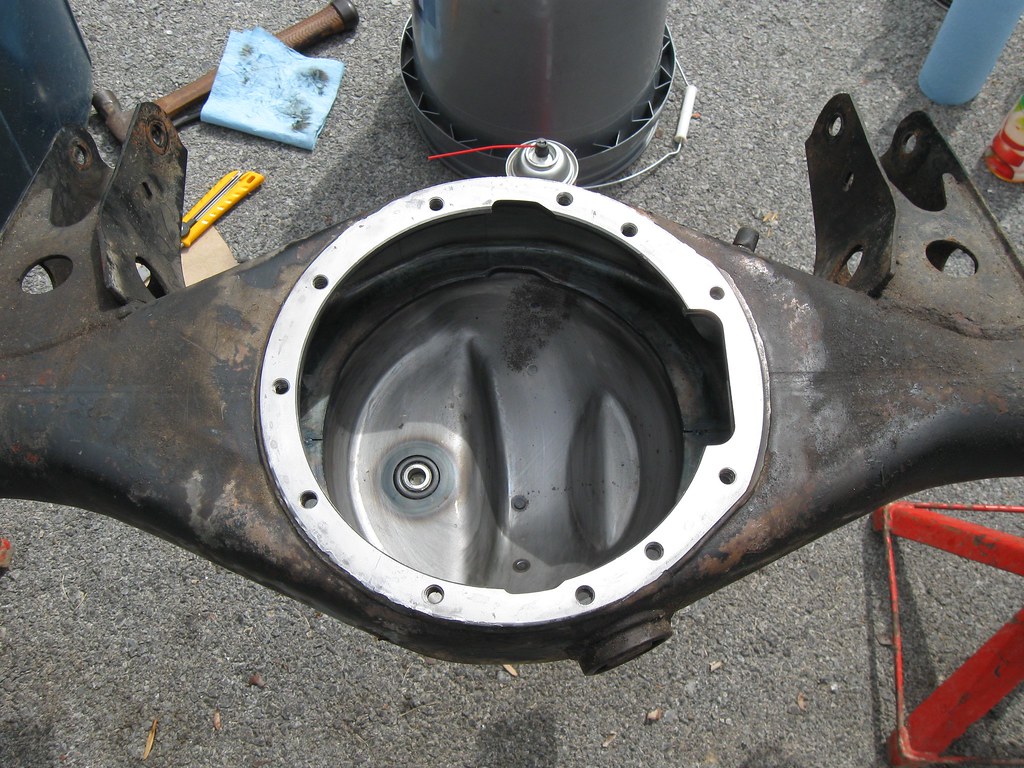
The inside cleaned up nicely with brake cleaner & a couple of blue shop towels. I also scraped off the old gasket. Sounds easy right? It was a pain. Maybe if the diff mating surface was perfectly flat a razor knife or scraper would have made it easy but it's not. At one point I pulled out my new chisel set & scraped very carefully. I'm pretty sure this diff was never off before! LOL I also used brake cleaner, sand paper & steel wool going from coarse to fine to make it pretty & smooth. We dont want any leaks! I actually put a few gouges in it when I was prying the carrier off but I smoothed them down & made sure there was plenty of Permatex gasket maker on there when I put it back together.
 IMG_2532 by Mike Campbell, on Flickr
I broke a few studs on both housings removing the diffs but I had enough between the two to make a full set. Extra long ones for E-LOCKER actuator!!!! LOL
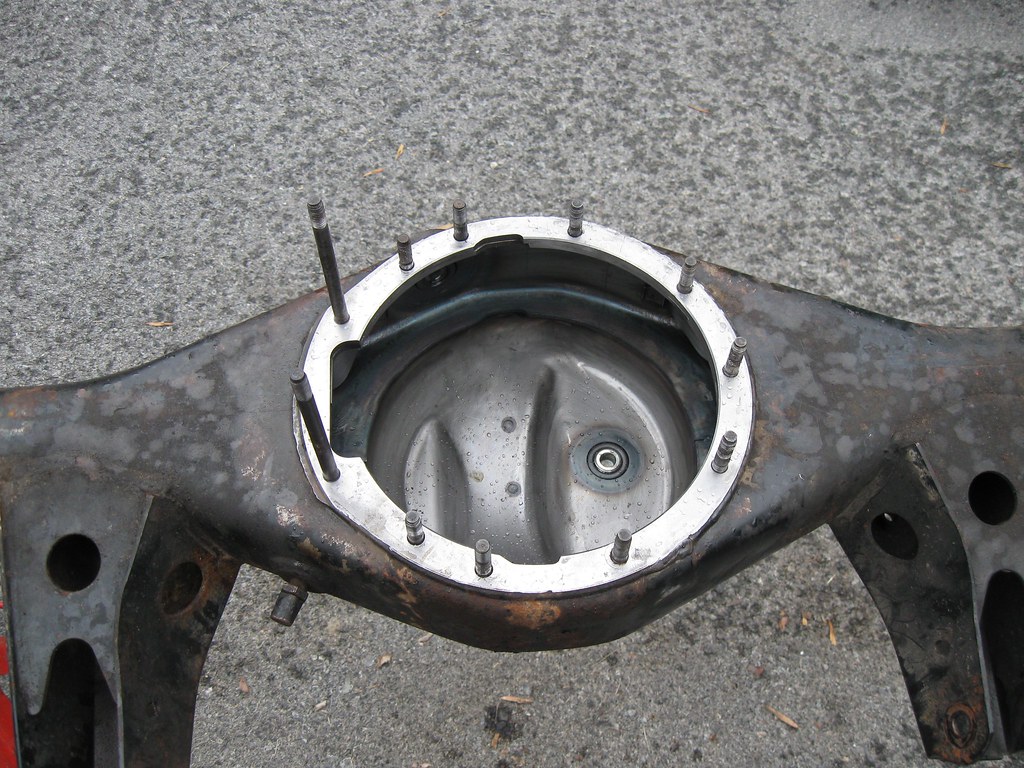 IMG_2533 by Mike Campbell, on Flickr
IMG_1067 by Mike Campbell, on FlickrWhile the gears were being swapped & and a new bearing rebuild kit installed I started to clean up the housing. I couldn't get the ABS sensors out so I left them but pulled off every other bolt & bracket to get ready to sand & paint.
IMG_2523 by Mike Campbell, on FlickrIMG_2522 by Mike Campbell, on FlickrThis e-locker housing came out of a 2000 Limited that was sitting for 2 years. Since the truck was originally from Cali before moving to Virginia it didn't have much rust but you can see here that there must have been some moisture in the housing.
IMG_2524 by Mike Campbell, on FlickrI sprayed some WD 40 on it scrubbed it with a synthetic brillo pad. I didn't want to use anything metal.
IMG_2525 by Mike Campbell, on FlickrThe inside cleaned up nicely with brake cleaner & a couple of blue shop towels. I also scraped off the old gasket. Sounds easy right? It was a pain. Maybe if the diff mating surface was perfectly flat a razor knife or scraper would have made it easy but it's not. At one point I pulled out my new chisel set & scraped very carefully. I'm pretty sure this diff was never off before! LOL I also used brake cleaner, sand paper & steel wool going from coarse to fine to make it pretty & smooth. We dont want any leaks! I actually put a few gouges in it when I was prying the carrier off but I smoothed them down & made sure there was plenty of Permatex gasket maker on there when I put it back together.
IMG_2532 by Mike Campbell, on FlickrI broke a few studs on both housings removing the diffs but I had enough between the two to make a full set. Extra long ones for E-LOCKER actuator!!!! LOL
IMG_2533 by Mike Campbell, on Flickr
Last edited:
Scramble
New member
Aug 2017
The diffs were at the shop for 2 weeks because the first time they rebuilt it they ordered the wrong size bearing kit. So I started sanding & painting a bunch of parts for the re-installation of the axle housing. I ordered a few used parts off e-bay from the Southwest because they're rust free & I can usually haggle them down in price. I picked up 2 mint rear bumper brackets (the ones that go inside the frame) for $20, the rear hatch striker for $25 and 4 control arms with really good bushings for $60! I was gonna buy 2 new OEM uppers & 2 lowers from Sonoran Steel but I saved around $450 by going the used route! LOL
All parts were sanded down & sprayed with 2 coats of Grey Eastwood Rust Encapsulator. The Black parts were sprayed with VHT Roll Bar & Chassis paint. This is my new go to paint, it's an Epoxy & hardens like a rock. You can get good deals on Amazon if you look for 6 packs. The parts that are Silver I used Rustoleum Professional Aluminum that I had laying around.
Rear sway bar. I had to use the grinder on this one, 18 NY salty winters.
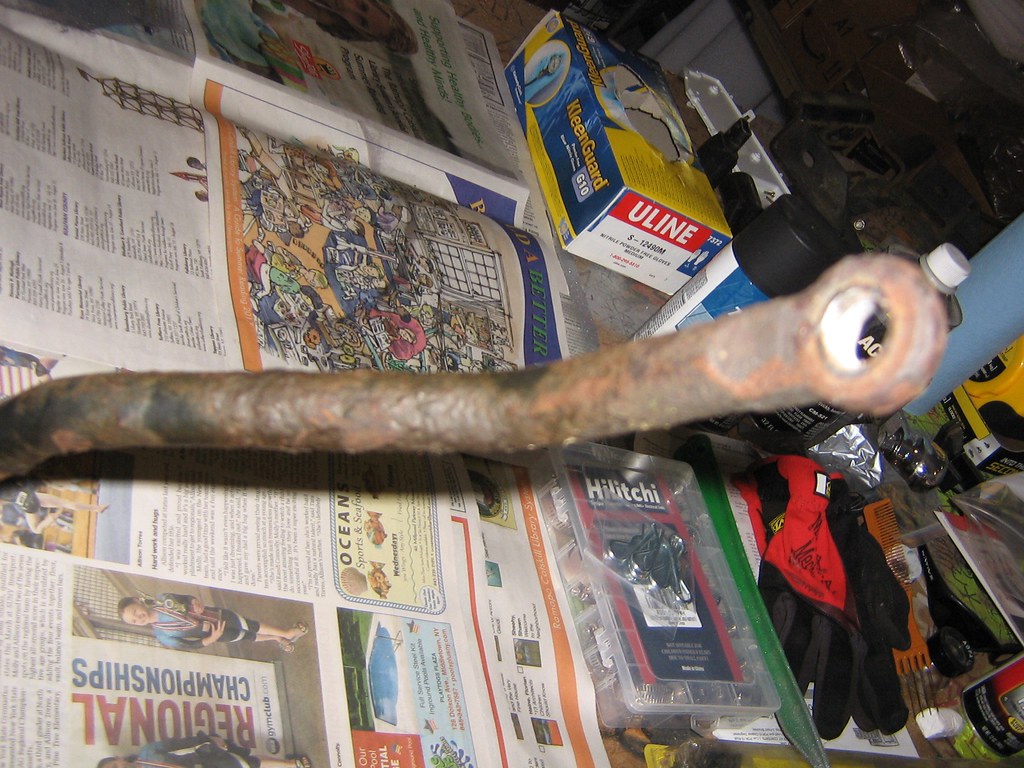 IMG_1998 by Mike Campbell, on Flickr
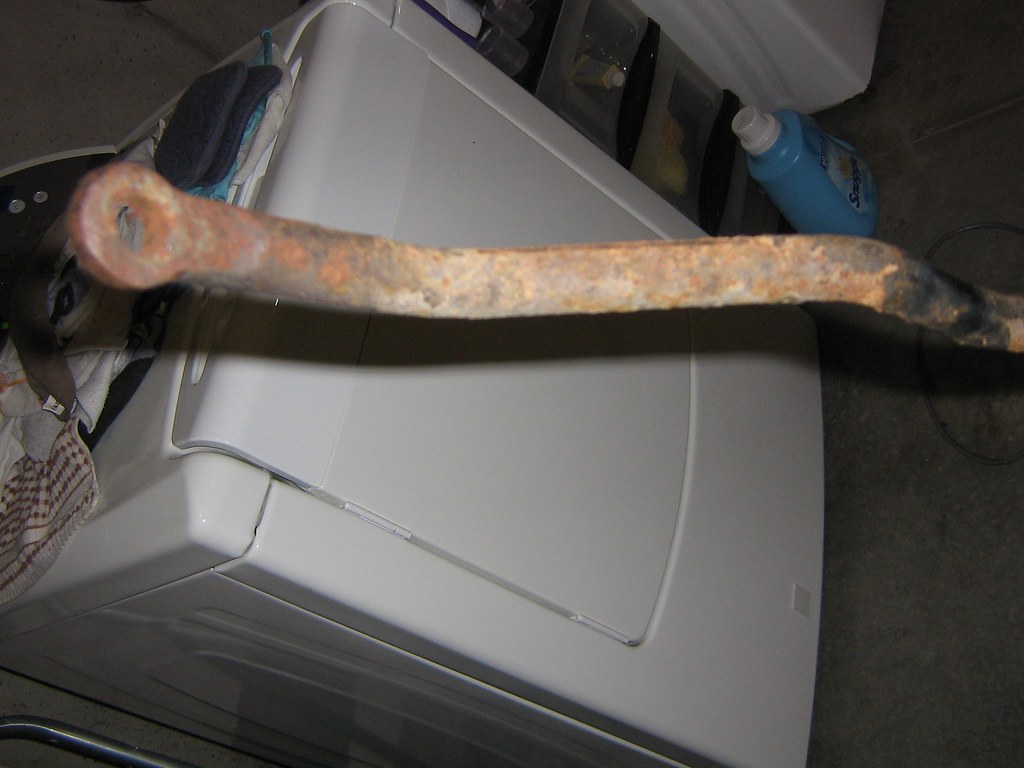 IMG_1999 by Mike Campbell, on Flickr
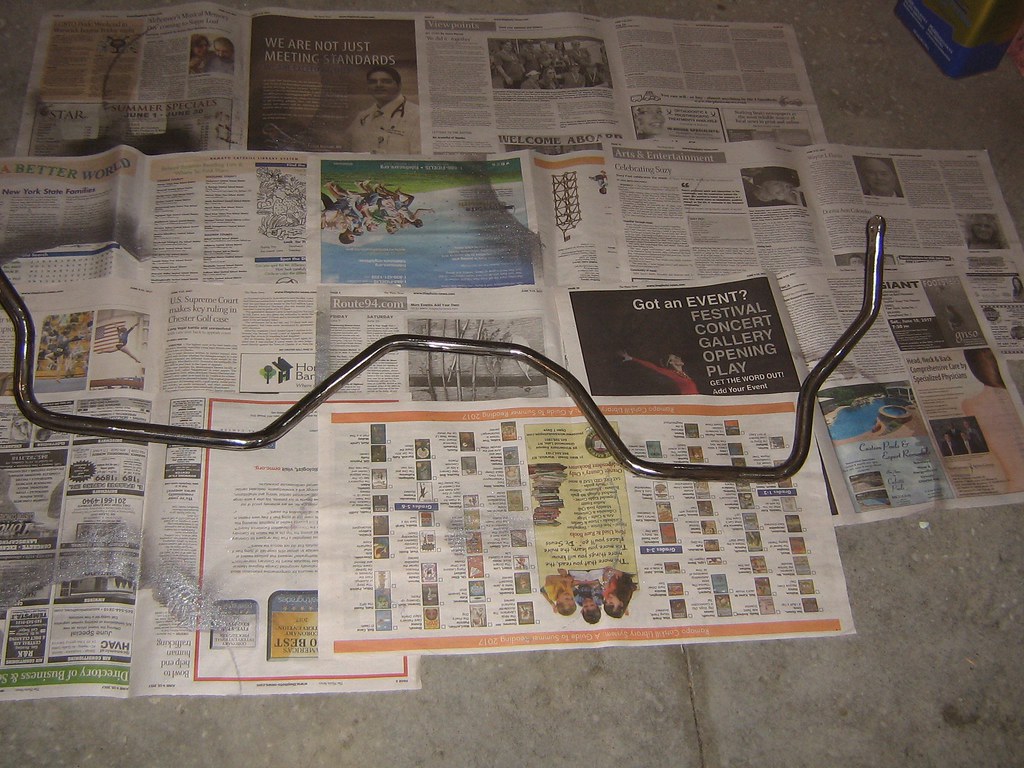 IMG_2000 by Mike Campbell, on Flickr
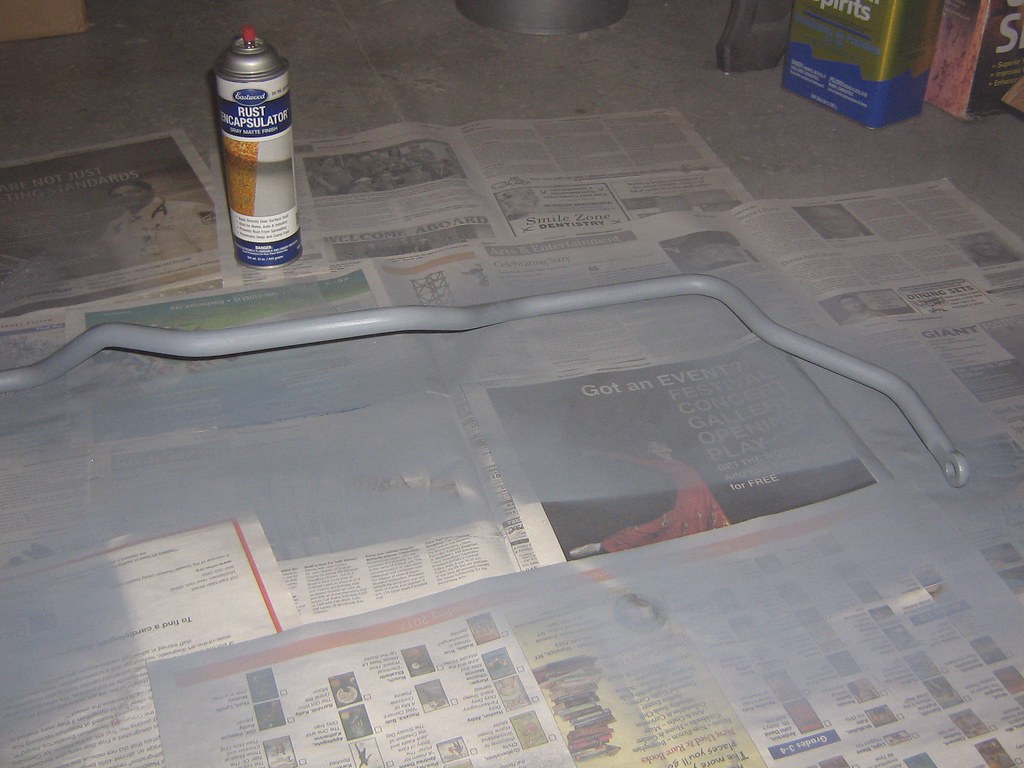 IMG_2001 by Mike Campbell, on Flickr
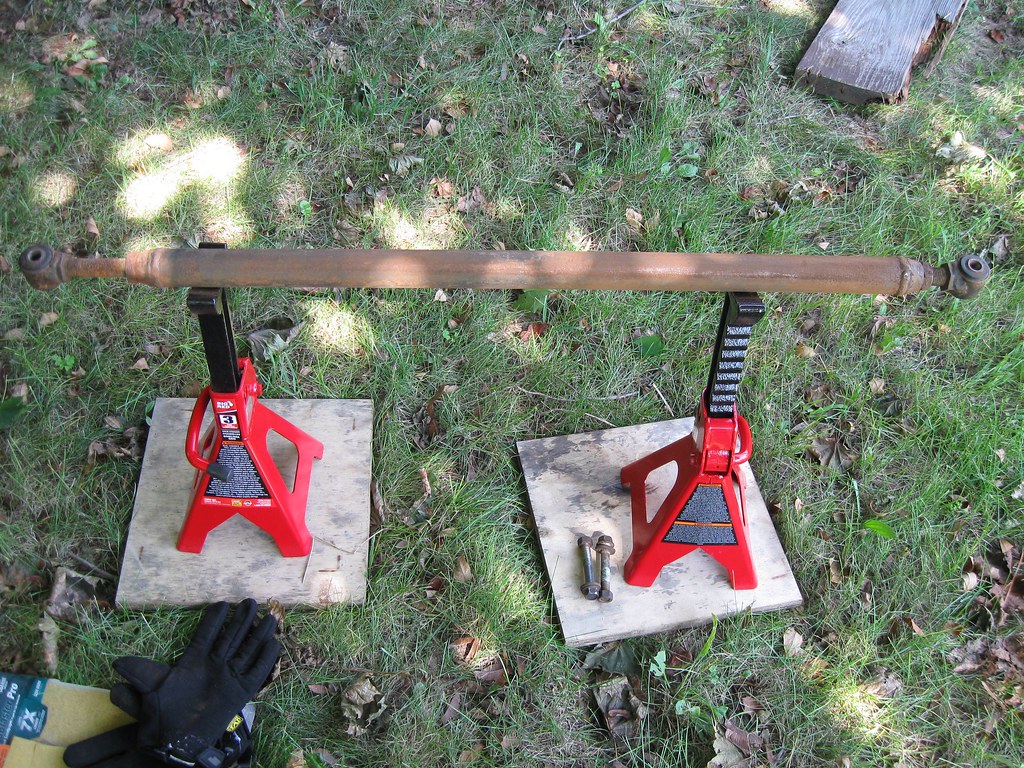 IMG_2537 by Mike Campbell, on Flickr
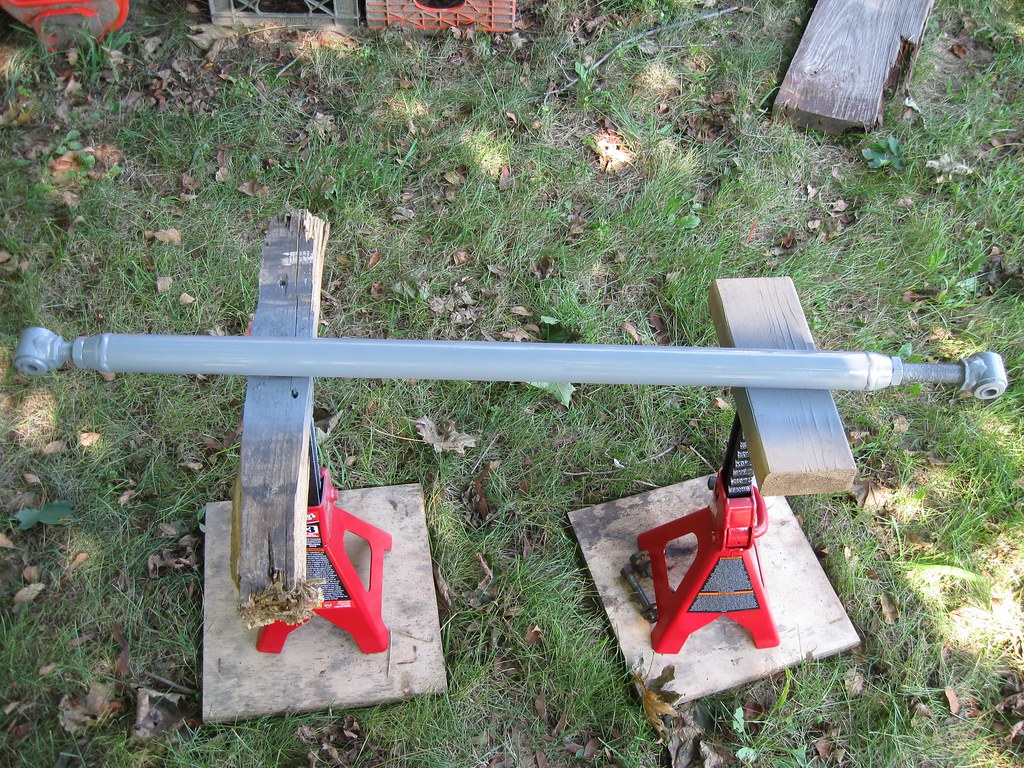 IMG_2539 by Mike Campbell, on Flickr
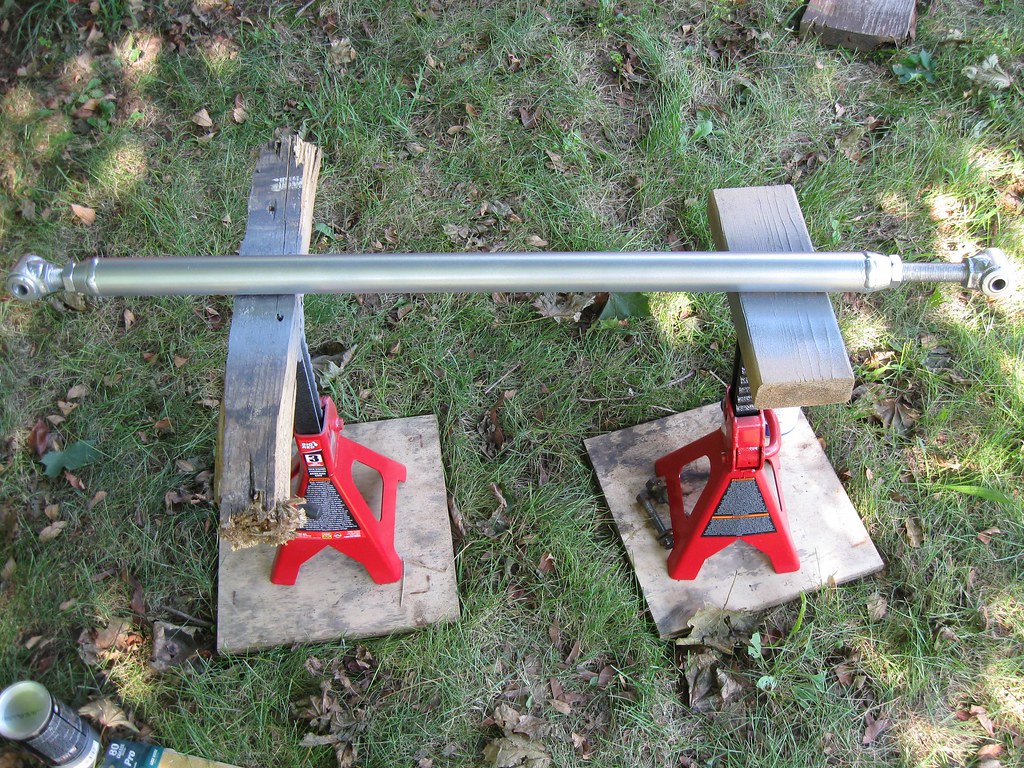 IMG_2540 by Mike Campbell, on Flickr
Bump Stop extentions. Like the cup? Yes I was working on my B-Day, Aug 21st. That cup was from my 50th party. :becky:
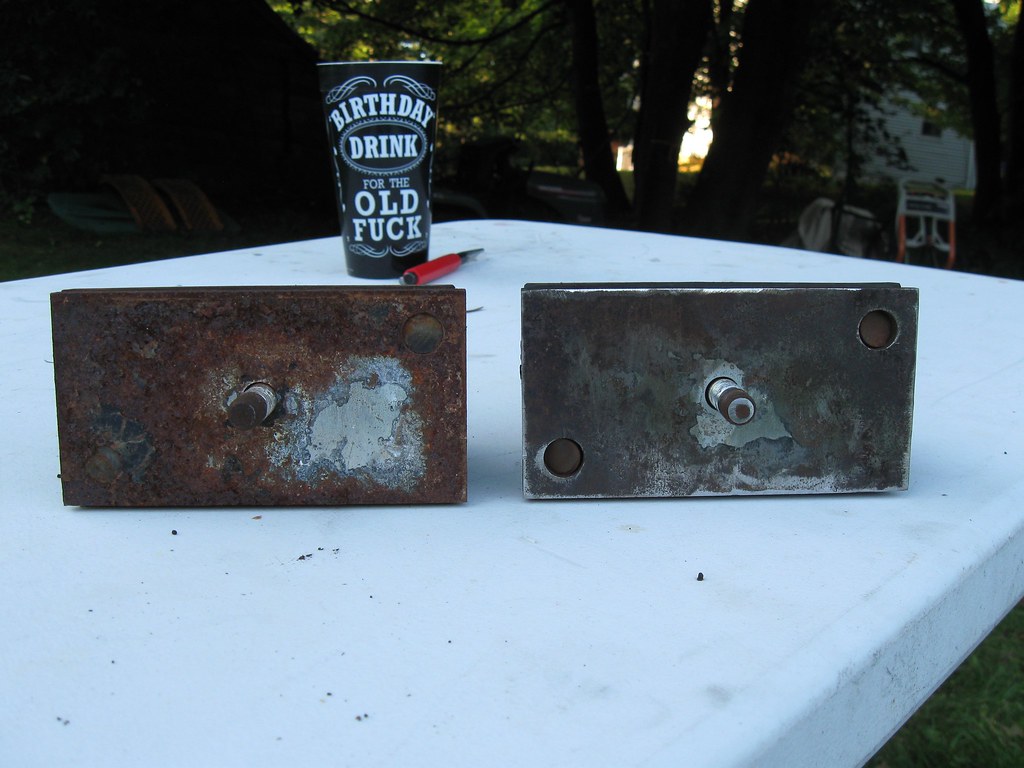 IMG_2546 by Mike Campbell, on Flickr
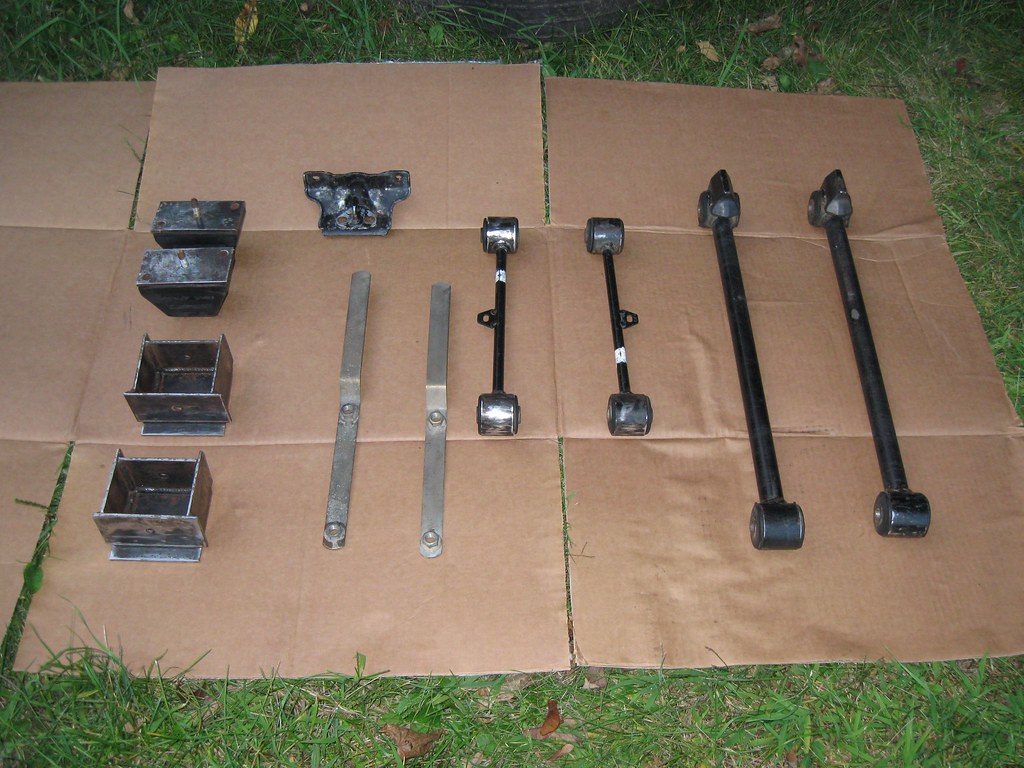 IMG_2549 by Mike Campbell, on Flickr
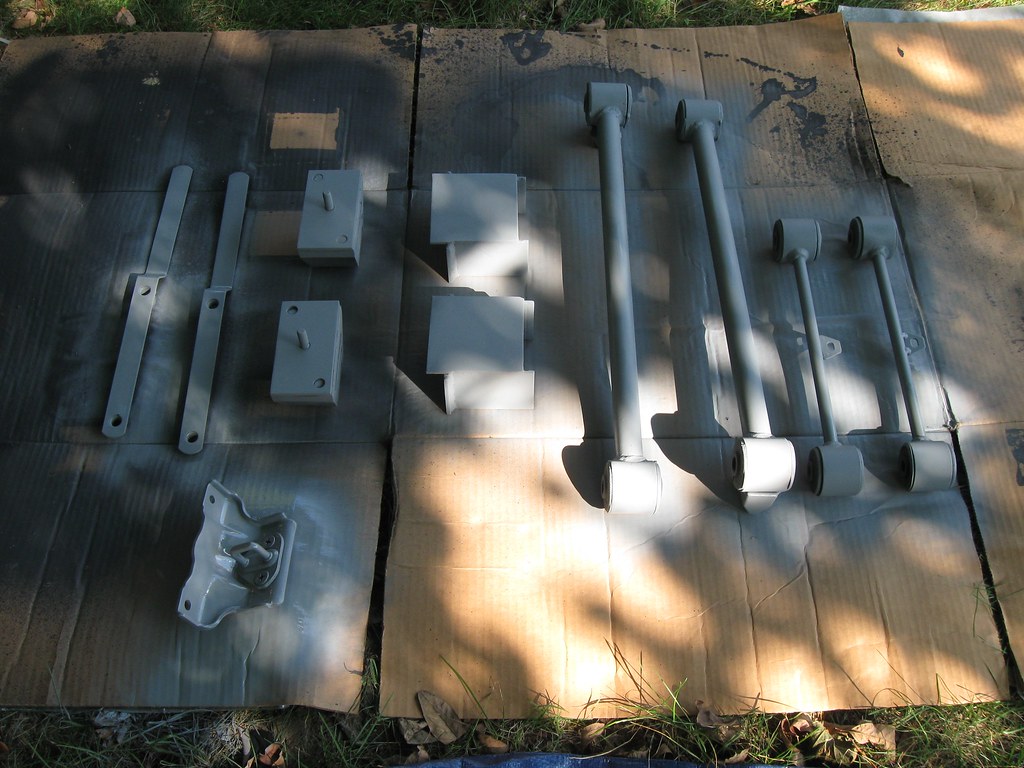 IMG_2566 by Mike Campbell, on Flickr
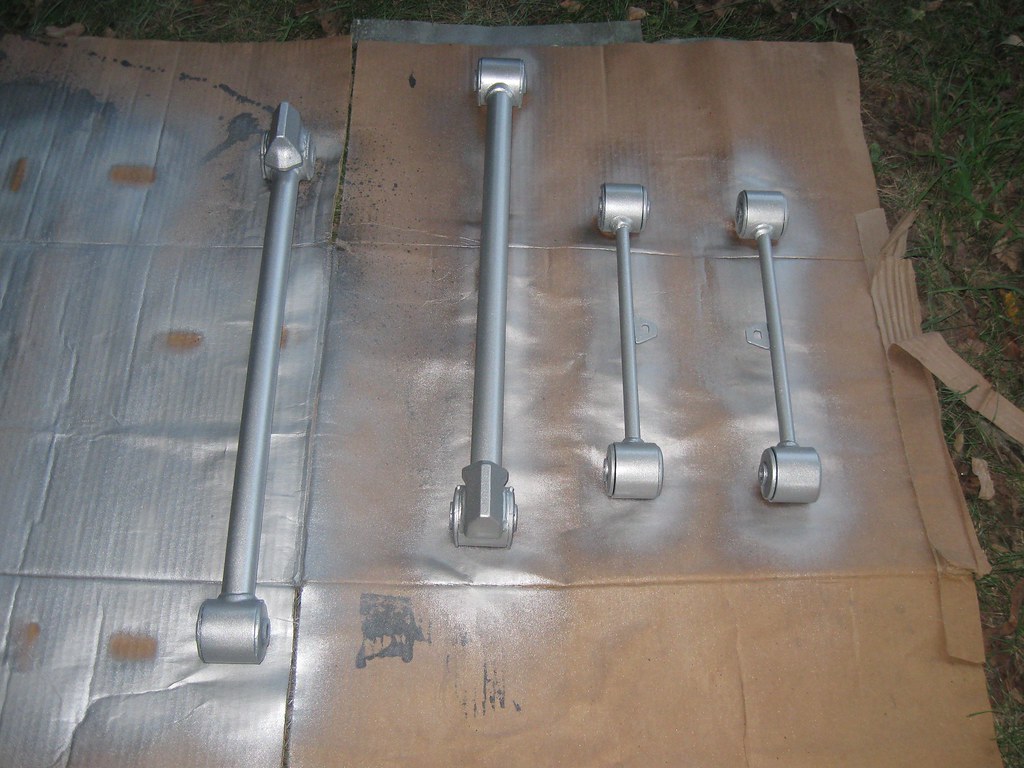 IMG_2570 by Mike Campbell, on Flickr
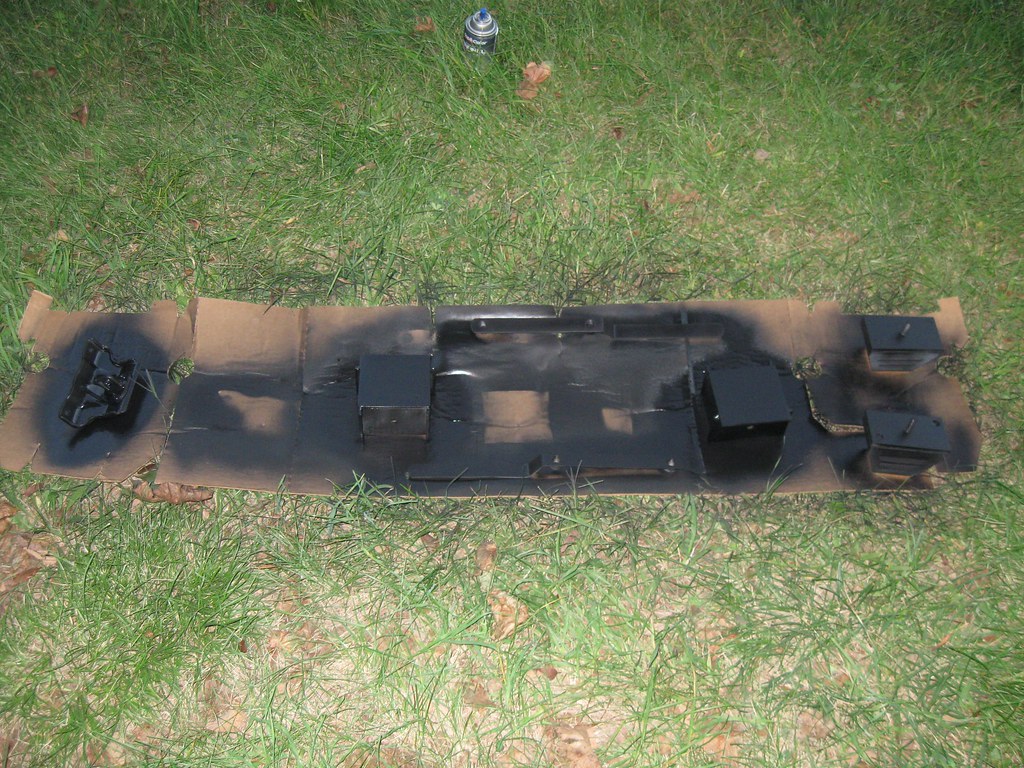 IMG_2571 by Mike Campbell, on Flickr
The diffs were at the shop for 2 weeks because the first time they rebuilt it they ordered the wrong size bearing kit. So I started sanding & painting a bunch of parts for the re-installation of the axle housing. I ordered a few used parts off e-bay from the Southwest because they're rust free & I can usually haggle them down in price. I picked up 2 mint rear bumper brackets (the ones that go inside the frame) for $20, the rear hatch striker for $25 and 4 control arms with really good bushings for $60! I was gonna buy 2 new OEM uppers & 2 lowers from Sonoran Steel but I saved around $450 by going the used route! LOL
All parts were sanded down & sprayed with 2 coats of Grey Eastwood Rust Encapsulator. The Black parts were sprayed with VHT Roll Bar & Chassis paint. This is my new go to paint, it's an Epoxy & hardens like a rock. You can get good deals on Amazon if you look for 6 packs. The parts that are Silver I used Rustoleum Professional Aluminum that I had laying around.
Rear sway bar. I had to use the grinder on this one, 18 NY salty winters.
IMG_1998 by Mike Campbell, on FlickrIMG_1999 by Mike Campbell, on FlickrIMG_2000 by Mike Campbell, on FlickrIMG_2001 by Mike Campbell, on FlickrIMG_2537 by Mike Campbell, on FlickrIMG_2539 by Mike Campbell, on FlickrIMG_2540 by Mike Campbell, on FlickrBump Stop extentions. Like the cup? Yes I was working on my B-Day, Aug 21st. That cup was from my 50th party. :becky:
IMG_2546 by Mike Campbell, on FlickrIMG_2549 by Mike Campbell, on FlickrIMG_2566 by Mike Campbell, on FlickrIMG_2570 by Mike Campbell, on FlickrIMG_2571 by Mike Campbell, on Flickr
Last edited:
Scramble
New member
I also hit my 8 wraps with Eastwoods on the rust spots & coated with VHT Roll Bar.
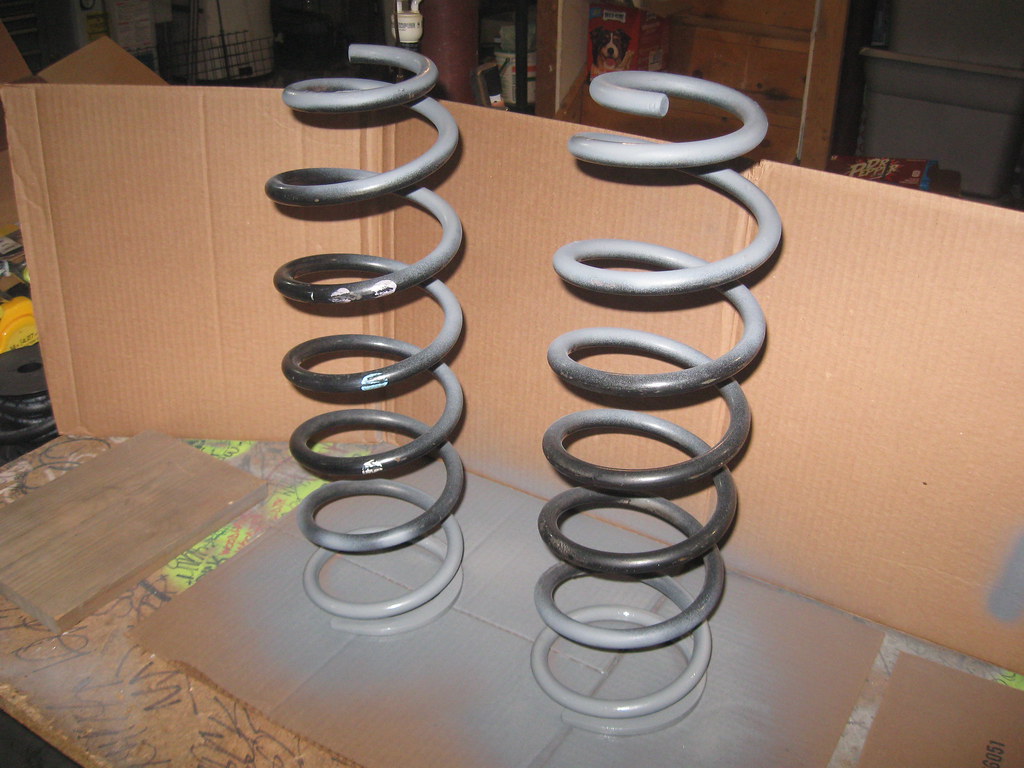 IMG_2630 by Mike Campbell, on Flickr
I covered the paint codes with tape so they will still show.
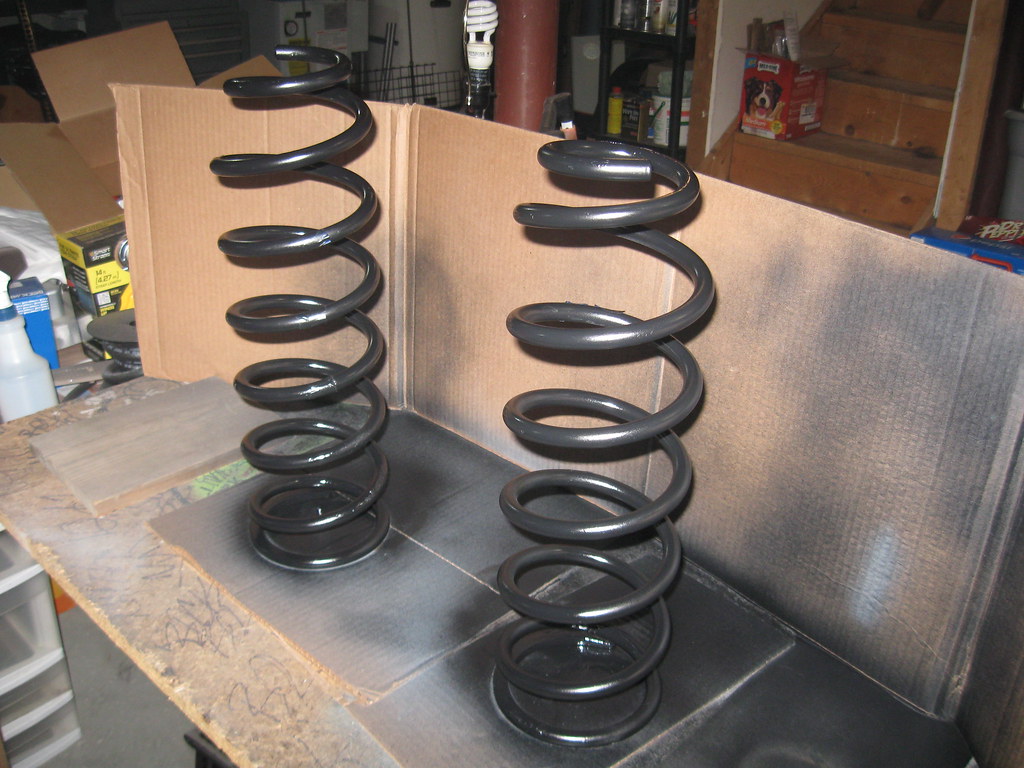 IMG_2631 by Mike Campbell, on Flickr
Swapped the bushings on my new Tundra 5100's. That broken c-clamp was my Grandfathers, probably from the 1950's. Luckily I have 2 more. I have all of his old tools, some dating back to the 1920's.
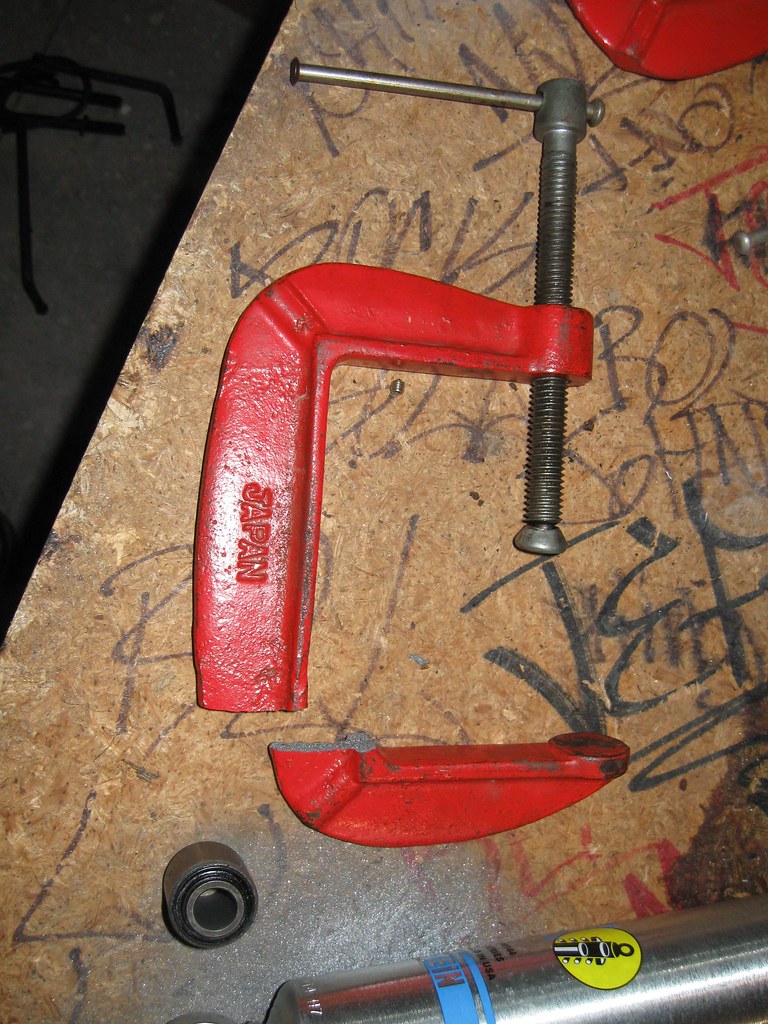 IMG_2573 by Mike Campbell, on Flickr
Modern tools! LOL
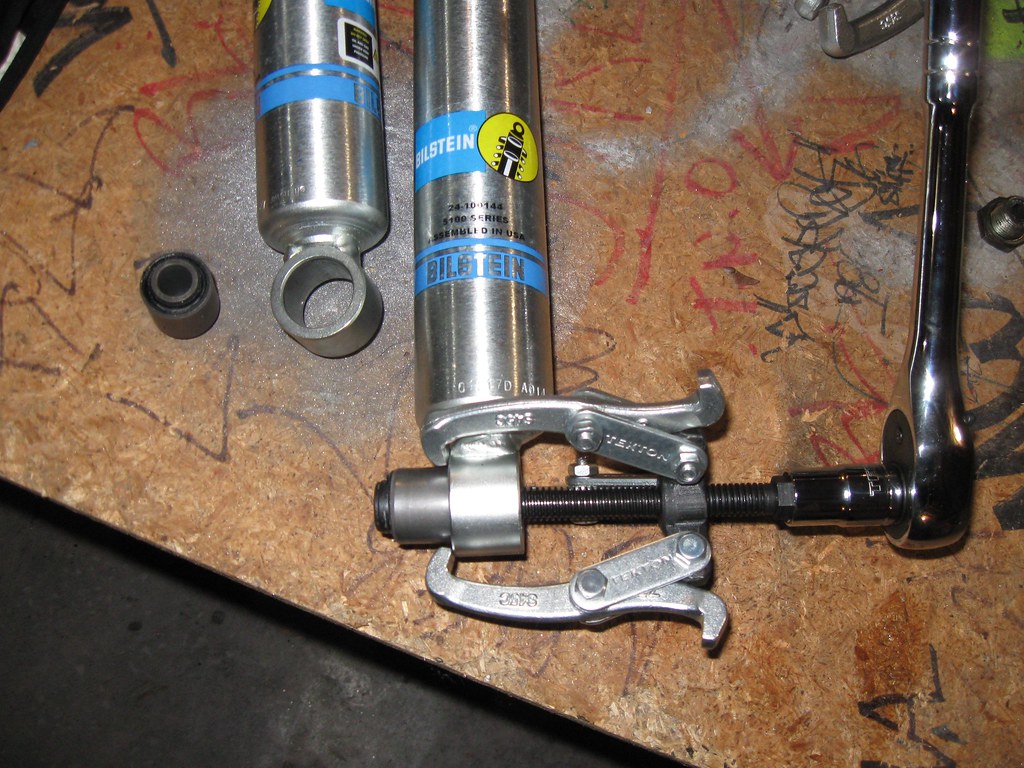 IMG_2572 by Mike Campbell, on Flickr
IMG_2630 by Mike Campbell, on FlickrI covered the paint codes with tape so they will still show.
IMG_2631 by Mike Campbell, on Flickr Swapped the bushings on my new Tundra 5100's. That broken c-clamp was my Grandfathers, probably from the 1950's. Luckily I have 2 more. I have all of his old tools, some dating back to the 1920's.
IMG_2573 by Mike Campbell, on FlickrModern tools! LOL
IMG_2572 by Mike Campbell, on Flickr
Last edited:
Scramble
New member
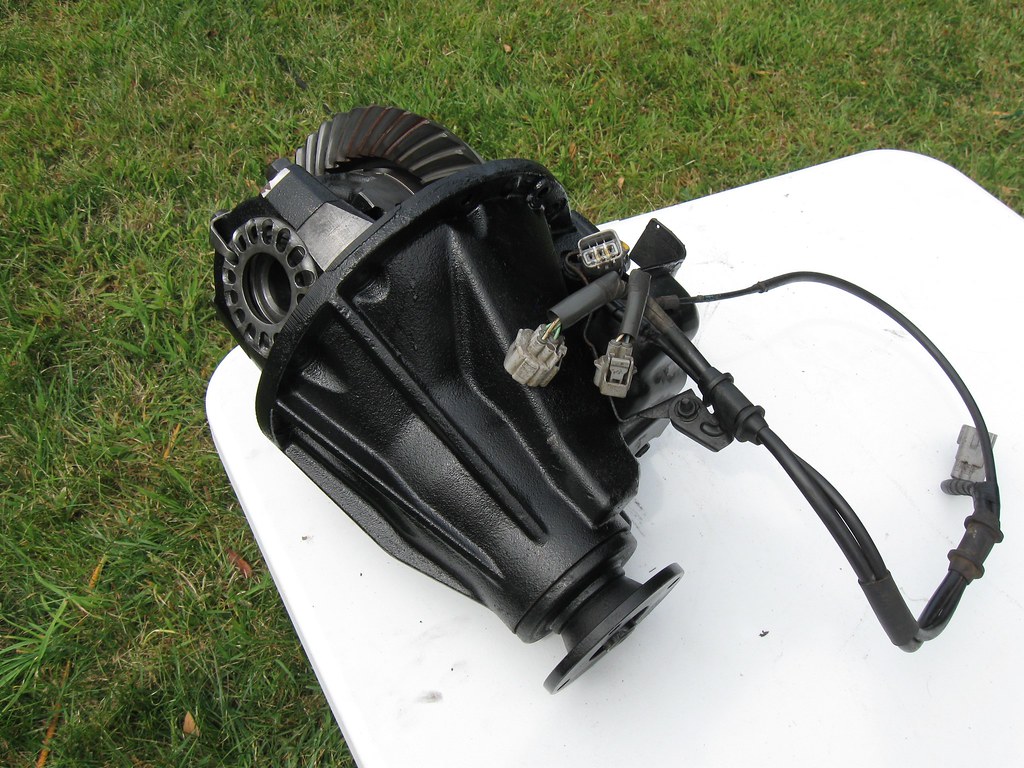
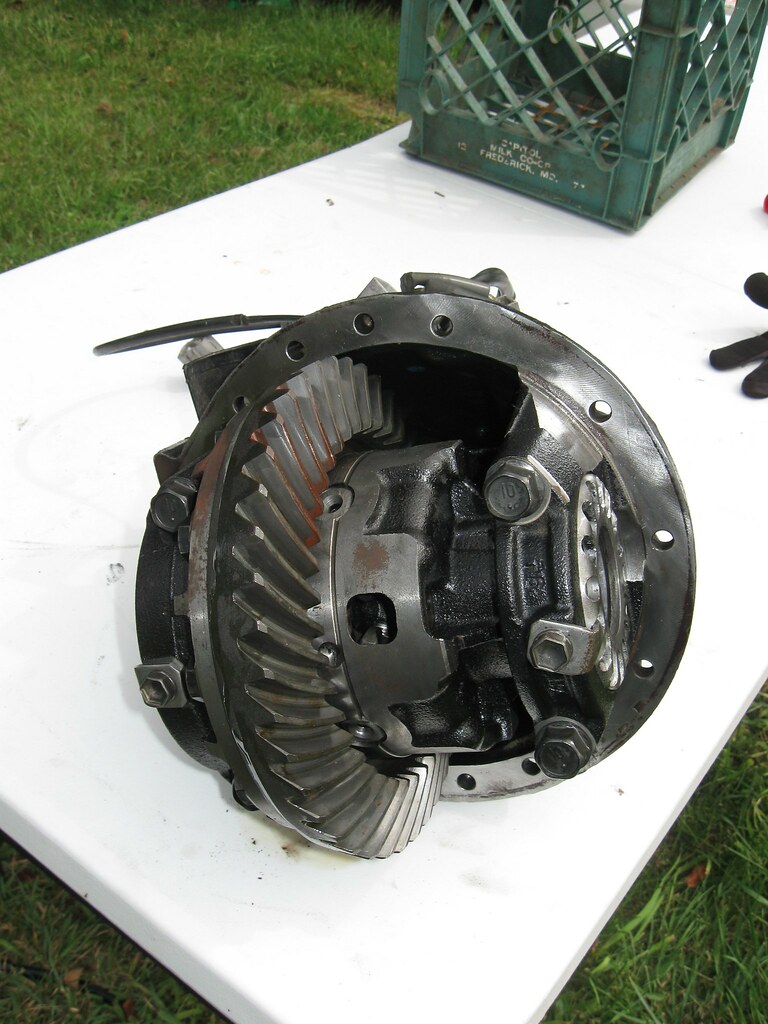
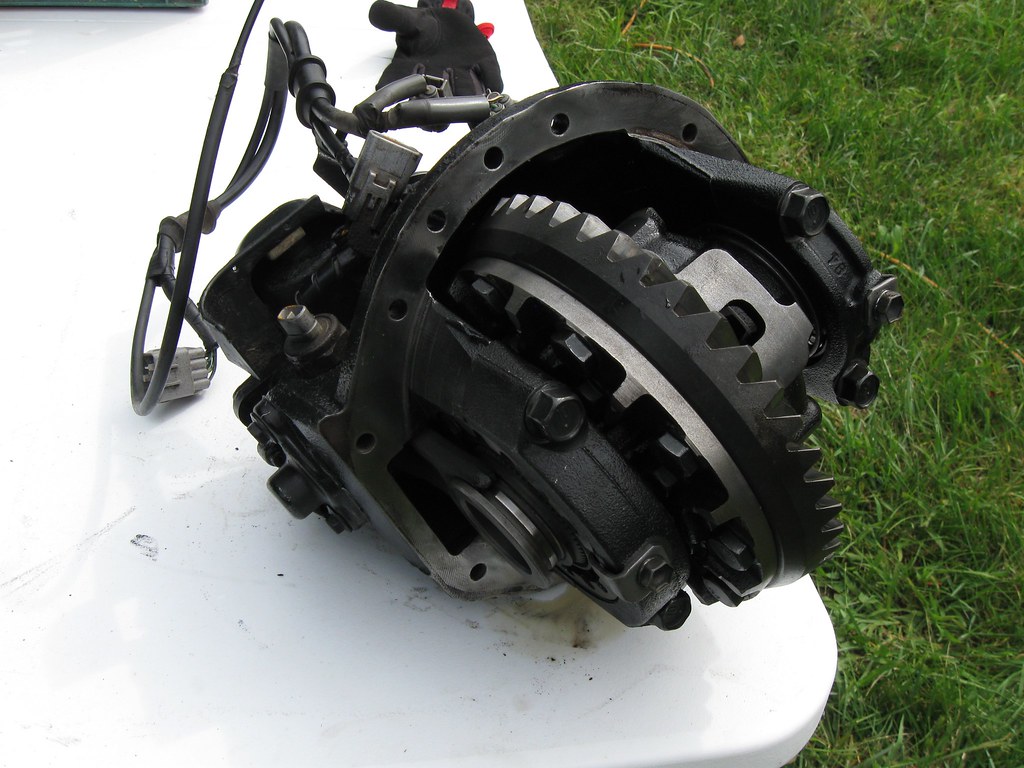
After 2 weeks at the shop my 4.56 E-Locked 3rd member was ready!
I put her on my outdoor work table & gazed at her beauty! :becky:
 IMG_2526 by Mike Campbell, on Flickr
 IMG_2527 by Mike Campbell, on Flickr
 IMG_2528 by Mike Campbell, on Flickr
The shop doesn't use that backlash grease. They measure pinion depth before & after the rebuild. They said it was spot on. I wanted to double check it so I Googled what else I could use that I had around the house & lipstick was something that I had. Not mine! My GF's! LOL
It was dead on.
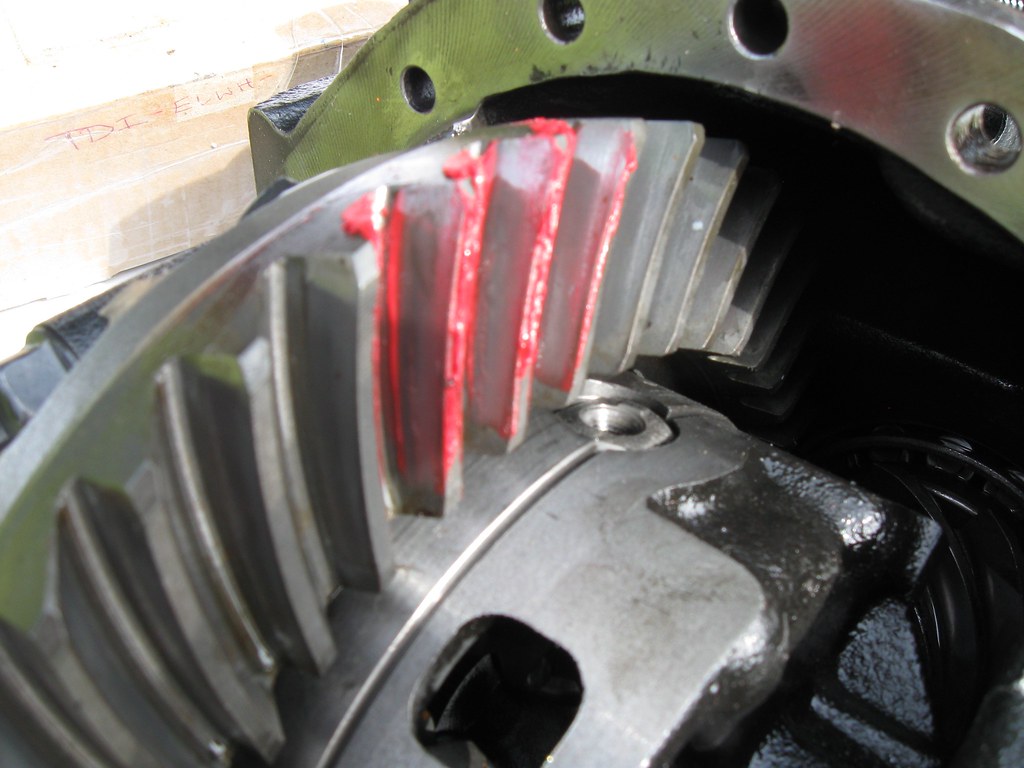 IMG_2530 by Mike Campbell, on Flickr
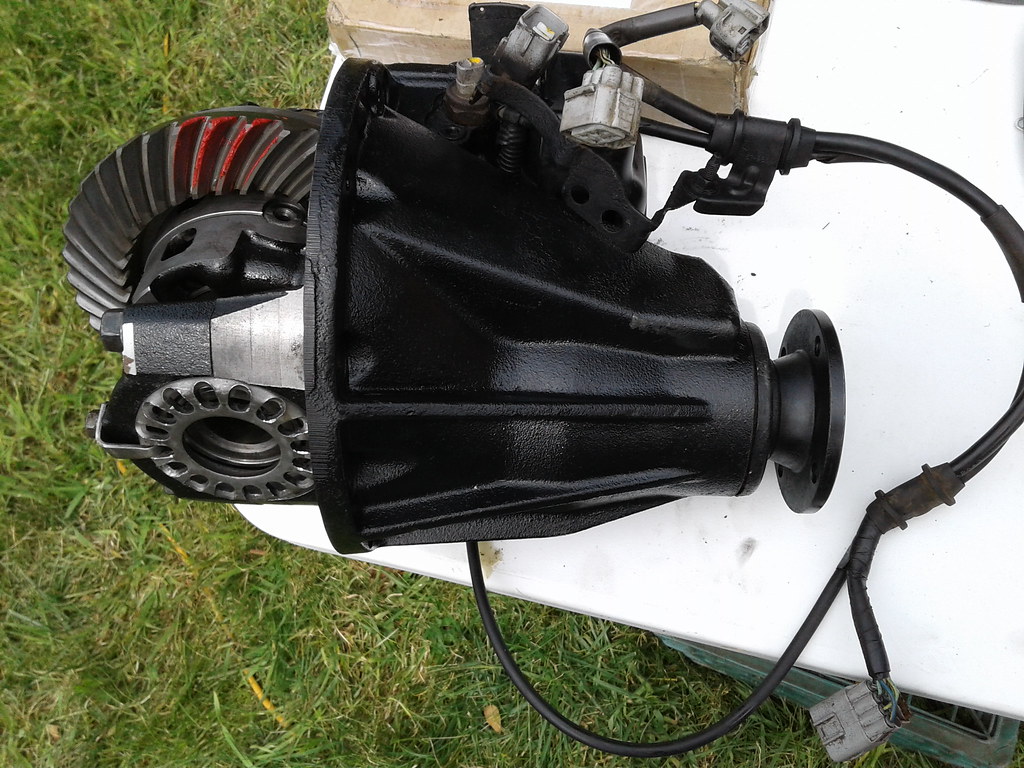 20170902_121132 by Mike Campbell, on Flickr
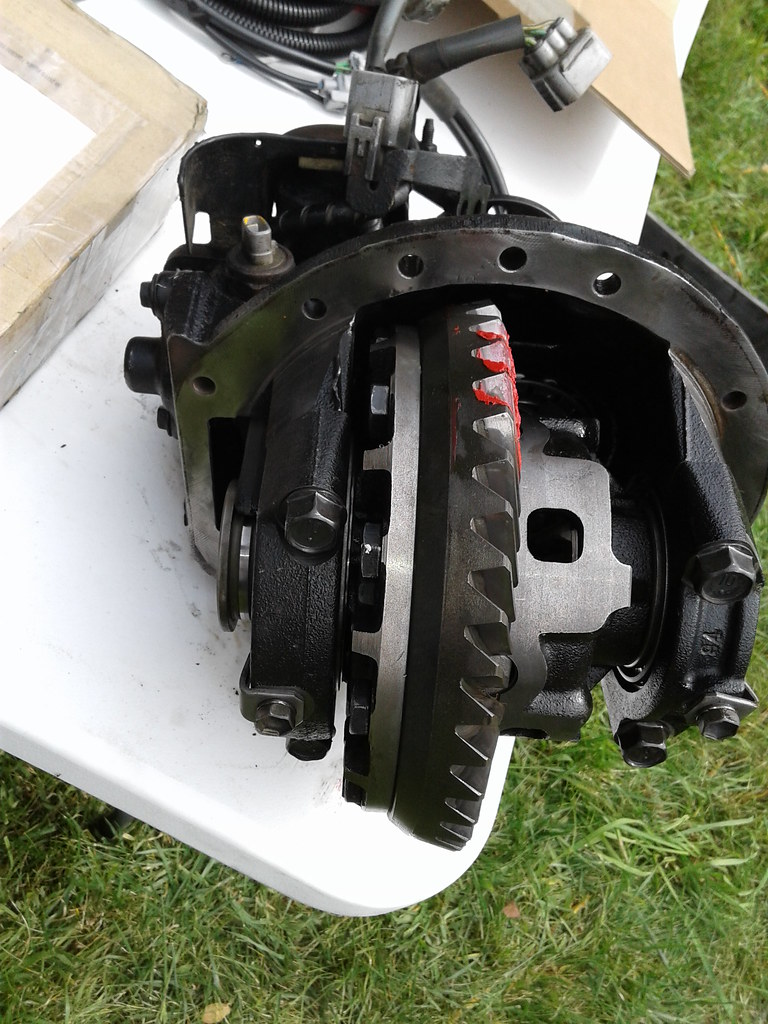 20170902_121150 by Mike Campbell, on Flickr
Here's the 4.30's & my old carrier. I have them boxed up for a rainy day.
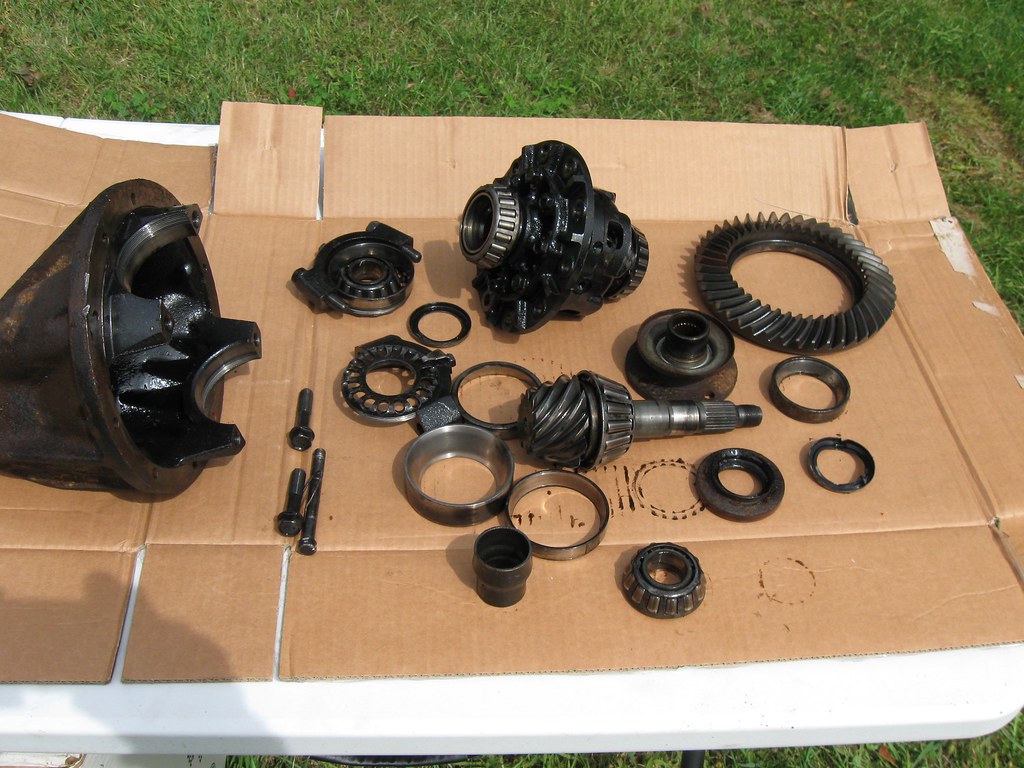 IMG_2531 by Mike Campbell, on Flickr
I bought the Low Range Off Road E-Locker harness from a member in the Classifieds for $100. Thats half off new. He sold his 3rd gen before doing the e-locker swap.
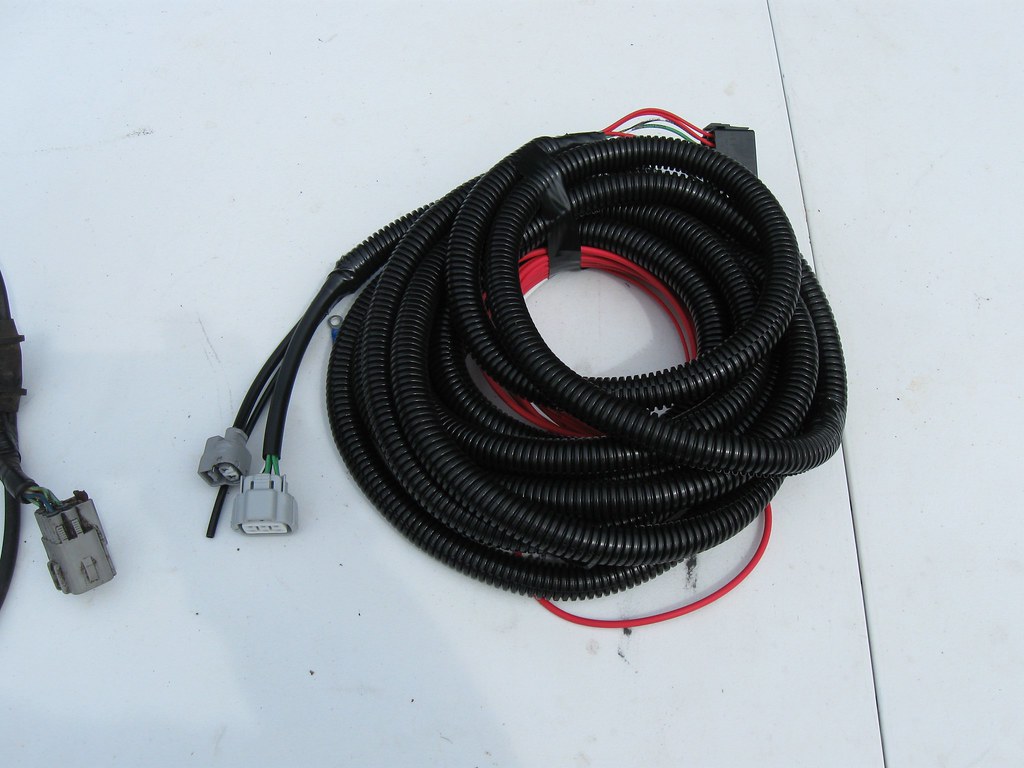 IMG_2529 by Mike Campbell, on Flickr
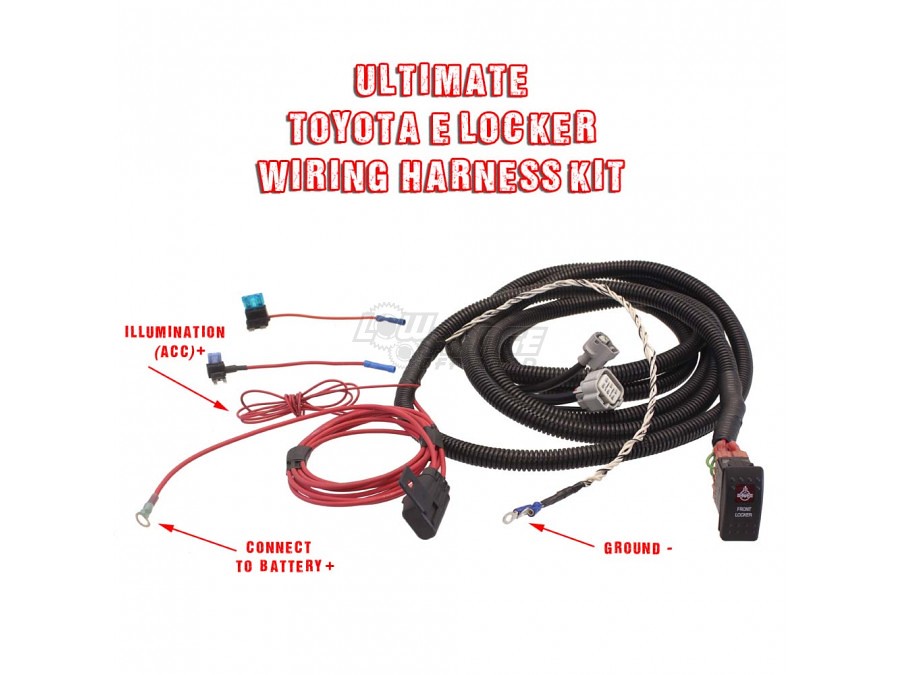 ultimate_toyota_elocker_wiring_harness_kit_1000px by Mike Campbell, on Flickr
I put her on my outdoor work table & gazed at her beauty! :becky:
IMG_2526 by Mike Campbell, on FlickrIMG_2527 by Mike Campbell, on FlickrIMG_2528 by Mike Campbell, on FlickrThe shop doesn't use that backlash grease. They measure pinion depth before & after the rebuild. They said it was spot on. I wanted to double check it so I Googled what else I could use that I had around the house & lipstick was something that I had. Not mine! My GF's! LOL
It was dead on.
IMG_2530 by Mike Campbell, on Flickr20170902_121132 by Mike Campbell, on Flickr20170902_121150 by Mike Campbell, on FlickrHere's the 4.30's & my old carrier. I have them boxed up for a rainy day.
IMG_2531 by Mike Campbell, on FlickrI bought the Low Range Off Road E-Locker harness from a member in the Classifieds for $100. Thats half off new. He sold his 3rd gen before doing the e-locker swap.
IMG_2529 by Mike Campbell, on Flickrultimate_toyota_elocker_wiring_harness_kit_1000px by Mike Campbell, on Flickr
Last edited:

Scramble
New member
September 2017
I followed the instructions on the Permatex label. I put a nice steady bead on the housing & around both sides of the studs. Set the carrier down carefully, "hand" tightened all of the nuts with my ratchet & let sit for an hour while I went in & had lunch. After an hour I tightened down by feel & then gave one more full turn. If you're an amateur use a torque wrench because these studs can snap pretty easily.
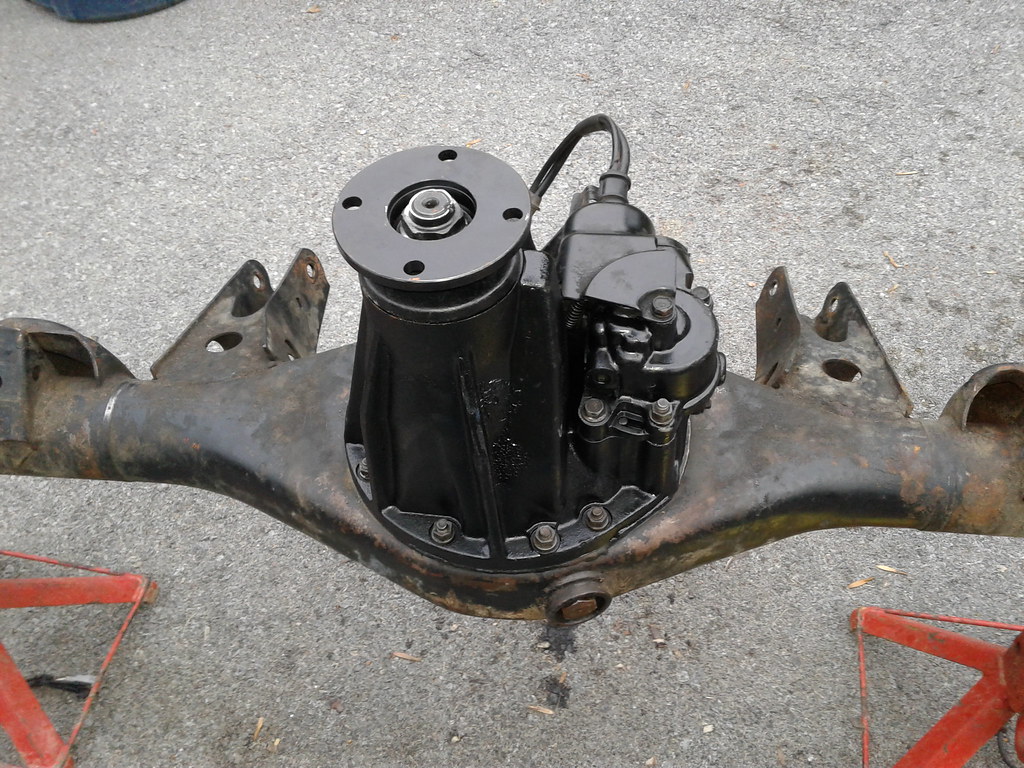 20170902_185632 by Mike Campbell, on Flickr
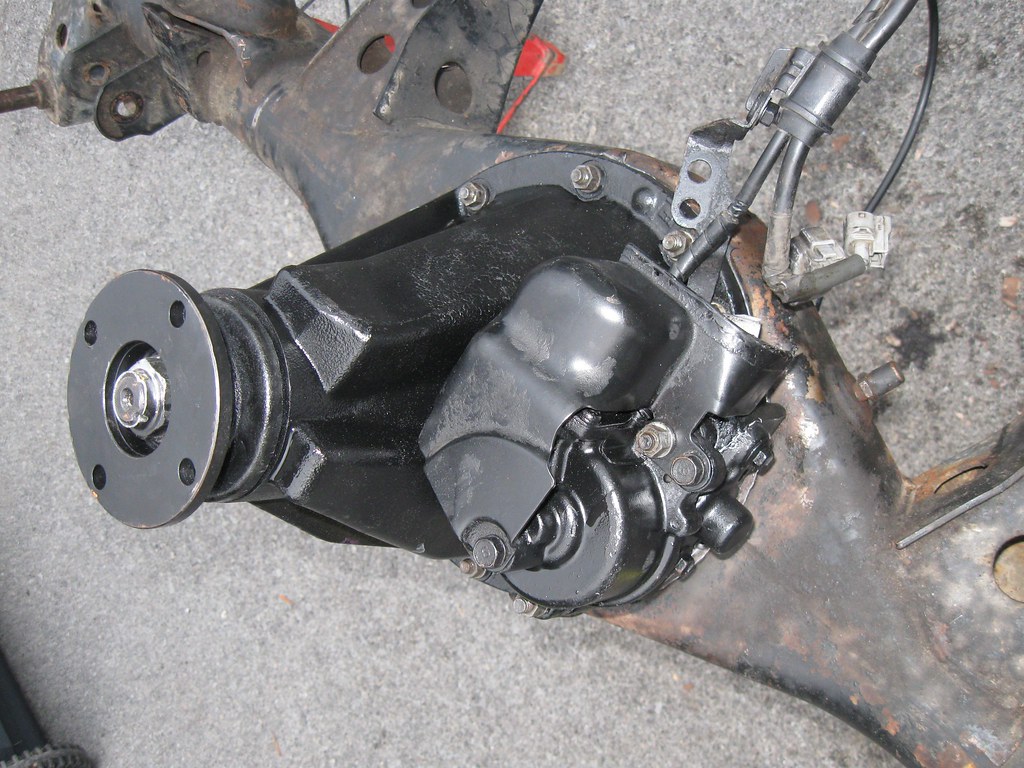 IMG_2534 by Mike Campbell, on Flickr
Here you can see a little of the Grey Permatex oozing out.
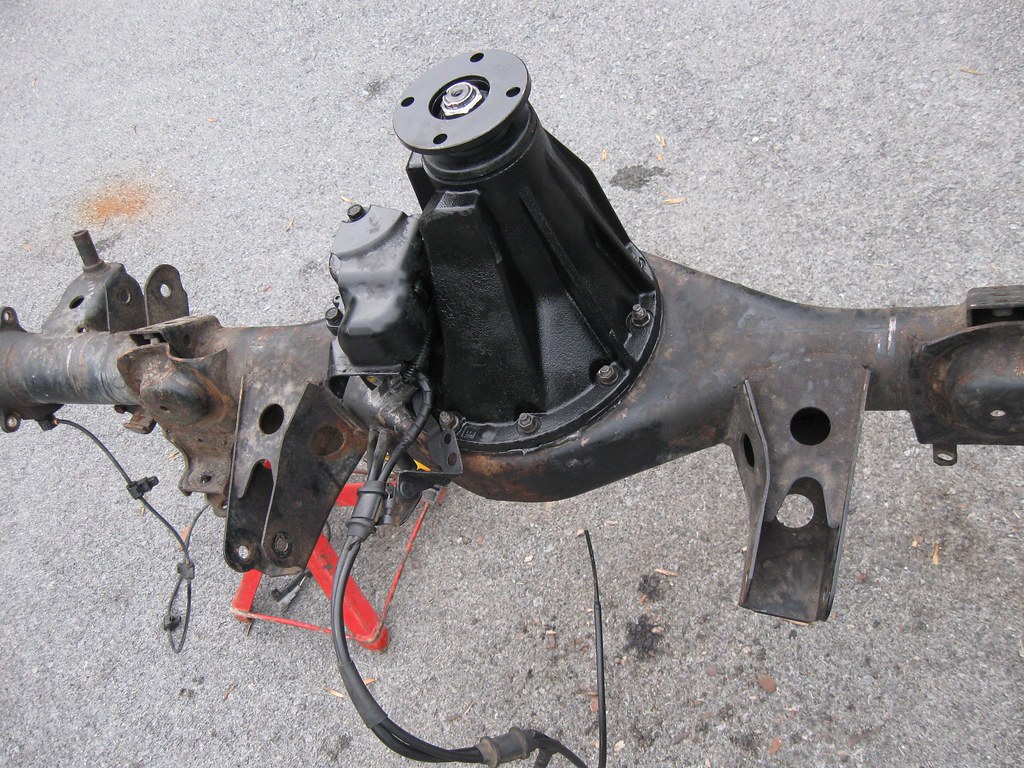 IMG_2535 by Mike Campbell, on Flickr
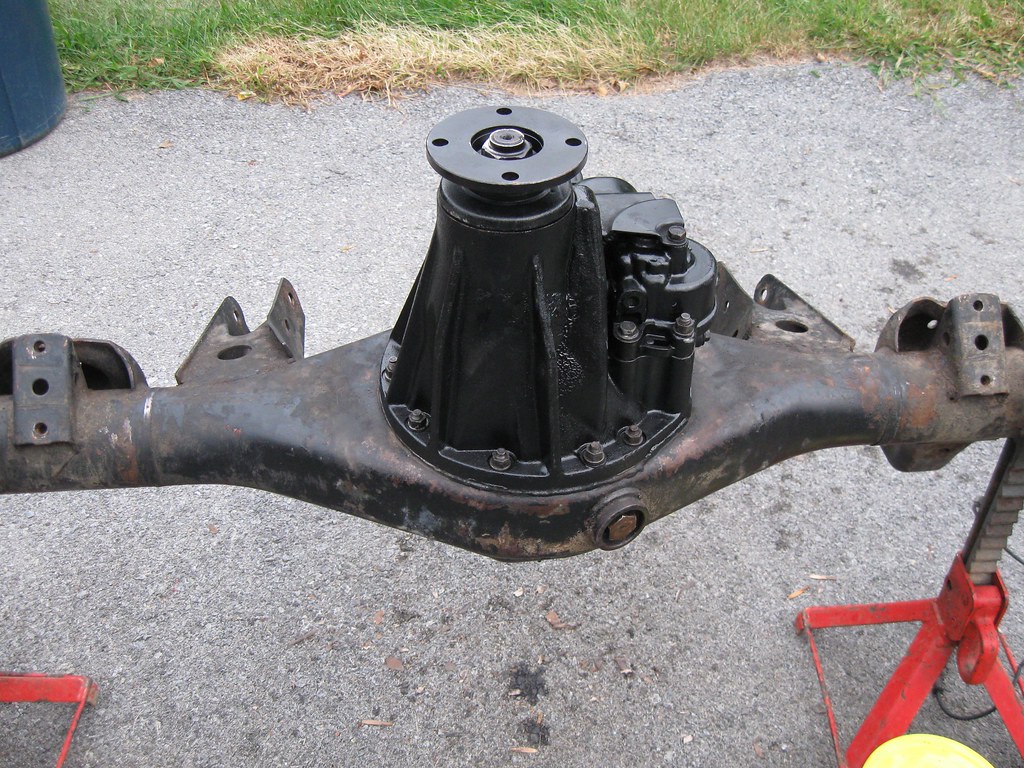 IMG_2536 by Mike Campbell, on Flickr
I followed the instructions on the Permatex label. I put a nice steady bead on the housing & around both sides of the studs. Set the carrier down carefully, "hand" tightened all of the nuts with my ratchet & let sit for an hour while I went in & had lunch. After an hour I tightened down by feel & then gave one more full turn. If you're an amateur use a torque wrench because these studs can snap pretty easily.
20170902_185632 by Mike Campbell, on FlickrIMG_2534 by Mike Campbell, on FlickrHere you can see a little of the Grey Permatex oozing out.
IMG_2535 by Mike Campbell, on FlickrIMG_2536 by Mike Campbell, on Flickr
Scramble
New member
After letting the Permatex dry for 24 hrs I started to de-grease the axle housing. I was gonna use the pressure washer but I was afraid to get water inside and/or damage any of the electrical connections on the actuator. I used POR-15 De-greaser & blue shop towels.
I bought a quart of Eastwood rust encapsulator & applied the first coat by foam brush. I was really hoping for a smoother finish but this stuff dries fast & the only way to make it smooth is by spraying.
https://www.eastwood.com/eastwood-black-rust-encapsulator-paint-over-rust.html
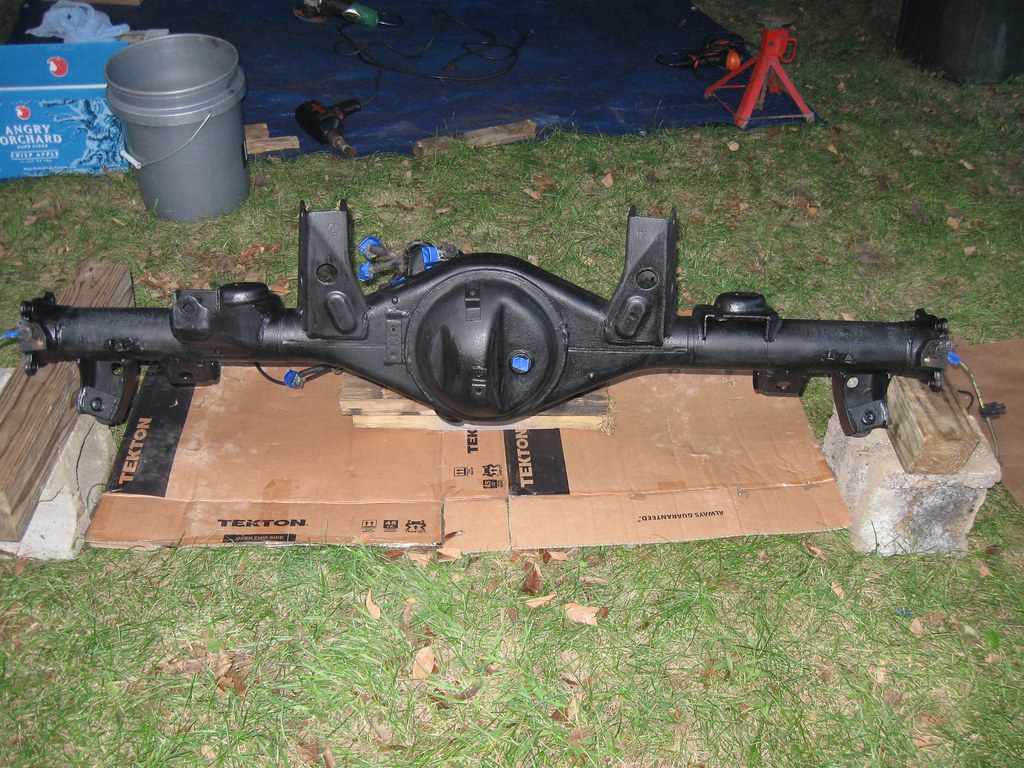 IMG_2548 by Mike Campbell, on Flickr
I used a can of Eastwood's Internal Frame Coating w/ the 360* nozzle to get into all of the spots that a brush wouldn't reach. Thats what those drips are on the cardboard, that shit flies out.
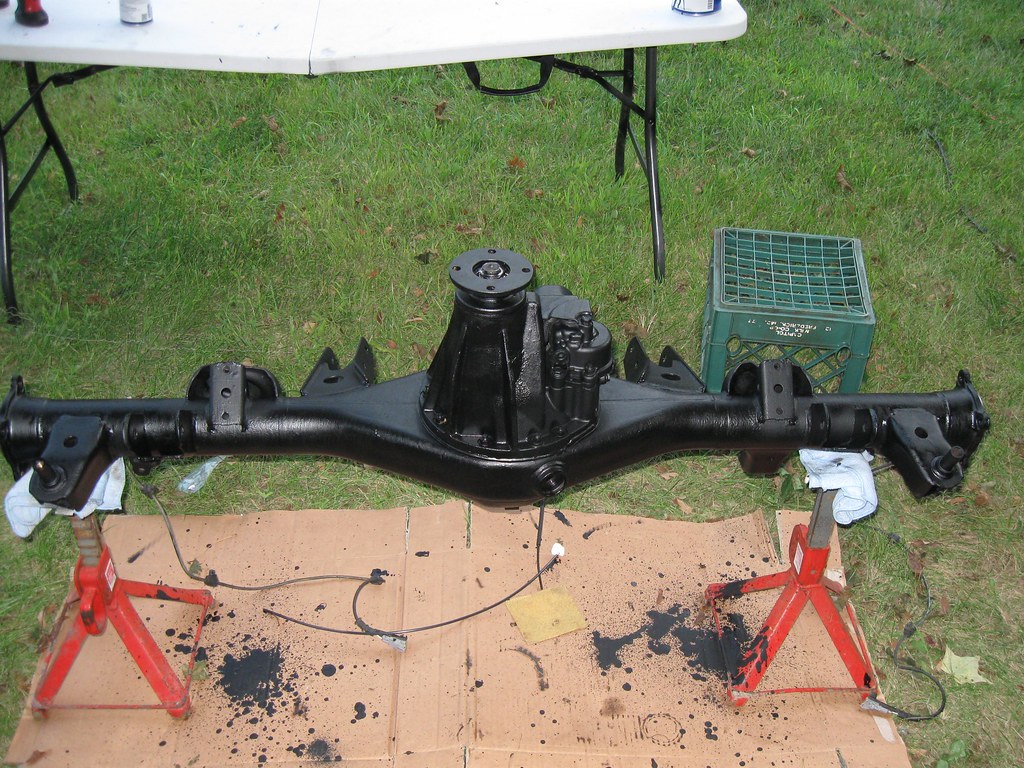 IMG_2541 by Mike Campbell, on Flickr
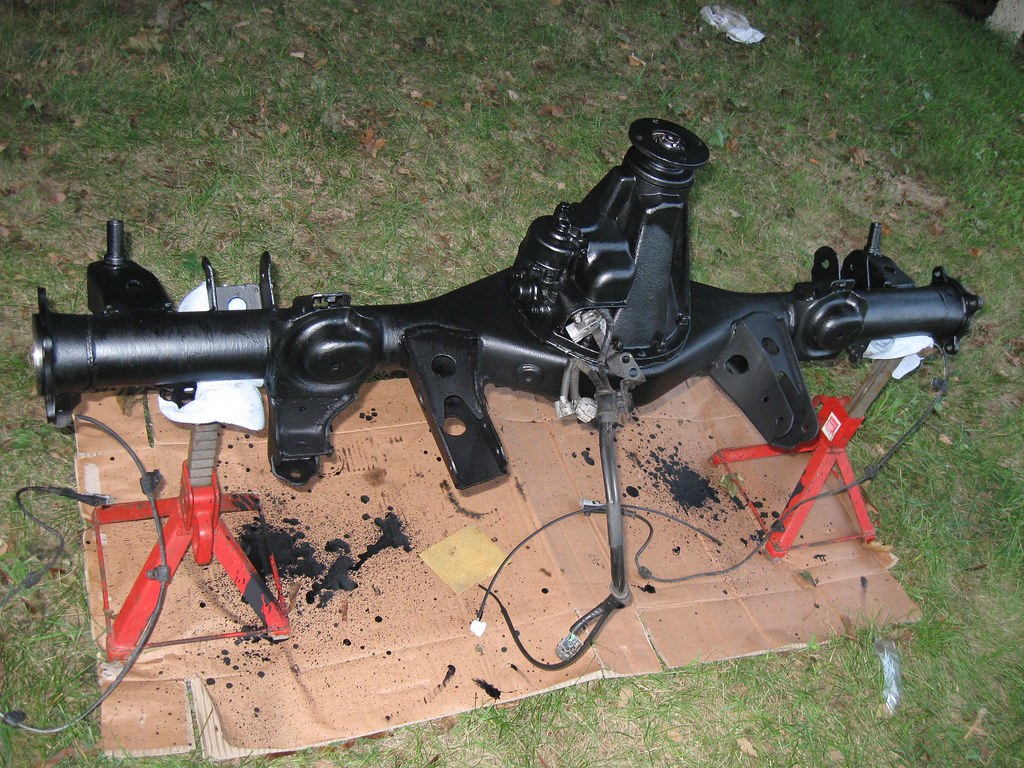 IMG_2542 by Mike Campbell, on Flickr
I let it sit until the following Sat & sanded the housing with 320 grit to get a smoother appearance & also to get good adhesion for the second coat.
I figured I'd try to spray this with my Wagner Stain sprayer that I used to do my deck. I diluted the paint with lacquer thinner & it worked pretty good. I wasted a pretty good amount of paint because the nozzle was too small but it got the job done.
https://www.amazon.com/Wagner-04170...34989767&sr=8-6&keywords=wagner+paint+sprayer
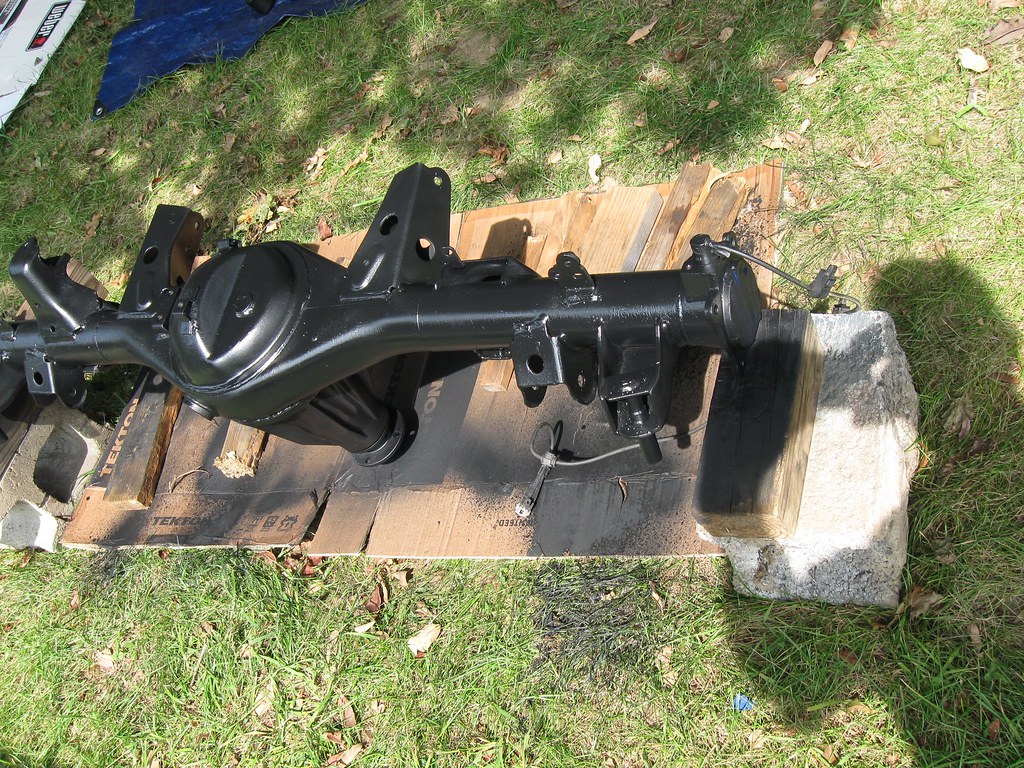 IMG_2550 by Mike Campbell, on Flickr
 IMG_2551 by Mike Campbell, on Flickr
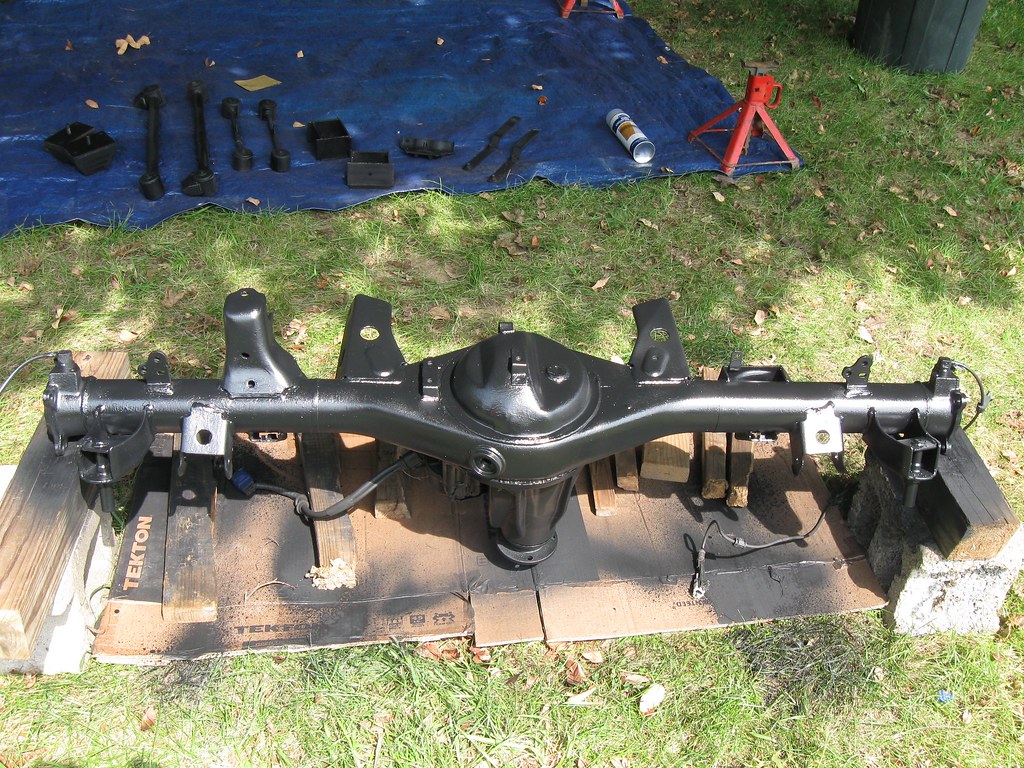
Let dry for 1 hour & added 2 coat's of Satin Black VHT Roll Bar & Chassis Paint.
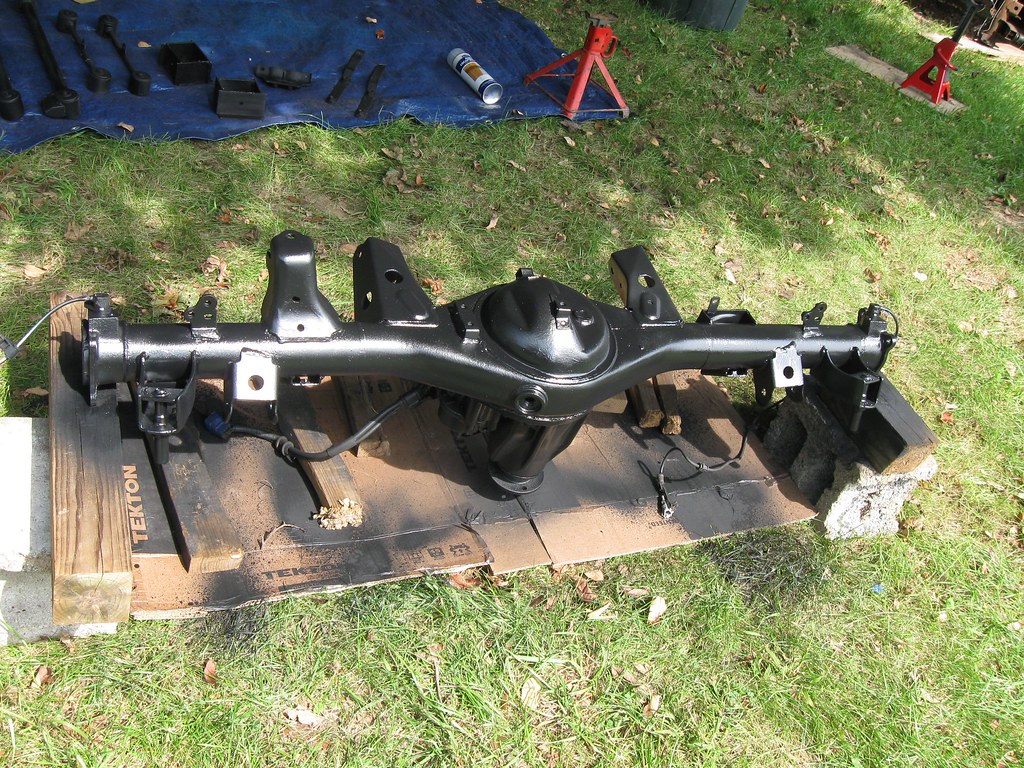 IMG_2552 by Mike Campbell, on Flickr
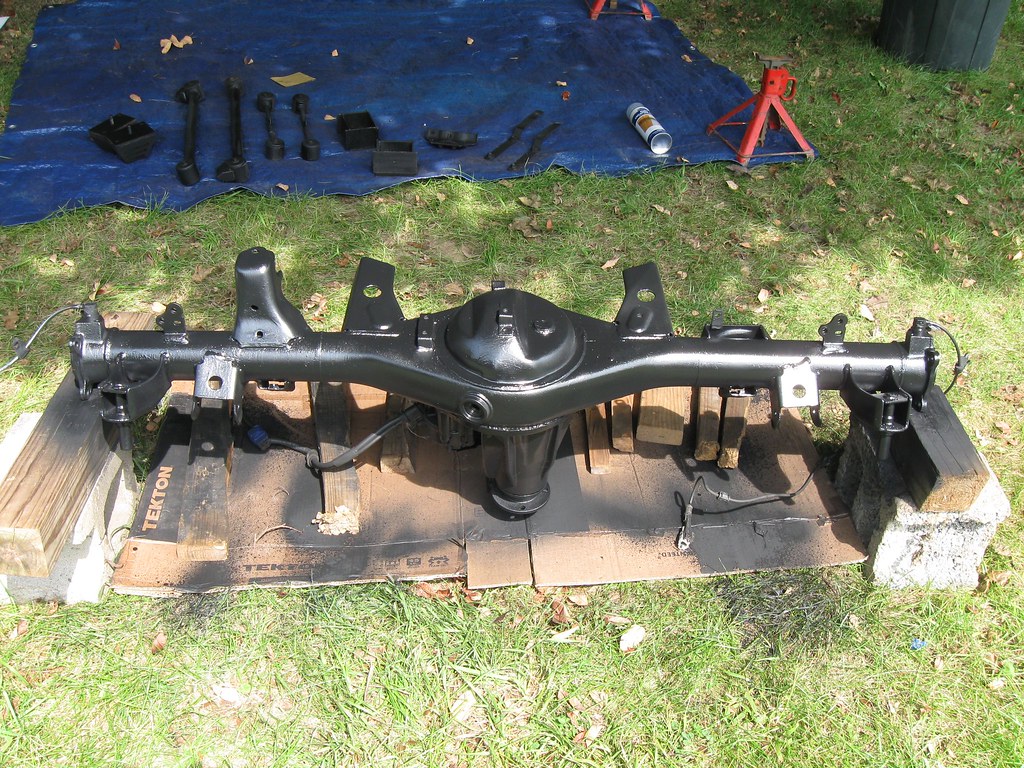 IMG_2553 by Mike Campbell, on Flickr
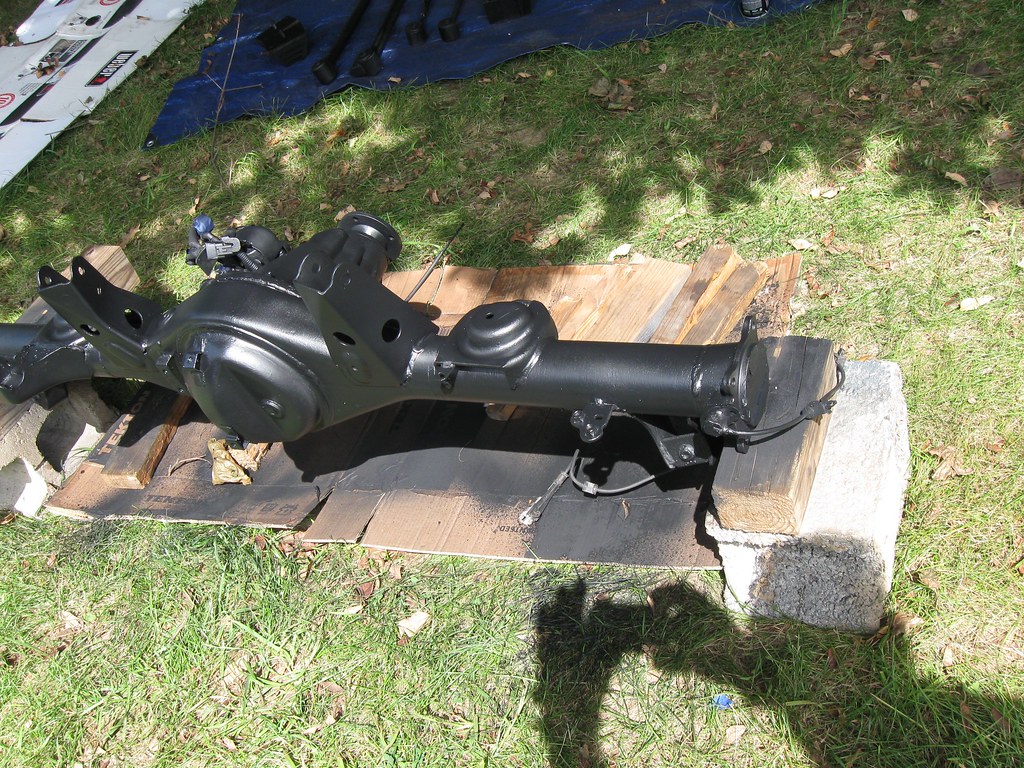 IMG_2555 by Mike Campbell, on Flickr
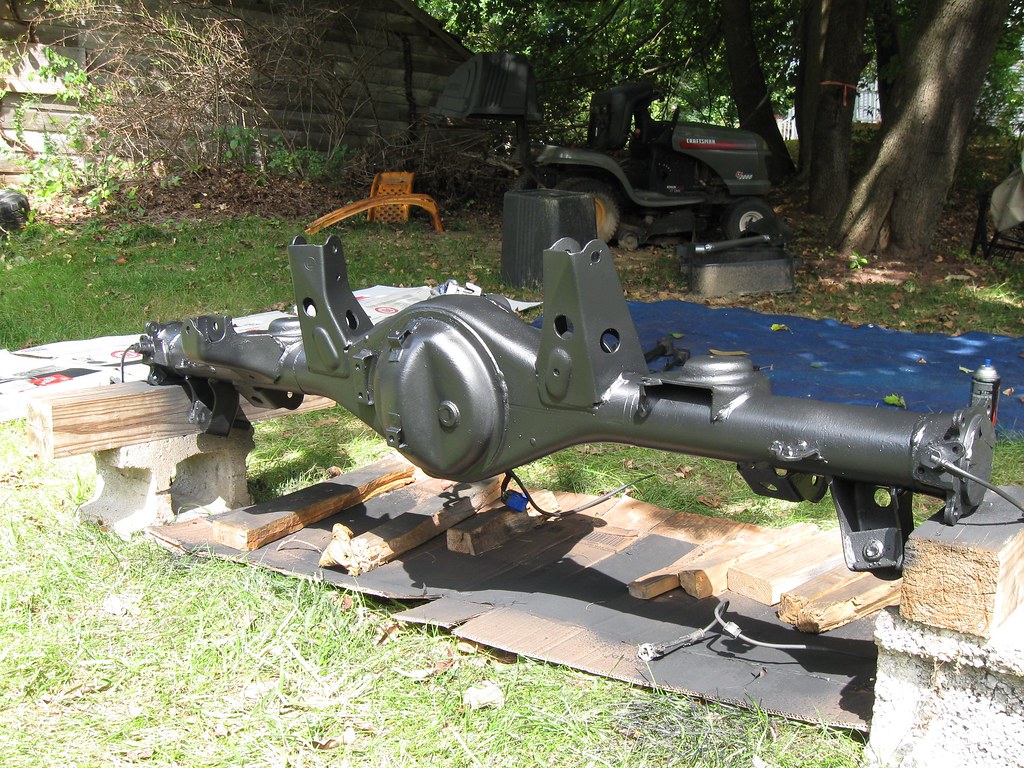 IMG_2556 by Mike Campbell, on Flickr
Old perfectly fine axle housing in the background.
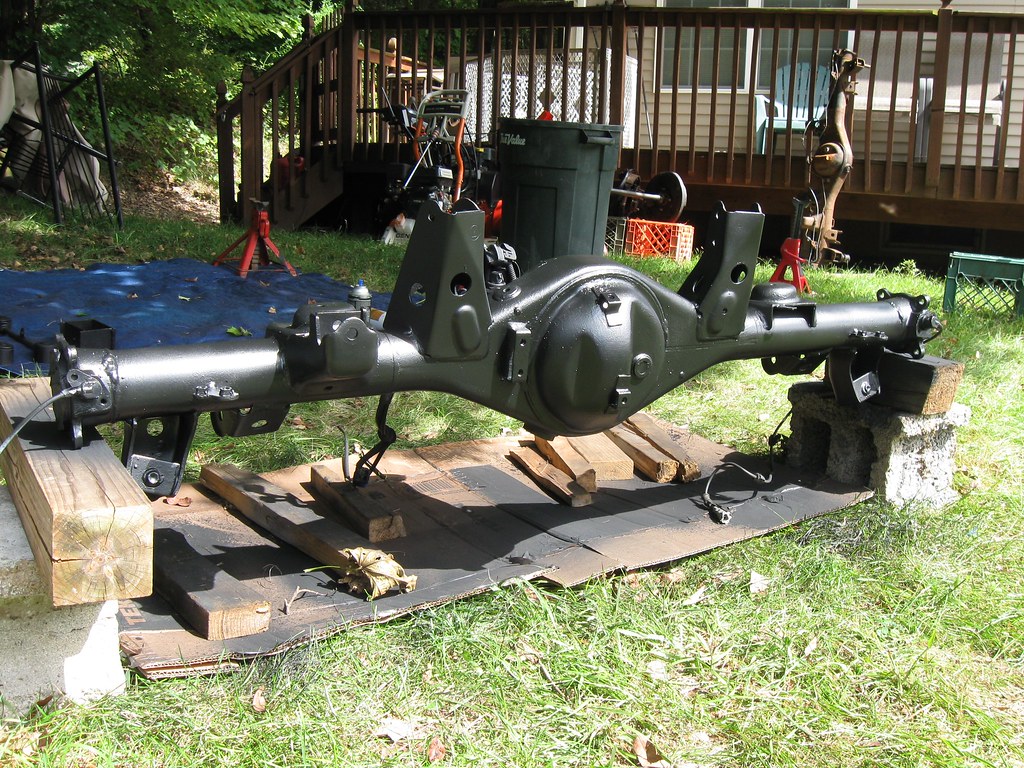 IMG_2557 by Mike Campbell, on Flickr
I bought a quart of Eastwood rust encapsulator & applied the first coat by foam brush. I was really hoping for a smoother finish but this stuff dries fast & the only way to make it smooth is by spraying.
https://www.eastwood.com/eastwood-black-rust-encapsulator-paint-over-rust.html
IMG_2548 by Mike Campbell, on Flickr I used a can of Eastwood's Internal Frame Coating w/ the 360* nozzle to get into all of the spots that a brush wouldn't reach. Thats what those drips are on the cardboard, that shit flies out.
IMG_2541 by Mike Campbell, on FlickrIMG_2542 by Mike Campbell, on Flickr I let it sit until the following Sat & sanded the housing with 320 grit to get a smoother appearance & also to get good adhesion for the second coat.
I figured I'd try to spray this with my Wagner Stain sprayer that I used to do my deck. I diluted the paint with lacquer thinner & it worked pretty good. I wasted a pretty good amount of paint because the nozzle was too small but it got the job done.
https://www.amazon.com/Wagner-04170...34989767&sr=8-6&keywords=wagner+paint+sprayer
IMG_2550 by Mike Campbell, on FlickrIMG_2551 by Mike Campbell, on FlickrLet dry for 1 hour & added 2 coat's of Satin Black VHT Roll Bar & Chassis Paint.
IMG_2552 by Mike Campbell, on FlickrIMG_2553 by Mike Campbell, on FlickrIMG_2555 by Mike Campbell, on FlickrIMG_2556 by Mike Campbell, on FlickrOld perfectly fine axle housing in the background.
IMG_2557 by Mike Campbell, on Flickr
Road Bull
Senior Member
Shrockworks charged my card today for the rear swingout bumper! Should ship tomorrow.
I already have a matching Trail Edition wheel & ordered the Sonoran Steel body mounts a few weeks ago.
Today I ordered a Hankook 285 matching spare from DTD! Nice!
Cool! I know you have been wanting that rear Shrockwors swing out for a while now. Congrats!! Looks like you will be ready to go when it lands. I look forward to seeing it on your rig.:snacker:
Scramble
New member
Cool! I know you have been wanting that rear Shrockwors swing out for a while now. Congrats!! Looks like you will be ready to go when it lands. I look forward to seeing it on your rig.:snacker:
Yea man, I've had that TE wheel for like 2 years now. LOL I like to plan ahead. :biggrin1:
Last year when I was painting the rear of the frame I started messing with the stock body mounts. They were pretty rusty & didn't budge. I had the rear bumper off so every weekend I'd hit them with WD40 & give them a little tug. After a few weeks they eventually cracked loose. I never tightened them back up so they should come out no problem. Now I need to figure out what gas can to get. I really needed it on my last wheelin' trip.

Scramble
New member
It's been a long time and I was thinking about your 4runners. I hope everything in NY is going okay for you. Any updates on the property and garage? Or cars and dogs?
Hey Man,
Thanks for checking in! Hope all is well with you & everyone else in this forum!
Well Covid screwed up lots of things. Me & my GF have been out of work since last March. She just started a new job last week so thats good. I'm on furlough, my boss says he's taking me back when work picks up but I only have 11 weeks of unemployment left. I was the night supervisor & there's not enough work to open up at night. They've laid off 100 of our 200 employes & only open from 7-3pm.
The garage is cleaned out but I have no money for the cement floor & other updates I wanted to do to it. I'm late on the property tax for the land. Unemployment doesn't even cover my bills forget about the luxuries that I've had. I've been taking money from my retirement to stay afloat.
The dogs are good except my Shepherd Eros. He's 11 & has Lou Gehrig's disease. He's having trouble with his hind legs now. He brain is fine but walks like a drunk. Not sure when we'll have to put him down yet. Probably when he cant make it outside to go to the bathroom.
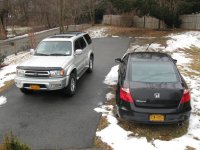
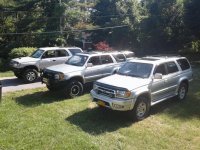
I'm not sure if I posted about my 3rd 4Runner. It's a fully built '99 E-Locked Limited with a rotted frame. Only has 144K on the clock. I drove it home but the frame is bad! Got it cheap & the e-locker axle was an add on so no rust on that. ARB bumper, TRD wheels w/ Duratracs, 3" Toy-Tec lift, CVJ axles, mint leather interior. I could part out a few things & break even easily. Or do a frame swap & have a really nice truck or keep it for parts. If I'm still out of work in the spring I'll have to part it out but I'd rather not. It runs & drives fine.
Here's a pic of all 3 in my front yard. Take care!
Attachments

spartacus
Senior Member
Neice Harem of 3rd gens. Good find on the runner. Its tough when dogs get old. I ve lost two, a 13 yr old GSP and a 12 yr old boxer. It's good to hear from you. Covid+ the shitty response for the working man and women did a number. Times are tough all around hope to God it gets better in a hurry. lots of my friends moving in with their families cause they can't afford the houses and expenses. All I can say is you are a strong Newyorker and I am sure you'll come out on top. Wish you the best.
Similar threads
- Replies
- 10
- Views
- 3K
- Replies
- 0
- Views
- 115

- Replies
- 2
- Views
- 3K


