SOLUTION: 4th gen Personal (aka Map) Light mod

I think you could, yes. Would you want the map light switches to retain some functionality as well (i.e. ON/OVERHEAD_LIGHT_SWITCH_MODE or OFF/OVERHEAD_LIGHT_SWITCH_MODE or ??/?? )?

jimsi said:
can you tap into the overhead light switch itself so it would be switched like the overhead light? ile controlled when in the door(pos3) position, off in pos 2 and on in pos 1?

...
This is the OEM wiring for other overhead lights. These are the same as above except when in the DOOR position. In that case, the ground path is controlled by ILE via the Body ECU. This does the fade out effect. If you leave them in the ON position, the dome relay switches them off.
Battery==Dome relay==Overhead Light Switch Pole
GND==============Overhead Light Switch Pos1 (On)
N/C ==============Overhead Light Switch Pos2 (Off)
GND==Body ECU(ILE)==Overhead Light Switch Pos3 (Door)
 
rando said:
I think you could, yes. Would you want the map light switches to retain some functionality as well (i.e. ON/OVERHEAD_LIGHT_SWITCH_MODE or OFF/OVERHEAD_LIGHT_SWITCH_MODE or ??/?? )?

I think I would like the map light switch to function as ON/Map_LIGHT_SWITCH_MODE (i.e. map light always on) and OFF/OVERHEAD_LIGHT_SWITCH_MODE (controlled via the overhead light switch...Door\Off\ON)

I think that I would mod the map light the same as this thread but what needs to be tapped from the overhead light switch itself (i.e what pin position or wire in the overhead switch needs to be used) and is a resistor required?

Thanks
 
Last edited:
It's one or the other, not both. In any case, based on your description I think you mean what I intended by the notation ON/Overhead_light_switch_mode. One position on the switch would force the map lights on, the other position would route their control to the overhead light switch so that they work in tandem with the overhead lights.

If I get a second, I'll take a look and make a suggestion. You'll be on your own to test and confirm.
 
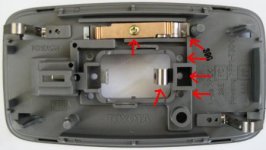
This could be what you want. Attach the wires from the map light switches (as shown in the original mod) to the switch pole of the overhead light. The red arrows on the picture below indicate the potential spots you might use to connect to the switch pole. The screw on the copper slider is probably easiest for testing.

This connection should cause your map lights to switch between two modes of operation

Postion 1: Original Mode: On, New Mode: On
Position 2: Original Mode: Off, New Mode: Controlled by overhead light switch position

Good luck.
 

Attachments

  • 4unner light 002.jpg
    4unner light 002.jpg
    19.9 KB · Views: 1,385
I finished this mod successfully, but lost one of the clips for the map light/sunglass holder console. Anyone know where I can get some extras?
 
bringing it back!

since this thread is so old, the pictures i am looking for are the ones deleted... :(

so i was wondering if anyone has pictures of how to remove the map light consol? the whole thing not just the lights.
yes i have searched found 3rd gen but not 4th. thanks.
 
If it's the same as the 2007 it just has two clips on the side closest to the windshield. Just slide your fingers under that edge and pull straight down. The other side (nearest the sunroof if you have it) has tabs that just slide in up above the headliner. Hope that helps.
 
I was wondering how to solve this design problem of not being able to see at nite when my 4R is off!...
 
Last edited:
Just got my 06 a month ago and wanted to do something like this and a search led me to this post.

Earlier in the post the amp load was mentioned as possibly being a bit high for the circuit. The map lights should not add but possibly an amp, give or take a bit, to the load. Usually fuses are rated at double the nominal load to make up for any fluctuations or differences in amp draw. So it it's made to run 4 or 5 amps, using a 10 amp fuse, then 5 to 6 amps will not effect the circuit any.

BUT, if you are still worried about it, you can always upgrade to LED bulbs, which use much less amperage/voltage to operate, and would negate any worries about adding amp draw to the circuit.....

Just a thought. I'm going to do this mod too as soon as I get the time, as the map lights staying dark when the rest come on bugs the hell out of me. My Acura Integra was the same way, and I always hated it but never seemd to get around to modding it.

Here's a link to a GREAT LED website, has LED replacements for most factory bulbs, just plug and play!!!

Super Bright LEDs - Store

And:

www.autolumination.com Tail Light Brake Light Turn Signal LED Bulbs

Great write-up!
 
Been a while, I know. I want to tap the ILE at the dome overhead and just run a short wire forward to the maplights. I know the ILE is pin 2, solid white... But I've got to harnesses connected to the dome (I have a 2004 Sport with JBL Synthesis and wireless headphone option) and don't know which pin is which. LOTS of solid whites in these harnesses. Anyone have a pic or a good way to test for the right pin?
 
Hello all, I just completed this mod and everything went smoothly. However the map light console is much looser than when I took it off. Did I bend a clip? If so, does anyone have a part number for those? I might just epoxy it to the head liner.
 
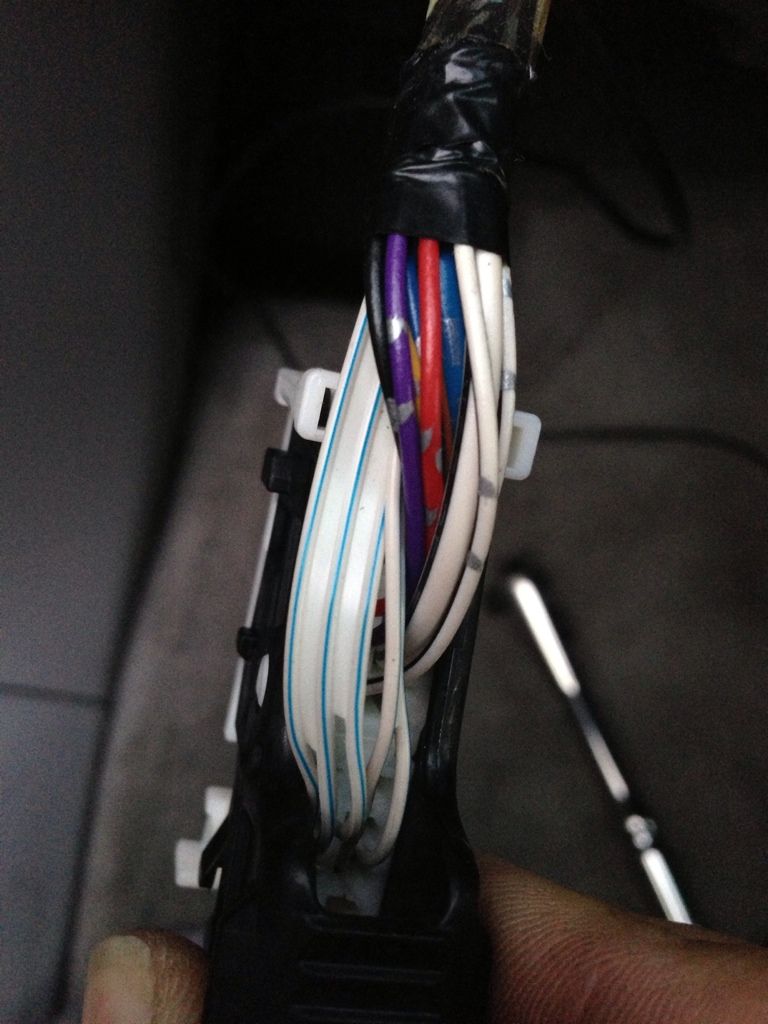
2007 T4R. I want to make sure I have the correct wires to tap into. Here's a pic of the 3-ribbon blue-striped wire at the fuse box. I tap the middle wire, correct?

A0EAE952-E8DB-4D54-91C8-958B6D2C639E-17678-00000DA6DA1139A8_zps9c310181.jpg~original
 
did this mod yesterday but i ran a wire from the switched ground on the center dome to the grounds on the front map lights so whenever the dome comes on the maps would too but didnt like that both maps would light if one was switched on so i added 2 small diodes to back and now when the door is opened or the center dome is switched on all the lights work but you can also use each map light individually now its the way it should have been from the factory
 
Trying to read through this isn't easy for someone that has never done this, and the blurry pics from 2005 don't help either. Has anyone simplified this mod yet? I'd like to do it but the OP seems risky so I'd like to be 100% clear on what I need to do before I begin.
 
Bump and +1 rep for an old thread!

It's been darker in the mornings now with fall here and not having the front of the cabin light up sucks. 10 mins, a couple feet of 18g wire and a 2 wire taps did the trick!

I didn't bother to remove the A Pillar trim. From the map lights, I just ran the wire to the door, tucked it under the top of the A Pillar plastic trim, ran it down the weather stripping, and tapped into the fuse box connector. Once you have all that figured out and done, just tuck the exposed wiring along the windshield into the headliner.

Thanks again!
 

Members online

No members online now.

Forum statistics

Threads
278,309
Messages
3,554,068
Members
248,016
Latest member
Advally Service

Trending content

Back
Top