soundproof rear cargo on 4th gen (pics)

aika1

Member
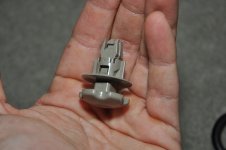
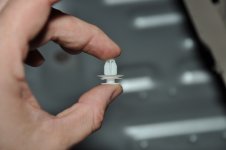
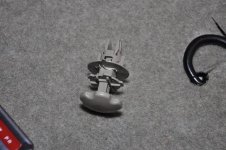
Hey guys- I've lurked long enough I guess. I went looking for a DIY on the rear cargo area with pics and didn't seem to find much. So I figured what the hell, I'll do it. First a picture of what you'll need for tools and the two clips that you'll be using for this job. Check 'em out. the first pic shows the "open" position of the clip, which you get by pulling the outermost piece (the mushroom head portion). it released the clips for insertion and whatnot. use a rag to save your fingertips (trust me on this one). The white clip is just a pushpin type. you'll probably break one of these (I did). No worries, you can get more at the local stealership...

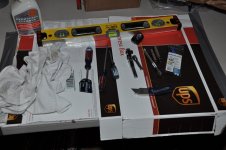
As for tools you'll need a 10mm and 14mm socket, a ratchet, flat and phillips head screwdrivers, a box cutter, rags, some sort of cleaning solution, a screwdriver with some pvc tape on it helps for prying without damaging your plastics, and of course, the sound dampening. I used the level and dry-erase for marking, measuring, and a straight edge, the flashlight for nooks and crannies, and the box is taped down to protect my table while I did the cutting.
 

Attachments

  • DSC_0116.jpg
    DSC_0116.jpg
    48.4 KB · Views: 4,318
  • DSC_0117.jpg
    DSC_0117.jpg
    103.3 KB · Views: 3,941
  • DSC_0125.jpg
    DSC_0125.jpg
    81.1 KB · Views: 3,940
  • DSC_0147.jpg
    DSC_0147.jpg
    132.7 KB · Views: 3,934
Register to hide this ad
more...

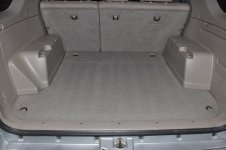
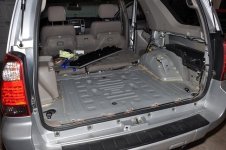
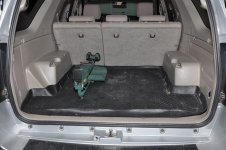
the 1st picture is the truck to start.

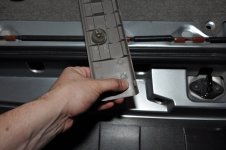
the 2nd picture is the trim piece closest to the liftgate's seal. remove the five screws and "pop" the trim piece up (using that screwdriver with the tape on it).

the 3rd shows the mushroom head clips. remove the two.

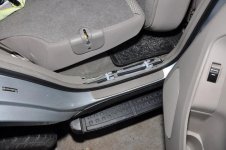
the 4th shows the rear door. there are two clips in the moulding. Pop the moulding off.
 

Attachments

  • DSC_0102.jpg
    DSC_0102.jpg
    112 KB · Views: 4,003
  • DSC_0105.jpg
    DSC_0105.jpg
    116 KB · Views: 3,939
  • DSC_0108.jpg
    DSC_0108.jpg
    97 KB · Views: 3,908
  • DSC_0110.jpg
    DSC_0110.jpg
    41.2 KB · Views: 3,906
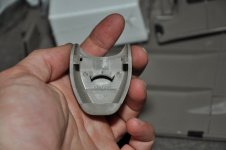
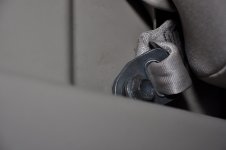
1st picture is the cover to the seatbelt bolt. Remove it by rotating the swiveling seatbelt anchor. and pulling it away from where the seatbelt enters...

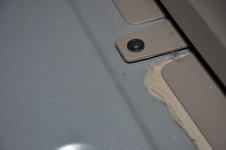
2nd picture shows the anchor itself. Remove that bolt. I used a wobble extension, but if you raise the seatback it's easier to do the removal using a socket with a short extension or a deep socket.

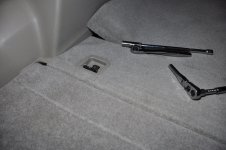
the 3rd picture shows the anchor points in the rear cargo area. Two screws each side, remove them.
 

Attachments

  • DSC_0111.jpg
    DSC_0111.jpg
    96.8 KB · Views: 3,882
  • DSC_0112.jpg
    DSC_0112.jpg
    88.2 KB · Views: 3,852
  • DSC_0118.jpg
    DSC_0118.jpg
    101.9 KB · Views: 3,889
The 1st picture shows the transition piece between the rear cargo and the seat back. it's just the carpeted section that looks a little odd. remove the two anchor loops.

the 2nd picture shows the one pushclip that this transition piece has. Pull the piece up straight, you'll be fine.

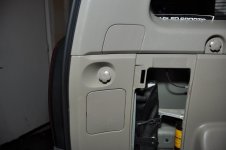
The 3rd picture shows the side. There are two screws in this side section. one is inside the pop-up door in the cubby. The other is right next to the Grocery hook. To get this whole piece off, you'll have to remove the screw that is right next to the liftgate opening too. You'll see it.
 

Attachments

  • DSC_0121.jpg
    DSC_0121.jpg
    127.6 KB · Views: 3,926
  • DSC_0123.jpg
    DSC_0123.jpg
    128.8 KB · Views: 3,878
  • DSC_0124.jpg
    DSC_0124.jpg
    107.3 KB · Views: 3,885
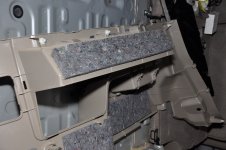
the 1st picture shows the side-paneling after it's been removed.

The 2nd picture shows the black tray that you'll remove after taking off the side-paneling. There are two screws on each end that you remove. Then you pop the tray up vertically. There is a pushclip in the middle of the tray. If the clip stays (mine did) carefully pry it up from the END of it with your fancy taped screwdriver.

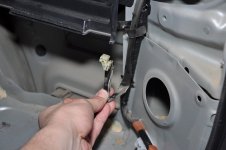
The 3rd picture shows the electrical harness for the cigarette outlet. When you remove the panel, don't pull it too far away without just pulling the harness off the socket. It's held on with friction.

The 4th picture is the panel removed, but prior to the black tray being removed.
 

Attachments

  • DSC_0126.jpg
    DSC_0126.jpg
    128.8 KB · Views: 3,919
  • DSC_0127.jpg
    DSC_0127.jpg
    42.5 KB · Views: 4,203
  • DSC_0130.jpg
    DSC_0130.jpg
    110.9 KB · Views: 3,832
  • DSC_0131.jpg
    DSC_0131.jpg
    47.9 KB · Views: 4,120
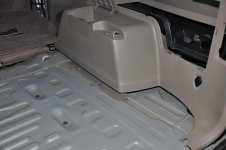
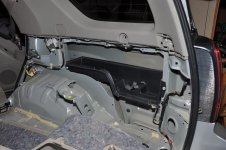
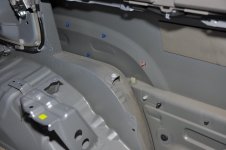
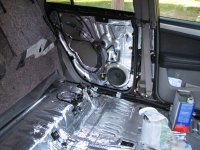
The 1st is the fender-well without the tray in it.

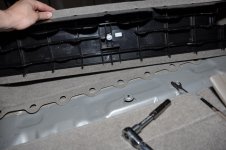
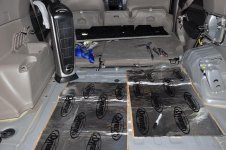
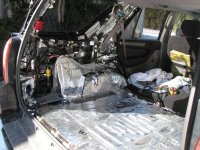
The 2nd is the installation in progress. It was mid-thirties in my garage so I set up a space heater in my truck to keep the rig as warm as possible since I didn't have a hairdryer to use. You'll want to lay the dynamat and use the back side of a round handled screwdriver to contour the dynamat to the rear cargo area. Lay the sheet down from the centerline of the truck and work sideways to fill in the deep contours in the cargo area. It'll help for sure. Use the hairdryer or heatgun afterwards to make sure it sits on nicely.

I used the level for a straight edge and marked it with Dry-erase markers for cuts to be made and measuring. Worked out pretty well.
 

Attachments

  • DSC_0132.jpg
    DSC_0132.jpg
    101.5 KB · Views: 3,863
  • DSC_0135.jpg
    DSC_0135.jpg
    49.5 KB · Views: 4,117
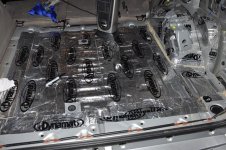
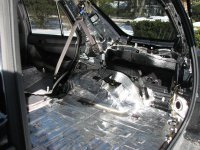
The 1st is the dynamatted rear cargo area. NOTE: there are a couple plugs from the cargo area into the underside of the vehicle. I did NOT dyna-mat those in case I had to drain the rig for some reason.

The 2nd is after I put it all back together.


ANOTHER NOTE: you do not have to take the sidepaneling off to do just the cargo mat. I wanted to do over the wheelwell as well so I did. But you're able to take the carpet up after taking the liftgate trim off and the transition piece between the cargo area and the seatbacks. This means you won't have to detach the seatbelt as well...


Hope you guys enjoyed this- not sure if it's so hot for my first write-up, but if it helps one person that's good. Thank you!
 

Attachments

  • DSC_0142.jpg
    DSC_0142.jpg
    64.9 KB · Views: 3,834
  • DSC_0146.jpg
    DSC_0146.jpg
    42.3 KB · Views: 5,809
Good job with the mod and pix. Interesting to see it all taken apart as well as why you did it? I get more noise from my roof rack. Can you tell a big diff?
 
I did mine pretty extensively. I found it made a slight difference but the 4runner is VERY quiet to start with.

If Aika1 wants or doesn't mind, I can add pictures of mine as well.

Excellent write-up on takin' it apart. If anyone is even THINKING about doing the roof area, STOP before you start the rear & make sure you have enough material. To get the headliner down, all those panels have to come out ( its alot of work & kinda a pain to do it twice - trust me on that one! ).
 
I got a TRD exhaust for Christmas, and while I like the sound of the exhaust, I do a LOT of driving for work. The dynamat cuts down on the roadnoise even more than the stock sound dampening. While the 4runner is quiet to start with, after doing the doors and rear cargo area, it's even quieter. Is it worth it? Well I paid 45 dollars for the dynamat and still have some left over after doing the doors AND the rear cargo area, so I'd say it's worth it to me. That being said, I got the least amount of return from the cargo area, since it's already dampened by the carpets. The other doors are a different story- they have NO dampening at all. I felt there was a large difference there.

Another reason I posted it is because for the life of me I couldn't find anybody who had posted pics of their rig taken apart in the rear end. I wanted to see how the clips worked, how it was all put together, etc. If I had to do it all over again, I'd likely skip the cargo area and do the floor area. Maybe that's my next project. After all I still have some Dyna-mat left.

Note: Amazon sold Dyna-mat for CHEAP a while back. keep checking on them if you're interested...
 
I did mine pretty extensively. I found it made a slight difference but the 4runner is VERY quiet to start with.

If Aika1 wants or doesn't mind, I can add pictures of mine as well.

Excellent write-up on takin' it apart. If anyone is even THINKING about doing the roof area, STOP before you start the rear & make sure you have enough material. To get the headliner down, all those panels have to come out ( its alot of work & kinda a pain to do it twice - trust me on that one! ).


I definitely do NOT mind. The more info on the rigs the better as far as I'm concerned. Part of the reason I took the photos (that and I'm a photography nut).

Thanks for the complement by the way. First time write-up for me...
 
Thanks for sharing! This is a GREAT post. Should be stickied!!! Anyway, I wanted to dynomat my cargo area as well. My 4R is quiet, but I do notice some road noise coming from the rear. Did you dynomat the rear hatch too??
 
Cargo area
As you can see, all the little scraps did NOT go to waste.
 

Attachments

  • cargo left.JPG
    cargo left.JPG
    129.3 KB · Views: 3,701
  • cargo right.JPG
    cargo right.JPG
    125.2 KB · Views: 3,688
Last edited:
Thanks for sharing! This is a GREAT post. Should be stickied!!! Anyway, I wanted to dynomat my cargo area as well. My 4R is quiet, but I do notice some road noise coming from the rear. Did you dynomat the rear hatch too??


Wow- you have no idea how much that stroked my ego! Thanks. I haven't done the rear hatch yet. I actually just did the rear cargo area on a whim yesterday... If/when I do the liftgate, I'll do the same type of write-up.
 
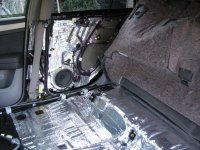
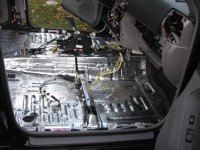
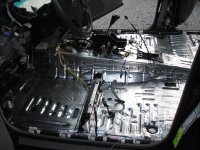
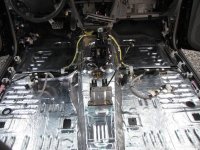
Front
 

Attachments

  • front right.JPG
    front right.JPG
    115.4 KB · Views: 1,619
  • front left.JPG
    front left.JPG
    116.8 KB · Views: 1,433
  • front.JPG
    front.JPG
    124.6 KB · Views: 1,486
Last edited:
to cut down on noise, u will need 2 layers of dynamat on the headliner, one on the floor, plus u have to lay a thick foam pad over it to get it more quiet, u guys did fully deaden the doors right? inside one layer and then outside one layer? i used the mega bulk pack and that covered everything but headliner and floor, still need some more to finish the job, but now its good enough. also when u guys dynamat the tailgate one in and out, do not roll the window down and open it, itll fall back on u if u dont force it up completely.
 

Members online

Forum statistics

Threads
278,316
Messages
3,554,111
Members
248,016
Latest member
Advally Service

Trending content

Back
Top