Sp8Ball’s Mod Thread (Stealing Other Poster’s Ideas Since Mid-2010)

Modification: Toytec Top Plate Spacer Lift (cont.)

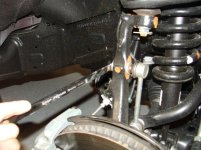
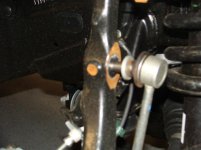
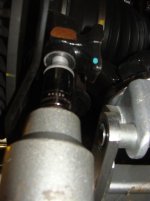
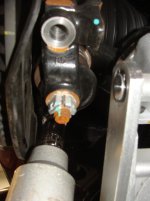
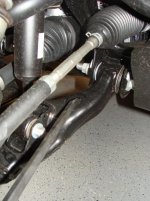
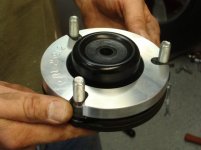
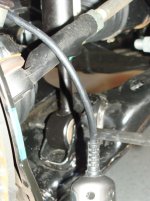
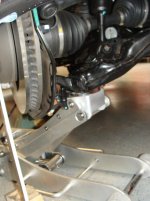
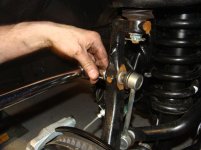
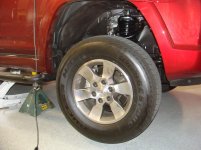
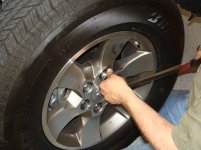
Step eight: Remove the nut and disconnect the stabilizer link from the steering knuckle. You may need to use a 6mm allen wrench to hold the stud if it rotates with the nut.

DSC05117.jpg

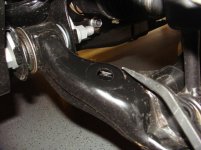
DSC05119.jpg

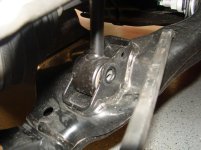
DSC05120.jpg

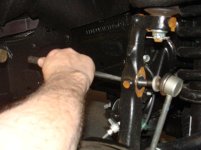
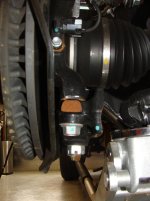
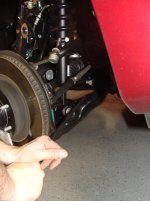
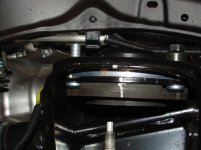
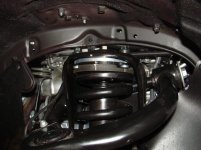
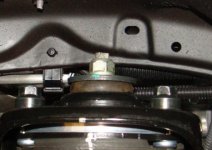
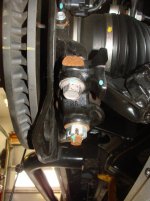
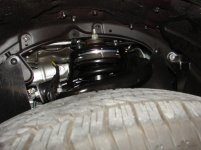
Step nine: IMPORTANT NOTE about this step: In step 6, we put the jack under the lower control arm. It should still be there. If somebody takes these next 2 bolts out without being careful and following directions (to quote Antman) "it could wind up being a bad, bad day." Remove the two large bolts just behind the rotor (but not the odd shaped one between the two of them). Now you slowly lower the jack to release the spring pressure.

DSC05121.jpg

DSC05123.jpg

DSC05124.jpg

[continued on next post]
 

Attachments

  • DSC05117.jpg
    DSC05117.jpg
    99 KB · Views: 23,557
  • DSC05119.jpg
    DSC05119.jpg
    66.6 KB · Views: 23,159
  • DSC05120.jpg
    DSC05120.jpg
    65.5 KB · Views: 23,110
  • DSC05121.jpg
    DSC05121.jpg
    73.1 KB · Views: 23,070
  • DSC05123.jpg
    DSC05123.jpg
    47.3 KB · Views: 22,924
  • DSC05124.jpg
    DSC05124.jpg
    60.3 KB · Views: 23,347
Last edited:
Modification: Toytec Top Plate Spacer Lift (cont.)

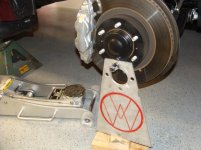
Step ten: Prop up the rotor so it doesn’t fall and ruin your CV joint.

DSC05127.jpg

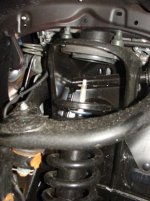
Step eleven: Insert a pry bar into one of the holes in the arm where the bottom of the shock absorber is mounted and push down on it to relieve the pressure on the bolt at the bottom of the shock.

DSC05128.jpg
DSC05129.jpg

(note, these pry bar openings are on both legs of the suspension system...you can use either side)

DSC05130a.jpg

Step twelve: Remove bolt, nut, and washer from bottom of shock absorber.

DSC05130.jpg

Step thirteen: Apply downward pressure to pry bar again, and work the shock and springs out of the top support.

DSC05131.jpg

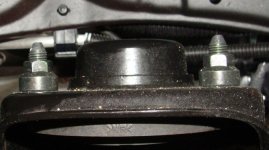
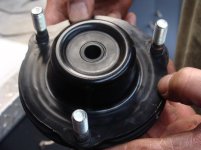
Step fourteen: This leaves three nuts that you have to remove from the three studs holding the top cushion in place. Here are two of the three studs in question (third is in the back):

DSC05132.JPG

Step fifteen: Loosen nuts from studs…but DON’T take it apart yet.


[continued on next post]
 

Attachments

  • DSC05127.jpg
    DSC05127.jpg
    100.9 KB · Views: 23,083
  • DSC05128.jpg
    DSC05128.jpg
    83.8 KB · Views: 22,911
  • DSC05129.jpg
    DSC05129.jpg
    108.9 KB · Views: 22,973
  • DSC05130.jpg
    DSC05130.jpg
    85.1 KB · Views: 22,937
  • DSC05131.jpg
    DSC05131.jpg
    86.8 KB · Views: 22,961
  • DSC05132.JPG
    DSC05132.JPG
    131.7 KB · Views: 22,907
  • DSC05130a.jpg
    DSC05130a.jpg
    87.7 KB · Views: 22,959
Modification: Toytec Top Plate Spacer Lift (cont.)

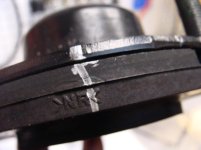
Step sixteen: Before disassembling this cushion from the top of the shock absorber housing, hit it with a silver Sharpie or something that can mark alignment for reinstallation.

DSC05135.jpg
DSC05136.jpg

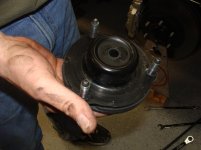
Step seventeen: Remove nuts from studs and take out cushion assembly.

DSC05133.jpg

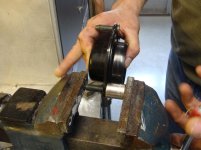
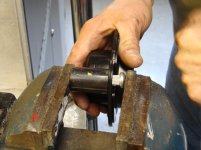
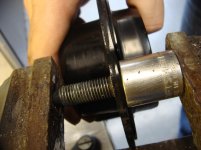
Step eighteen: Press out OEM studs from rubber cushion using a vise.

DSC05137.jpg
DSC05137a.jpg
DSC05138.jpg


[continued on next post]
 

Attachments

  • DSC05135.jpg
    DSC05135.jpg
    52.9 KB · Views: 22,868
  • DSC05136.jpg
    DSC05136.jpg
    69.6 KB · Views: 22,792
  • DSC05133.jpg
    DSC05133.jpg
    72.8 KB · Views: 22,808
  • DSC05137.jpg
    DSC05137.jpg
    82.8 KB · Views: 22,813
  • DSC05137a.jpg
    DSC05137a.jpg
    78.4 KB · Views: 22,725
  • DSC05138.jpg
    DSC05138.jpg
    79.1 KB · Views: 22,650
Modification: Toytec Top Plate Spacer Lift (cont.)

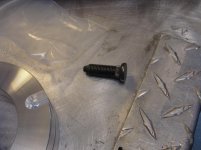
Step nineteen: Press new studs (from Toytec) into holes.

DSC05140.jpg
DSC05141.jpg

Step twenty: Place metal spacer lift onto assembly.

DSC05142.jpg

Step twenty-one: After getting alignment (silver sharpie marks) right, reinsert shock absorber cushion assembly (with spacer) into top of shock absorber housing. Tighten the three nuts to 47 ft-lbs.

DSC05143.jpg

Step twenty-two: Work top end of shock absorber back through hole in top of housing and “seat” coils onto rubber shock absorber cushion.

DSC05144.jpg

Step twenty-three: Work pry bar again, and apply pressure to allow the bottom of the shock absorber find it’s seating location.

DSC05145.jpg

[continued on next post]
 

Attachments

  • DSC05140.jpg
    DSC05140.jpg
    83.6 KB · Views: 22,910
  • DSC05141.jpg
    DSC05141.jpg
    67.9 KB · Views: 22,941
  • DSC05142.jpg
    DSC05142.jpg
    61.1 KB · Views: 31,680
  • DSC05143.jpg
    DSC05143.jpg
    80.7 KB · Views: 23,971
  • DSC05144.jpg
    DSC05144.jpg
    90 KB · Views: 22,923
  • DSC05145.jpg
    DSC05145.jpg
    87.3 KB · Views: 22,672
Modification: Toytec Top Plate Spacer Lift (cont.)

Step twenty-four: Move jack back into position behind rotor to apply pressure to springs and further push the top stud into position to receive hardware.

DSC05146.jpg

Step twenty-five: Secure rubber shock absorber cushion, retainer, and nut to top of shock absorber at 18 ft-lbs.

DSC05147.JPG

Step twenty-six: Secure bottom of shock absorber with bolt, washer, and nut. (70 ft-lbs of torque)

Step twenty-seven: Re-secure stabilizer link. (52 ft-lbs of torque)

DSC05150.jpg

Step twenty-eight: Put red loctite on the two bolts that go into the lower control arm. Re-install two bolts from just behind rotor. (165 ft-lbs of torque)

DSC05151.jpg

Step twenty-nine: Reattach wheel, but don’t overtighten.

DSC05152.jpg

Step thirty: Lower truck and remove jacks and jackstands. Torque six wheel lug nuts to 83 ft-lbs.

DSC05153.jpg

Step thirty-one: Remove rear chocks.


[continued on next post]
 

Attachments

  • DSC05146.jpg
    DSC05146.jpg
    74.2 KB · Views: 22,747
  • DSC05147.JPG
    DSC05147.JPG
    84.8 KB · Views: 22,631
  • DSC05150.jpg
    DSC05150.jpg
    77.9 KB · Views: 22,710
  • DSC05151.jpg
    DSC05151.jpg
    90.7 KB · Views: 22,637
  • DSC05152.jpg
    DSC05152.jpg
    100.7 KB · Views: 22,672
  • DSC05153.jpg
    DSC05153.jpg
    85.6 KB · Views: 22,653
Last edited:
Modification: Toytec Top Plate Spacer Lift (cont.)

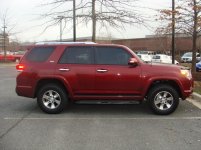
Here’s a picture of the installed spacer.

DSC05155.jpg

It started raining on Thursday night, so I haven’t had a chance to take an “after” picture for a before and after comparison. All measurements are from the ground to the bottom of the fender.

Before:

Front Driver Side: 34-3/4 inches ** Front Passenger Side: 35-1/4 inches
Rear Driver Side: 36-1/2 inches ** Rear Passenger Side: 36-1/2 inches

DSC05105.jpg


After:

Front Driver Side: 36 inches ** Front Passenger Side: 36 inches
Rear Driver Side: 36-1/2 inches ** Rear Passenger Side: 36-1/2 inches

DSC05176.jpg
 

Attachments

  • DSC05155.jpg
    DSC05155.jpg
    74 KB · Views: 24,339
  • DSC05105.jpg
    DSC05105.jpg
    102.6 KB · Views: 22,763
  • DSC05176.jpg
    DSC05176.jpg
    126.5 KB · Views: 22,607
Last edited:
My arms are now famous. Yes- great forum- great people and thanks for the props- it was fun. As usual = good writeup! Personal note- I got to keep the Toytec Sticker for my "toolbox trophy"- thanx sp8ball!:trophy:
 
Perfect timing! I was loading it (and the pics) up to the site when you asked.
Bravo sir, Bravo. That was a great write-up. It makes me think I could maybe even pull it off except for the fact that I own neither a floorjack, jack stand or any other 'car' tools to speak of. Great thread, I look forward to your seeing your new posts. Almost like getting a new issue of a favorite magazine. Keep up the great work and if you get the inclination to start a thread on "How To Convince Your Wife That Doing this To The Truck Is Not A Waste Of Time And Money" Im sure you would have many more subscribers.
 
good work yet again sir. #winning

edit: i keep forgetting that we live not to far from each other. I keep thinking that you and antman live in texas.
 
Last edited:
good work yet again sir. #winning

edit: i keep forgetting that we live not to far from each other. I keep thinking that you and antman live in texas.

Not far at all. We should get you, Antman, Jesse, and myself together for beverages (and a truck photo shoot!).
 
Bravo sir, Bravo. That was a great write-up. It makes me think I could maybe even pull it off except for the fact that I own neither a floorjack, jack stand or any other 'car' tools to speak of. Great thread, I look forward to your seeing your new posts. Almost like getting a new issue of a favorite magazine. Keep up the great work and if you get the inclination to start a thread on "How To Convince Your Wife That Doing this To The Truck Is Not A Waste Of Time And Money" Im sure you would have many more subscribers.

Thanks for the note! I appreciate it.

You don't need a lot of special tools to do this. Just a socket wrench set(mostly 17mm and 19mm sockets), the jacks, and jackstands. And a torque wrench. You'll see an impact driver in some of the pictures, but we used it for convenience. You can get all of that stuff at any hardware store or Harbor Freight, and it shouldn't be too expensive. Fortunately for me, Antman had the gear!
 
Monday morning status report:

(as if there are people who care...but I humor myself)

I'm having trouble attaching pictures from work, so I'll upload the "after" picture on post #87 tonight. I added the before and after measurements.

Also going to post a quick write-up on the Husky Weatherbeater Cargo Mat.

That leaves:

1) Color-matched door handles (parts are held up because they're made in Japan, and parts are slowing down coming out of there for obvious reasons - keep them in your prayers, and don't forget about them after Libya and government shutdowns removed them from the front page!)

2) Back-up Camera on/off switch* - allows you to flip a switch to see rearview camera when you're not in "Reverse"

3) Footwell Lights* - will provide footwell lighting that comes on the same time as the overhead map/dome lights when the truck is unlocked or doors are open (for those of us who don't have a Limited)

4) Footwell Accent Lights* - I'm super stoked about this one...LED strips that light up the footwells, coming on whenever the headlights are turned on

5) Interior door handle LEDs* - provides a small area of light around the interior door handles, lighting up whenever the window up/down switches are lit (for those of us who don't have a Limited)

6) Cupholder LEDs* - Small LEDs that light up the cupholders in the center console

7) Gear and 4WD Shifter changeout, and 4WD shifter skirt changeout

8) Aftermarket Exhaust Tip* - to cover up the cold, dark, gray exhaust tip of the T4R.

9) Paint a spare set of chrome front grille "wings" to match the truck (Salsa Red Pearl), and trade them out for my chrome version

* - These are what I like to call "Antman Specials". He's already done them to his SR5, and he's going to tutor me in how to do it so we can document it and post it for you all to see. These are cheap, easy, and fun!

Over the summer, I'm hoping to get to:

- Putting on a Magnaflow muffler

- Replace chrome fog light bezels

- Put in yellow Putco fog lights

- Install a USB drive in the glovebox for music

- Replace front dash speakers

- Paint roof rack end caps with black Plastidip paint...but I need a spare set of end caps. (and it's about $140 for all 4 if I buy them new)

Long term? I'm looking at:

- I was toying with the idea of a black Bull Bar, but I would come across as a total poser...until some idiot pulls out in front of me or unleashes a shopping cart towards my front end...

- Thule Crossbars (45050)

- Thule MOAB Cargo basket

- HID headlights

- TRD Cold Air Intake

- TE headlight housings(?)

- New tires, where I'm waffling between 285/70/17 Nitto Terra Grapplers and BFG All-Terrain T/A KOs

- New wheels, where I want to go black, and the wife doesn't - which you know if you've read anything in this thread. She says they look spray-painted. But I think I'm cracking the code, though...I spent the weekend pointing out cars with black wheels to her, and they were always something like a 1985 Dodge Caravan where the hubcap fell off or something. I would say, "that is not the look I'm going for", and she started to "get it". Shiny black wheels with small hints of chrome (like MotoMetal 951s!) should do the trick...

And one brief note about my gorgeous, intelligent, and patient wife...

[Editor's note: after writing it, I noticed it wasn't "brief"...sorry]

Two weeks ago she told me I was "done" changing things around on a perfectly good truck. She was/is convinced that I am not smarter than the engineers at Toyota that designed this thing (and she's right). However, I have started to convince her that they had to design a truck for everyone - from the off-roading tough guys on t4r.org to the soccer moms parading their new SUVs at the mall who have no idea what the benefits of "box-on-frame construction" are or that they're driving the last "real" SUV of this size. She also knows that this will likely be the automobile that I drive until our 7-year-old turns 16 and can drive it himself (i.e. I'm in this truck for the long haul), and we bought a Toyota because 200,000 miles is an easy goal...so I might as well make it "my own" because it's going to be with us for a while.

Then she asked me about "Antman", and when I told her about his extensive experience working on cars, she lowered her defenses with a "well, it's ok to do stuff if he's already done it and he knows what he's doing." Just on that answer alone, I should probably take over paying Antman's mortgage or something.

The point is...I think the wives are just scared that we'll screw up a $35,000 truck. Now, some of you don't have this problem because you've been doing this "car stuff" your whole life and have a proven track record of excellence, so the rest of this paragraph doesn't apply to you. For the rest of us who are just used to tinkering (or never had a car/truck that we wanted to "tweak"), it can be a little intimidating for us (see the "Sp8ball Intimidation Factor"), but it's probably even worse for the wives! They've never seen us attempt stuff like this, so they're a little leery. All of our 5th Gens are brand new, and they were bought with the expectation that they'll last for a decade as a family investment. The second we start screwing with them, the wives get all nervous and see money twirling around in a toilet bowl.

My advice? Go slowly. Put in new lights and let them see the value in those types of mods...and how you didn't screw it up when you did it. Put in new Floor Liners, and show how they provide a cheap, tangible benefit in the life of the truck (note: these awesome Weathertech and Husky products aren't priced that much differently than OEM carpet mats, and they last longer!). Pretty soon, you'll have done a half dozen small things, and if she's liked them, you can puff your chest out a bit while gaining the confidence (in yourself and her eyes) to tackle more daunting projects.

And finally, if you or your spouse have trepidations about modding your T4R, just tackle mods that can be undone. Nerf bars can be removed, black vinyl can be peeled off to show the original chrome, and LED lights can be changed back to incadescent - but you can't unpaint things!

Finally, I have one last confession to make...

The gorgeous and intelligent wife decided that I had spent enough money, and it was time to put a halt to it. Granted, she's approved the money spent to date, but she wants to move on. She also told me to just add the rest to a "wish list" for Easter, Father's Day, etc.

But...

:infidel:(and here comes the dorky confession):infidel:

I have 5-6 totes in our basement full of, um, unopened Star Wars toys from the mid-90s. In the original packaging. I kept them in case the collectible market for them blew up the way it did for my Star Wars toys. So it was an investment, ok?!? Anyway, she has somehow managed to shrink back into her size 2 clothes a mere 5 weeks after having our son, and now she wants those totes for maternity and winter clothing storage. I've been told to unload the Star Wars stuff. Which I am not heartbroken about doing...and I cut a deal to use part of the money for mods! LOL

[Surgeon General's Warning: Modding your Toyota 4Runner can be dangerously addictive, and should not be attempted by people with compulsive disorders or other mental problems. (see: Sp8ball) Modding your 4Runner is a sickness, and should not be handled lightly. Clinical help may be required, or at least a call to A&E's "Intervention" television show. Wives should be involved in the process to moderate the spending and complexity of the project if these conditions exist. People with high cholesterol or a history of heart problems should not mod a Toyota 4Runner. Call your physician for any mod lasting longer than 4 hours.]

 
Last edited:
modification: Toytec top plate spacer lift (cont.)

here’s a picture of the installed spacer.

View attachment 42383

it started raining on thursday night, so i haven’t had a chance to take an “after” picture for a before and after comparison. All measurements are from the ground to the bottom of the fender.

before:

front driver side: 34-3/4 inches ** front passenger side: 35-1/4 inches
rear driver side: 36-1/2 inches ** rear passenger side: 36-1/2 inches

View attachment 42384


after:

front driver side: 36 inches ** front passenger side: 36 inches
rear driver side: 36-1/2 inches ** rear passenger side: 36-1/2 inches

**pic will be posted monday evening**

monday evening!!!!!!!! Blasphemy!!!!!!!!!
 
Monday morning status report:

Two weeks ago she told me I was "done" changing things around on a perfectly good truck. She was/is convinced that I am not smarter than the engineers at Toyota that designed this thing (and she's right). However, I have started to convince her that they had to design a truck for everyone - from the off-roading tough guys on t4r.org to the soccer moms parading their new SUVs at the mall who have no idea what the benefits of "box-on-frame construction" are or that they're driving the last "real" SUV of this size. QUOTE]
I have a comment but it involves a bit of backstory so be patient sp8ball.
I was a bodyman for several years before college; I tinted windows, pinstriped and added car acessories during college; I was/am a certified welder; I am an engineer specializing in off highway mobile hydraulics system design; I have completed frame off restorations; I have swapped several engines; I built a Chevy p/u SWB running 35's with a 4 link long travel suspension and so on. Suffice to say I have did a few things to vehicles in my lifetime. So now the comment!

When you mod a vehicle, especially one you plan on keeping for a while, you should do the mods a little at a time. I have seen firsthand people that go all out in the first few months, mod like crazy, then get bored because everything is done and want to get rid of it! Plan the mods and do them slowly so you are always looking forward to something, not the instant gratifacation thing. Will you be like that? I don't know as I don't know you, but over the years I have seen this happen too many times to count. If you are changing suspension components or just putting on a bugshield I count this the same: 1 mod. You are doing a good job just don't want you to "burn out" and be left with nothing to look forward to. Also you do a great job of documentation keep up the good work! Oh, your wife is right: The Toyota engineers are good at what they do. Can you imagine what they would build if they could specialize in a true off road truck?
 
I love this thread. I may not do a single mod in it, but I love the write-up and the humor and the humility in your posts.

You're awesome.
 
Modification: Husky Weatherbeater Cargo Liner

Weathertech Digital Fit Floor Liners - $77.95
autoanything.com
Husky Weatherbeater Cargo Liners, WeatherBeater Liners, Husky WeatherBeaters Trunk Liner

Difficulty Scale (1 to 10): One

Sp8ball’s Personal Intimidation Factor (1 to 10): One

Install Time: Five minutes…plus another few hours (explained below)

Reason for Doing It: I put some totes in my truck last week, and got some pebbles and dirt on my carpeted floor mat…so I decided that wasn’t cool

Benefit: No stained cloth floor mat; Better protection for underlying carpet; looks good.

Cons: Same as with the floor liners - Losing the “4Runner” logo’ed floor mats; they’re a little pricey, but I believe that they pay for themselves with the long-term cleanliness you’ll get from the switch.

Other Products Considered: NCAA Logo Cargo mat, Weathertech Cargo Liner (my first choice, but not available for models with third row seating)
_____________________________

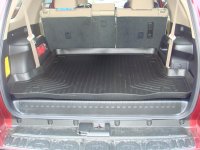
OK. We’re back to the “low-hanging fruit” type of mods…I replaced the cargo mat!

I want to say that I am very, very happy with my Weathertech DigitalFit Floor Liners that are in the rest of the truck. I went right back to their website to purchase a cargo liner and…they aren’t compatible with my truck because I have 3rd row seating. If they had one that I could use, I would have bought it hands down.

Once I got the Husky product, I feel even more strongly about that opinion.

Don’t get me wrong – the Husky product is much cheaper ($77.95 versus $137.95), and is sufficient for what I need. It lines up nicely with the cargo area, and provides good protection for the carpet. I would have paid the extra $60 because the Weathertech product feels more…substantial.

I mentioned that I noticed a little “mounding” near the edges of the Weathertech product where the liners were bent a bit in the box. Well, the Husky liners are made with a stiffer, thinner, and cheaper plastic material (as opposed to the more rubbery feel of the Weathertechs), and it came rolled up in a box. And when I pulled it out it stayed in the shape of…a rolled up cargo liner. However, the Husky folks knew this would be true, and included very simple instructions for how to address the issue. They said to lay the liner out in the cargo area, and put something with some weight on it (they suggested a book) around the edges for 15-20 minutes on a warm-ish day, and that the liner would find its way back to its original shape. This was a little frustrating, because the liner has a raised edge I had to ply (just a little) into its vertical position. I also elected to put 4 toolboxes around the edge, and I left it for a day rather than 15-20 minutes.

The results were quite impressive, I must say. The liner now fits flat in the cargo area and accounts nicely for the space. I am happy with the purchase, as I feel it’s the best available option for folks with the 3rd row seating option. And since it’s in the cargo area, it doesn’t have to look as nice as the Floor Liners.

DSC05175.JPG

Again, here are the threads that discuss the Weathertech vs. Husky debate in great detail. I still think that in the end, it comes down to personal preference and what you’re willing to pay. I think that with these two brands, you get what you pay for, and both are a good value at their respective price points. I just happen to prefer the Weathertechs.

http://www.toyota-4runner.org/5th-gen-t4rs/71284-weathertech-v-husky-mats-v.html

http://www.toyota-4runner.org/5th-g...ners-new-discussion-husky-vs-weathertech.html
 

Attachments

  • DSC05175.JPG
    DSC05175.JPG
    109.1 KB · Views: 6,357

Members online

Forum statistics

Threads
278,315
Messages
3,554,102
Members
248,016
Latest member
Advally Service

Trending content

Back
Top