
You are using an out of date browser. It may not display this or other websites correctly.
You should upgrade or use an alternative browser.
You should upgrade or use an alternative browser.
Sp8Ball’s Mod Thread (Stealing Other Poster’s Ideas Since Mid-2010)
- Thread starter sp8ball
- Start date


sp8ball
New member
sp8ball
New member
Modification: Switch to Activate Backup Camera
Radio Shack Paddle Switch (about $7)
Also need: some speaker wire, small zip/wire ties, and shrink wrap
Difficulty Scale (1 to 10): Eight (again - I hate wiring stuff up, but Antman had already done this, so it was lowered to a pretty quick “2”)
Sp8ball’s Personal Intimidation Factor (1 to 10): Seven (mitigated to a “two” by Antman's involvement)
Install Time: About 45 mins, at most
Reason for Doing It: Because Antman did it, and I thought it was cool, and then the forum got curious, so we did it to my truck in an effort to document it for the masses!
Benefit: Gives you the ability to observe the area behind you while driving (observe something you’re towing); great when you’re putting a boat in the water
Cons: You have to cut a wire…scary! And you drill into a blank! That’s permanent change!
Other Products Considered: None
_____________________________
I know the message board is all a-clatter about this mod, waiting for it to get posted. Once again, I’ll tell you that this is an “Antman Original” – something he did to his vehicle (he will tell you he got the idea from the Tacoma forum), then inspired me to do it to mine, and to document it while it happened so we could share his genius with the rest of you.
Or something like that.
This will be picture-heavy (again), but I think you guys will appreciate the detailed, step-by-step process we can document by using a lot of pics.
Let’s get this thing started, shall we?
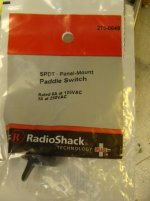
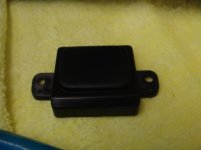
Here’s the switch we both used for this mod:
Identify your overhead console. It looks like this if you have an SR5 (Trails and Limiteds may have different buttons and whatnot):
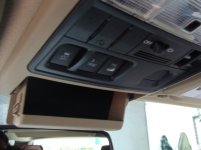
If you have an SR5 like mine (and Antman’s), you have a “blank” on the passenger side of the overhead console. That’s where we mounted our switch.
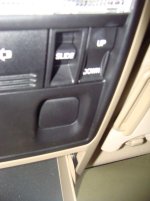
Lower the sunglass holder compartment thingy. There will be two screws in there that hold the console to the roof.
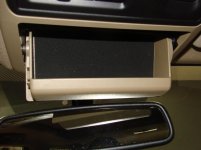
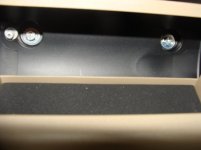
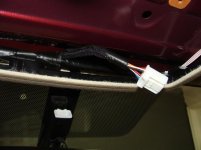
Once those screws are removed, you can just pull down on the console and it will pop out. See that white wiring harness on the driver’s side? You have to disconnect that to completely remove the console.
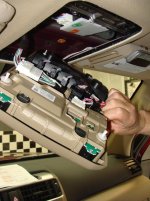
Pop off this plastic cover between your rearview mirror and headliner/console.
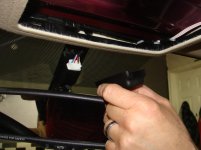
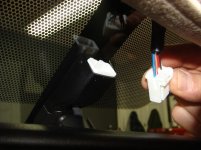
Disconnect the white connector that runs between the mirror and the overhead console.
Radio Shack Paddle Switch (about $7)
Also need: some speaker wire, small zip/wire ties, and shrink wrap
Difficulty Scale (1 to 10): Eight (again - I hate wiring stuff up, but Antman had already done this, so it was lowered to a pretty quick “2”)
Sp8ball’s Personal Intimidation Factor (1 to 10): Seven (mitigated to a “two” by Antman's involvement)
Install Time: About 45 mins, at most
Reason for Doing It: Because Antman did it, and I thought it was cool, and then the forum got curious, so we did it to my truck in an effort to document it for the masses!
Benefit: Gives you the ability to observe the area behind you while driving (observe something you’re towing); great when you’re putting a boat in the water
Cons: You have to cut a wire…scary! And you drill into a blank! That’s permanent change!
Other Products Considered: None
_____________________________
I know the message board is all a-clatter about this mod, waiting for it to get posted. Once again, I’ll tell you that this is an “Antman Original” – something he did to his vehicle (he will tell you he got the idea from the Tacoma forum), then inspired me to do it to mine, and to document it while it happened so we could share his genius with the rest of you.
Or something like that.
This will be picture-heavy (again), but I think you guys will appreciate the detailed, step-by-step process we can document by using a lot of pics.
Let’s get this thing started, shall we?
Here’s the switch we both used for this mod:
Identify your overhead console. It looks like this if you have an SR5 (Trails and Limiteds may have different buttons and whatnot):
If you have an SR5 like mine (and Antman’s), you have a “blank” on the passenger side of the overhead console. That’s where we mounted our switch.
Lower the sunglass holder compartment thingy. There will be two screws in there that hold the console to the roof.
Once those screws are removed, you can just pull down on the console and it will pop out. See that white wiring harness on the driver’s side? You have to disconnect that to completely remove the console.
Pop off this plastic cover between your rearview mirror and headliner/console.
Disconnect the white connector that runs between the mirror and the overhead console.
Attachments








Last edited:
sp8ball
New member
Modification: Switch for Backup Camera (cont.)
Wrestle that white connector (that you disconnected from the mirror in the previous step) between the windshield and the headliner, pushing it back into the space vacated by the overhead console.
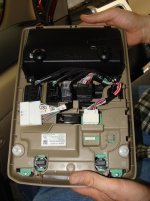
Put down a shop towel or rag to protect the “cabin” side of your console, and place the console on top of this towel, with the electronics facing up. The inside of your overhead console looks like this:
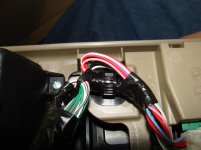
Immediately above the “blank” is this bundle of wires. They’re tied together and snapped into a hole right above the blank.
Gently cut the small piece of plastic bridging from the side of the console to the plastic area to which that bundle of wires is clipped.
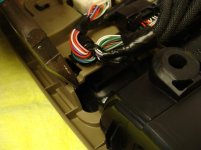
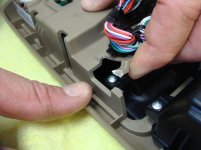
Pop out that bundle of wires snapped into the plastic.
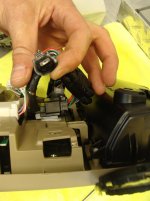
Wrestle that white connector (that you disconnected from the mirror in the previous step) between the windshield and the headliner, pushing it back into the space vacated by the overhead console.
Put down a shop towel or rag to protect the “cabin” side of your console, and place the console on top of this towel, with the electronics facing up. The inside of your overhead console looks like this:
Immediately above the “blank” is this bundle of wires. They’re tied together and snapped into a hole right above the blank.
Gently cut the small piece of plastic bridging from the side of the console to the plastic area to which that bundle of wires is clipped.
Pop out that bundle of wires snapped into the plastic.
Attachments






sp8ball
New member
Modification: Switch for Backup Camera (cont.)
With a long, thin screwdriver, unscrew the two screws that hold the “blank” in place, and remove the blank!
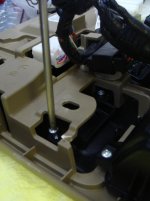
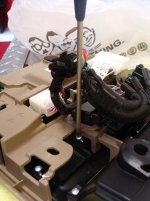
Mark the center of the blank, and drill a pilot hole.
(Warning: Sp8ball is not responsible for your safety if you attempt this mod and do something unsafe or stupid and mutilate your fingers…)
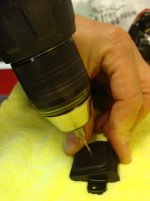
Use that pilot hole to center and drill a hole of identical size to your switch. (Warning: Again, sp8ball is not responsible for your safety if you attempt this mod and do something unsafe and mutilate your fingers…like holding something you’re drilling like this)
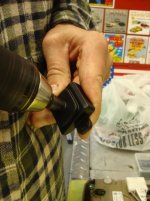
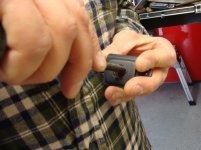
We used a round file and an exacto knife to file the hole to the correct size and deburr the edges of the hole. We were shooting for it to be tight enough to be snug (no squeaking down the road!), but didn’t want it to be so tight that we had to screw it on.
Please don’t cut yourself.
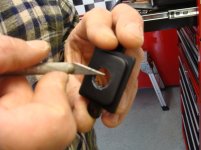
With a long, thin screwdriver, unscrew the two screws that hold the “blank” in place, and remove the blank!
Mark the center of the blank, and drill a pilot hole.
(Warning: Sp8ball is not responsible for your safety if you attempt this mod and do something unsafe or stupid and mutilate your fingers…)
Use that pilot hole to center and drill a hole of identical size to your switch. (Warning: Again, sp8ball is not responsible for your safety if you attempt this mod and do something unsafe and mutilate your fingers…like holding something you’re drilling like this)
We used a round file and an exacto knife to file the hole to the correct size and deburr the edges of the hole. We were shooting for it to be tight enough to be snug (no squeaking down the road!), but didn’t want it to be so tight that we had to screw it on.
Please don’t cut yourself.
Attachments







sp8ball
New member
Modification: Switch for Backup Camera (cont.)
We added some solder to the ends of all three switch poles.
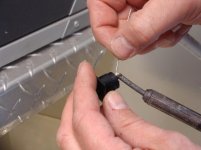
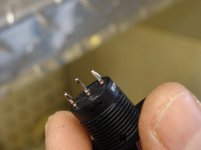
Then we pulled out Antman’s “Giant Tub O’ Wire” to get some wire to connect the three poles on the switch to the three wires in the console into which we need to tap.
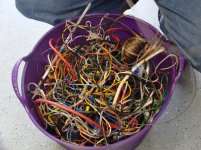
We elected to use one two-wire bit of speaker wire, and one single-wire. This also helped us keep track of which wire did what.
Then we soldered the wires to the posts, and (of course) shrink wrapped them for excellence.
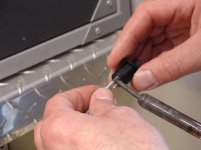
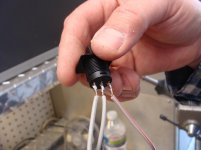
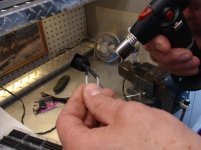
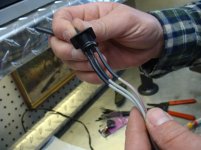
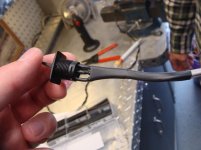
We added some solder to the ends of all three switch poles.
Then we pulled out Antman’s “Giant Tub O’ Wire” to get some wire to connect the three poles on the switch to the three wires in the console into which we need to tap.
We elected to use one two-wire bit of speaker wire, and one single-wire. This also helped us keep track of which wire did what.
Then we soldered the wires to the posts, and (of course) shrink wrapped them for excellence.
Attachments








sp8ball
New member
Modification: Switch for Backup Camera (cont.)
Here’s the completed switch assembly, with wires.
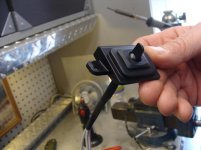
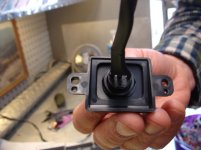
But wait! That wiring and deep back of the switch assembly won’t allow it to fit back where it was! The horror!
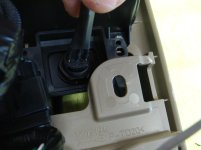
So…you have to trim that plastic piece a bit more…
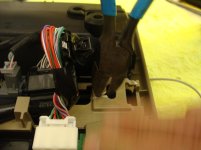
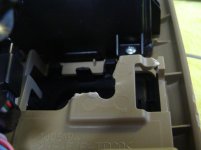
Gently pull up on the remaining plastic “tab” that’s left behind, and it will now fit.
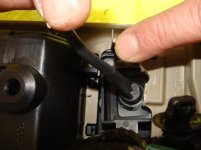
Screw the blank back in place.
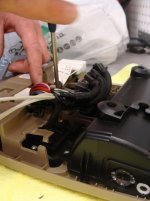
And then semi-snap the wire bundle back to where it originally went, and use a small zip tie to secure it.
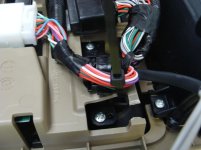
Here’s the completed switch assembly, with wires.
But wait! That wiring and deep back of the switch assembly won’t allow it to fit back where it was! The horror!
So…you have to trim that plastic piece a bit more…
Gently pull up on the remaining plastic “tab” that’s left behind, and it will now fit.
Screw the blank back in place.
And then semi-snap the wire bundle back to where it originally went, and use a small zip tie to secure it.
Attachments








sp8ball
New member
Modification: Switch for Backup Camera (cont.)
It should look a lot like this on the other side (minus the grease smudge near the switch):
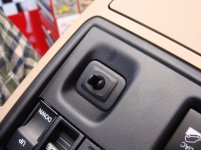
OK…the console work is done, and you just have to do the wiring. Back to the truck! Put the overhead console on the dash, and hopefully you have enough slack in your wires to reach to the overhead area.
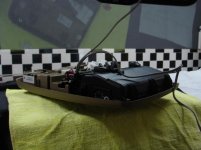
Climb in and find that wire bundle that was pushed into the console space between the headliner and windshield.
Take the plastic electrical tape and gently cut it away to free the wires.
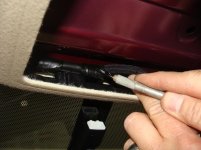
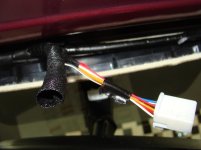
Isolate these red, white, and blue wires (“on the clip side”) - the red and blue wires are the ones we’re going to be tapping into during this mod.
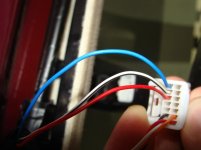
Tap your wire from Post 1 on your switch to the blue wire in the overhead connection.
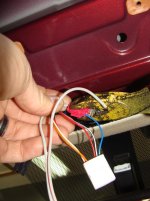
Cut the red wire. (ulp!)
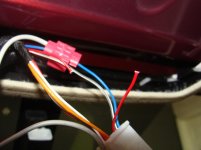
Added July 2011: Now that you've cut the red wire - and for the sake of clarity - GO TO THIS POST AND READ IT.
The “clip side” of the red wire gets connected to Post #2 on the switch. The “harness” side of the red wire gets connected to Post #3 on the switch.
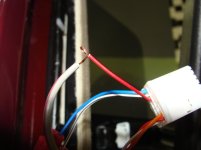
It should look a lot like this on the other side (minus the grease smudge near the switch):
OK…the console work is done, and you just have to do the wiring. Back to the truck! Put the overhead console on the dash, and hopefully you have enough slack in your wires to reach to the overhead area.
Climb in and find that wire bundle that was pushed into the console space between the headliner and windshield.
Take the plastic electrical tape and gently cut it away to free the wires.
Isolate these red, white, and blue wires (“on the clip side”) - the red and blue wires are the ones we’re going to be tapping into during this mod.
Tap your wire from Post 1 on your switch to the blue wire in the overhead connection.
Cut the red wire. (ulp!)
Added July 2011: Now that you've cut the red wire - and for the sake of clarity - GO TO THIS POST AND READ IT.
The “clip side” of the red wire gets connected to Post #2 on the switch. The “harness” side of the red wire gets connected to Post #3 on the switch.
Attachments








Last edited:
sp8ball
New member
Modification: Switch for Backup Camera (cont.)
Once you have secure connections, put electrical tape over them and then re-wrap them as best as you can with the factory wrap. We didn't use shrink wrap, because we didn't want to use the torch near the headliner.
(note: my camera died during the mod, so these smaller pics are from Antman’s phone!)
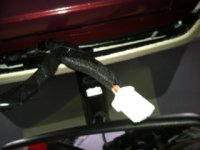
Push the wire bundle back between the headliner and windshield, towards the mirror. Plug the connector back into the mirror.
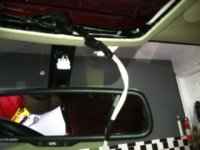
We wrapped the whole entirety of the speaker wires in electrical tape to protect it and make it look nice. Then we tucked it into the headliner space as we raised the console into position.
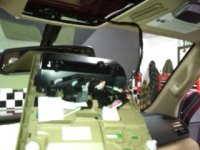
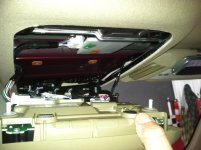
Snap the console back into place, and re-secure the console with the two screws in the sunglass area. Fire up the truck, and flip on your switch.
This picture was taken in Antman’s garage, and I was in “Park”. Notice the switch…and the image on the left side of the mirror!
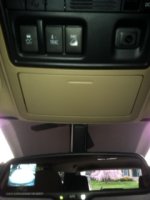
And just like that, it’s done!
Once you have secure connections, put electrical tape over them and then re-wrap them as best as you can with the factory wrap. We didn't use shrink wrap, because we didn't want to use the torch near the headliner.
(note: my camera died during the mod, so these smaller pics are from Antman’s phone!)
Push the wire bundle back between the headliner and windshield, towards the mirror. Plug the connector back into the mirror.
We wrapped the whole entirety of the speaker wires in electrical tape to protect it and make it look nice. Then we tucked it into the headliner space as we raised the console into position.
Snap the console back into place, and re-secure the console with the two screws in the sunglass area. Fire up the truck, and flip on your switch.
This picture was taken in Antman’s garage, and I was in “Park”. Notice the switch…and the image on the left side of the mirror!
And just like that, it’s done!
Attachments





Last edited:


Reata
New member
Slicker than an egg in grease.....unless, of course you have a Trail that has Navigation.
Antman, you really need to get the number for the Manicurist that Sp8ball uses.
I will be driving in from Texas this weekend to have you "determine" how to modify my back-up camera when engaged shows up on the navigation screen. Not really, but if you have any ideas or anyone else does, please let me know.
Antman, you really need to get the number for the Manicurist that Sp8ball uses.
I will be driving in from Texas this weekend to have you "determine" how to modify my back-up camera when engaged shows up on the navigation screen. Not really, but if you have any ideas or anyone else does, please let me know.


Johnny Utah
New member
Modification: Switch for Backup Camera (cont.)
We added some solder to the ends of all three switch poles.
View attachment 42934
View attachment 42936
Then we pulled out Antman’s “Giant Tub O’ Wire” to get some wire to connect the three poles on the switch to the three wires in the console into which we need to tap.
View attachment 42937
We elected to use one two-wire bit of speaker wire, and one single-wire. This also helped us keep track of which wire did what.
Then we soldered the wires to the posts, and (of course) shrink wrapped them for excellence.
View attachment 42939
View attachment 42940
View attachment 42941
View attachment 42942
View attachment 42943
Wow, that looks really good and clean. Nice work boys
EDIT: off topic, but, does anybody know how to quote a picture without it showing up as a thumbnail or as an attachment. Is that a feature that is disabled on this forum? It's pretty annoying. Like for instance. The last pic #42943 looks awesome, so i want to comment on how good and clean it looks, but, it wont show up because the attachment is there. I know you need to use the tags, but, how would i find those, since when you quote a reply, it doesn't show the path for the file.
thoughts?
Last edited:
Johnny Utah
New member
also, are you or antman planning on doing Satoshi Grill Mod? Just wondering!
sp8ball
New member
also, are you or antman planning on doing Satoshi Grill Mod? Just wondering!
When i first saw the Satoshi Grille mod, I was adamant that I was going to do it.
It's on my spreadsheet and everything.
But...it's a little cost prohibitive. I'm pretty sure I'd go with Grillcraft because of the concerns I've seen listed on here about the other grilles that people have used, and new Grillcraft grilles are about $300 (last time I checked).
As such, I had decided against it.
And then last night I was looking through the Satoshi Grille mod thread again, and thinking "man, i really want to do that."
So...I have a picture open in another browser window of the good-looking trucks from that Satoshi thread, and I'm going to discretely show them to Mrs. Sp8ball to gauge her opinion. I'm 69.4% sure it won't fly, but we'll see.
Johnny Utah
New member
When i first saw the Satoshi Grille mod, I was adamant that I was going to do it.
It's on my spreadsheet and everything.
But...it's a little cost prohibitive. I'm pretty sure I'd go with Grillcraft because of the concerns I've seen listed on here about the other grilles that people have used, and new Grillcraft grilles are about $300 (last time I checked).
As such, I had decided against it.
And then last night I was looking through the Satoshi Grille mod thread again, and thinking "man, i really want to do that."
So...I have a picture open in another browser window of the good-looking trucks from that Satoshi thread, and I'm going to discretely show them to Mrs. Sp8ball to gauge her opinion. I'm 69.4% sure it won't fly, but we'll see.
haha. Yeah, i was viewing that grille mod thread too, i'm still contemplating what i'm going to do. I thought i remember you mentioning it, so i figured i'd bring it up...
Awesome
Awesome posts. :nicethread: This is my first post and just had to compliment you on how great all of the posts have been. That and to let you know my productivity at work has greatly decreased since reading your posts. You know, reading, imagining, searching for parts, day dreaming... not only about what I want to do but picturing my wife being as cool as yours and allowing me to do some of these things... etc.
I do have one question. If your switch to the back up camera is 'unswitched' when you place your car in reverse does the camera come on automatically or do you still have to hit the switch. I basically want it to work as it does now but occassionally flip the switch when towing the boat.
Thanks once again!
Oh ya and your nails are B E A UTIFUL...
Awesome posts. :nicethread: This is my first post and just had to compliment you on how great all of the posts have been. That and to let you know my productivity at work has greatly decreased since reading your posts. You know, reading, imagining, searching for parts, day dreaming... not only about what I want to do but picturing my wife being as cool as yours and allowing me to do some of these things... etc.
I do have one question. If your switch to the back up camera is 'unswitched' when you place your car in reverse does the camera come on automatically or do you still have to hit the switch. I basically want it to work as it does now but occassionally flip the switch when towing the boat.
Thanks once again!
Oh ya and your nails are B E A UTIFUL...

sp8ball
New member
Awesome posts. :nicethread: This is my first post and just had to compliment you on how great all of the posts have been. That and to let you know my productivity at work has greatly decreased since reading your posts. You know, reading, imagining, searching for parts, day dreaming... not only about what I want to do but picturing my wife being as cool as yours and allowing me to do some of these things... etc.
I do have one question. If your switch to the back up camera is 'unswitched' when you place your car in reverse does the camera come on automatically or do you still have to hit the switch. I basically want it to work as it does now but occassionally flip the switch when towing the boat.
Thanks once again!
No problem!
Here's how it works...
When the switch is "off", the system works just like it normally does (camera comes on when in Reverse).
When the switch is "on", the camera comes on in the mirror. It'll stay on for a few minutes, and then turn off. You have to toggle it "off" and then "on" again to bring the image back up. If the image "timed out" and shut off, and you put it in Reverse, it will work again.
Similar threads
- Replies
- 0
- Views
- 2K
- Replies
- 2
- Views
- 1K

- Replies
- 2
- Views
- 3K


- Replies
- 13
- Views
- 3K


