Steel City Racing: King of the Hammers 2019 Toyota 4Runner IFS 4600 Build Thread

Just purchased the Blue Sea 9002e, a bunch of 2 gauge wire, and a 4-Post Power Distribution block for the "Out".

Wiring will be:
In 1: Battery
In 2: Alternator Power In
Out: Wire that goes to 4-Post Distribution Block. Alternator Power Out, Distribution Block/Fuse Box, and Anything Else

Fingers crossed third time's a charm. Thanks for everyone's help.

Fuel system up next...
 
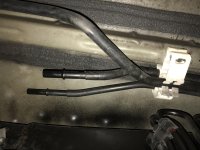
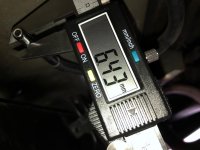
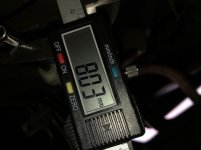
Does anyone know the diameter of these stock fuel lines running along the frame? I seem to have “misplaced” my calipers...
 

Attachments

  • 758A6DBE-0349-47E8-BBB9-55C557D35A71.jpg
    758A6DBE-0349-47E8-BBB9-55C557D35A71.jpg
    137.3 KB · Views: 455
Okay, I literally spent hours with Aeromotive Tech today (Brett is solid) and here's the initial plan:
- Phantom 200 Stealth EFI Fuel System:
https://www.aeromotiveinc.com/product/phantom-200-stealth-fuel-system/
- Use ORB-06 to AN-06 Fittings for Supply and Return
- Run steel braided line from AN-06 to existing Supply and Return hard lines
- Use AN-06 to 6MM / 8MM Female adapters back to OEM Hard Lines along frame

We'll cap the vent on the Phantom (ORB-06 Port Plug) and instead run AN-8 from the fuel cell vent to the OEM charcoal catchment can (which should meets KOH Rules after a lot of routing).

The Phantom will drop in the cell (via 3.25" Hole Saw) and work fine with Alltech baffles. I'll then do a slightly larger hole in the lid of the cell to make sure it doesn't contact when sealed.

I also got a 10" Fuel Level Sender and Ohm converter from Summit that'll hopefully allow us to use our stock gauge (if not, we'll use aftermarket).

If anyone sees any issues with this system, let me know. Aeromotive had never worked on a 4.7L V8, so it took a lot of pictures and hours of diagnosing to figure it all out.

Now I just need to find 6MM and 8MM Female to AN-06 Male adapters...
 
Last edited:
Thanks for sharing and posting! It's pretty cool to see this happen. I'm subscribing for sure

I've only plumbed fuel one time using AN fittings, on an old chevy 350, and I can say that it was pretty easy to get a fuel leak! I had to really crank those things down. I'm sorry, this probably isn't the advice you need, but the best I can do!
 
That fuel setup sounds like a cluster ****, and I would be very wary to drill into the cell since you'll have to seal up the bladder plus modify the filler plate and other things.

What is the point of keeping the charcoal canister? I would delete it and just run a simple vent in the back. A SIMPLE BASIC vent hose is like 12+ feet long to begin with, routing it literally all around the back of your truck plus then routing it forward seems like a lot of work and added complexity for something so simple.
 
That fuel setup sounds like a cluster ****, and I would be very wary to drill into the cell since you'll have to seal up the bladder plus modify the filler plate and other things.

What is the point of keeping the charcoal canister? I would delete it and just run a simple vent in the back. A SIMPLE BASIC vent hose is like 12+ feet long to begin with, routing it literally all around the back of your truck plus then routing it forward seems like a lot of work and added complexity for something so simple.

The charcoal canister is located directly underneath the rear hatch on 4th gens, not in the engine bay like on 3rd gens. So the routing should be pretty simple unless you were talking about something else.
 
The charcoal canister is located directly underneath the rear hatch on 4th gens, not in the engine bay like on 3rd gens. So the routing should be pretty simple unless you were talking about something else.

Agreed - I followed it this morning and it's in an ideal spot. And if it gets nixed when the 4Link goes in, so be it - a simple vent will work.
 
That fuel setup sounds like a cluster ****, and I would be very wary to drill into the cell since you'll have to seal up the bladder plus modify the filler plate and other things.

What is the point of keeping the charcoal canister? I would delete it and just run a simple vent in the back. A SIMPLE BASIC vent hose is like 12+ feet long to begin with, routing it literally all around the back of your truck plus then routing it forward seems like a lot of work and added complexity for something so simple.
The phantom system install is pretty simple and it's no different than installing in an OEM tank (poly shell inside a steel box) and people install them in OEM poly tanks all the time. I'll just cut the top of the cell a little larger than the 3.25" inner hole.

I'm definitely getting a simple basic vent hose, but the canister is literally right below the cell where it has to end up per KOH rules anyway (after the crazy routing it has to go through).
 
I have to travel a good bit for work this week, but wanted to send out a quick update. Lots of work done this past week:

- Atlas II 3.8 Trail Case and Adapater for A750F ordered and should be in AL in time for me to load it up for the drive to CA. Thanks again to Advance Adapters for their sponsorship on this build!

- East Coast Gear Supply also signed up to sponsor the build. We're getting the Front Nitro 4.56 Gears, Install Kit, and our Front ARB Locker from ECG! The rear Currie RJ60 already has the ARB installed.

- Aermotive is also sponsoring the build - we'll be running their Phantom 200 Kit and they've included various adapters we'll need for AN lines.

- Ordered a ton of parts for the fuel system on Friday - mostly Russell fittings and AN6 lines. Who knows if I got what I'll actually need.

- New "basic" master kill switch also ordered and on it's way that should solve finally our Battery/Alternator problem.

- Classic Instruments Fuel Level Sender and Ohm converter arrived over the weekend. Since no-one has a sender that works with the OEM Toyota gauge, this converter should allow us to make it work:
39515251_414315832425696_7693651380627570688_n.jpg


- Rear LED race light came in from Amazon. Amber and Red with Clear Centers (acts as reverse LED lights). Hope to have time to mount/wire it this week - likely put it on the spoiler and have to double/triple mount it so it doesn't fly off:
39535881_414313612425918_8929130725123293184_n.jpg


- My wife and girls were kind enough to take a road trip to TN with me to hunt through a Toyota heavy salvage yard south of Nashville on Saturday. Cool owners from Jordan who had been in the states for 30-yrs - they had a ton of 4th gen doors! The place was a mud pit though. But we found solid doors for an extremely low price. We'll leave the glass in till it gets to CA (in case it rains):
39397708_413430429180903_6481917308288630784_n.jpg


At this point, all key sponsors are landed and all key purchases have been made for this build. The main things left are electrical (master kill switch, race light, & MAF Calibrator), fuel system (plumbing, fuel pressure gauge, & cell temporary mount), salvage door install with secondary locks, and then the drive out to CA where the real work begins (suspension, steering, cage, armor, axles, t-case, tries/wheels, etc). I may also try to fit in safety nets and latches before the drive over if I have time.

One question:
Rugged Radios has agreed to sponsor us with a discount, but I'm honestly really surprised at how much comms cost, even with the discount. Are there any lower budget solutions out there for Vehicle to Pit/Pit to Vehicle and Driver to Co-Driver communications? Similar to what LeadNav is doing for Navigation (as a cheaper Lowrance alternative)?

For example, I've looked at bluetooth motorcycle Driver to Rider devices that could help with comms for $150 or so on Amazon.

Thanks everyone.

 
On safety nets, it is my understanding that SFI 27.1 Cert requires:

1) Window nets are required to be constructed either entirely from 1″ Webbing Material, or from Mesh Material with a strip of 1″ Webbing at 8 inch intervals across the length of the net.

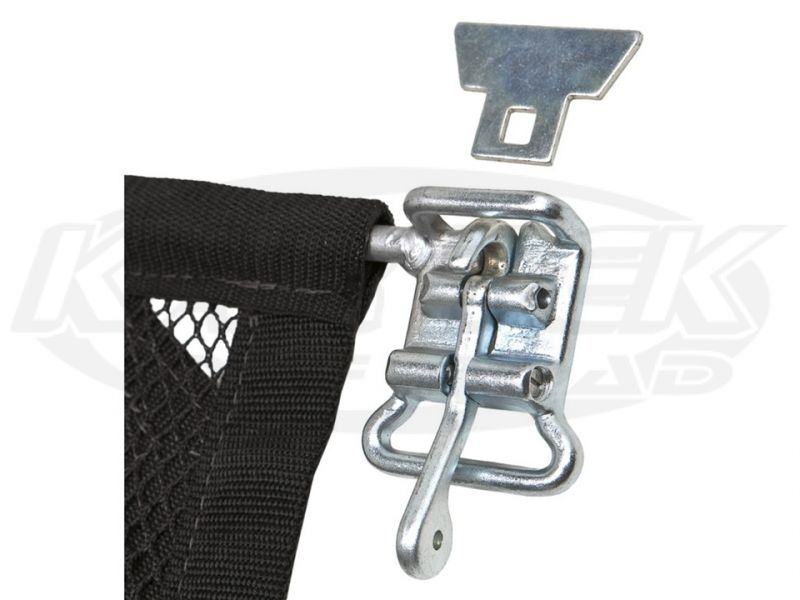
2) The net must be secured to the vehicle on the top and bottom by either a Spring Rod or Latch System. This allows for a quick disconnect of the net by the occupants, regardless of the position of the vehicle. For small triangle style nets grommets are recommended.

Question: Is there increased visibility of Mesh with 1" Webbing at 8" intervals? Or does everyone just go with 1" webbing for simplicity?

And what about Spring Rod vs. Latch?
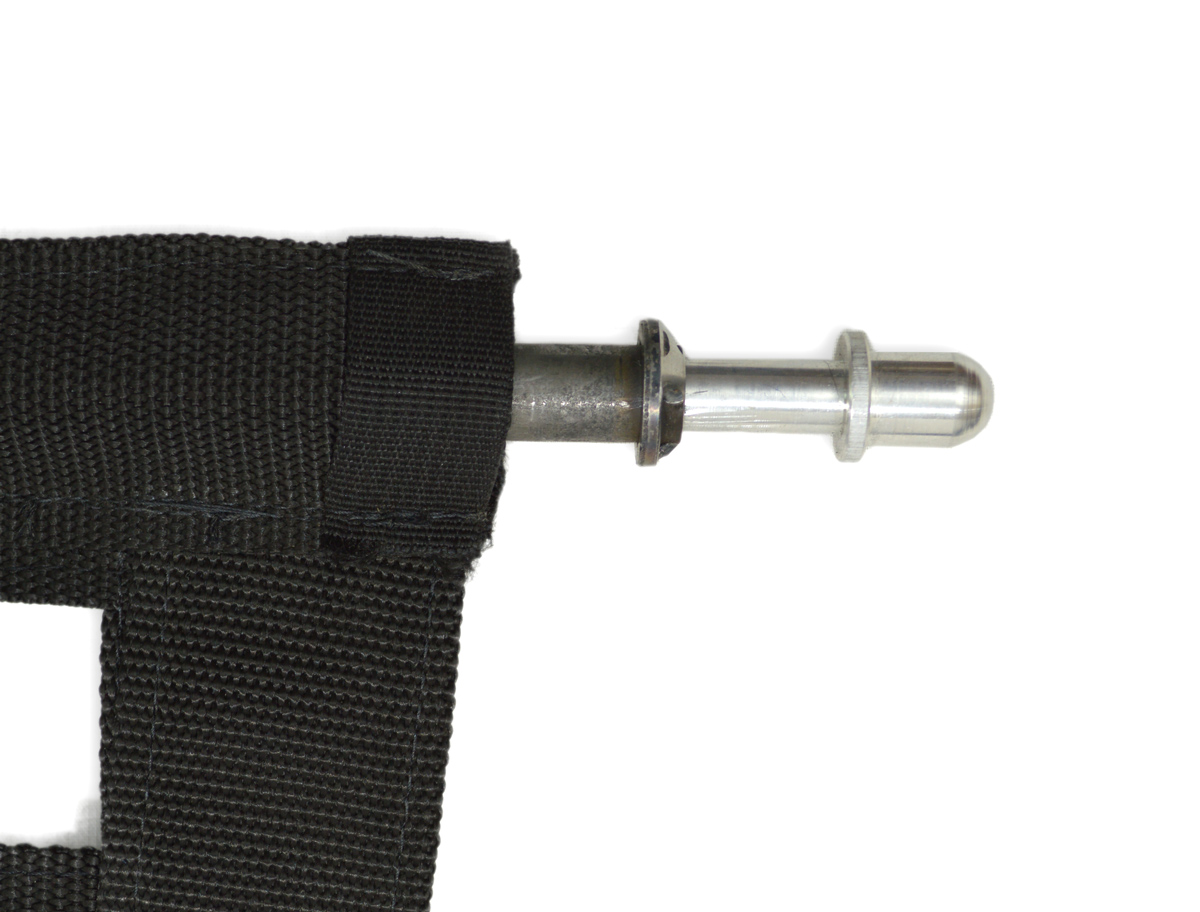
Spring Rod:
SpringRod.jpg


Latch:
JAZ-90803_RodWindowInstKit_1_800x600.jpg

https://www.kartek.com/parts/allsta...ch-window-net-mounting-kit-28-rod-length.html

Per the rules:
"Nets attached to door frames are permitted."
-----This is what we'll do.-----

"Nets must be installed so that the occupants can release the netting unassisted and exit the vehicle regardless of the position of the vehicle."

"The net border or edge and the net attachment must be made of materials that are as strong as, or stronger than, the net itself. Net attachments must be at a minimum of every 6 inches. Acceptable attachments include, but are not limited to: steel hose clamps, snaps, lift-a-dot, metal hooks, and steel rods. Nets must be tight so that when subject to a pushing force of approximately 50lbs the net deflects no more than four inches."
 
Last edited:
A little more progress last night...

39589329_415558985634714_9120875137711734784_n.jpg


39811066_415558095634803_3846731173115985920_n.jpg


39744869_415558335634779_4574383046345621504_n.jpg


Also got all the door hardware swapped over to the salvage doors so all we have left is to install them.
 
A few more goodies from our sponsors at East Coast Gear Supply just arrived!

4.56 Front Nitro Gears that to match the rear 4.56 gears in the Currie RJ60:
39883719_416193365571276_1922601393764433920_n.jpg


Front ARB air locker to match the rear ARB in the Currie RJ60:
39868967_416192322238047_8937626763140268032_n.jpg
 
For starters, this is super exciting to see a 4th gen headed to KOH. Add one more to the list of member's that will be pulling for you on race day.


When I put in the Atlas II, will it automatically eliminate VSC (CDL will be gone)?

For the race, we want VSC Off and ATRAC selectable (with ARBs F/R of course)

I have installed a switch to turn off ABS (and therefore VSC, TRAC, and ATRAC). It makes a huge difference in speed and performance. I'll leave all on for the drive to CA. But on the starting line, ABS will be off.

Not to beat a dead horse or anything but you definitely don't want any of the above mentioned acronyms active during the race. I personally just unplug the front left wheel speed sensor in the engine bay when offroading. (its closest to the driver seat when stepping out of the truck) Come to think of it I don't believe I've plugged it back in about 2 years.

Which wheel speed sensor wiring is what I wanted to bring up. the wiring may get short on you once you move to the long travel suspension. Specially if your stepping out of the aftermarket world and into custom fab'd control arms.

just my $.02 but if you're building a race truck why mess with switches on the VSC/ABS/etc.? I would get rid of the ABS and kill the dash lights. The only reason I plug my ABS wire back in is to make the dash lights go out. I realize its a stock class and maybe there are rules that require you to pass safety inspection or something I've missed so my thought process may be mute.

If you're removing the factory T-case your 4wd computer will be useless you can unplug and remove that directly. its located on a panel under the dash just above the glove box. The 4wd computer processes signals to the electric actuator on the factory t-case. Not sure if the atlas II has shift position sensors on it or not but if it does you can wire the sensors back to the dash lights through the factory wiring harness. I used the center diff lock light for 4wd, and then 4lo for 4lo obviously when switching to a manual fj t-case.


Also Curious if you plan to run a spare tire an what you plan to do for mounting/location? I'd definitely remove the factory spare and even cut that cross member it hangs from to shave weight. (not a bad location for a fuel cell, though would require a fill neck)

so many questions and thoughts, will be very intrigued to see the project progress!

happy wrenching to you!
 
Question: Is there increased visibility of Mesh with 1" Webbing at 8" intervals? Or does everyone just go with 1" webbing for simplicity?

And what about Spring Rod vs. Latch?

Personally, I prefer spring rod, but either one is fine if implemented properly. Spring rod can be a little easier to file/tweak if your net comes in a little tight after a recert/replacement. Might be worth considering putting a rod end to serve as the rear pivot for the net so it doesn't drop all the way out of reach when unlatched, that way it'll just pivot downward.
 
For starters, this is super exciting to see a 4th gen headed to KOH. Add one more to the list of member's that will be pulling for you on race day.

Not to beat a dead horse or anything but you definitely don't want any of the above mentioned acronyms active during the race. I personally just unplug the front left wheel speed sensor in the engine bay when offroading. (its closest to the driver seat when stepping out of the truck) Come to think of it I don't believe I've plugged it back in about 2 years.

Which wheel speed sensor wiring is what I wanted to bring up. the wiring may get short on you once you move to the long travel suspension. Specially if your stepping out of the aftermarket world and into custom fab'd control arms.

just my $.02 but if you're building a race truck why mess with switches on the VSC/ABS/etc.? I would get rid of the ABS and kill the dash lights. The only reason I plug my ABS wire back in is to make the dash lights go out. I realize its a stock class and maybe there are rules that require you to pass safety inspection or something I've missed so my thought process may be mute.

If you're removing the factory T-case your 4wd computer will be useless you can unplug and remove that directly. its located on a panel under the dash just above the glove box. The 4wd computer processes signals to the electric actuator on the factory t-case. Not sure if the atlas II has shift position sensors on it or not but if it does you can wire the sensors back to the dash lights through the factory wiring harness. I used the center diff lock light for 4wd, and then 4lo for 4lo obviously when switching to a manual fj t-case.


Also Curious if you plan to run a spare tire an what you plan to do for mounting/location? I'd definitely remove the factory spare and even cut that cross member it hangs from to shave weight. (not a bad location for a fuel cell, though would require a fill neck)

so many questions and thoughts, will be very intrigued to see the project progress!

happy wrenching to you!
Thanks! It's late, so my apologies for the short responses:

- ABS is already disabled via a mod on this forum. But it does leave the lights on per your point. The lights don't bother me though and I like the ability to turn ABS back on for the drive to CA and afterward.

- Yes, the Atlas II will replace the OEM 4wd mechanisms. I doubt we'll wire the lights back up - the sticks will tell us all we need to know. The Atlas II is ordered and being built now.

- The fuel cell is close to being mounted already. I purchased one with dimensions to fit in the cargo area just behind the rear seats perfectly. It will not go underneath - it would get hit on obstacles and interfere with the 4-Link. All fuel system parts are acquired (some still in route now though)

- The spare will sit behind the fuel cell, likely against the liftgate and connected securely to the cage. We'll have 3 more spares at each of the Main/Remote pits. All wheels/tires have been acquired.
 

Members online

Forum statistics

Threads
278,315
Messages
3,554,131
Members
248,016
Latest member
Advally Service

Trending content

Back
Top