Sub and Amp install (PICS) '03 T4R

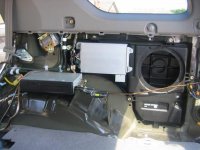
The little tab that sticks up on the top left side goes into a factory mounting location. I'm going to use that to hold the box in place

T4R_Stereo_045.sized.jpg
 
Wow that looks like a time consuming prossess. My wife would have never let me work that long before getting me to help with the kids :awais: Good luck with the rest of the project.
 
Good job! Wonder what your car smells like right now ;).

What sub are you lookign to put in that space? Any reason why are aren't taking advantage of the storage space behind there to maybe inset the sub a bit?
 
TeCKis300 said:
Good job! Wonder what your car smells like right now ;).

What sub are you lookign to put in that space? Any reason why are aren't taking advantage of the storage space behind there to maybe inset the sub a bit?

Check the first page.
 
Spider5 said:
Check the first page.

;):

The leftover storage space isn't a big enough area to put the speaker. I'm going to place it like the JL stealthbox.

Smell isn't bad. For a few days after, there was a little hint of the smell, but the wife barely even noticed.:biggrin2:

No progress on this. This weekend was busy. I'm home with my youngest today (nany is sick) so I may have a few moments during naps to go add some more layers of FG or to cut out the speaker rings.
 
I saw that the amp was in that space, but by losing the cover, you can still save another 1" or so of space....although I can understand why you left it there since you'll be able to take the sub box out easily and have the whole cargo space to use.

I'm also doing my install and I've been looking for ways to have great sub performance, without using a bulky enclosure, while still maintaining all the usuable cargo space so I can go on vacation fully loaded without taking out the sub. The JL 103v3 was near the top of my list but it's total depth was greater then 6". Factor in the enclosure and grill and it will easily be 8".

 
Last edited:
Got another layer done yesterday. I'm home again with my youngest cause the nanny is still sick. So I put another layer on this morning. Hopefully I'll get another 2-3 layers done throughout the day. I aslo got my MDF ring cut out to mount the sub to.

T4R_Stereo_048.sized.jpg


T4R_Stereo_049.sized.jpg


T4R_Stereo_051.sized.jpg
 
I haven't forgot about updating, just haven't had any time. This project should have taken a weekend. But with the wife and kids it just drags on forever.

I put a total of 6 layers down. The thing has no flex in it whatsoever so I think it's good enough.

After the last layer was dry I put it back in the 4Runner so I could mark where to trim it. I decided not to use the bottom portion cause it just didn't work out so I just cut it off.

The mounting tab that I added in may not work as planned. After I get the rest of it finished I'll see how well it will work. My concern is that the cargo cover may not lock into place with how thick the tab is. I may just use a peice of thin guage steel and secure it to the back of the box with some screws.

After marking my trim lines I pulled it back out and used my Dremmel to trim it. After about half of the trimming was done my Dremmel got so hot it started burning my hands. So I switched over to my 3" air powered cut-off wheel and went to town.:biggrin2: That made short work of the rest of it. I then used my angle grinder (With flap sanding disks) to make the mounting tab a little thinner.

I was planning out the rest of the box (I think the rest will be MDF) and then ran out of time. Hopefully I'll have it completed this weekend.

Last layer drying:
T4R_Stereo_052.sized.jpg


Re-installed:
T4R_Stereo_054.sized.jpg


Marked for trimming:
T4R_Stereo_055.sized.jpg


Trimmed and re-installed:
T4R_Stereo_057.sized.jpg


Waiting for some MDF:
T4R_Stereo_058.sized.jpg
 
Last edited:
4alarm said:
Got another layer done yesterday. I'm home again with my youngest cause the nanny is still sick. So I put another layer on this morning. Hopefully I'll get another 2-3 layers done throughout the day. I aslo got my MDF ring cut out to mount the sub to.

T4R_Stereo_048.sized.jpg


T4R_Stereo_049.sized.jpg


T4R_Stereo_051.sized.jpg


your setup is going to look SICK.....i have the same woofer and i love it...
ed0aebc7.jpg
 
hey 4alarm, very nice job at putting n the sub. I'm trying to do the same thing in my '97 4runner. hard thing is getting how to wire an amp etc.
 
Thanks for the comments. I wish I could work faster.

I spent most of the time I had today just stareing at the enclosure. I'm not real happy with how it's coming together. Mostly, I don't like the shape. The woofer is too deep, so I had to bring the back of the box out further, so it's got an angle to it.

I was trying to build the rest of the box from MDF, but the front panel just isn't going to work. I went ahead and built the sides, top and bottom from MDF, but I'll have to make the front panel from fiber glass. I've also scrapped the mounting tab that I built into the back panel. It was taking up too much space in the square cut-out so the rear cover wouldn't fit. I still plan to use the same location to mount it, but I'll have to use something else.

Only thing left to do with MDF is build my second ring, so the woofer will be recessed. Then I just have to layer on the FG.

Side and bottom:
T4R_Stereo_060.sized.jpg


Sides, bottom, and top in car:
T4R_Stereo_062.sized.jpg


Inner ring:
T4R_Stereo_063.sized.jpg
 
Do you know if anyone has tried to buy the JBL factory plastic sub box and side pannel and install a 10" sub and amp that way?

I have a 2003 SR5

I am trying to find a good way to set up the 10" sub and amp that I already own.

Any thoughts?

Here is a picture of what the box looks like (not my 4Runner).
 

Attachments

  • img_0564.jpg
    img_0564.jpg
    31 KB · Views: 3,674
If you are using a 10" sub, then there is no good reason to try and reuse the stock enclosure. It will be very difficult to mount the 10" sub in a solid airtight fashion since the stock enclosure in inset at an oblique angle for an 8".

Time to bust of the fiberglass. Fiberglass boxes are really not that hard to do. Just takes time. If I get bored enough in the future, I may sell my current sub and do something more crazy with fiberglass. Too little time now though.
 
So the sub that comes with the JBL system is an 8" I looked on the toyota site and couldnt find the size. Well if it is an 8" that would be a good reason why people havent done that.

thanks
 
Finally got back to this project. I cut out my flush mount ring from MDF and put the two rings together with some liquid nails and 2 screws to keep it from floating while the glue dried. I used 3 screws to hold the rings in position in the box then streched some fleece around it. I used a staple gun to hold the fleece in place wherever there was MDF to staple to. The staples wouldn't penetrate the fiberglass so I had to drill 2 pilot holes and use screws in one area to keep the fleece up against the boxs edge. For the rest of it I just streached the fleece all the way around until I hit MDF and again used staples to hold it.

Perfect circles:
T4R_Stereo_064.sized.jpg


Flush mount ring cut out:
T4R_Stereo_065.sized.jpg


Mount and flush mount rings together:
T4R_Stereo_067.sized.jpg


Rings mounted to box:
T4R_Stereo_068.sized.jpg


Fleece streched around box:
T4R_Stereo_069.sized.jpg
 
The fleece sucked up the resin pretty quickly. I had to use two 8oz batches and an additional 4oz batch of resin for the fleece.

After that dried I cut a sheet of FG to fit and added my second layer. This time it only took two 8oz batches (this stuff goes quick!). That was all I got done on Saturday.

First layer (fleece and resin):
T4R_Stereo_071.sized.jpg


Second layer (FG mat and resin):
T4R_Stereo_072.sized.jpg


Second layer (different angle):
T4R_Stereo_074.sized.jpg
 
Last edited:
Today I got 2 more layers done. I was out of town all morning so didn't get the first layer of the day on until around 3pm.

16oz (2 batches @ 8oz ea) seems to be the magic number for the amount of resin required for the top of the box.I found that the single sheet of FG mat was too stiff around the edges and that was causing me extra time working the edges down to keep the air bubbles out. So I cut a full sheet to cover it, then cut it in half (so I would have a little more time to mix my second batch of resin) and cut ~2" frills around the edges so they'd be more plyable. This worked really well. I also found it helpful to have a my second batch of resin ready to mix with the hardener before I got started, so my brush wouldn't gel up while I tried to count another 90 drops of hardener for the second batch.

Anyways, 2 more layers today:

Third layer (FG mat and resin):
T4R_Stereo_075.sized.jpg


Forth layer (FG mat and resin):
T4R_Stereo_077.sized.jpg
 
I noticed you fiberglassed over the trim ring. Be careful that the area stays flat. I ran in to some problems there. if there are some high spots, the sub wont sit perfectly flat. and even if you sand it..its tough to get it perfectly flat like the original trim ring was. dont want any air leaking out there.

Just some helpful advise from someone who's done way too many fiberglass boxes
 

Members online

Forum statistics

Threads
278,316
Messages
3,554,113
Members
248,016
Latest member
Advally Service

Trending content

Back
Top