T-man's '05 Sport Build Thread

Man I had no idea you had a build page! Pleasure reading through it lol. Question for you: I know you were forced to replace your rear 3rd member in '14. You said that rear 3rds from all older model 8 inch rear axles will work, correct? Did your 4th gens axle splines line up to the splines in the older 3rd member correctly?

Reason I ask is because I have a 4:10 rear 3rd laying around my house from a pickup I owned. ECGS isnt nearly as pricey if you only have to buy one 3rd as opposed to two lol. I had researched it previously and found that they WOULD work(hints why I havent sold the 3rd yet) , but also found a thread stating otherwise. you are the first person I've read that recently had any experience with the matter lol.

Thans man!, Greg
 
Man I had no idea you had a build page! Pleasure reading through it lol. Question for you: I know you were forced to replace your rear 3rd member in '14. You said that rear 3rds from all older model 8 inch rear axles will work, correct? Did your 4th gens axle splines line up to the splines in the older 3rd member correctly?

Reason I ask is because I have a 4:10 rear 3rd laying around my house from a pickup I owned. ECGS isnt nearly as pricey if you only have to buy one 3rd as opposed to two lol. I had researched it previously and found that they WOULD work(hints why I havent sold the 3rd yet) , but also found a thread stating otherwise. you are the first person I've read that recently had any experience with the matter lol.

Thans man!, Greg

Haha, I've been slacking on the thread lately. Lots of little updates coming though.
For the rear dif, axles splines line right up but the flange for the pinion is a different bolt pattern and you will have to get the correct flange from East coast gear supply.
After buying a used dif that was wore out I returned it and bought a whole third member from ECGS with a 5 year warranty. Expensive but so worth it! That solid spacer is a serious piece of mind for me!
 
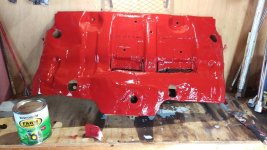
Cleaning up my skid plate. I pulled the front one off and used a wire wheel to clean it up, found out how mangled and rusted it really is. Will have to devise a new skid plate soon. The skid under the motor is stuck for now with seized up bolts. I used 2 coats of Rustoleum filler primer and sanded it down. I then put a coat of Rustoleum tractor paint on it. I have to do one more coat of paint then flip it over and do the underside. Here's a pic of it still wet. uploadfromtaptalk1441113319700.jpg
 

Attachments

  • uploadfromtaptalk1441113319700.jpg
    uploadfromtaptalk1441113319700.jpg
    140.1 KB · Views: 661
You still playing with them factory skids.... shheeesssshhhh.
I'm surprised you can still mount them, I had problems I pulled them off and beat on them to re install. I gave up......

I do seriously like what you've done to her.... I need BIGGER tires now, and. and, and....
 
You still playing with them factory skids.... shheeesssshhhh.
I'm surprised you can still mount them, I had problems I pulled them off and beat on them to re install. I gave up......

I do seriously like what you've done to her.... I need BIGGER tires now, and. and, and....

i painted my factory skid to clean it up and tried to put it on afer my lift and it was kinda of a hassle and just left it off till i could afford some afermarkets!:D

but that sure is some bright red right there could deffinity notice that a mile away
 
i painted my factory skid to clean it up and tried to put it on afer my lift and it was kinda of a hassle and just left it off till i could afford some afermarkets!:D

but that sure is some bright red right there could deffinity notice that a mile away

Ya I'm surprised they've lasted this long. I think my only saving grace is I don't rock crawl.
I'm planning a new lift, bigger lift, that includes skids, so I'm waiting for that.
I'm really liking the red highlights theme. This red may be a little bright, not sure, have to rock it for a bit and see how I like it. Lol
Also, I'm thinking 37's for my next set of tires. [emoji6]

You still playing with them factory skids.... shheeesssshhhh.
I'm surprised you can still mount them, I had problems I pulled them off and beat on them to re install. I gave up......

I do seriously like what you've done to her.... I need BIGGER tires now, and. and, and....
 
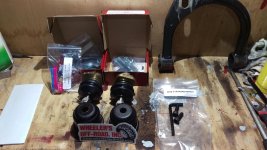
Received some parts from Wheelers Offroad.! Getting closer.
Super bumpstops
Spc ball joints
Cam bolts
And my personal favorite!
Little bag of candy and a sticker!!!
uploadfromtaptalk1441220332790.jpg
 

Attachments

  • uploadfromtaptalk1441220332790.jpg
    uploadfromtaptalk1441220332790.jpg
    139 KB · Views: 582
Haha, I've been slacking on the thread lately. Lots of little updates coming though.
For the rear dif, axles splines line right up but the flange for the pinion is a different bolt pattern and you will have to get the correct flange from East coast gear supply.
After buying a used dif that was wore out I returned it and bought a whole third member from ECGS with a 5 year warranty. Expensive but so worth it! That solid spacer is a serious piece of mind for me!

Awesome man. I appreciate the reply. Was it difficult to change the flange? I've swapped a lot of toyota 3rds, but never just the flange.

Edit: I HAVE taken a flange off to replace a pinion seal, and it slipped my mind. Sorry. Do you, by chance, remember the torque spec for the nut?
 
Last edited:
Awesome man. I appreciate the reply. Was it difficult to change the flange? I've swapped a lot of toyota 3rds, but never just the flange.

Edit: I HAVE taken a flange off to replace a pinion seal, and it slipped my mind. Sorry. Do you, by chance, remember the torque spec for the nut?

If you have the stock crush sleeve you have to tighten it back to where it was, mark it before hand with a paint marker. If you have the solid spacer as we should if we offroad then you will need to know what torque it was set at when installed. Which could be a bit of a pain... lol
 
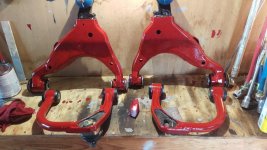
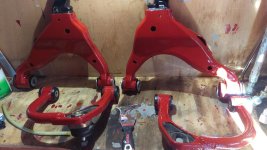
Painted my uca's and lca's. Hopefully getting them in this weekend!
First coat
uploadfromtaptalk1441935553432.jpg
Second coat
uploadfromtaptalk1441935596230.jpg
 

Attachments

  • uploadfromtaptalk1441935553432.jpg
    uploadfromtaptalk1441935553432.jpg
    140.8 KB · Views: 486
  • uploadfromtaptalk1441935596230.jpg
    uploadfromtaptalk1441935596230.jpg
    139 KB · Views: 502
Install was successful. Will post pics tomorrow. What a *****!! 3 frozen ball joints, 4 frozen cam bolts, tons of cutting! 5 Sawzall blades, that were worthless, and 3 cut off wheels, that really saved my ass!
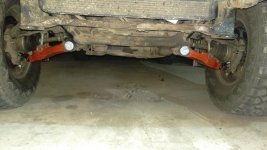
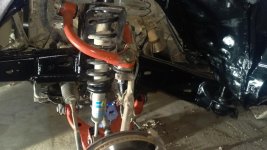
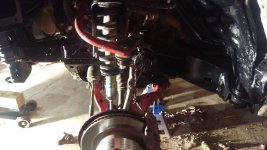
Finished pic, before alignment and putting skid back on.
uploadfromtaptalk1442207150185.jpg
 

Attachments

  • uploadfromtaptalk1442207150185.jpg
    uploadfromtaptalk1442207150185.jpg
    129 KB · Views: 535
Ok, so, lessons learned? Do yourself a favor and get several 7" cutting disks, not the 4.5 inch ones like I did! The 4" ones are just slightly to small to reach. Actually some 6" ones will probably work too. Pry bars, breaker bar, lots of lube! Lol, PB Blaster or something like that should suffice. Torque wrench is also a must!
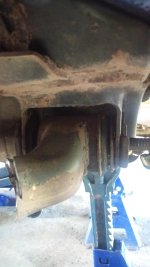
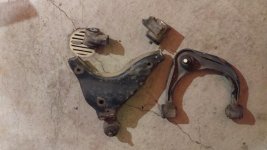
So, Sawzall was a joke. Literally just flattened the teeth. I couldn't get the grinder up in there far enough so I cut the arms off then worked on weaseling my way in deep enough to cut the bushing pins out. Took lots of shifting things around, but managed. The cam tabs were so rusted I had to beat them with a sledge after cutting out the bushing pins!
uploadfromtaptalk1442238205511.jpg
uploadfromtaptalk1442238259664.jpg
uploadfromtaptalk1442238299745.jpg
 

Attachments

  • uploadfromtaptalk1442238205511.jpg
    uploadfromtaptalk1442238205511.jpg
    122.8 KB · Views: 536
  • uploadfromtaptalk1442238259664.jpg
    uploadfromtaptalk1442238259664.jpg
    124 KB · Views: 534
  • uploadfromtaptalk1442238299745.jpg
    uploadfromtaptalk1442238299745.jpg
    128.4 KB · Views: 524
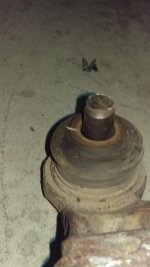
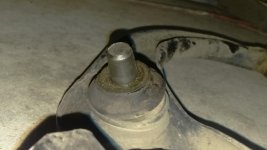
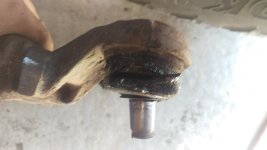
To add to my pain, all but one of the ball joint nuts where locked right up! I couldn't even get the pins out, so, back to the cutting disks. All the ball joints were shot too.
uploadfromtaptalk1442238455619.jpguploadfromtaptalk1442238474732.jpguploadfromtaptalk1442238501047.jpg
 

Attachments

  • uploadfromtaptalk1442238455619.jpg
    uploadfromtaptalk1442238455619.jpg
    102.9 KB · Views: 522
  • uploadfromtaptalk1442238474732.jpg
    uploadfromtaptalk1442238474732.jpg
    105.8 KB · Views: 516
  • uploadfromtaptalk1442238501047.jpg
    uploadfromtaptalk1442238501047.jpg
    114.2 KB · Views: 537
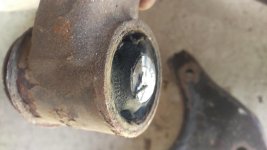
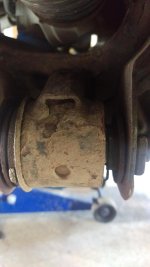
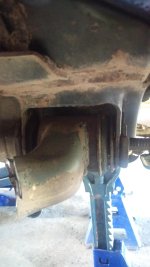
I had tons of pay in the bushings, especially since the were locked right up. They were distorted over half an inch backwards.
uploadfromtaptalk1442238703444.jpg
uploadfromtaptalk1442238766021.jpg
 

Attachments

  • uploadfromtaptalk1442238703444.jpg
    uploadfromtaptalk1442238703444.jpg
    123.7 KB · Views: 513
  • uploadfromtaptalk1442238766021.jpg
    uploadfromtaptalk1442238766021.jpg
    122.8 KB · Views: 522
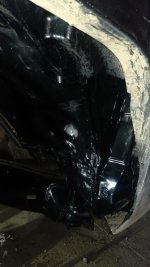
I cleaned everything up while I was down there. Used rust converter on the frame and chassis paint on everything. I trimmed my plastic liner farther up and finished flattening my pinch welds. Wire wheel was a HUGE help throughout this.
uploadfromtaptalk1442239026168.jpguploadfromtaptalk1442239048663.jpguploadfromtaptalk1442239097805.jpg
 

Attachments

  • uploadfromtaptalk1442239026168.jpg
    uploadfromtaptalk1442239026168.jpg
    126.5 KB · Views: 535
  • uploadfromtaptalk1442239048663.jpg
    uploadfromtaptalk1442239048663.jpg
    131.1 KB · Views: 523
  • uploadfromtaptalk1442239097805.jpg
    uploadfromtaptalk1442239097805.jpg
    134.1 KB · Views: 523
After I get the alignment done and the front skid on I'll post a finish shot.
Next time I have to do wheel bearings I think I'll paint the knuckle up.
I also have some touchups to do on the control arms. Little more paint and you'll never know!
 

Members online

Forum statistics

Threads
278,316
Messages
3,554,112
Members
248,016
Latest member
Advally Service

Trending content

Back
Top