Tacoma Suspension Swap

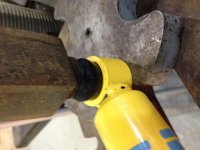
Didn't need much pressure to press them out.

My teardown begins tonight!! Jacking it up, taking off the tires, disconnecting X-REAS lines at the check valves and hitting all the bolts with more PB Blaster. I might even tear into the rear if I've got time.

I'm using a 3-ton floor jack with 21" height capacity, 2 3-ton jack stands and 2 4-ton jack stands. Hopefully I have enough clearance for everything. I'm only doing about a 2-2/5" lift, so it should be okay with the 265/70/17s.

Wish me luck. :pray:
 
My teardown begins tonight!! Jacking it up, taking off the tires, disconnecting X-REAS lines at the check valves and hitting all the bolts with more PB Blaster. I might even tear into the rear if I've got time.

I'm using a 3-ton floor jack with 21" height capacity, 2 3-ton jack stands and 2 4-ton jack stands. Hopefully I have enough clearance for everything. I'm only doing about a 2-2/5" lift, so it should be okay with the 265/70/17s.

Wish me luck. :pray:

I'm sure you will be fine. Thats what on my truck now with no lift. It rubs at full lock but with the tacoma springs I hope that it will be remedied. Good luck with everything.
 
I didn't have a press, so I just used the 3/8" rod stock and bolts in the vise method. I used a 1 1/16" socket because it was cheaper that a 26 mm and a 19 mm socket on the other side. It worked pretty well. Only recommendation I have is to buy some stainless steel washers to back the sockets. The zinc ones totally failed and the galvanized ones didn't fair much better. I used a combo of stainless and galvanized and that did the trick.

I'm lucky I have alot of the tools at work that I can use such as presses heavy impacts etc..
 
I'm sure you will be fine. Thats what on my truck now with no lift. It rubs at full lock but with the tacoma springs I hope that it will be remedied. Good luck with everything.

Well, it's all finished. I dropped it off at the local dealership for a 4 wheel alignment. It was a battle royale of rusted-seized bolts!

FRONT
I started with the front using the no spring compressor method (although I had 2 sets of compressors just in case). Got all 4 wheels off the ground and used the 6 ton jacks stands in the front and 3 ton in the rear. I would recommend 6 tons all the way around if I were to do it again, 3 ton stands are too weak IMHO. Removed the skid plates and disconnected all 4 XREAS shocks at the check valves. The check valves weren't hard to disconnect, but I did have to buy a 22mm wrench for the rear because the crescent wrench was too big to fit in the space.

After disconnecting the sway bar links, upper shock bolt (the single one up top), lower shock bolt, and using a floor jack to jack up the lower control arm, I removed the lower ball joint bolts. When I lowered the floor jack, nothing moved. I saw in pictures of others who had used this method and saw the lower control arm dropped significantly. We then loosened the cam adjustment bolts after marking them up for alignment. Again, the lower control arm did not drop. At this point we couldn't tell if the spring had been so compressed over time that it was sagging or if something was seized and there was still pressure on the spring. To be safe, we put the upper shock bolt back on and switched over to the spring compressor method. Got the shock and spring out, compressed the spring and sure enough, the upper washer was rusted to the shock shaft. Without the upper shock nut on, we basically had a bomb, so glad we went with the compressor method. Hammered the crap out of the washer/bushing until the washer broke free and it was easy after that.

Decompressed the spring, pressed out the studs from the top mount, pressed in the extended studs from Toytec, compressed the new TRD Off Road springs and assembled the shock/coil. Installation went well, although the lower ball joint bolts are always a little tricky to align. Torqued everything to spec and repeated the process on the other side (which also had a seized/rust welded washer). I started the other side using the spring compressor method just to be safe. Once it was all torqued, I replaced the sway bar and skid plates, put the wheels on and lowered to the ground.

REAR
Got everything set up (I removed the spare while it was still on the ground btw), raised the rear axle at the pumpkin with my floor jack. Now, most everything I've read says the rear is easier than the front, which is true, unless you have a frozen upper strut nut, which I did (driver's side). I tried multiple methods for stopping the shock from spinning while loosening the nut, but nothing worked. Lucky for me, I have XREAS, which means there is a bolt at the top of the shock that carries hydraulic fluid to the shock. I used a 3 ft wrecking bar and wedged it on top of the XREAS bolt, keeping the shock from spinning. I then used a 17mm wrench and interlocked it with a 22mm wrench to get maximum torque on the nut. Eventually, it moved, but it fought me every inch of the way, but hey, I got my workout in!

Hammered the piss out of the XREAS strut to remove it from the lower mount and declared victory. I put one of the 6 ton jack stands under the opposite side of the rear axle and lowered the floor jack, making sure the brake lines weren't stretched. The old springs slid out nicely. I tried to fit the FJ springs in with the Daystar 1.5" spacer, but it was too tall, so I grabbed the spring compressors and compressed them about 2 inches. Tip: be careful were you put the compressors on the spring, because they can hit up against the frame or other components. I had to relocate mine a couple times.

Once the springs and spacer were in, I raised up the axle on the pumpkin a few inches, test fit the strut and then raised it up a bit more for a close fit. Then pushed the strut onto the lower mount, but had to use my dead blow hammer to get it on. Once it was well on, I inserted the lower strut bolt and starting tightening and that pressed the strut bushing on the rest of the way. I was surprised to see a bit of a gap between the bushing and the axle, but remember reading that others had experienced the same issue, so it must just be how it fits. Carefully aligned the upper strut and raised the axle more, until it was all the way seated on the bushing. Installed the upper bushings, washer and nut. Repeated the process on the other side. Torqued everything to spec, wheels on, lowered it to the floor and torqued all lug nuts to 83 ft lbs. Cleaned up and dealt with the dead battery from running the radio too long, haha of course.

Also, since my mud flaps were tearing off, I helped them along. Took the off, and removed the mud flap part, but kept the rest of the plastic wheel well covering and put it back on.

HOW DOES IT RIDE?
Took it to the carwash and snapped some pics. The ride is a bit softer/bouncier than XREAS, but it's more like a truck and to me how it should be from the factory. Probably the opposite of harsh. I drove over some speed bumps at the dealership and could just fly over them and barely noticed them. AMAZING! With XREAS, I would've had to slow way down and even then it was a harsh drop. No more. Freeway driving felt fine. I didn't have any problems with the back end that I was fearing. It didn't step out on any turns or shake side to side, just a little bouncier on some of the bumps, again, more like a truck. As I was leaving the dealership, I saw a guy picking up his brand new Tacoma TRD Off Road and could tell his truck moved the same way my setup does now, a little bouncier.

BEST HELPFUL TOOLS
  • Craftsman C3 19.2V impact wrench (which claims to have 200 ft-lb of torque) torqued my lower ball joint nuts right off (that just sounds wrong)
  • Ratcheting wrenches, they are amazing, get a set with 12, 14, 15, 16, 17mm if you can
  • 3ft wrecking bar
  • Dead blow hammer
  • Vice (I used that and the end of my floor jack handle to press out the old and press in the new top mount studs), found a 5 inch Craftsman on craigslist for $40
  • Spring compressors, 2 sets (they're not that scary, just have to be careful and go slow) rented from O'reilly's for free
  • 6 ton jack stands (again 3 ton are too small IMO)
  • Patience
  • Determination
 

Attachments

  • IMG_1838.jpg
    IMG_1838.jpg
    137.6 KB · Views: 1,135
  • IMG_1842.jpg
    IMG_1842.jpg
    130 KB · Views: 1,151
  • IMG_1841.jpg
    IMG_1841.jpg
    127.5 KB · Views: 1,132
  • IMG_1844.jpg
    IMG_1844.jpg
    127 KB · Views: 1,187
Well, it's all finished. I dropped it off at the local dealership for a 4 wheel alignment. It was a battle royale of rusted-seized bolts!

FRONT
I started with the front using the no spring compressor method (although I had 2 sets of compressors just in case). Got all 4 wheels off the ground and used the 6 ton jacks stands in the front and 3 ton in the rear. I would recommend 6 tons all the way around if I were to do it again, 3 ton stands are too weak IMHO. Removed the skid plates and disconnected all 4 XREAS shocks at the check valves. The check valves weren't hard to disconnect, but I did have to buy a 22mm wrench for the rear because the crescent wrench was too big to fit in the space.

After disconnecting the sway bar links, upper shock bolt (the single one up top), lower shock bolt, and using a floor jack to jack up the lower control arm, I removed the lower ball joint bolts. When I lowered the floor jack, nothing moved. I saw in pictures of others who had used this method and saw the lower control arm dropped significantly. We then loosened the cam adjustment bolts after marking them up for alignment. Again, the lower control arm did not drop. At this point we couldn't tell if the spring had been so compressed over time that it was sagging or if something was seized and there was still pressure on the spring. To be safe, we put the upper shock bolt back on and switched over to the spring compressor method. Got the shock and spring out, compressed the spring and sure enough, the upper washer was rusted to the shock shaft. Without the upper shock nut on, we basically had a bomb, so glad we went with the compressor method. Hammered the crap out of the washer/bushing until the washer broke free and it was easy after that.

Decompressed the spring, pressed out the studs from the top mount, pressed in the extended studs from Toytec, compressed the new TRD Off Road springs and assembled the shock/coil. Installation went well, although the lower ball joint bolts are always a little tricky to align. Torqued everything to spec and repeated the process on the other side (which also had a seized/rust welded washer). I started the other side using the spring compressor method just to be safe. Once it was all torqued, I replaced the sway bar and skid plates, put the wheels on and lowered to the ground.

REAR
Got everything set up (I removed the spare while it was still on the ground btw), raised the rear axle at the pumpkin with my floor jack. Now, most everything I've read says the rear is easier than the front, which is true, unless you have a frozen upper strut nut, which I did (driver's side). I tried multiple methods for stopping the shock from spinning while loosening the nut, but nothing worked. Lucky for me, I have XREAS, which means there is a bolt at the top of the shock that carries hydraulic fluid to the shock. I used a 3 ft wrecking bar and wedged it on top of the XREAS bolt, keeping the shock from spinning. I then used a 17mm wrench and interlocked it with a 22mm wrench to get maximum torque on the nut. Eventually, it moved, but it fought me every inch of the way, but hey, I got my workout in!

Hammered the piss out of the XREAS strut to remove it from the lower mount and declared victory. I put one of the 6 ton jack stands under the opposite side of the rear axle and lowered the floor jack, making sure the brake lines weren't stretched. The old springs slid out nicely. I tried to fit the FJ springs in with the Daystar 1.5" spacer, but it was too tall, so I grabbed the spring compressors and compressed them about 2 inches. Tip: be careful were you put the compressors on the spring, because they can hit up against the frame or other components. I had to relocate mine a couple times.

Once the springs and spacer were in, I raised up the axle on the pumpkin a few inches, test fit the strut and then raised it up a bit more for a close fit. Then pushed the strut onto the lower mount, but had to use my dead blow hammer to get it on. Once it was well on, I inserted the lower strut bolt and starting tightening and that pressed the strut bushing on the rest of the way. I was surprised to see a bit of a gap between the bushing and the axle, but remember reading that others had experienced the same issue, so it must just be how it fits. Carefully aligned the upper strut and raised the axle more, until it was all the way seated on the bushing. Installed the upper bushings, washer and nut. Repeated the process on the other side. Torqued everything to spec, wheels on, lowered it to the floor and torqued all lug nuts to 83 ft lbs. Cleaned up and dealt with the dead battery from running the radio too long, haha of course.

Also, since my mud flaps were tearing off, I helped them along. Took the off, and removed the mud flap part, but kept the rest of the plastic wheel well covering and put it back on.

HOW DOES IT RIDE?
Took it to the carwash and snapped some pics. The ride is a bit softer/bouncier than XREAS, but it's more like a truck and to me how it should be from the factory. Probably the opposite of harsh. I drove over some speed bumps at the dealership and could just fly over them and barely noticed them. AMAZING! With XREAS, I would've had to slow way down and even then it was a harsh drop. No more. Freeway driving felt fine. I didn't have any problems with the back end that I was fearing. It didn't step out on any turns or shake side to side, just a little bouncier on some of the bumps, again, more like a truck. As I was leaving the dealership, I saw a guy picking up his brand new Tacoma TRD Off Road and could tell his truck moved the same way my setup does now, a little bouncier.

BEST HELPFUL TOOLS
  • Craftsman C3 19.2V impact wrench (which claims to have 200 ft-lb of torque) torqued my lower ball joint nuts right off (that just sounds wrong)
  • Ratcheting wrenches, they are amazing, get a set with 12, 14, 15, 16, 17mm if you can
  • 3ft wrecking bar
  • Dead blow hammer
  • Vice (I used that and the end of my floor jack handle to press out the old and press in the new top mount studs), found a 5 inch Craftsman on craigslist for $40
  • Spring compressors, 2 sets (they're not that scary, just have to be careful and go slow) rented from O'reilly's for free
  • 6 ton jack stands (again 3 ton are too small IMO)
  • Patience
  • Determination

Looks great. Yeah those springs intimidate me a little. Thanks for the write up of all the tools you had used. I think patience is key to most projects.
 
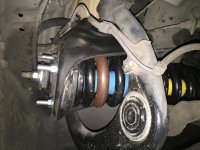
Pressed in the Energy Bushings/Coil questions

Slid right in, no fighting. I have been doing some reading and it seems everyone is using the fj springs. I just want to leave well enough alone and just replace the shocks. Will I have any issue with the fitment of the shock by not using the fj coils? Thanks everone
 

Attachments

  • image.jpg
    image.jpg
    135.2 KB · Views: 994
Last edited:
Slid right in, no fighting. I have been doing some reading and it seems everyone is using the fj springs. I just want to leave well enough alone and just replace the shocks. Will I have any issue with the fitment of the shock by not using the fj coils? Thanks everone

The Taco TRD Bilsteins may be too long for stock coils. They could possibly extend too far and dislodge the spring, that is why people go with a taller spring. I used an FJ spring and Daystar 1.5" spacer to compensate.

After riding with the rear Taco shocks, I agree that they are a bit too soft for the 4Runner, they just can't handle the weight very well. I'm considering some 5100s or Toytec Boss rear shocks instead. I'll see what's on sale come Black Friday.

But it's worth trying out to see if it meets your needs, because if you want to switch the shocks out, I think it's the easiest component to change, only 1 bolt and 1 nut (which won't be seized anymore). Just my experience.
 
Rear shocks

The Taco TRD Bilsteins may be too long for stock coils. They could possibly extend too far and dislodge the spring, that is why people go with a taller spring. I used an FJ spring and Daystar 1.5" spacer to compensate.

After riding with the rear Taco shocks, I agree that they are a bit too soft for the 4Runner, they just can't handle the weight very well. I'm considering some 5100s or Toytec Boss rear shocks instead. I'll see what's on sale come Black Friday.

But it's worth trying out to see if it meets your needs, because if you want to switch the shocks out, I think it's the easiest component to change, only 1 bolt and 1 nut (which won't be seized anymore). Just my experience.

That's too bad that they area a little soft. I did some measuring and found that the stock shocks are 1/2 inch shorter than the taco Bilstiens. So I'm just going to do it. I don't think it should matter too much. And even at full articulation, I don't think it should be an issue.
 
That's too bad that they area a little soft. I did some measuring and found that the stock shocks are 1/2 inch shorter than the taco Bilstiens. So I'm just going to do it. I don't think it should matter too much. And even at full articulation, I don't think it should be an issue.

Well the wife doesn't think it's bad at all, but then again, she's not the one that drives it everyday. I thinks it's okay for now, but I'm still looking for a deal on some 5100s. Let me know how it feels to you.
 
Swap Done

Just got the swap finished at my buddies shop. I was going to attempt it myself, but my wife thought I was crazy. And it's hard being down one vehicle. Way too many kids stuff! Anyways, I am happy almost 1.5 lift in the front, and now the truck feel so different. Rides way nicer now. The xreas were shot. Also got few other things done as well, axles, and new sway bar in the back. It's like a new truck. Now I don't have that nosed down feeling. It's such a bang for your buck swap, I'm very happy.
 
Last edited:
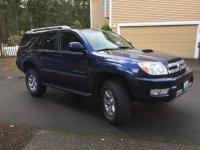
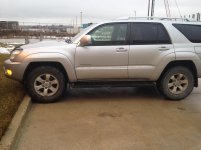
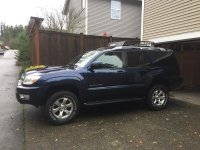
Before picture

This picture was taken before it went into the shop.
 

Attachments

  • image.jpg
    image.jpg
    134.4 KB · Views: 1,116
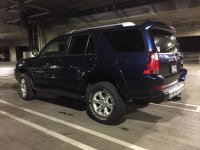
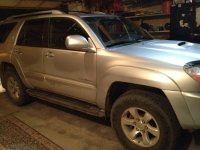
After pic

Here she is after i picked her up. In all the gains in the front is 1 1/4 inch. Very happy with it. And the different feel altogether with the new suspension. I'll update with a better pic, and give her a bath!
 

Attachments

  • image.jpg
    image.jpg
    133.3 KB · Views: 1,020
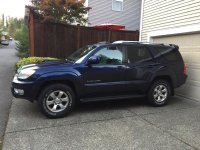
Here is my before and after. Got about 2.5" up front and 2" in the rear.
 

Attachments

  • IMG_1646.jpg
    IMG_1646.jpg
    137.9 KB · Views: 954
  • IMG_1865.jpg
    IMG_1865.jpg
    136.5 KB · Views: 1,021
Tacoma TRD coils + Bilsteins

Looking at this front suspension kit on craigslist to upgrade the stock suspension of my '05 4R Sport (first post on the forum! bought 4R last week):

FOR SALE: Ride height adjustable bilstein 5100 front coil overs with stock 2010 TRD off-road springs. (plus taco ULA's). 2 years old. Cost$250

A few questions...
- is this kit worth $250?
- How seamlessly will they fit? I am assuming about 1-2 inches lift up front?
- Recommendations for rear suspension upgrade that would work well with the above set-up?

00k0k_frERg251TtQ_600x450.jpg
 
[email protected] with the tacoma offroad coils will give you well over 3" fyi so you will need to plan on UCA's..

I have them set at .85 with the 5100's and am sitting at 2.5"

Even with the progressive coild preloaded, I still wish it was more firm, and I have a v6...
do you have spacers? also, what are you running on the back?
 
Looking at this front suspension kit on craigslist to upgrade the stock suspension of my '05 4R Sport (first post on the forum! bought 4R last week):

FOR SALE: Ride height adjustable bilstein 5100 front coil overs with stock 2010 TRD off-road springs. (plus taco ULA's). 2 years old. Cost$250

A few questions...
- is this kit worth $250?
- How seamlessly will they fit? I am assuming about 1-2 inches lift up front?
- Recommendations for rear suspension upgrade that would work well with the above set-up?

If that's $250 CAD, then it's not terrible. I would offer $200 CAD though, because it's only the fronts. If that's USD, I would offer $150.

They will be a direct replacement (no modification required) and it looks like from the grainy picture that it's set at the 0.85" perch. The springs gave me about 1.5" of lift. The shock will add 0.85" so 2.35" of total lift up front.

For the rear there are lots of spring and shock combos. Several have done Bilstein 5100s with FJ springs. I used FJ springs with a 1.5" Daystar spacer and Taco TRD Off Road shocks. I went with the Daystar spacer because I also wanted to keep some forward rake. FJ springs give about 1/2" of lift in the rear. The rear 5100s don't add any lift as they are not height adjustable like the fronts. OME is another option for springs/shocks.

You can frequently find some used FJ springs for sale on here, on the FJ forum or on Craigslist. You can also buy some new Moog FJ springs, but some have reported fitment issues.

Hope that helps. Good luck and congrats on the new 4Runner.
 
do you have spacers? also, what are you running on the back?

No spacers. in the rear I have the Moog FJ coils which dont seat very nicely but they work, I got about 1.5" of lift with them. this gives an ever-so -slight rake over my 2.5" lifted front. For rear shocks I have 5th gen Tokiko's which are firmer than the taco yellow bilsteins, any you can get them cheap or free. I'm pretty happy with the feel of the back. much better than stock at least. Im taking out the front springs next week and putting in the FJ 4x4 moog coils for a little extra stiffness.

Selling tacoma suspension pieces in the for sale section fyi (although you are in canada.. I will be in toronto but im not sure that helps much)

front 5100 set at .85" and tacoma offroad coils (+2.5")
rear Fj moog coils/5th gen t4r tokiko shocks (+1.5)
265/70/17" cooper discoverer AT3
75CC945B-D890-4958-89E9-C20D32357432_zpsqujrkuna.jpg~original
 
Looking at this front suspension kit on craigslist to upgrade the stock suspension of my '05 4R Sport (first post on the forum! bought 4R last week):

FOR SALE: Ride height adjustable bilstein 5100 front coil overs with stock 2010 TRD off-road springs. (plus taco ULA's). 2 years old. Cost$250

A few questions...
- is this kit worth $250?
- How seamlessly will they fit? I am assuming about 1-2 inches lift up front?
- Recommendations for rear suspension upgrade that would work well with the above set-up?

As a side note, you probably have XREAS suspension which means you'll need to replace all corners at the same time. I don't have an issue with the Taco TRD Off Road progressive coils in the front, but I realize they aren't for everyone. They are definitely softer than stock though. Kind of depends what you want. I wonder if the softer coils are better for off road than the Moog FJ's and the Moog FJ's better on road? I haven't seen any comparisons on that, but I wonder.
 
No spacers. in the rear I have the Moog FJ coils which dont seat very nicely but they work, I got about 1.5" of lift with them. this gives an ever-so -slight rake over my 2.5" lifted front. For rear shocks I have 5th gen Tokiko's which are firmer than the taco yellow bilsteins, any you can get them cheap or free. I'm pretty happy with the feel of the back. much better than stock at least. Im taking out the front springs next week and putting in the FJ 4x4 moog coils for a little extra stiffness.

Selling tacoma suspension pieces in the for sale section fyi (although you are in canada.. I will be in toronto but im not sure that helps much)

front 5100 set at .85" and tacoma offroad coils (+2.5")
rear Fj moog coils/5th gen t4r tokiko shocks (+1.5)
265/70/17" cooper discoverer AT3

Since you've swapped out the fronts before already, I wonder how fast you can do it the 2nd time!?! I'll bet you could do it in under 3 hours.

Let us know how the new FJ Moog coils ride.
 
I drove around with the tacoma setup in the front and the xreas in the rear for a week or so before I could get the time to deal with the rusted upper rear shock bolts since they were completely rusted on (I ended up breaking the shock shafts in the removal process as they just wouldn't turn.

If you disconnect the front xreas lines at the reservoir on the frame rail, you can remove the front without losing a drop of fluid. Just pull the shock and lines together.
 

Members online

Forum statistics

Threads
278,316
Messages
3,554,112
Members
248,016
Latest member
Advally Service

Trending content

Back
Top