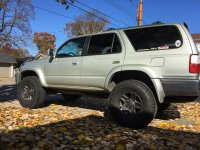
Thor or: How I Learned to Stop Worrying and Love the Vibrations (build thread)

Nice rig! You had the vibrations with the 4th gen wheels too? That's literally so weird lol. That has to be my biggest gripe with these trucks, almost all of them I've driven have had just a little bit around 71mph, some much worse and at more speeds.

Thanks!

Yeah, vibrations with the 4th gen wheels, 2nd gen Tacoma wheels and street tires, and now the third set of tires on the 3rd gen 5 stars. It's a high enough frequency that it's either got to be CVs or driveshaft, but 3 sets of CVs, two driveshafts, and 1° pinion angle later it's still not fixed. I'm tired of worrying about it though. When it breaks something, I'll know what the vibration is.
 
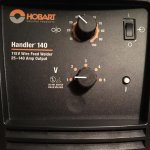
Not really a big update, just put the 285 KO2s back on. Probably going to buy a welder on Black Friday if there are any big sales and stick the sliders on the following weekend while my fiancee is working ...if it's not snowing or something dumb.

Unrelated: maple trees suck. I raked my yard like 3 days ago.
 

Attachments

  • IMG_8143.jpg
    IMG_8143.jpg
    134.9 KB · Views: 740
Beat the pinch welds in using the method [MENTION=116387]Unner[/MENTION] described in this post in his build thread. Definitely the most time consuming part is just getting everything apart to get to the pinch welds. Having a wet rag to "quench" the hot plastic fender liner is clutch.

Unner do you happen to know the part number for those "grommets"? I broke four or five of them.

Also reinstalled the front sway bar with 2nd gen rear endlinks and poly bushings.

Between the reduced body roll and additional clearance, the 285s don't seem to rub anymore, but I'm sure they will if I stuff the tires at some point.
 
Beat the pinch welds in using the method [MENTION=116387]Unner[/MENTION] described in this post in his build thread. Definitely the most time consuming part is just getting everything apart to get to the pinch welds. Having a wet rag to "quench" the hot plastic fender liner is clutch.

Unner do you happen to know the part number for those "grommets"? I broke four or five of them.

Also reinstalled the front sway bar with 2nd gen rear endlinks and poly bushings.

Between the reduced body roll and additional clearance, the 285s don't seem to rub anymore, but I'm sure they will if I stuff the tires at some point.

Glad my post was helpful! Unfortunately I do not know the part number for those grommets.
 
After finally getting around to buying a welder, I got the 4xinnovations sliders I've had in my basement for six months welded together. I still need to paint them and then discover how badly I fit them up whenever it stops snowing long enough to weld them to the frame, but it's a start at least. Also, flux core is gross and I'm not showing y'all a closeup of my welds.

Be jealous of my fab shop. I only set the yard on fire once!

ktQMRU0.jpg

TY3Hdxd.jpg

Bnt0Crp.jpg


(edited because sideways pics)
 
Last edited:
I only set the yard on fire once!

This is the best sentence I've read all day.

Unseasonably snowy so far here, so frustrating when you're trying to get stuff done.

I am jealous of your Am fabricator status but your workshop looks about right to me.
 
This is the best sentence I've read all day.

Unseasonably snowy so far here, so frustrating when you're trying to get stuff done.

I am jealous of your Am fabricator status but your workshop looks about right to me.

SO frustrating! When we moved to KY, I told my (now fiance) that I didn't care where we lived or what our house looked like as long as I got a good garage.

What's the one thing our house doesn't have?

Could be worse, she didn't kick me out for the yard fire.
 
SO frustrating! When we moved to KY, I told my (now fiance) that I didn't care where we lived or what our house looked like as long as I got a good garage.

What's the one thing our house doesn't have?

Could be worse, she didn't kick me out for the yard fire.

Well, it's a very airy 'garage'
and that was mighty nice of your fiance. :tongue1:
 
No big updates, still waiting for good weather and free time to weld my sliders on. I did order a Coastal Offroad front bumper kit that should be here next week, so I hopefully will be able to put that together and get the sliders on sometime in March.

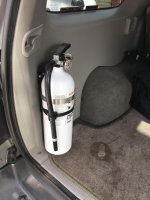
Did accessory belts and AC tensioner pulley today, and finally got around to mounting my fire extinguisher. I've got big fender washers behind the panel here but I'm still not convinced this isn't going to pull thru or just end up pulling the panel off entirely. We'll see though, and at least it's not in the way anymore.

Just ignore the surf wax melted into the carpet...
 

Attachments

  • IMG_8796.jpg
    IMG_8796.jpg
    132.4 KB · Views: 694
Last edited:
No big updates, still waiting for good weather and free time to weld my sliders on. I did order a Coastal Offroad front bumper kit that should be here next week, so I hopefully will be able to put that together and get the sliders on sometime in March.

Did accessory belts and AC tensioner pulley today, and finally got around to mounting my fire extinguisher. I've got big fender washers behind the panel here but I'm still not convinced this isn't going to pull thru or just end up pulling the panel off entirely. We'll see though, and at least it's not in the way anymore.

Just ignore the surf wax melted into the carpet...

What kind of fire extinguisher is that? Have a link? Thanks.
 
:naughty:

I guess you can't embed with Imgur anymore....

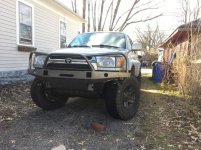
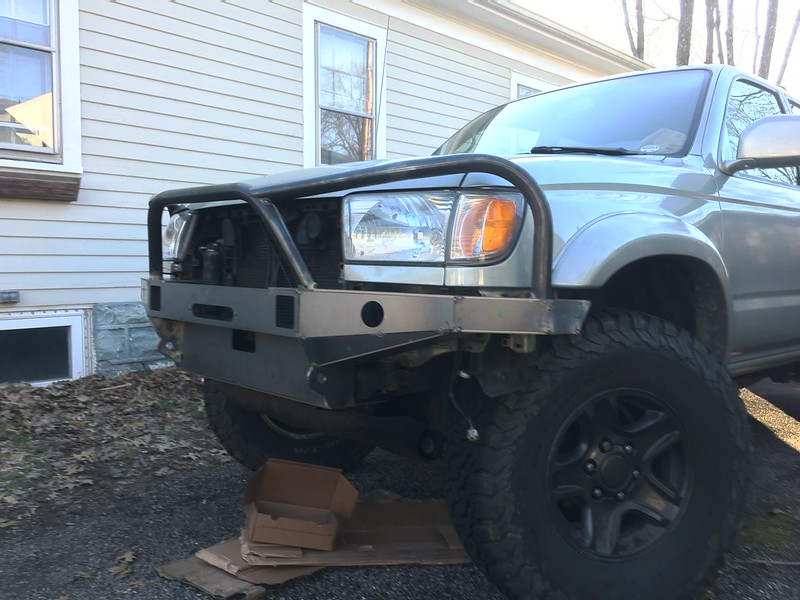
Anyway, the bumper is sitting a little cockeyed in that pic because it won't quite go the last 3/4" or so. Need to figure that out when I have time this week.

What kind of fire extinguisher is that? Have a link? Thanks.

Not sure what brand, but it's the "shop/garage" fire extinguisher Home Depot carries. I'll check this afternoon and get back to you.
 
What kind of fire extinguisher is that? Have a link? Thanks.

That is a Kidde extinguisher, they are the most popular brand. This one, from what is visible in the picture looks like it is most likely an A, B, C extinguisher which is a common choice for carrying in cars.
 
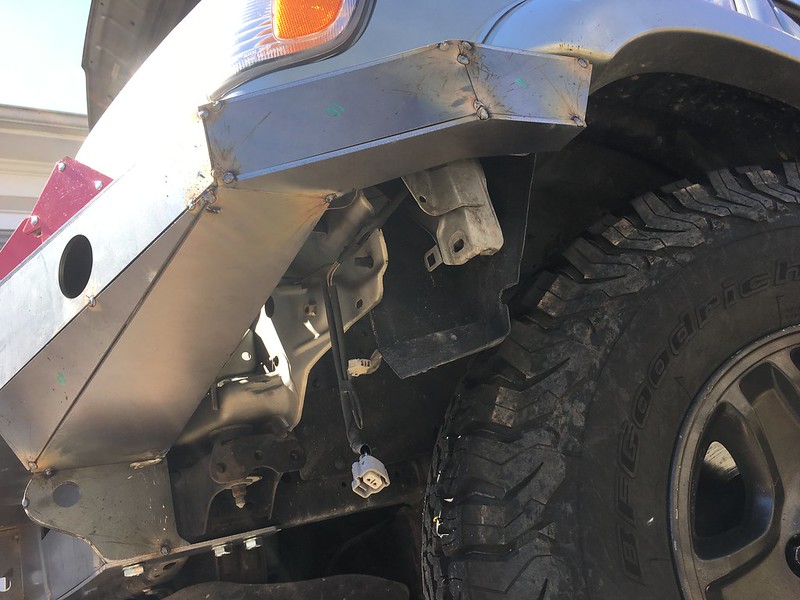
I ordered a Coastal Offroad front bumper a couple of months ago and finally had almost enough time to assemble it last weekend. So I did it anyway.

I haven't seen anyone do much of a build tutorial so I tried to document it as best I could. It took WAY longer than I expected it to, so there's not much towards the end, but no one really wants to see me spend a whole day grinding down my flux core booger welds, do they?

Anyway, here are the pics I did take:

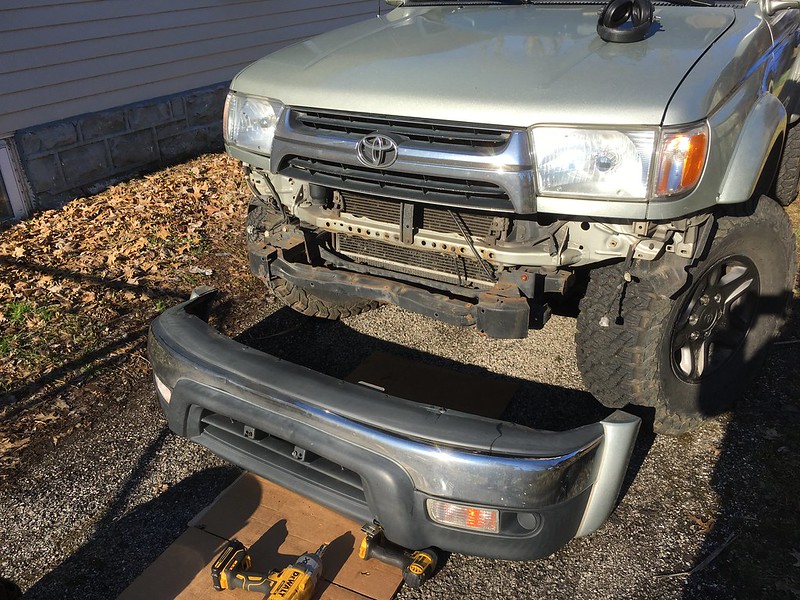
Step 1 - remove your front bumper:
46535751985_85e3a3ca53_c.jpg


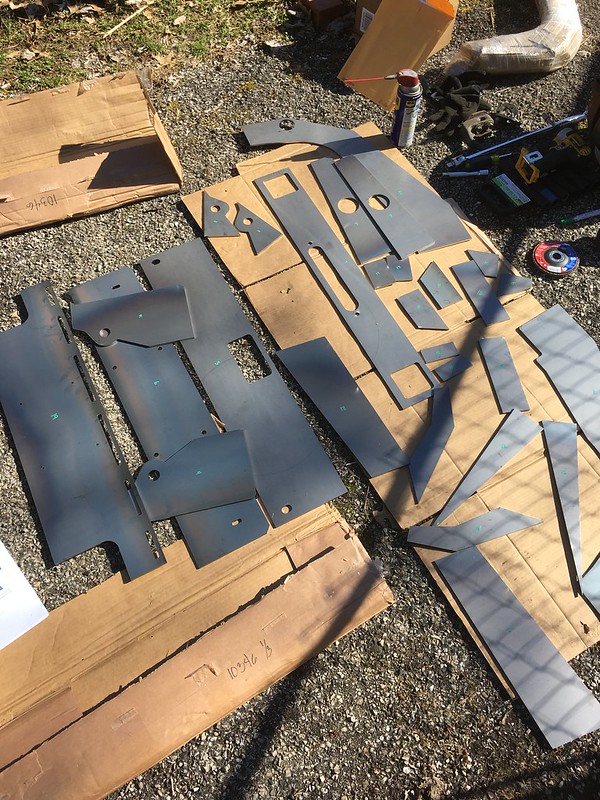
Step 2 - lay out all the pieces and use a paint marker to number them:
33574816568_ef52603c27_c.jpg


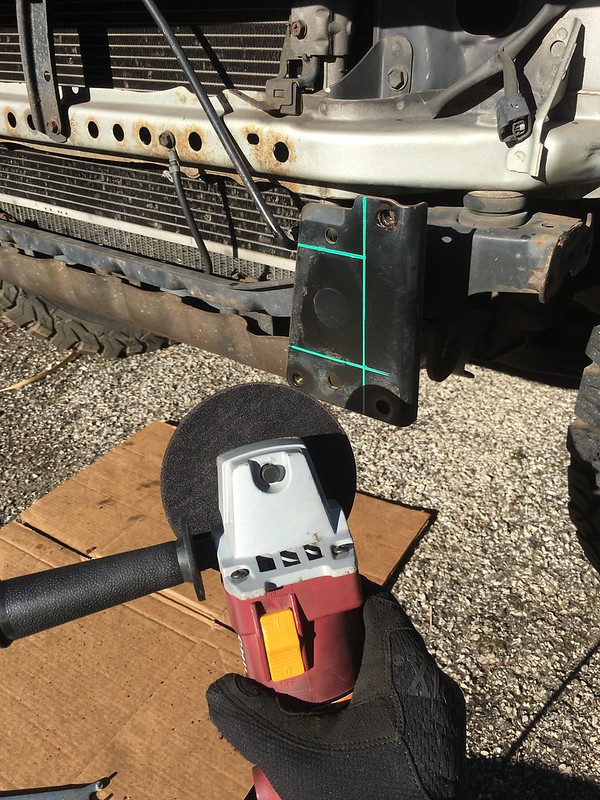
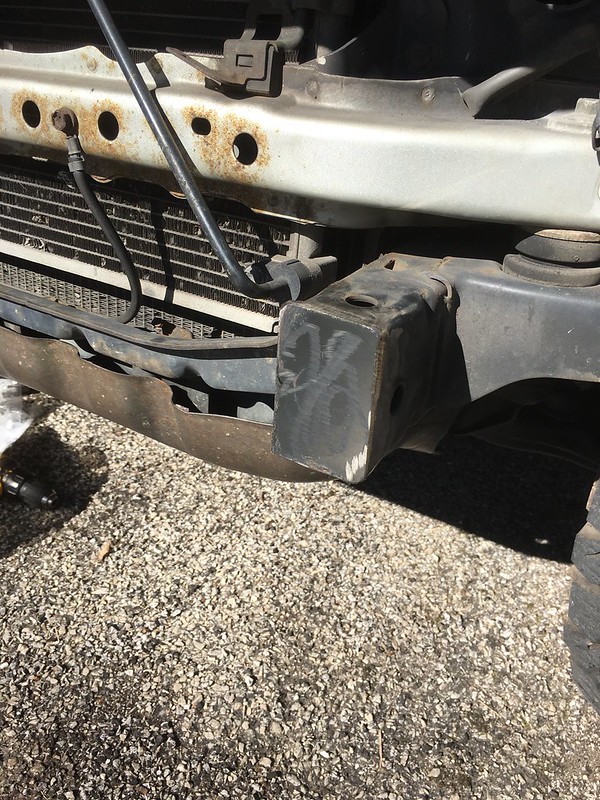
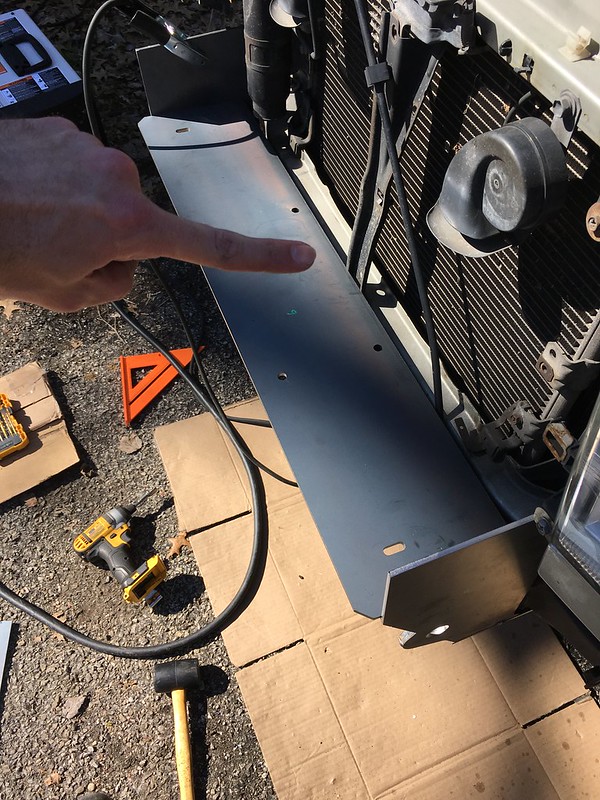
Step 3 - cut the bumper mounting flanges off the frame horns. I decided to not cut the welds and leave the frame ends capped. YMMV.
47450929281_644fc94d5c_c.jpg

32509142157_523b0cf0a6_c.jpg


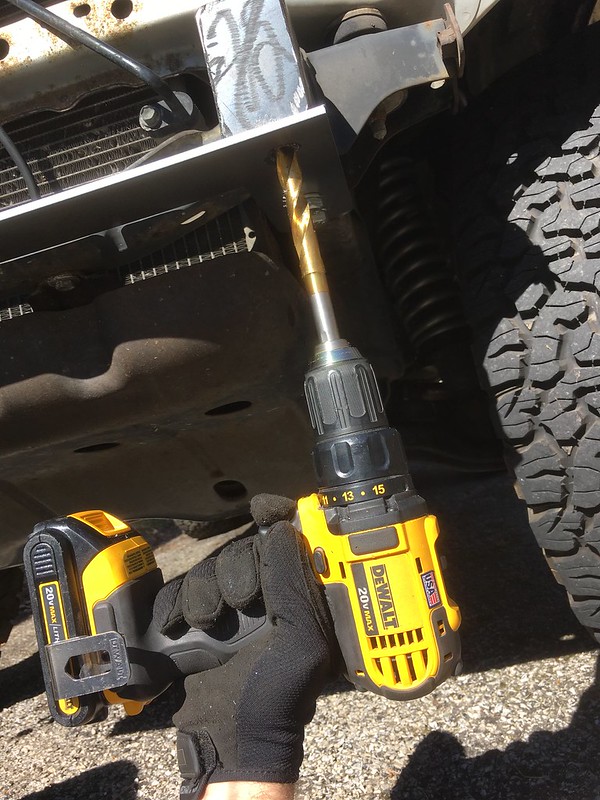
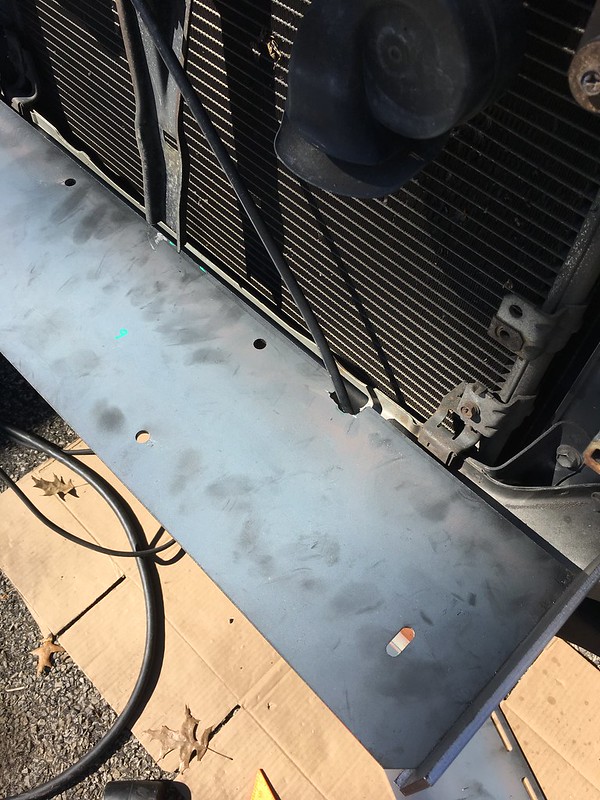
Step 4 - mount the bottom plate using the factory tiedown/tow hook bolt holes and then drill a big (9/16" in my case) hole through the frame. Start with 1/8", then 1/4", then 3/8", then 1/2" or you'll spend all damn day trying to cut a 9/16" hole in the frame.
47398016802_1c166cabc5_c.jpg


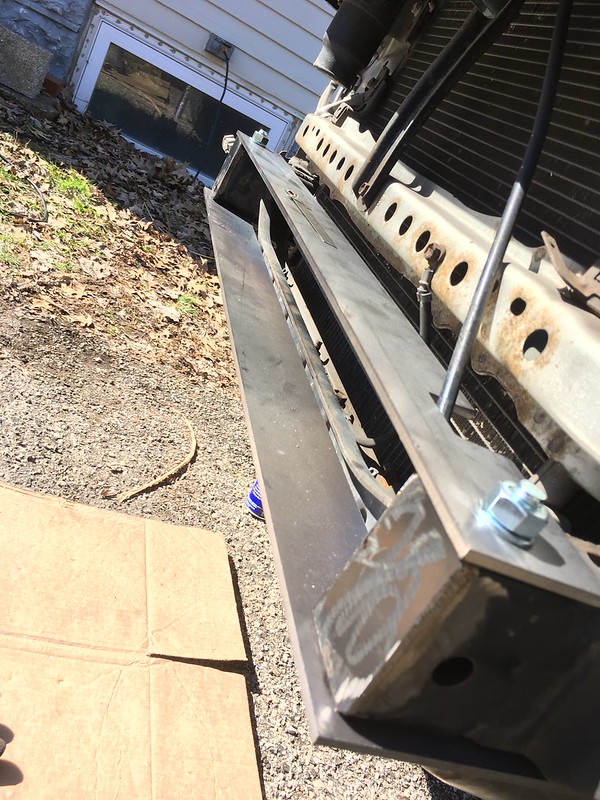
Step 5 - bolt the upper frame plate on. DO NOT forget to take these bolts back out before you mount the winch plate or you'll have to cut the bumper apart to get them out. I'm a dumbass and neglected to do that, but I thankfully only had them finger tight and was able to get it apart from the bottom. I had to open up the notch in this plate more for the AC line. Also had to bend that ground strap terminal back so it wasn't rubbing. Oh, and tack the front plate on too.
47450926381_de960f07fb_c.jpg

47451057151_b3ecb92254_c.jpg

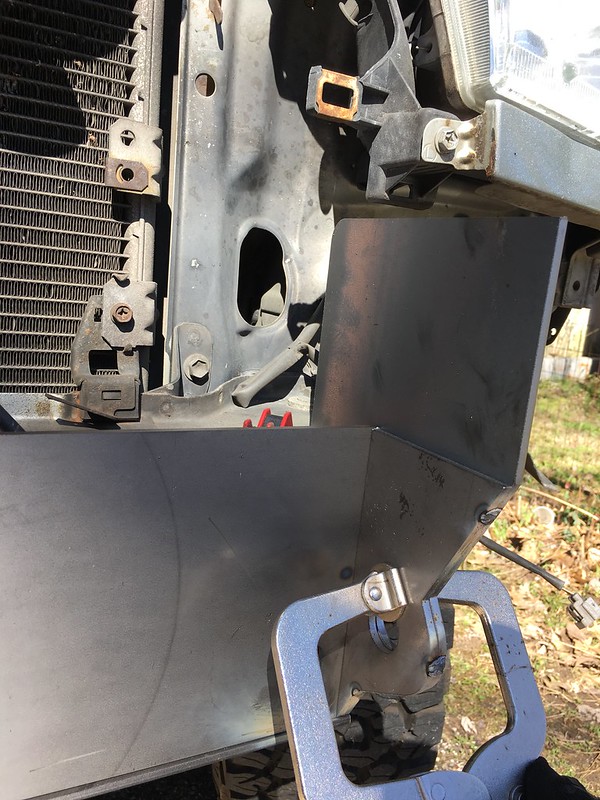
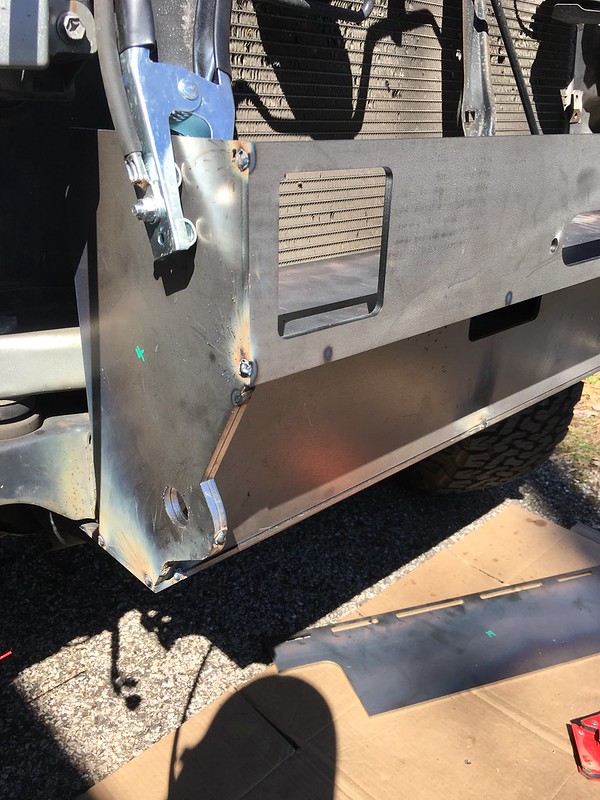
Step 6 - tack the upright plates together and then to the frame plates. You can see that the smaller upright reinforcement plate forms a shelf for the winch plate to sit on.
47398150952_c4bac2da4c_c.jpg


Step 7 - put the winch plate on. This is where I start having gripes with this kit. The upper frame plate is notched (but not enough) for the AC line, but the winch plate is not. It's also not notched for the reinforcement strap between the hood latch and lower core support. I cut that strap so the bumper will fit, but it took a TON of rigidity out of the core support, so now the hood latch twists easily. I'm going to try to modify the strap so that it mounts to the winch plate, but this is an area where the bumper kit design is lacking.

47398151222_c36df31eff_c.jpg

46727861904_b5781466b0_c.jpg
 
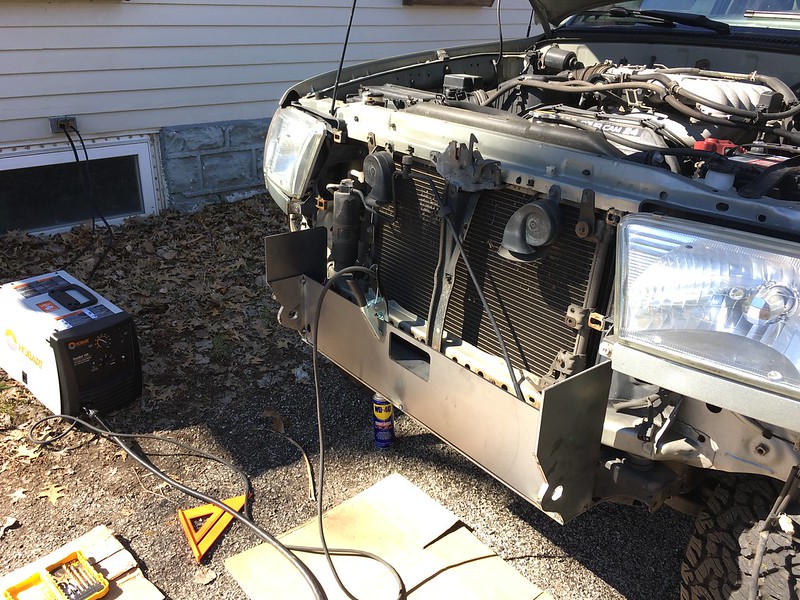
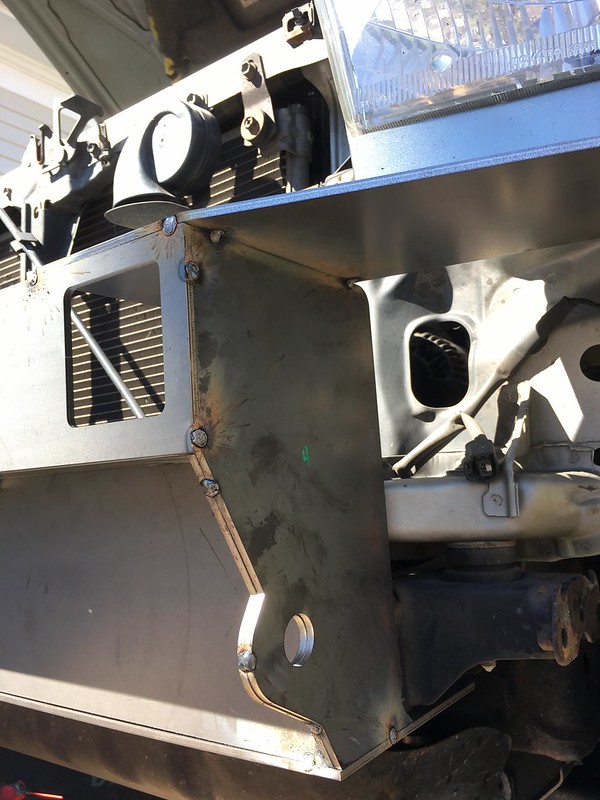
Step 8 through Step ? - tack a bunch of stuff together. I'm functionally retarded and just eyeballed all of this, but it came out pretty well. I recommend measuring ..at least some.
47398151062_e34e2d3d85_c.jpg

32509141357_4684ee64e3_c.jpg

32509141267_8b6bdd9c05_c.jpg

40484958963_c1df91cec1_c.jpg


Step ? through ?? - tack the grill tubes on. Fitting this up was a *****. I have so much more respect for fabricators who can make a roll cage fit snugly. I got LUCKY that this came out as well as it did. Plan for several hours of fit-up. I didn't take many pictures of this process for a couple reasons: 1. it was frustrating 2. it wasn't pretty 3. I nicked my left hand with a grinder wheel and bled a lot (wear good gloves, kids) 4. too much cussing.
47450928641_1db269ab4e_c.jpg


Step ?? through ??? - make sure all your tacks are good and strong, then pull the bumper off - hopefully you took the long bolts out a while ago - and finish weld it all. I focused most of my welding on the center structure between the shackle loops and the frame and the winch plate and the frame. The outer wings of the bumper I was mostly just filling in the groove between edges of the plates.

Step ??? through ???????? - Grind. Grind grind grind. Then grind more. Grind all your exterior welds down. I used a couple of 40 grit flap wheels. I wouldn't use a hard disc for this because it'll leave marks that show through the paint. Seriously though, I killed my harbor freight grinder doing this.

My wife is *****ing at me as I type this to come hang out with her, so I will post more pics later. Maybe tomorrow.

Let me say this though - despite some of the fit-up issues I had, I'm really pleased with the kit. I eyeballed the whole thing and it came out pretty damn good. I'd do it over again if I had to, but I would budget three full days from start to finish.
 

Members online

No members online now.

Forum statistics

Threads
278,316
Messages
3,554,124
Members
248,016
Latest member
Advally Service

Trending content

Back
Top