Well, as I had said some time back, I am indeed still working on the house, and the end of the summer still looks to be about when it should be done.
I have managed to do a few things here and there on the 4Runner, like while waiting for tile thinest to cure...
I'd been wanting a "half" rack, ideally in aluminum, and Rocky Mountain Racks delivered the Antero. Thanks again Alex (Flemster).
This is the extended version which is 9" longer and has an extra bar (five). That said, one of the bars is not installed as one end was mistakenly not threaded. My tap and die sets are metrics, so this install is not yet 100% done...
The extended Antero, with all hardware, weighs almost exactly 25 pounds. With the OEM rack weighing 10 pounds, that's only a net gain of 15 pounds. I'm not going to paint it. I might when it's Monstaliner time though...
Just recently I did some rear bushing replacement:
Lower rear control arms (Whiteline)
Upper rear control arms (Whiteline)
Rear sway bar (Energy Suspension)
I'd be remiss to not mention that Tim (mtbtim) and Sean's (infamousRNR) videos were an inspiration and most certainly helpful...
The videos of relevance here:
https://www.youtube.com/watch?v=nq-lzK7CPKQ
https://www.youtube.com/watch?v=IvBid-kIdiI&t=24s
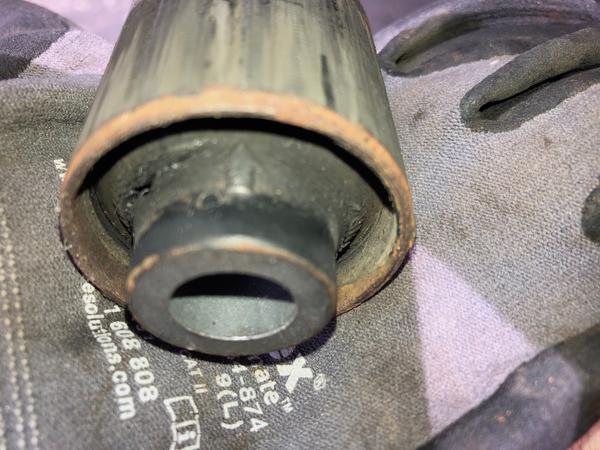
As we learned in another thread, and it's worth noting again, the lower control arm bushings are directional (note the arrow):
That said, I and others were able to press them out regardless. I used a 20-ton press that I had purchased from Harbor Freight quite a few years ago and had just re-assembled for this project...
With the correct sleeves, they came-out rather easily:
There was some light, mostly surface rust on the arms, upper & lower, so I took some time to clean them up:
After a few coats of paint, they came-out pretty nice:
I cleaned-up the fasteners too, by wire brushing them and also allowing them to sit in some vinegar for a while. Here the bolts for the lower control arms:
I also cleaned-up and painted the arm mount locations, here a photo of the lower ones:
Using ratchet straps as Tim recommends helps a great deal in order to get the arm holes to align. I also found my lifting jack stands to be very helpful. Think jack stand + bottle jack together...
While the straps can pull the rear forward or back as needed, I found these jacks also help as raising or lowering each side effectively lengthens or shortens the arms, which allowed me to get the holes lines=up. Twice the ratcheting strap was not able to get me aligned as the desired tension was between two clicks. If I had a helper, I imagine that would not have been a problem though.
Torque specs (ft-lbs):
lower arms = 107 (19mm)
upper arms = 64 (17mm)
rear sway bar bushing brackets = 14 (12mm)
For the front, I already have bushings for the steering rack and the front sway bar. Given the torque needed on the steering rack, I'll need to wait until I have a helping hand...
Speaking of the front, I also have these waiting:
Kings are currently being built, with 650 pound springs. I got what looks to be a pretty good deal ($869 delivered) too from Low Range Off-Road.
1996-2004 Toyota Tacoma OEM Performance King Shocks Front Coil Overs Only - 0'-3" Lift by King (25001-151)
I should get them in a few weeks. Brian (BrianSD_42) was most helpful in addressing my questions. Not sure what I'll do for the rear suspension just yet...
I finally picked-up a Fumoto oil drain valve that I'll likely install before I mount the RCI skid plates (3):
I pretty much decided to get Savage front and rear bumpers. I'll install this Cadillac horn kit (A, C, D & F) when the front bumper goes in...
So, plenty to keep me busy, once the house ceases to do so!