TonyB66's Ownership -> Build Thread (2000 Limited)

It doesn't take long and it's a pretty good bang for the buck mod. Mine still manage to stop the rig in lo/lo. Barely. lol

I just need to squeeze it in at a good time family-wise. Leaving early Monday morning on a biz trip... I usually spend more time with them the weekend before I depart. That said, tonight was several hours at some holiday lights park with rides and ice skating. They loved it. A couple or so hours on the 4Runner to help it stop better, to keep us safer, should be an easy sell :-)

IMGUR is the way to go. Glad to hear it is working for you. IMGUR powers Reddit.com with free image hosting for all the Reddit users. I doubt they will take away free image hosting anytime soon. With a global traffic rating of 18th most visited website in the world there is a lot of money at stake when any change is made. That same free image hosting drives users and ad revenue. :flame:

Brian, good call on IMGUR. Thanks again.
 
BTW great job with painting the undercarriage. Winter is coming, will those tires be mounted in time?

Thanks Brian. I realize the undercarriage painting is likely overkill, especially out here in CA. I just like to address things when I'm "there"... Makes me feel better I suppose.

Wheels and tires will go on after the alignment, which is of course after the suspension work is done. We don't have our Tahoe trip until the first week of April, so plenty of time. It won't see any inclimate weather until then, and maybe only a couple local trips, like to The Home Depot.

Richard at Stubbs said that my sliders will be here next Friday! I couldn't find one of my 11R vice grips, so bought two more, and those showed-up today. Richard said those would come in handy. I need to make time to find a good welder in these parts, also to do the PCK. Willing to drive a ways...
 
Got 15 minutes in tonight, which basically got it up jack stands, front wheels off, and some time to check things out a little.

I'll be using the Tacoma front brake lines which will allow me to eliminate the hard line on the caliper (banjo bolt connection). A couple questions:

1. Does the tab on that brake line get secured to the plate where the current hard line and rubber hose mate-up? It would seem so...

YGMPBF5.jpg


2. Any thoughts on a good plug or cap on the hard line for when I remove the caliper hard and rubber lines? I'll try to have a few things ready, but figured I'd ask as it could be a time-saver.

Thanks.
 
With respect to my #2 above, I found the bleeder valve caps to be decent for capping the hard lines. With respect to securing the Tacoma flex lines, I feel that I can benefit with more time to find the best routing and a way to secure them...

So, the job is not done, and I won't be back home until later in the week. I did get the driver's side done. On the passenger side, the dust shield was trimmed, the bare metal painted, and the new rotor and caliper in place.

I'd be done if not replacing the lines. The driver's side was a bit tough to break free. I needed to use a penetrant, but it finally came loose. Knowing the time it took on the driver's side, I figured it best to not rush and just finish-up after I return home. I also spent some time routing the brake line in various ways, trying to find one that might be more desirable; and also a way to secure it.

Some photos...

I keep these old rusty vice grips for jobs like these.

a6IBQzQ.jpg


Where to cut...

Hk8hfwU.jpg


I followed Spktyr's dust shield trim guidance here, and it worked very well. With limited time, it really helped.

http://www.toyota-4runner.org/3rd-g...wl-tundra-calipers-rotors-71.html#post3168705

After cutting and some filing.

MmEffoc.jpg


I used a Dremel with a cut-off wheel and rotary file.

4OzxwvK.jpg


The exposed metal was painted.

HMDfrUy.jpg


Mn5Lar7.jpg


Not happy that one of the Brembo rotors had some overspray.

jsr2dbR.jpg


The brake line retainer clips used where hard and flex lines unite have seen better days. Cleaned them up and applied a light coat of paint.

wo9Qdi8.jpg


The current driver side brake line routing...

BzhDr6D.jpg


And the driver's side, all done, minus the pads and a bleed.

FStTVZ2.jpg


The Russell speed bleeders are in the calipers. I still need to install the rear ones, and I'll do those when I do extended brake line back there, after I return home...
 
Last edited:
With respect to my #2 above, I found the bleeder valve caps to be decent for capping the hard lines. With respect to securing the Tacoma flex lines, I feel that I can benefit with more time to find the best routing and a way to secure them...

So, the job is not done, and I won't be back home until later in the week. I did get the driver's side done. On the passenger side, the dust shield was trimmed, the bare metal painted, and the new rotor and caliper in place.

I'd be done if not replacing the lines. The driver's side was a bit tough to break free. I needed to use a penetrant, but it finally came loose. Knowing the time it took on the driver's side, I figured it best to not rush and just finish-up after I return home. I also spent some time routing the brake line in various ways, trying to find one that might be more desirable; and also a way to secure it.

Some photos...

Hk8hfwU.jpg


I followed Spktyr's dust shield trim guidance here, and it worked very well. With limited time, it really helped.

http://www.toyota-4runner.org/3rd-g...wl-tundra-calipers-rotors-71.html#post3168705

After cutting and some filing.

MmEffoc.jpg


I used a Dremel with a cut-off wheel and rotary file.

4OzxwvK.jpg


The exposed metal was painted.

HMDfrUy.jpg


Mn5Lar7.jpg


Not happy that one of the Brembo rotors had some overspray.

jsr2dbR.jpg


The brake line retainer clips used where hard and flex lines unite have seen better days. Cleaned them up and applied a light coat of paint.

wo9Qdi8.jpg


The current driver side brake line routing...

BzhDr6D.jpg


And the driver's side, all done, minus the pads and a bleed.

FStTVZ2.jpg


The Russell speed bleeders are in the calipers. I still need to install the rear ones, and I'll do those when I do extended brake line back there, after I return home...

Looks good man! Only thing I dunno about is routing the brake line under the sway bar. Might be better to throw a couple small zip ties on the spindle or something..? Maybe it’s fine, hard to tell without seeing it in real life lol..
 
Looks good man! Only thing I dunno about is routing the brake line under the sway bar. Might be better to throw a couple small zip ties on the spindle or something..? Maybe it’s fine, hard to tell without seeing it in real life lol..

I hear ya on the routing, which is why I mentioned it... That said, as I recall, it's a few inches below the sway bar. It's up on jack stands for that photo, full droop with this set-up, so I believe it should be fine. I tried other ways and there are for sure more problematic paths. It was frustrating as I was watching the clock.

You have the same lines so curious what you come-up with... I return home Thu night.
 
Back from a biz trip to RTP, then it was my wife's b-day, so not much time to wrench over the weekend. I got some time in though, including today and finished the TBU, and other brake-related mods.

Russell Performance Speed Bleeders front and back.

NGkT0mI.jpg


vvsFCxU.jpg


Sonoran Steel's SS extended rear brake line.

QlsOESX.jpg


The Power Stop Z36 pads, greased-up and installed.

LuNcdBI.jpg


With the TBU installed it was time for new fluid and a chance to use those speed bleeders. Having had many aquariums over the years, I have tons of airline and that made for a snug fit. That small segment contains some of the new fluid that I can use for comparison purposes.

t7mJrlL.jpg


After a few pumps on the right rear you can still see the color difference.

gcj1VmB.jpg


And a little later I got a better match...

nyfcQoI.jpg


It went fast and I was at the front driver's side in no time.

zS6OHcO.jpg


I had the key in the ignition, playing some music and I now think the engine should have been on during the bleed. Doesn't seem all that firm while driving, so I will try again later...

Sliders should be here by the end of the week. Front and rear bumpers, not sure, but soon. Time-wise, Decembers are rough: wife's b-day, a week later our anniversary, a week after that, Christmas...

Once the sliders and bumpers are installed, then, finally the Kings front and rear. After that, wheels and tires, which are taking-up a lot of floor space.
 
Last edited:
Marker lights as turn signals?

Can marker lights be used as turn signal lights? I imagine so, with a relay possibly, but haven't done such before.

Roy at Savage said that my bumpers are likely to ship tomorrow, Friday at the latest. Here is an image of the front bumper.

0116907aab8f37501b17d2974a9ed7528e461f7509.jpg


The outermost holes are intended for turn signals, and are 2" diameter. There are plenty of "marker" light options in that size, like these.

https://smile.amazon.com/gp/product/B0784VWMXV/ref=ox_sc_saved_title_3?smid=A1EQP448COWZL4&psc=1

Roy said that some have gone with dual turn signals on each side, using the next 2" holes going inward...

As another option, I'm considering moving the turn signal lights up into the running light housing by creating a hole for that socket.

Any thoughts or ideas are welcome.
 
Can marker lights be used as turn signal lights? I imagine so, with a relay possibly, but haven't done such before.
You can easily make the side markers blink with/opposite of the turn signals. I did this on my 4Runner to supplement the turn signals on my aftermarket bumper (and I made the turn signals into switchback white/amber bulbs too). If you get a bright enough 194-type LED, you wouldn't really even have to modify the housing.

All you have to do is disconnect the ground connection for the corner light (White-Black) from ground and instead connect it to the power wire for the turn signal (Grey-Black or Green-Yellow, depending on side). With the headlights off, the corners will blink/match the turn signals. With the headlights on, the corners will blink opposite the turn signals.

At that point, you can put in a 'main' turn signal in the bumper opening, or whatever you choose.

-Charlie
 
You can easily make the side markers blink with/opposite of the turn signals. I did this on my 4Runner to supplement the turn signals on my aftermarket bumper (and I made the turn signals into switchback white/amber bulbs too). If you get a bright enough 194-type LED, you wouldn't really even have to modify the housing.

All you have to do is disconnect the ground connection for the corner light (White-Black) from ground and instead connect it to the power wire for the turn signal (Grey-Black or Green-Yellow, depending on side). With the headlights off, the corners will blink/match the turn signals. With the headlights on, the corners will blink opposite the turn signals.

At that point, you can put in a 'main' turn signal in the bumper opening, or whatever you choose.

-Charlie

Charlie, that sounds very encouraging! I believe I follow what you are saying and if so, it seems that it will accomplish what I wish. I had replaced that 194 amber running lights on the front corners with pretty bright LED ones, so I might be good in that respect.

When you say blink opposite, you mean alternate? If so, I'd want to see what that looks like. I somehow feel that it might be distracting for other drivers, but not sure. I'll Google for a video as that would help to make sure I understand.

Thanks again.
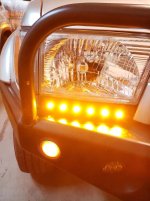
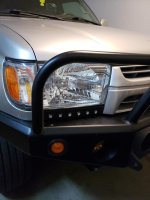
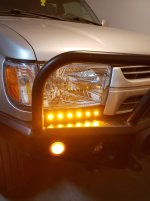
Also, I just ordered those 2" markers. I believe I can make use of them on the 4Runner, and if not, for sure on the trailer...

https://smile.amazon.com/gp/product/B0784VWMXV/ref=oh_aui_detailpage_o00_s00?ie=UTF8&psc=1
 
Last edited:
When you say blink opposite, you mean alternate? If so, I'd want to see what that looks like. I somehow feel that it might be distracting for other drivers, but not sure. I'll Google for a video as that would help to make sure I understand.

Thanks again.
Yeah, I guess you could say alternate. With the parking/head lights on: when the front turn signal is off, the light is on and when the turn signal is on, the light is off. When the There are a few vehicles that actually work this way stock (rear lights of many Chevy trucks, for example). When the parking/head lights are off, the corner lights go on and off with the turn signals.

Maybe I should take a video of how my 4Runner is setup - but the switchback LEDs (for turn signals) might confuse the issue.

-Charlie
 
Yeah, I guess you could say alternate. With the parking/head lights on: when the front turn signal is off, the light is on and when the turn signal is on, the light is off. When the There are a few vehicles that actually work this way stock (rear lights of many Chevy trucks, for example). When the parking/head lights are off, the corner lights go on and off with the turn signals.

Maybe I should take a video of how my 4Runner is setup - but the switchback LEDs (for turn signals) might confuse the issue.

-Charlie

If a picture is worth a 1,000 words, a video more? If not much trouble, it would be helpful, I imagine for the community too, not just me in this thread.

If not, I now at least realize there are options, and seemingly viable ones. Your instructions, down to the wires colors helps with experimentation.
 
If a picture is worth a 1,000 words, a video more? If not much trouble, it would be helpful, I imagine for the community too, not just me in this thread.

If not, I now at least realize there are options, and seemingly viable ones. Your instructions, down to the wires colors helps with experimentation.

I’m curious about the whole ‘switch back’ thing too, I ordered this to install with my addicted Offroad bumper https://www.srqfabrications.com/product-page/turn-signal-filler-panels

They offer them with the option of switch back but I wasn’t sure what it meant so I just went with the regular kit.. lol..
 
I’m curious about the whole ‘switch back’ thing too, I ordered this to install with my addicted Offroad bumper https://www.srqfabrications.com/product-page/turn-signal-filler-panels

They offer them with the option of switch back but I wasn’t sure what it meant so I just went with the regular kit.. lol..

I bought that same thing and I had them wire it so it syncs with the LED circle lights that came with my 4xinnovations front bumper.

I think all the switch back does is it'll show white light if the turn signal is not being used... So extra light in addition to the headlights.

Here's a couple pics of mine.

edit: rotated images, apparently they uploaded sideways if I do it via mobile
 

Attachments

  • 3.jpg
    3.jpg
    129.2 KB · Views: 403
  • 2.jpg
    2.jpg
    121.1 KB · Views: 403
  • 1.jpg
    1.jpg
    129.6 KB · Views: 407
Last edited:
I’m curious about the whole ‘switch back’ thing too, I ordered this to install with my addicted Offroad bumper https://www.srqfabrications.com/product-page/turn-signal-filler-panels

They offer them with the option of switch back but I wasn’t sure what it meant so I just went with the regular kit.. lol..

The terminology used can be confusing, and gets only worse when others misuse these, which I've seen in various accounts on the web.

Visibility works two ways: seeing and being seen. I will likely go with two turn signal indicators on each side.
 
Visibility works two ways: seeing and being seen. I will likely go with two turn signal indicators on each side.
Bingo. I run headlights/foglights with good beam patterns and cutoffs, set correctly (for seeing) - and (at least on the 4Runner) run bright marker lights and extra turn signals for being seen (controlled amount of light outside the normal headlight beams).

I put together a video of my turn signal setup:

https://youtu.be/KkMzJlFE0VQ

You can see turn signals only, turn signals with parking lights, etc. in the video. Let me know if you have more questions.

-Charlie
 
Bingo. I run headlights/foglights with good beam patterns and cutoffs, set correctly (for seeing) - and (at least on the 4Runner) run bright marker lights and extra turn signals for being seen (controlled amount of light outside the normal headlight beams).

I put together a video of my turn signal setup:

https://youtu.be/KkMzJlFE0VQ

You can see turn signals only, turn signals with parking lights, etc. in the video. Let me know if you have more questions.

-Charlie

Charlie, thanks for making the time for that video. That helps me better understanding what you meant earlier. I think alternating explains it well, at least for me. It's an attention-grabber, which is likely a positive, but I'm leaning toward turns signals firing in unison, in all scenarios.

May I ask what fog lights you decided upon? A forum member has the Baja Designs Squadron-R Sport Pair UTV LED Light Wide Cornering Amber Pattern, and I really like the pattern on those (he showed nice lighting photos in his build thread)....

They are not cheap at over 200 bucks though:

https://smile.amazon.com/gp/product/B01CO8YGKA/ref=ox_sc_saved_title_2?smid=A1Q6MC9GBY3II0&psc=1

Thanks again! Hey, you might want to consider a thread start on what you did, along with the vid. I imagine quite a few will not find it buried in this often boring discussion...
 
Last edited:
Charlie, thanks for making the time for that video. That helps me better understanding what you meant earlier. I think alternating explains it well, at least for me. It's an attention-grabber, which is likely a positive, but I'm leaning toward turns signals firing in unison, in all scenarios.

May I ask what fog lights you decided upon? A forum member has the Baja Designs Squadron-R Sport Pair UTV LED Light Wide Cornering Amber Pattern, and I really like the pattern on those (he showed nice lighting photos in his build thread)....

They are not cheap at over 200 bucks though:

https://smile.amazon.com/gp/product/B01CO8YGKA/ref=ox_sc_saved_title_2?smid=A1Q6MC9GBY3II0&psc=1

Thanks again! Hey, you might want to consider a thread start on what you did, along with the vid. I imagine quite a few will not find it buried in this often boring discussion...
You can use a trailer light converter to run the corner lights to work in unison with the turn signals at all time, instead of alternating when the parking lights are on. A google search will hopefully help you there.

I am running Rigid D2 SAE/DOT fog lights. They are lower output than true off-road lights (limited by DOT rules) and have a good cutoff. I wired them to run off my factory fog switch/wiring. I actually have a set of the BD Squadrons on order (with combo and wide cornering lenses) for my off-road lighting. Those *should* have a good off road pattern, but it doesn't look like they have a great cutoff for street driving, even in the wide cornering design. You want balanced foreground/distance lighting on the street, so fog lights that are too bright isn't a great idea.

My build thread in my signature has a lot of stuff - I'll put up a post on my lighting setup once I have the Baja Designs lights on there... but maybe a separate thread on aftermarket bumper lighting would be good too.

-Charlie
 
You can use a trailer light converter to run the corner lights to work in unison with the turn signals at all time, instead of alternating when the parking lights are on. A google search will hopefully help you there.

I am running Rigid D2 SAE/DOT fog lights. They are lower output than true off-road lights (limited by DOT rules) and have a good cutoff. I wired them to run off my factory fog switch/wiring. I actually have a set of the BD Squadrons on order (with combo and wide cornering lenses) for my off-road lighting. Those *should* have a good off road pattern, but it doesn't look like they have a great cutoff for street driving, even in the wide cornering design. You want balanced foreground/distance lighting on the street, so fog lights that are too bright isn't a great idea.

My build thread in my signature has a lot of stuff - I'll put up a post on my lighting setup once I have the Baja Designs lights on there... but maybe a separate thread on aftermarket bumper lighting would be good too.

-Charlie

Looking at trailer light converters now, thanks.

I have Rigid D2 fogs on my short list. With respect to the BD Squadrons, the Sport version as I recall has much less output, but I suppose they are also too bright for on road use. I'll need to put some more thought into where I plan to go with the lighting approach, on and off-road.

I don't believe I've viewed your build thread in a while, but it's now on my reading list! Agreed on a thread for aftermarket bumper lighting being a good idea. Thanks for the help Charlie.
 

Members online

Forum statistics

Threads
278,316
Messages
3,554,120
Members
248,016
Latest member
Advally Service

Trending content

Back
Top