Toytec 1" Body Lift

nor_cal51501

New member
First let me say, if this is redundant let me know and I'll remove it. The only writeup i could find was the 4crawler one and it seemed outdated with pictures that were still difficult for me to use. Anyways, heres my attempt on a How-To. Let me know what you all think guys. Its also on my thread, but figured it might get a bit more exposure here.

So I haven't seen anyone really do a good step by step on the body lifts so I thought I would give it a go at a simple write up. Let me preface this by saying the lift was very easy. The only part that was mind numbingly anger inducing was that Toytec doesn't tell you which length bolts you use to replace your factory ones with and they supply more bolts than needed. It would of made the process much faster and simpler if they simply added that info, and for the likes of me I can't fathom why they don't have that in the instructions. Some moron didn't do their job it seems. Anyway, rant over. Any input would be great and i'll amend the write-up if needed.

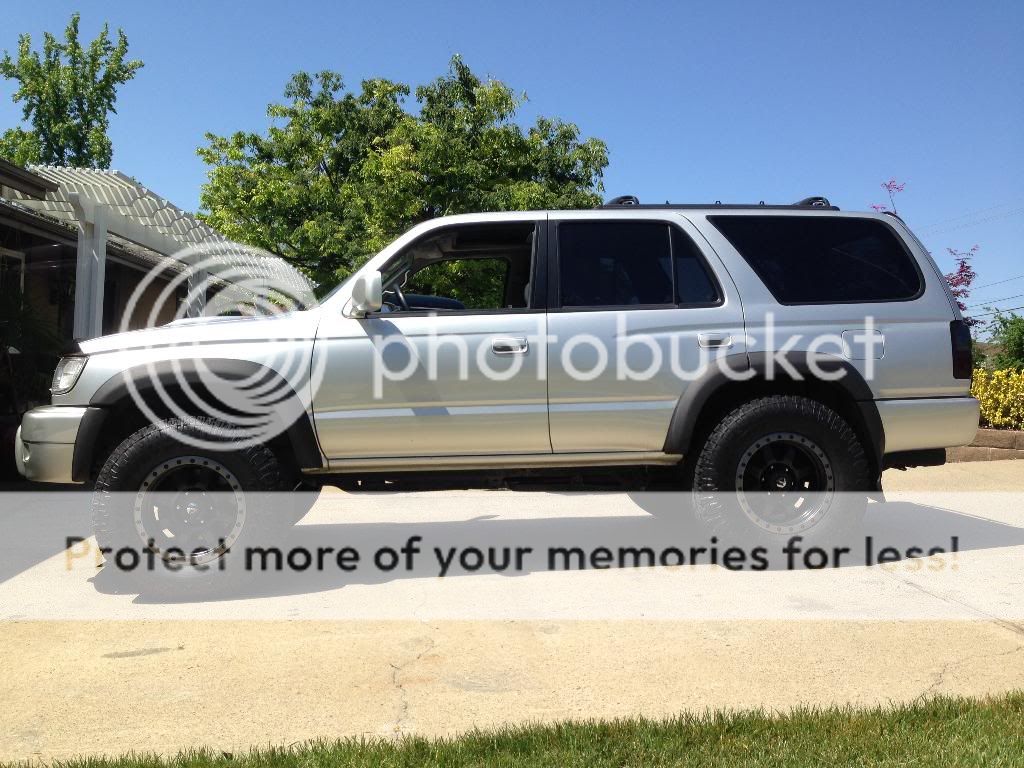
Starting Point:

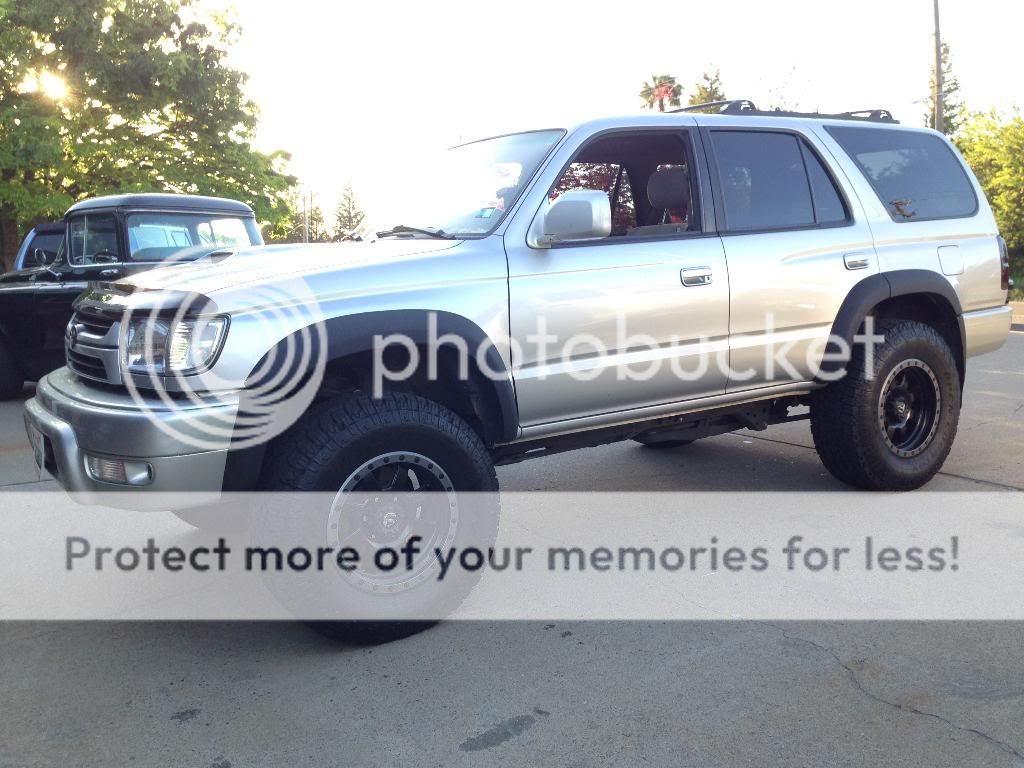
Finished Product:
Tools Needed to complete the lift:
Jack with enough lift to reach the body and extend at least 2" higher or jack plus wood blocks.
Philips screw driver
27mm socket
17mm socket
14mm deep socket
13mm socket
13mm box wrench
12mm deep socket
12mm socket
12mm box wrench

Step 1: Remove the front bumper

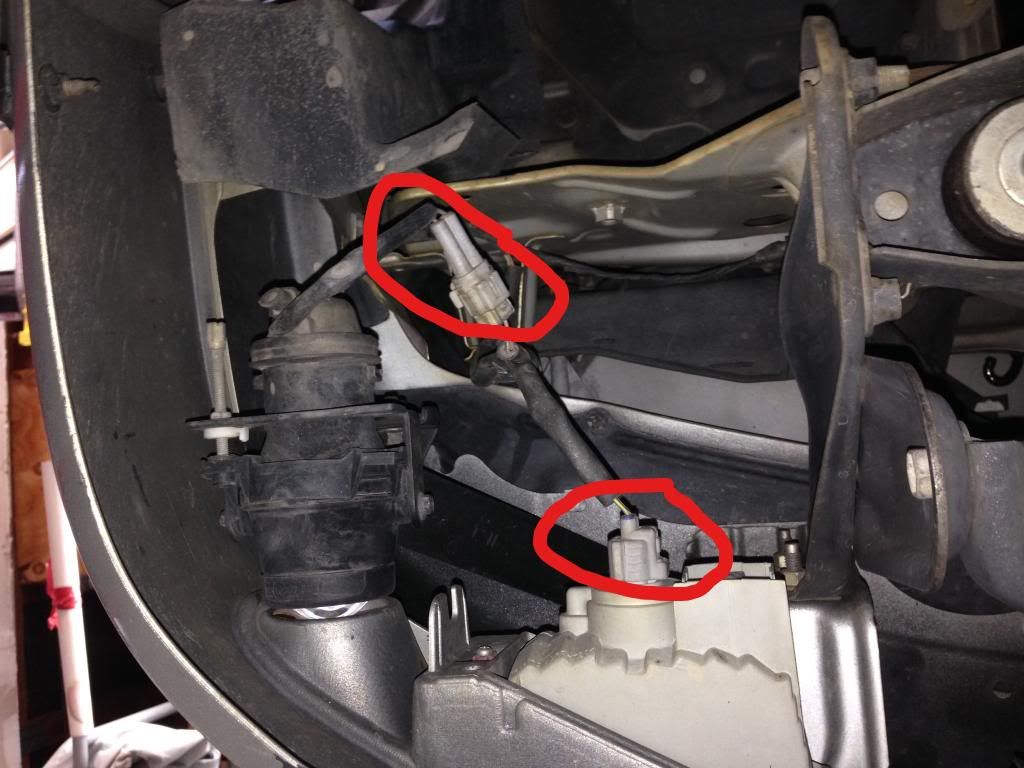
*Before unbolting the front bumper make sure to disconnect the turn signals and fog lights(if equipped).*

Drivers side

Passenger side
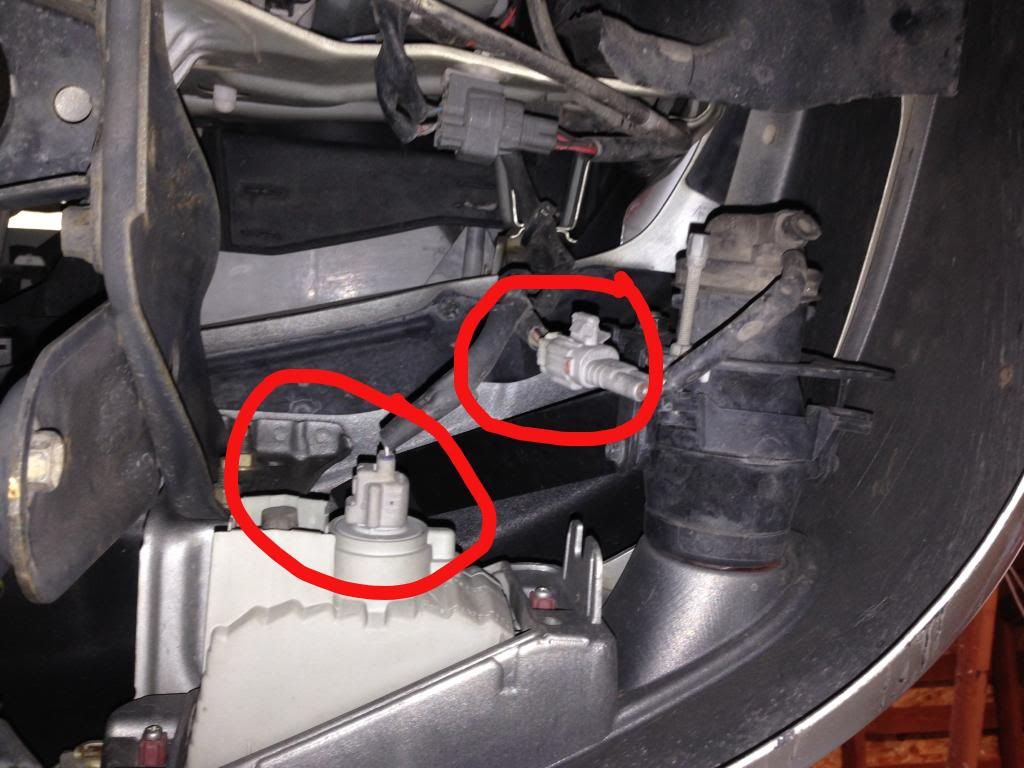
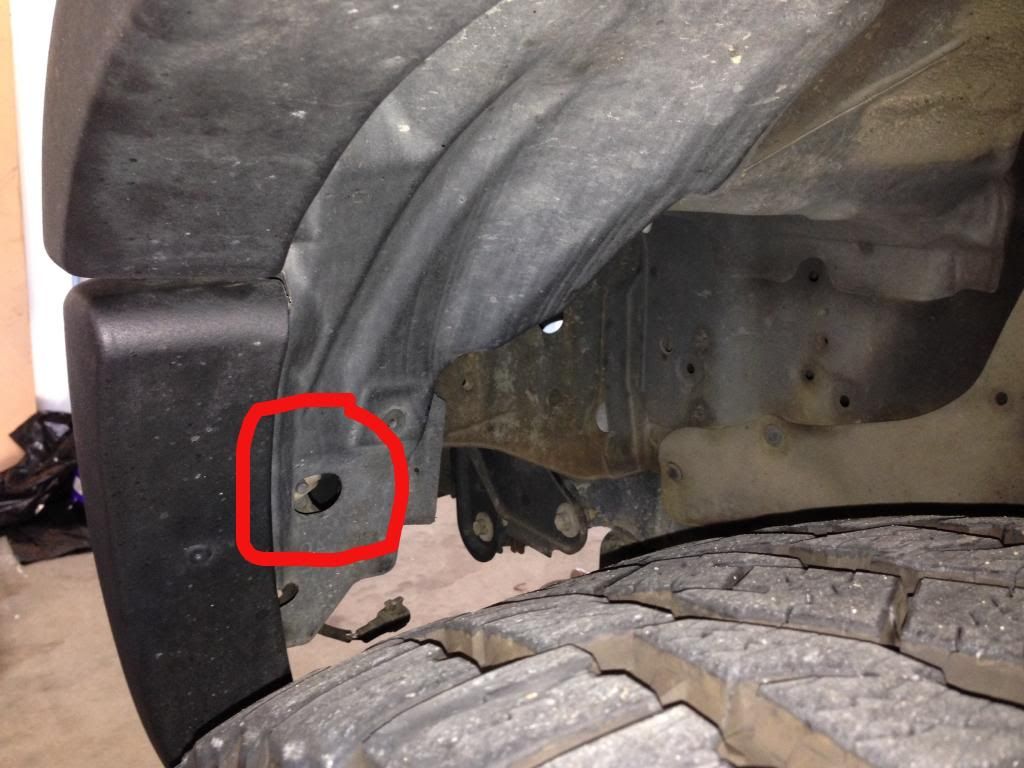
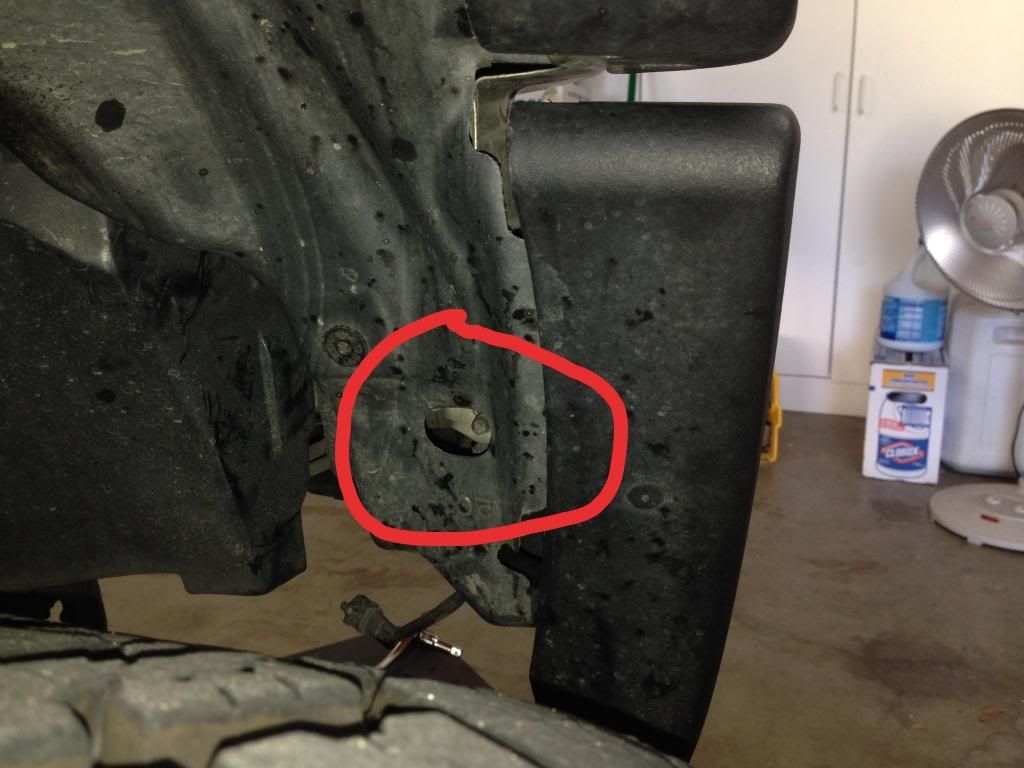
In order to remove the front bumper there are 4 bolts and 1 nut on each side of the vehicle; 4 bolts on each frame plate and 1 nut on each side in the inner wheel well mounting the bumper to the fender. The 8 bolts attaching the bumper to the frame are 14mm and the nuts attaching the bumper to the fender are 12mm.

Inner wheel well opening to remove nut attaching bumper to fender - Drivers Side

Inner wheel well opening to remove nut attaching bumper to fender - Passenger Side

The drivers side frame plate(looking from the front of vehicle)
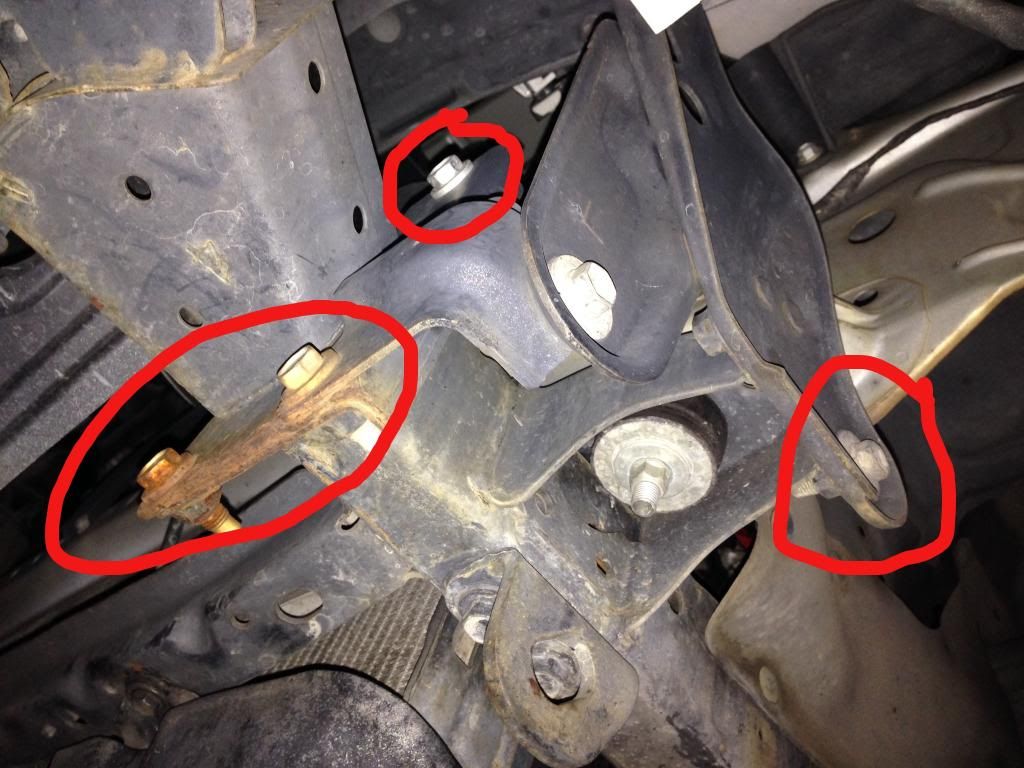

The passenger side frame plate(looking from the front of vehicle)
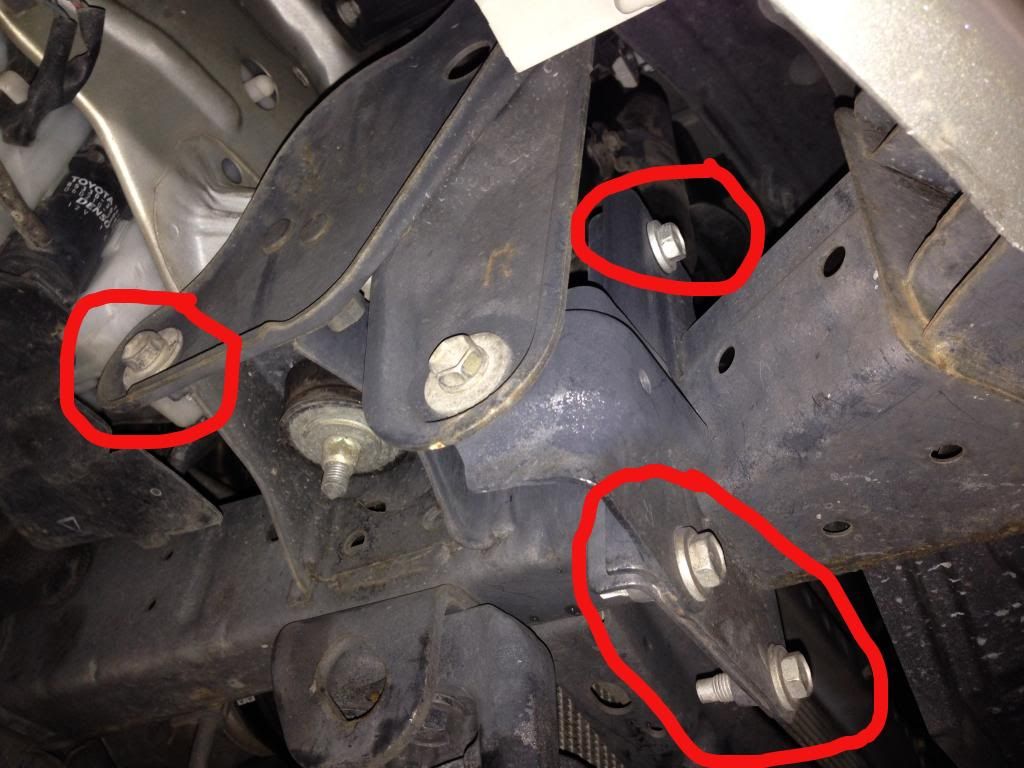
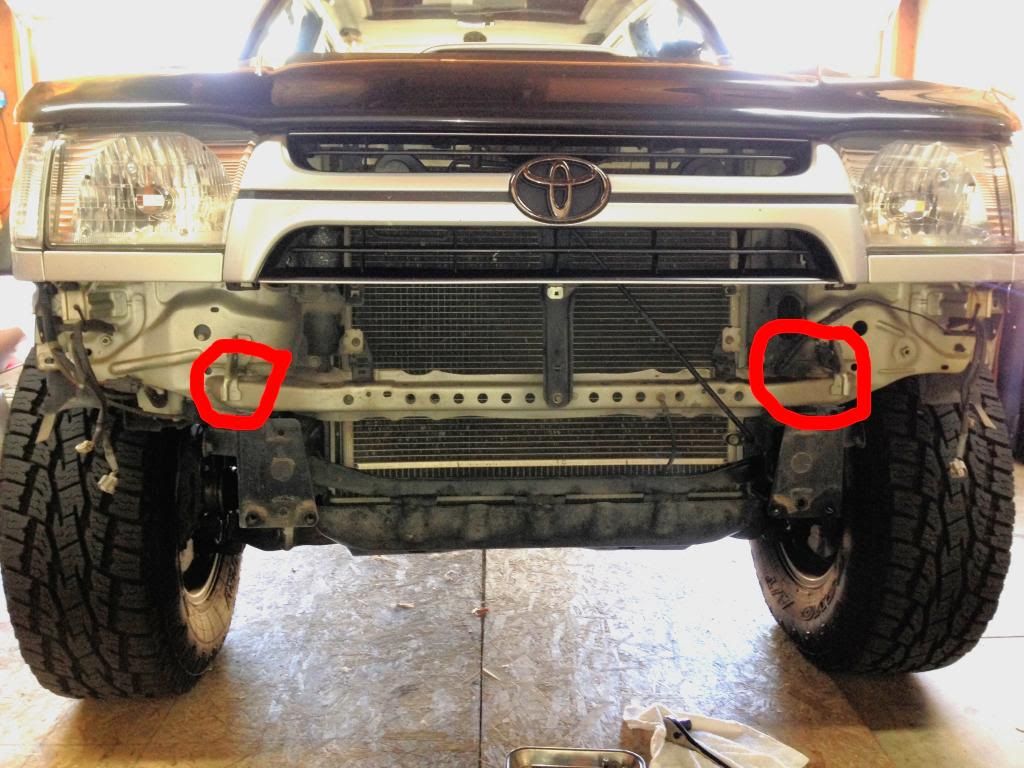
Once you have all the bolts/nuts removed and the electrical disconnected you should be able to giggle the bumper a bit and pull it from the fender mounts. You now have access to both front body mounts and should look similar to this.

Front bumper removed - circled the body mount bolts
Step 2 - Interior panel removal

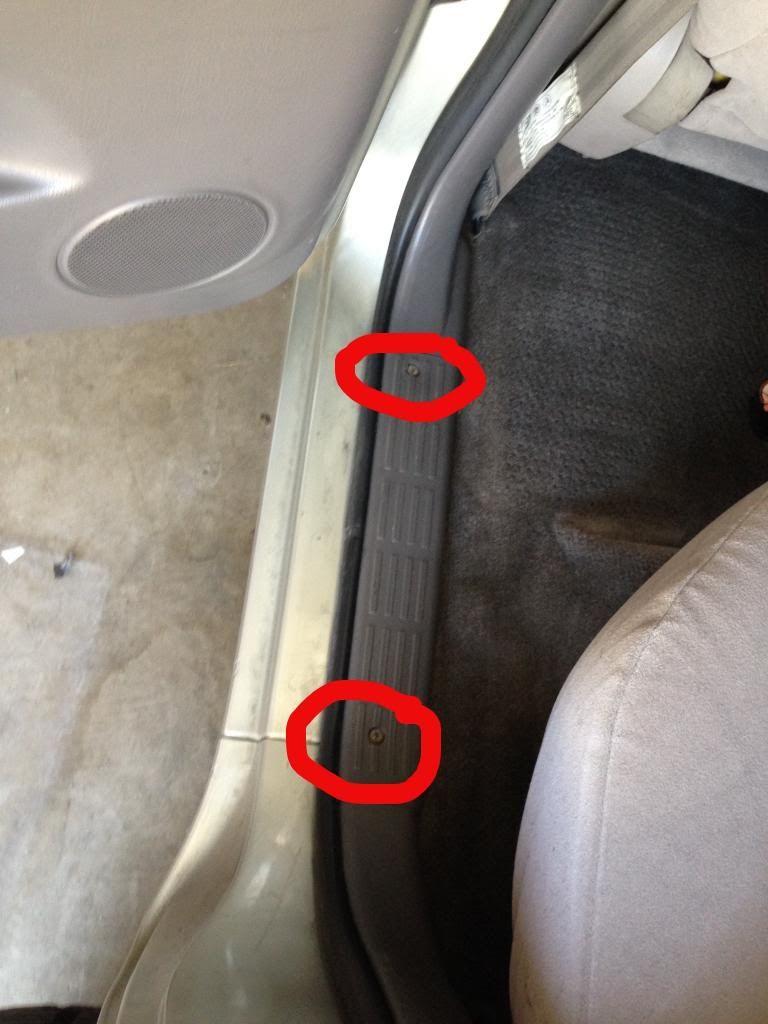
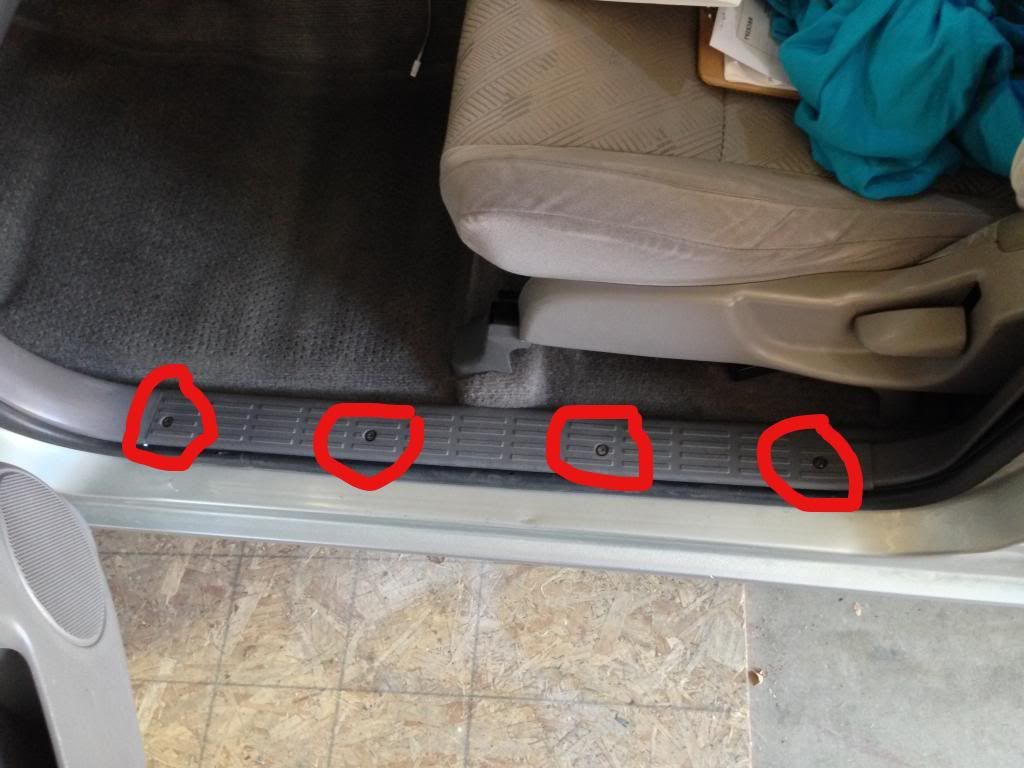
I started on the drivers side and worked my way around to the passenger side. First step is to remove the drivers side door sill plate. Remove the 4 screws then pull the plate up.

Drivers side door sill plate
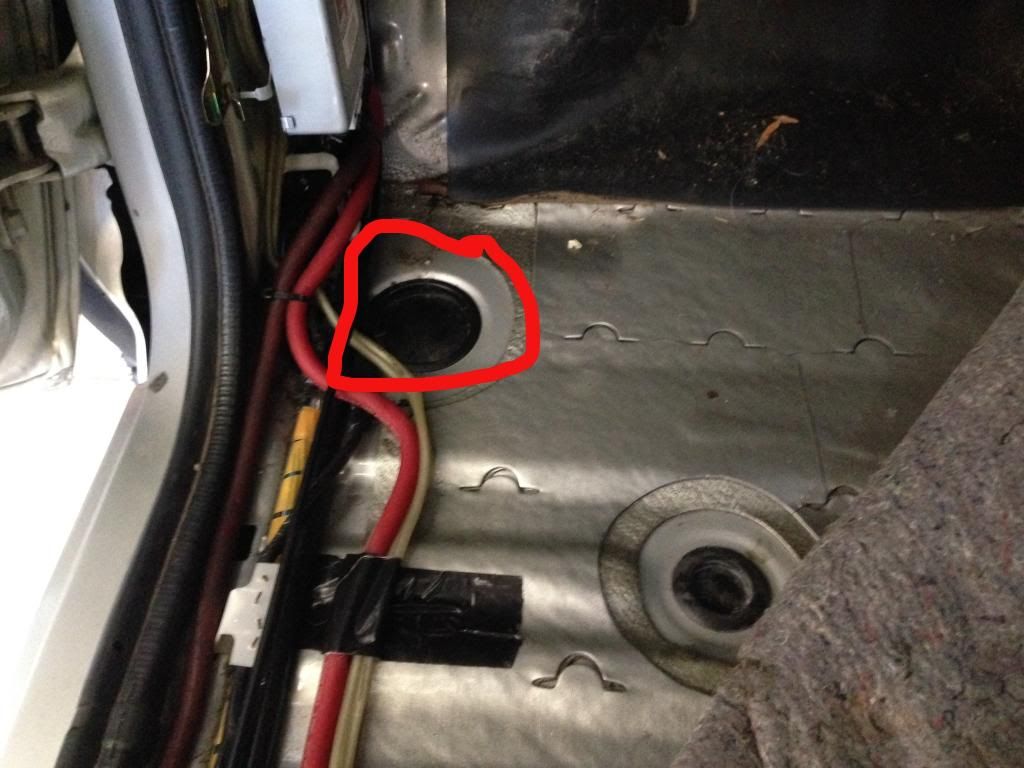
Next grab the kick panel by your foot and pull back on it towards the seat and it will pop right off. Then pull back the carpet and you can see your first interior body mount cover.

First body mount cover - Drivers seat

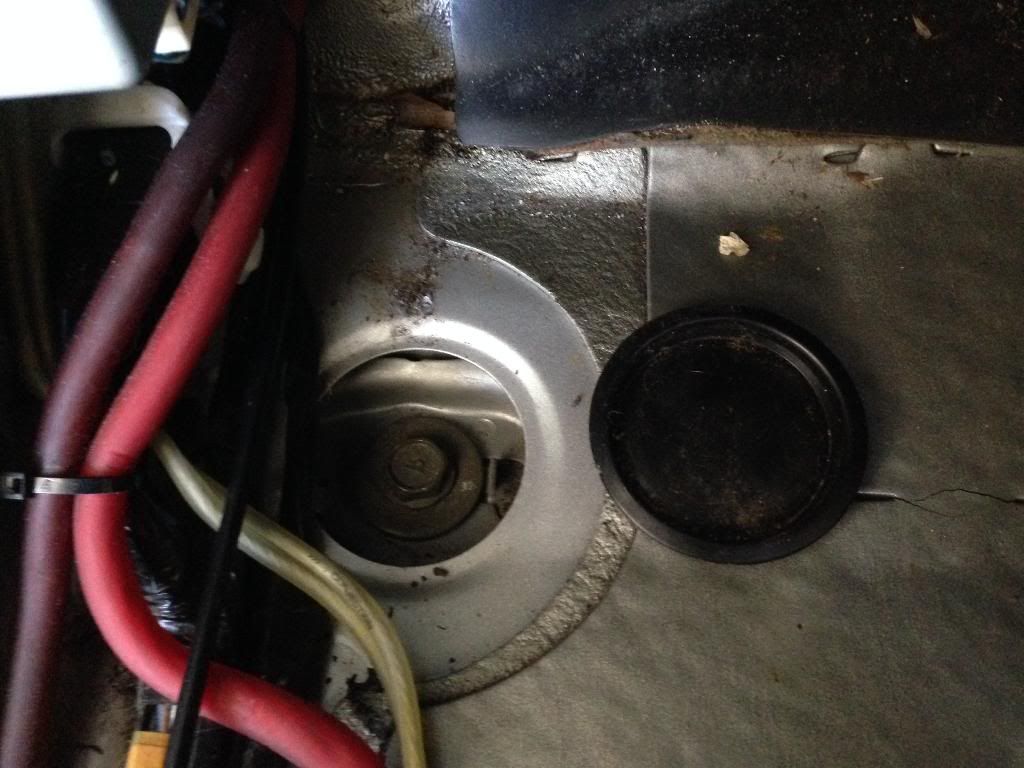
Cover removed
Next, move to drivers sider passenger door and remove the door sill plate there as well, it's 2 screws.

Drivers side passenger sill plate

Next remove the drivers side interior B pillar panel. Its the panel that is in-between the drivers front and rear door. It has a few light duty clips and will just pull right off the body and lift out of place.

B pillar removed
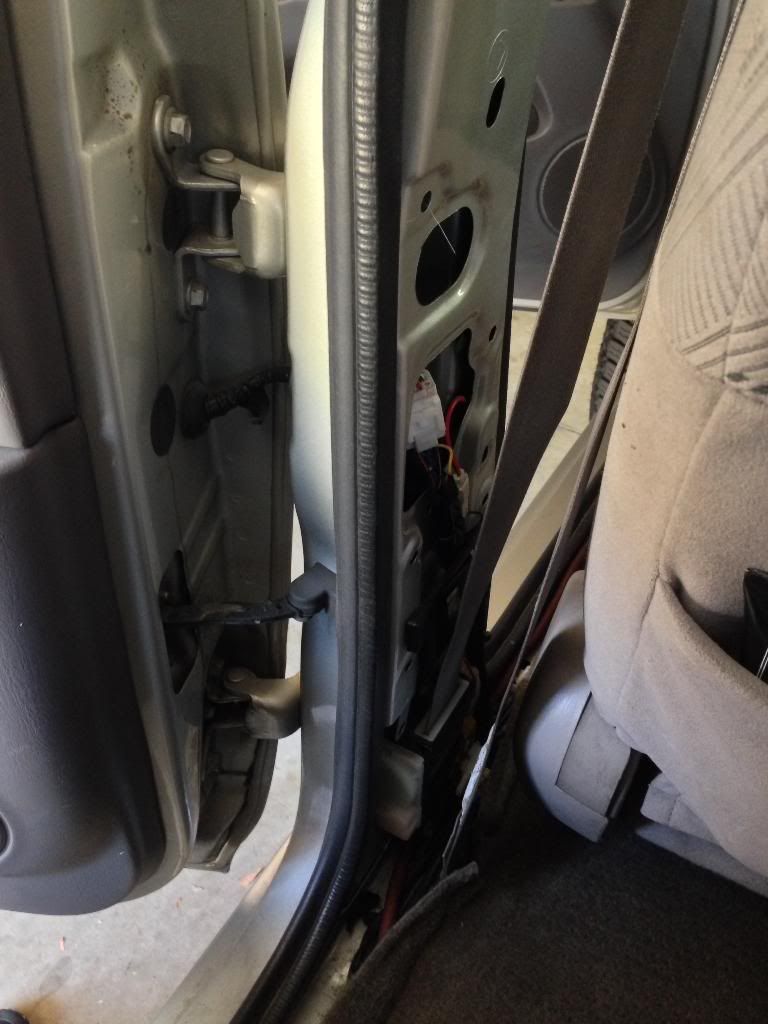
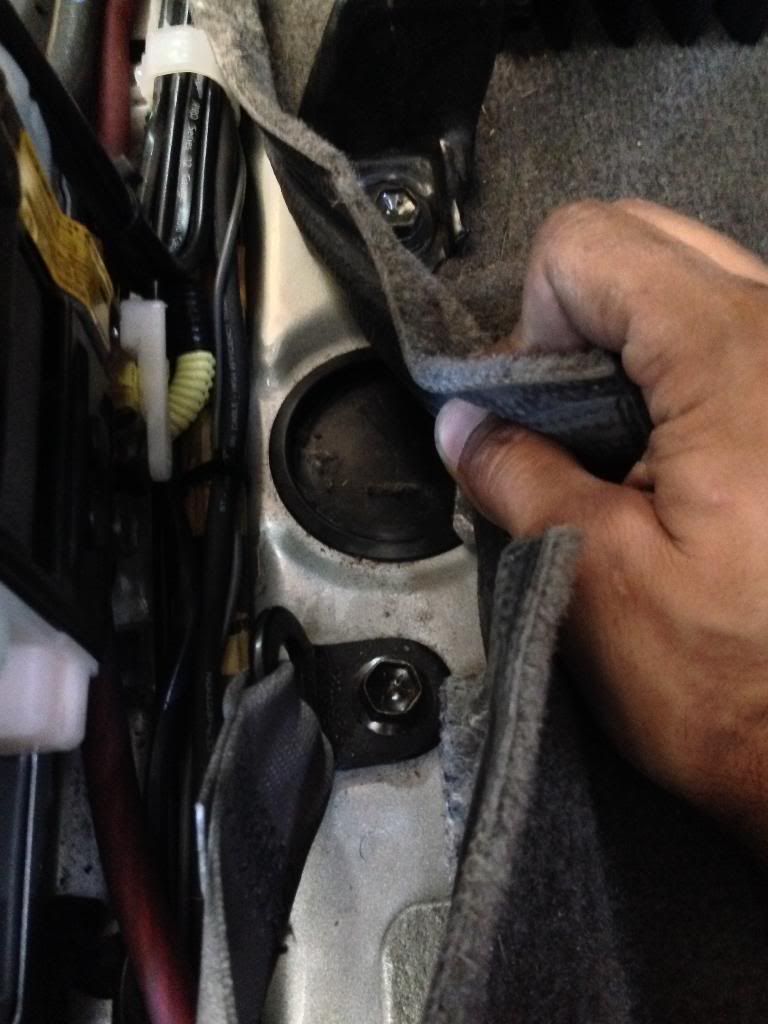
Next slide the drivers seat as far forward as it can go, then pull up the rear carpet near the seat belt bolt on the floor and you will see the next body bolt cover.

Drivers seat rear body bolt
Next fold down your rear seat and remove the interior panel behind the passenger door next to the passenger backrest. It has a few light duty clips and should pull away and off the body fairly easy. Make sure all the clips came off with it or pull them out and put them back on the panel you removed.

Drivers side passenger backrest panel
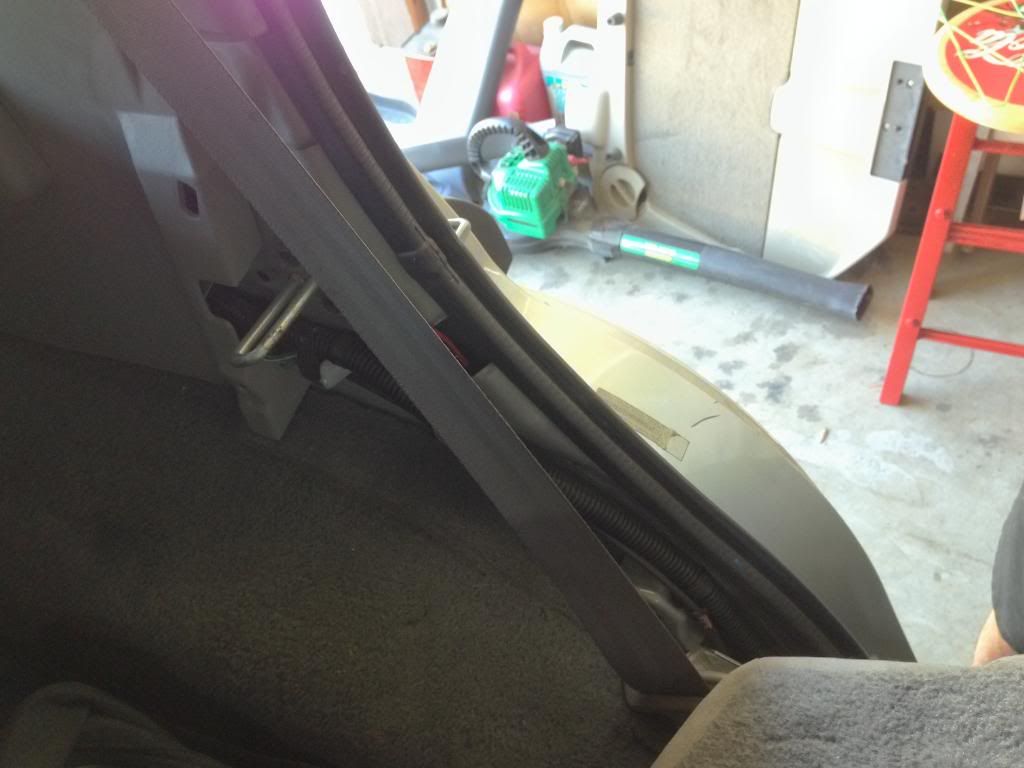
Partially fold the backrest back up and pull the carpet back underneath the seat and you will see the next body bolt near the door sill.

Drivers side passenger body bolt #2
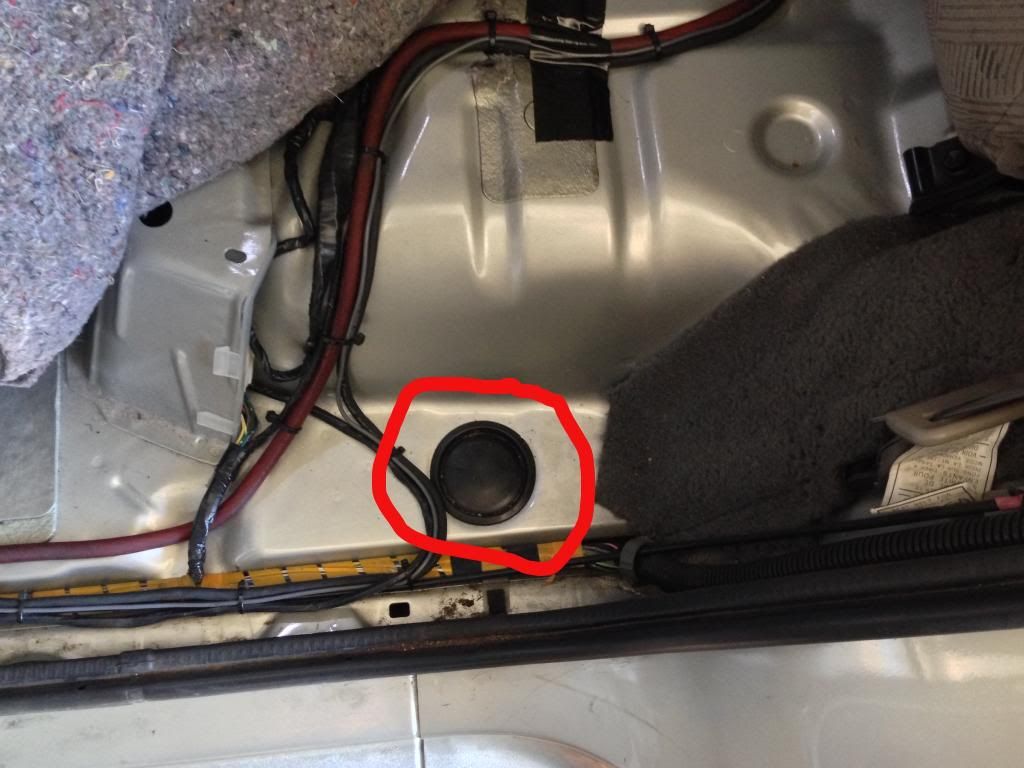
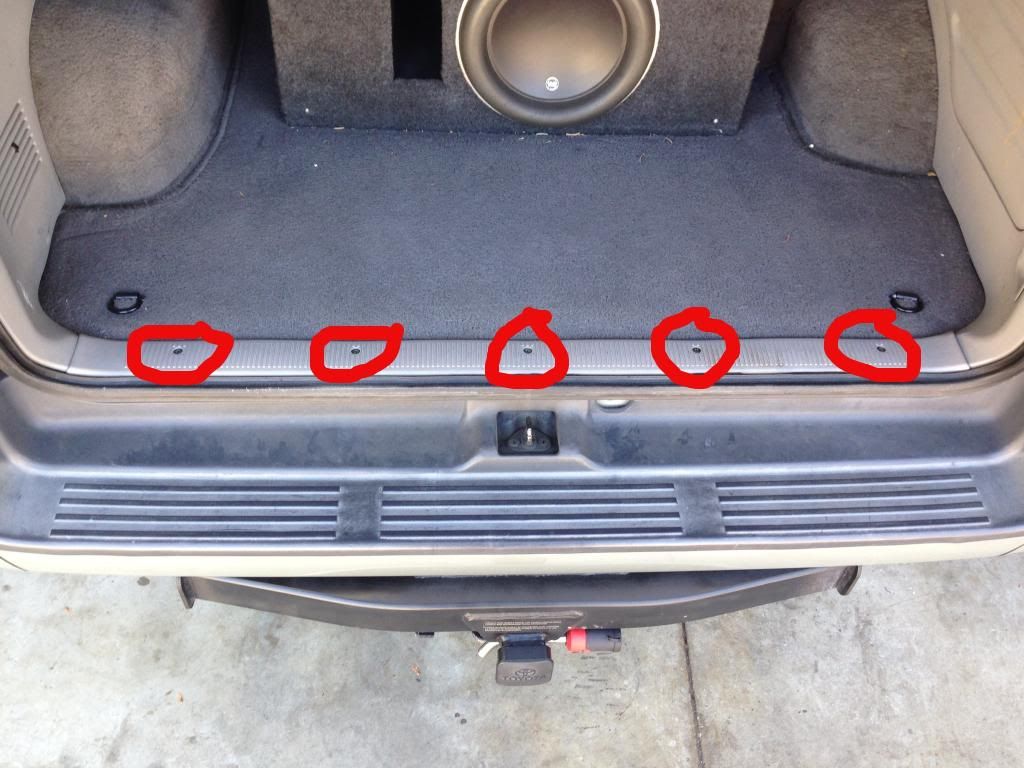
Move to the rear cargo area now and begin disassembly there by unscrewing the 5 screw on the sill plate and removing the plate.

Rear hatch sill plate - 5 screws
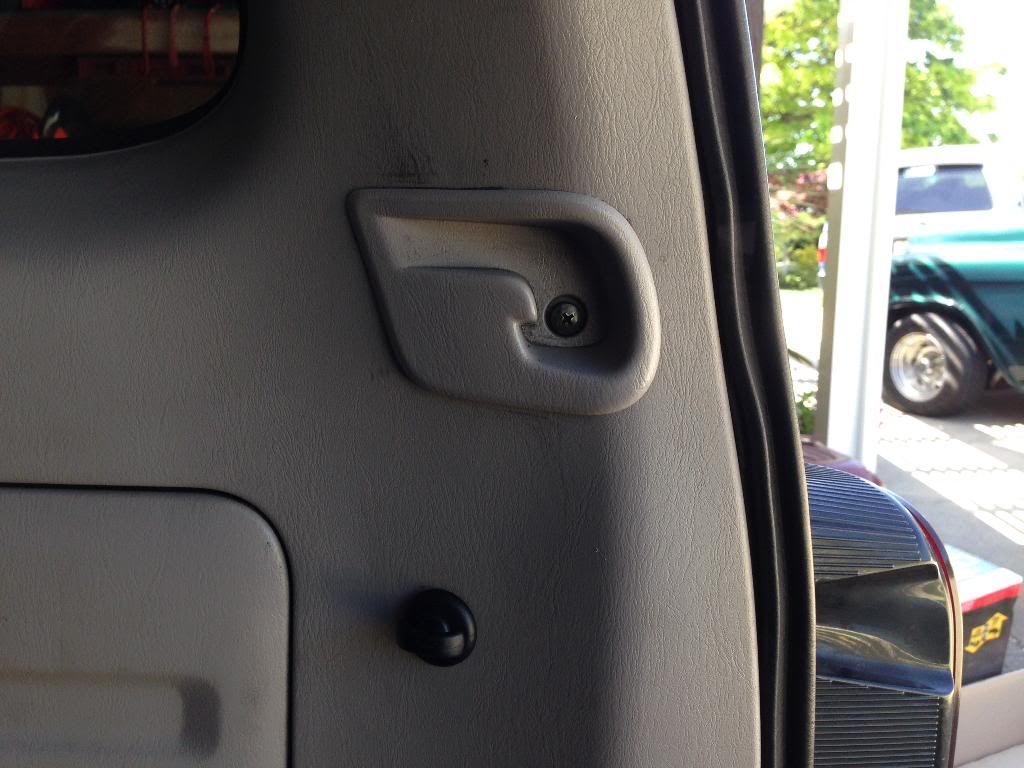
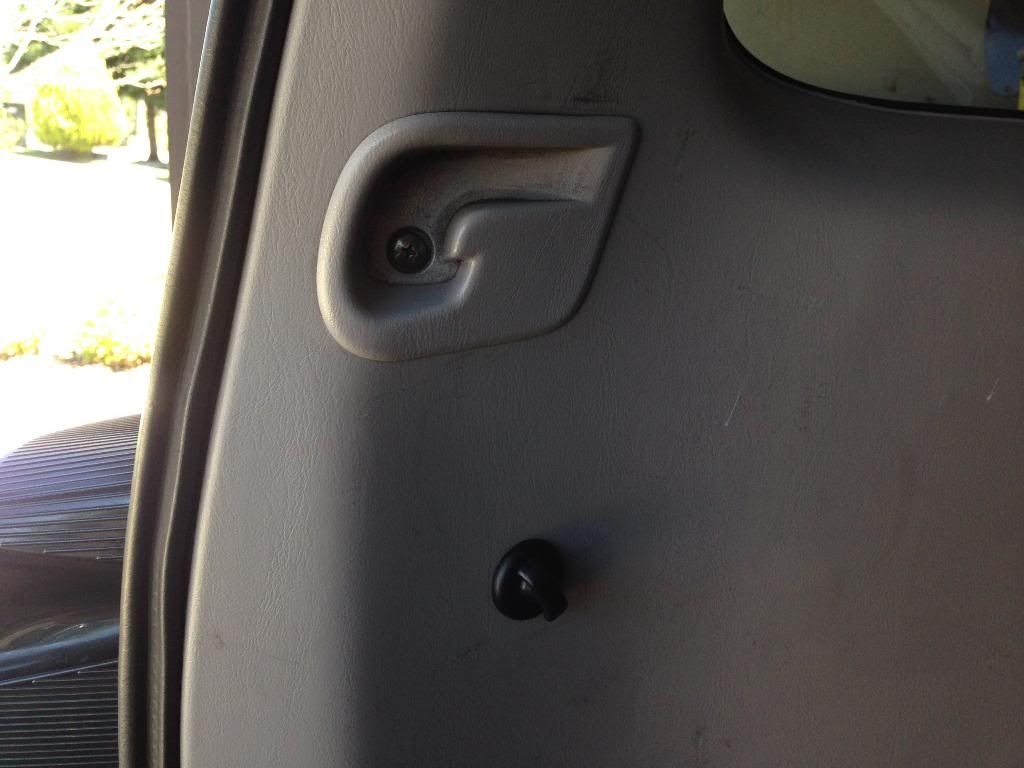
Next remove the rear cargo cover catch sleeves(no idea what they are really called). Remove the single philips screw and slide the plate out.

Drivers and passenger catch sleeves

 
Last edited:
Register to hide this ad
Removed


Now you should be able to gently pull the panels back far enough to access the rear body mounts on the floor of the cargo area.

Drivers side/Passenger side


Next move to the passenger side, and remove the door sill plates, panels, and carpet in the same order as the drivers side.

Passenger side interior disassembly


Step 3 - Steering rag joint disconnecting
If you crawl under the drivers side door and look up next to the front diff you will see the steering rag joint. You need to disconnect the two bolts that hold the steering shaft plates together. You will need two 12mm box wrenches or a combination of 12mm box wrench and socket to remove the rag joint bolts. **IMPORTANT: DO NOT ROTATE OR MOVE YOUR WHEEL ONCE YOU DISCONNECT THE RAG JOINT OR IT WILL BE DIFFICULT TO REPOSITION AND CONNECT!**

Steering rag joint bolts


Last edited:

For the time being you need to leave the rag joint disconnected so there is no stress on it while jacking the body up off the frame. **IMPORTANT: DO NOT ROTATE OR MOVE YOUR WHEEL ONCE YOU DISCONNECT THE RAG JOINT OR IT WILL BE DIFFICULT TO REPOSITION AND CONNECT!**

Step 4 - Installing spacers and new body bolts

This step is where I didn't really take as many pictures because the sun was going down, the instructions SUCKED, and I wanted to finish. I started with the drivers side front and worked my way to the back. All the body mount bolts are 17mm inside the car and 14mm outside the car with the exception being the front mount bolts. They are 14mm on the top and bottom. *Only take one side of the vehicle apart at a time! Make sure to remove all the body bolts for one side before attempting to jack the body up. *Make sure to not mix up the bolts and their locations or their assembly order.* I took one body mount off at a time and reassembled it off the car. Until I was ready to reinstall that particular one I left it directly beneath the mount location it belongs with. Once the 5 body mounts for the drivers side are removed, switch out the hardware to the new bolts of correct length.
-The front body mounts use the longest bolts supplied.
-The drivers and passenger kick panel bolts get replaced with the shortest bolts supplied.
-The body bolts behind the drivers/passenger seat and underneath the rear seat both get replaced with the middle length bolts supplied.
-The rear body mounts in the cargo area get replaced with the shortest bolts supplied.

I used a 27mm socket and a sand filled rubber mallet to remove the built on washers from the original bolts. I put the socket over the head of the bolt and gave it a few good smacks and the washer came right off each bolt.

Washer removal


After switching out the washers and hardware jack up the body in the middle of the side of the vehicle so it goes up evenly front to rear about an inch or slightly more to allow the pucks to be inserted in between the body mounts and the body. One at a time insert a puck and reassemble its body bolt and hand tighten them. *Important: There are two spacer pucks that are smaller in diameter, they are the front body mounts and shouldn't be confused and used elsewhere. After all 5 of the drivers side mounts have been switched and hand tightened lower the body back down.

Drivers side done

Repeat the same exact procedure for the passenger side.

-The new body bolts and nuts are 14mm for both the bolt and the nylon lock nut.

Once both sides are completed you can go around the vehicle and snug up all the nuts and bolts for the body mounts. Then reinstall the interior panels in reverse order.

Driver front body mount - Top


Bottom


Drivers kick panel mount


Mount behind drivers seat


Mount next to rear passenger seat - drivers side


Rear drivers side mount


Rear passenger mount


Mount next to rear passenger seat - passenger side


Mount behind passenger seat


Passenger kick panel mount


Both front mounts


Step 5A - Reinstall the bumper
Bumper installs in reverse order, but make sure to align the fender bolts on the bumper to go into the fender mounts. They need to be angled up a bit in order to make it to the raised body. *The body is now 1" higher than the front bumper, so the bumper will be angled slightly downward now. The bumper bolts to the frame should be torqued with a torque wrench to 32ft-lbs. The fender bolts can be hand tightened to snug fit.

*If you want to avoid the nose dive and gapped bumper skip to step 5B*

Gapped bumper with downward angle
 
Last edited:
Step 5B(optional) - Bumper bracket mod for 1" Body lift

If you would like to eliminate your front bumper gap and bumper nose dive with a 1" body lift, its pretty easy.

Required extra tools/Hardware:
Hammer
Power Drill
5/16 metal drill bit
(2)M8-1.25 x 35 Hex Cap Screws
(2)M8-1.25 Nylon Lock Nuts
14mm deep socket
13mm deep socket
13mm box wrench
12mm deep socket


Here is everything required for this mod.


This mod is very simple. All you do is drill one hole in the bumper bracket on each side and use a pre-existing hole in the bumper itself for the extra bolt.

Drivers side bumper bracket


Passenger side bracket

All you do is remove the brackets by removing these two nuts and the single bolt.

Once you do this, I placed the replacement bolt into the center hole in the bumper and made a mark on the bracket itself for the new lower bolt hole that I needed to drill. Circled is the new hole in the bumper you will be using as the Top bolt hole in the bracket. It is directly between the top and bottom bolt on the bumper mount and is predrilled from the factory.

Then drill the hole in the bracket(s) using the 5/16 drill bit.

Next you need to take the hammer and tap the factory Top bolt out of the way a tiny bit and you will be able to bolt the brackets back on with ease and BOOM, your bumper is now 1" higher to match your body lift. *The new M8 bolts and nuts are 13mm instead of the 12mm original nut. You will use one of the new M8-1.25 x 35 bolt and M8-1.25 nut combination per side and one of the original bolts and 12mm nut per side.

Finished product will look like this - Drivers side


Finished product will look like this - Passenger side

Differences in bumper spacing:

Before bracket mod


After bracket mod - factory fit again


Step 6 - Installing the rag joint spacer and new hardware
Align the new spacer so the holes drilled completely through the spacer align with the bolt holes for the existing mount locations and the half drilled holed go over the extruding bolts.

Rag joint spacer in place


Rag joint bolted back into place

I wasn't clear why from the factory the bolt for the rag joint is positioned from the bottom up, but I figured that its lasted 200k on my car without issue, so I reinstalled the new bolts in the same direction. The new rag joint bolts and nuts are 13mm. Once those are snugged up you are done!!! Now is the time to pull it into the sun and take MANY MANY pictures and post up on curbs and become fascinated at your MASSIVE lift!!
:clap2::D:banana::party::first:

Finished pics - pre 1" bumper mod


Last edited:
Good job taking all the pics. Like you said, even though it's an easy job, it's nice to scroll through and see everything you actually have to do and how to do it. I've always considered a 1" BL, for extra clearance of 33's.
 
Perfect timing. I was up late last night looking up how to do this. I got the 1" body lift from toytec since my 285/75/16 duratracs rub. The kids and I got up early this morning to knock this out and you just helped. Great write up thanks for taking out the time to do it.
 
Good job taking all the pics. Like you said, even though it's an easy job, it's nice to scroll through and see everything you actually have to do and how to do it. I've always considered a 1" BL, for extra clearance of 33's.

[MENTION=40945]quicksilvr[/MENTION], that's exactly why I did a 1". I didn't need any more, just enough to clear my tires.

Perfect timing. I was up late last night looking up how to do this. I got the 1" body lift from toytec since my 285/75/16 duratracs rub. The kids and I got up early this morning to knock this out and you just helped. Great write up thanks for taking out the time to do it.

[MENTION=81553]Jaynhunt[/MENTION], no problem man. Good luck with the BL this morning. Let us know how it goes.

What would you assume total time involved in doing this? With rusty bolts? Thanks!

[MENTION=100859]runandcycle[/MENTION], the lift took me longer because I had to figure out which bolts went in which locations. The trial and error took about an extra 45 minutes. The entire lift should only take between 2.5 and 4 hours depending on your speed and prep work. I had a can or WD-40 penetrating spray that made my nuts and bolts easy to work with. Luckily the only bolts that were rusty on my rig were the drivers side bumper mounts. Strange that it was only that side, but the rest came off smoothly.

Good job man.

I'll put this on the tutorial list.

[MENTION=65101]BrianSD_42[/MENTION], thanks man. Much appreciated.
 
Body lift is done... about 3 hours all together was simple. Only problem is the bolts for the steering extension are too short. So have to wait for the wife to get home to go to the hardware store. I drilled new holes for the bumper bracket and fits perfect. No need for a new bracket
 
Body lift is done... about 3 hours all together was simple. Only problem is the bolts for the steering extension are too short. So have to wait for the wife to get home to go to the hardware store. I drilled new holes for the bumper bracket and fits perfect. No need for a new bracket

That's awesome. Good job man. Your rag joint bolts were too short? They didn't supply extended ones?
 
Last edited:
thanks for those instructions, its kinda funny because its almost exactly what i send to those who purchase a body lift from me! i make them in all sizes.
 
[MENTION=81553]Jaynhunt[/MENTION], after talking about you doing the bumper bracket mod I decided not to be lazy and fix mine and add it to the writeup. Thanks for making me get off my ass and get 'er done.
 
Looks good and nice write up! I put mine on by myself in a 1 car apartment garage with a wintry mix coming down outside. Add that to the list of how NOT to install your body lift. I was sore for days from the contortionist act I had to do on the frozen concrete. Glad I did it now tho! :cheers:
 
[MENTION=81553]Jaynhunt[/MENTION], after talking about you doing the bumper bracket mod I decided not to be lazy and fix mine and add it to the writeup. Thanks for making me get off my ass and get 'er done.

Lol np. Did u get it done? Didn't take me few minutes and we'll worth the effort.
 
So I am just thinking here, but is it possible to induce a rake with body lifts? Say install 2" pucks towards the rear and only a .5" or 1" in the front? I was thinking angling the pucks to account for the angle at which the body will be at with the rake. Would this stress anything out?

I have maybe .5" of rake from my suspension, and if I can get more, then I'd be happier :D

Also, just curious, but does the rear bumper not attach to the frame like the front does? How come you don't need to do the 1" mod to the rear like you did to the front? I haven't yet peaked in that area of the car, but I will when I start designing my rear.
 
So I am just thinking here, but is it possible to induce a rake with body lifts? Say install 2" pucks towards the rear and only a .5" or 1" in the front? I was thinking angling the pucks to account for the angle at which the body will be at with the rake. Would this stress anything out?

I have maybe .5" of rake from my suspension, and if I can get more, then I'd be happier :D

Also, just curious, but does the rear bumper not attach to the frame like the front does? How come you don't need to do the 1" mod to the rear like you did to the front? I haven't yet peaked in that area of the car, but I will when I start designing my rear
.

please DO NOT give your car a rake with a body lift.

technically you could do what your asking in terms of shorter body lift pucks in the front and bigger ones in the rear... if you were to do this, probably gradually increase in puck size as you go from front to back...

if you want rake... buy longer coils in the rear... Land Crusier (LC) 7 wraps, 8 wraps, 9 wraps. or any compatible rear coil that is longer than yours is currently

i have to admit... i ran a larger size tire in the rear that the front.. 265's in the front 285's in the rear... but this wasn't something i planned to keep long term

rear bumper is attached to the body, not the frame.. front bumper is attached to the frame, not the body.. so no need to adjust the rear bumper since it moves with the body
 
Last edited:
please DO NOT give your car a rake with a body lift.

technically you could do what your asking in terms of shorter body lift pucks in the front and bigger ones in the rear... if you were to do this, probably gradually increase in puck size as you go from front to back...

if you want rake... but longer coils in the rear... Land Crusier (LC) 7 wraps, 8 wraps, 9 wraps. or any compatible rear coil that is long than yours is currently

i have to admit... i ran a larger size tire in the rear that the front.. 265's in the front 285's in the rear... but this wasn't something i planned to keep long term

rear bumper is attached to the body, not the frame.. front bumper is attached to the frame, not the body.. so no need to adjust the rear bumper since it moves with the body

So it won't do any damage to my truck if I induce a rake with BL? I actually like the rake look, so if I WERE to get a BL and inducing a rake doesn't do any long term damage, then I will go for it.

The next time I change out my rear suspension, I will definitely look into the LC wraps. But that's probably years down the line, considering my suspension is new.
 

Members online

Forum statistics

Threads
278,316
Messages
3,554,106
Members
248,016
Latest member
Advally Service

Trending content

Back
Top