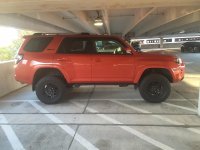
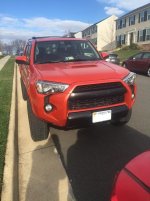
Trd pro lift question

I need to get larger tires for mine but hard to justify it with only 3k on the stock tires unless I find someone to take them


I doubt you'd have any trouble finding someone who'd buy them. I've heard of some folks making out pretty good at Discount Tire too.
 
I have a set of brand new BFG KO2's 275/70/17 for sale. I decided to go 285's after the lift so these are available and have less than 100 miles on them. Only thing is that I won't ship them. So you would have to pick them up from me in NE PA (19608)
 
I have a set of brand new BFG KO2's 275/70/17 for sale. I decided to go 285's after the lift so these are available and have less than 100 miles on them. Only thing is that I won't ship them. So you would have to pick them up from me in NE PA (19608)

Will the 275 or 285 fit where the spare goes? Or did you just buy 4


Not trying to sound like a jerk but did you read the descriptions of all three?
 
Worked with Toytec and it turns out they can/will swap out the 2" lift super flex with the 1-1/2" Sway Aways (SAW) for $38.01 more!


Also he said that "Black Friday" is right around the corner for 10% off. If you folks can wait it would be worth the savings. I'm going to try.:clock:


Has anyone swapped out for the sway always ? Is it worth it ??
 
I did.

However, it turns out that the Sway Away 1 1/2" lift springs are out of stock so I am still waiting for that to come in.

I will post pictures as soon as I have it installed but it looks like I won't get the stuff in for another 1 week at the soonest.
 
I did.


However, it turns out that the Sway Away 1 1/2" lift springs are out of stock so I am still waiting for that to come in.


I will post pictures as soon as I have it installed but it looks like I won't get the stuff in for another 1 week at the soonest.


Sounds good , I think I'm gonna bite the bullet for the Black Friday deal
 
Ok, so I am going to do my best to not forget anything here but this was my experience in installing the ToyTec lift for the TRDP, spacer plates top and bottom for the front coil-overs and larger springs in the rear. I will warn you that I am not a mechanic so if I call something by the wrong name, my bad, give me the heads up and I will correct it. :loco:

First, be sure to set your emergency brake and chock your wheels. I started in the front because I perceived it as being more challenging then the rear and as it turns out I was correct. I had a buddy help me do the lift, which I highly recommend as well as two floor jacks, jack stands and two spring compressors. The directions where a great help, so be sure to print a copy out to have on hand when trouble arises. Here's the link.

http://toyteclifts.com/images/stories/pdf_files/10upfj4r.pdf

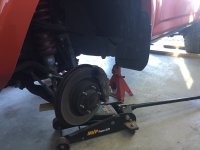
1. Remove the front wheels both sides, and use a jack to help keep the whole assembly steady while you are dissembling.
1.JPG

2. Remove the end links to the sway bar on each side.
2.jpg
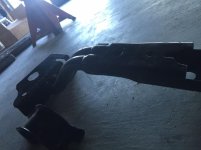
3. Remove the front skid plate and the two supporting brackets to get them out of the way to remove the sway bar. The two brackets hold the skid plate on the frame and look like this.
6.jpg
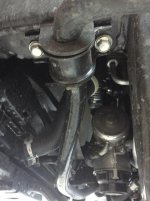
4. When you slide under the rig from the front, you will see two brackets that look like these that are supporting the sway bar. Loosen both bolts closest to the front of the rig, but not totally removing them, they are slotted and need to remain to put it back together more easily. Remove the two bolts closest to the rear of the vehicle all the way out. Be sure to keep track of every bolt you take off, I used zip-lock baggies to help and taped them to their respective parts. Once you remove the back two bolts, the sway bar is free to be taken off but having two people to guide it together was much easier than doing it alone.
4.jpg
 

Attachments

  • 1.JPG
    1.JPG
    125.7 KB · Views: 3,831
  • 2.jpg
    2.jpg
    57.7 KB · Views: 3,610
  • 4.jpg
    4.jpg
    70.5 KB · Views: 3,707
  • 6.jpg
    6.jpg
    49.3 KB · Views: 3,206
Continued:
5. I simply left the sway bar and brackets under the truck, they didn't get in the way there.
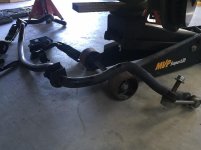
7.jpg
6. Remove the two bolts located directly under the rotor to free up the CV joint for the needed mobility to get the coil-over out once it's detached. The bolt is located directly above the sticker on the floor jack behind/under the rotor, fyi and there are two of them.
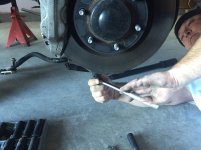
11.jpg
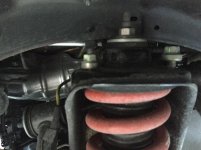
7. Remove the bolt on the bottom of the shock and the three at the top. Be sure to take a picture prior to removal and mark the back bolt to distinguish it from the other two for proper placement when re-installing. I used a sharpie and put a dot on the top of it. If one person moves the upper UCA around, it will help you get the shock out much easier and will prevent you from scratching it all up.
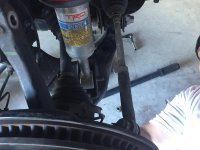
9.jpg
10.jpg
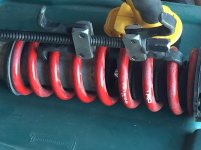
8. I went to Advanced Auto and they run a rental buy back program for the spring compressor, you will need TWO. You buy it, use it and return it for a FULL refund, nice eh? I only got one and man did I regret it. It makes the spring tilt to the side it's installed on and once you add the bottom spacer, getting the top nut, washer and washer centered was a PITA. Here it is:
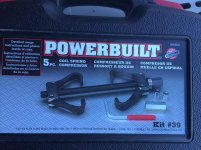
16.jpg
9. Once you have the springs compressed, the top bolt should come off easily, if it doesn't then the spring needs to be compressed more. If you try to take it off when it's still too tight the kinetic energy in the spring will hurt you badly and very quickly. BE CAREFUL HERE.
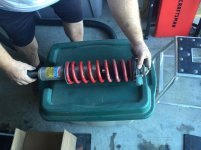
13.jpg
14.jpg
I had to stop taking pictures here as my hands were being used on the install so I will just walk you through the rest without them.

10. Once you remove the top nut, washer and washer off, gently remove the shock from the spring.

11. Take the bottom stock spacer off, put the thick spacer on in its place.
12. Place the spring back on the shock and be sure the washers are all in their respective places they came off of.
13. Re-attach the top rubber grommet, washer and nut. Once re-installed, tighten it down until it stops and use the very top portion of the shock to hold it from spinning while tighten the nut.
14. Be sure to add the small spacer to the top of the fully assembled coil-over before you install it back.

Sidebar.....since I only had one spring compressor on the spring it twisted the spring to one side and then popped off before I had reinstalled it. As you can imagine this was a pretty big problem. I put it back on but was very weary of it coming off again so this is when I used some common sense to help me out. I put only the washer and the nut on, until I had the coil-over back on the truck. I put everything back together, sway bar, shock etc from beginning to end and put the tire back on. Once the truck was taken off the jack stands and lowered back to the ground, the weight of the truck made getting the grommet to fit properly WAY easier. We actually repeated this "mistake" on the other side to save worrying about the spring compressor popping off. Two spring compressor's should prevent this, but if you only have one, there is another way.

The rear was basically by the book as far as the instructions state, loosen the sway bar, the link ends and drop the axle to remove the stock springs. I took the spare out for easier access. Be sure to jack the rear end up HIGH because the new springs are quite a bit bigger and you will need the extra travel space. Good luck, hope this helps someone and feel free to ask questions.

 

Attachments

  • 7.jpg
    7.jpg
    53.1 KB · Views: 3,647
  • 9.jpg
    9.jpg
    130.5 KB · Views: 3,144
  • 10.jpg
    10.jpg
    65.5 KB · Views: 3,684
  • 11.jpg
    11.jpg
    68.8 KB · Views: 3,678
  • 13.jpg
    13.jpg
    63.4 KB · Views: 3,996
  • 14.jpg
    14.jpg
    58.6 KB · Views: 3,924
  • 16.jpg
    16.jpg
    93.4 KB · Views: 3,846
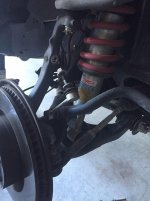
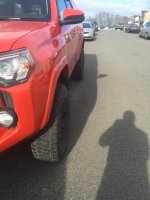
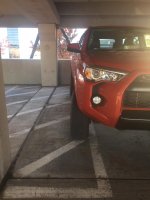
Review of the install, if you have the money pay someone else to do it, hahaha! It wasn't extremely difficult, but there were times when I wasn't sure we were going to figure out issues mainly due to the proper spring compressor. The rig came out like others have said, "like it should have come from the factory!" It took us about 5 hours but that was with many breaks for mental stability. :mad2: Do the front first, the back is pretty painless. If you own a TRDP and want more from the look and feel, this is the lift for you to not have to replace the majority of your suspension. Here are some pics of the finished product, sorry my phone sucks but it's all I have....I did also add the Spidertrax adapters and they require no fender well trimming with this lift. The truck drives almost the same as before but I don't want to give that feedback until I have driven it a bit more.
 

Attachments

  • 18.jpg
    18.jpg
    137.5 KB · Views: 2,844
  • 19.jpg
    19.jpg
    127.9 KB · Views: 2,828
  • 20.jpg
    20.jpg
    123.3 KB · Views: 2,999
  • 17.jpg
    17.jpg
    78.2 KB · Views: 2,896
Last edited:
Ok, so I am going to do my best to not forget anything here but this was my experience in installing the ToyTec lift for the TRDP, spacer plates top and bottom for the front coil-overs and larger springs in the rear. I will warn you that I am not a mechanic so if I call something by the wrong name, my bad, give me the heads up and I will correct it. :loco:

First, be sure to set your emergency brake and chock your wheels. I started in the front because I perceived it as being more challenging then the rear and as it turns out I was correct. I had a buddy help me do the lift, which I highly recommend as well as two floor jacks, jack stands and two spring compressors. The directions where a great help, so be sure to print a copy out to have on hand when trouble arises. Here's the link.

http://toyteclifts.com/images/stories/pdf_files/10upfj4r.pdf

1. Remove the front wheels both sides, and use a jack to help keep the whole assembly steady while you are dissembling.
View attachment 181039

2. Remove the end links to the sway bar on each side.

3. Remove the front skid plate and the two supporting brackets to get them out of the way to remove the sway bar. The two brackets hold the skid plate on the frame and look like this.

4. When you slide under the rig from the front, you will see two brackets that look like these that are supporting the sway bar. Loosen both bolts closest to the front of the rig, but not totally removing them, they are slotted and need to remain to put it back together more easily. Remove the two bolts closest to the rear of the vehicle all the way out. Be sure to keep track of every bolt you take off, I used zip-lock baggies to help and taped them to their respective parts. Once you remove the back two bolts, the sway bar is free to be taken off but having two people to guide it together was much easier than doing it alone.

You went with the 2" rear springs didnt you? By the way great job, looks awesome...thanks for the write up
 
You went with the 2" rear springs didnt you? By the way great job, looks awesome...thanks for the write up

Yes, the 2" rear springs and thanks. It is quite a bit more Impressive in person than pics I saw on here to. With these results, best mod so far.
 

Members online

No members online now.

Forum statistics

Threads
278,312
Messages
3,554,083
Members
248,016
Latest member
Advally Service

Trending content

Back
Top