wally's 87 4runner upkeep thread

had a click-no start today. first time that's happened with my 4runner. after about 15 key-turns, the starter finally engaged and it started right up.

i've already addressed the factory wiring flaw in the starting system as outlined and broken down by RAD4r. and, a few months ago, my wife's '97 corolla had a solenoid contact issue, which i fixed by replacing the worn contacts with new. in doing this, i discovered that my 4runner has the same starter series as the corolla, so when it didn't start today, i figured it was the solenoid contacts.

and i took pics of the process.

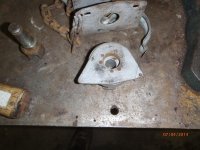
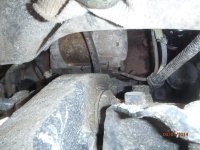
there it is, in all it's so close yet unnecessarily difficult to remove glory. requires 14mm sockets or wrenches to remove, along with extensions/swivels. i chose to remove the fender flaps to get a better view.

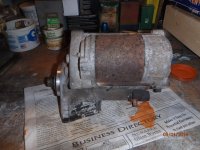
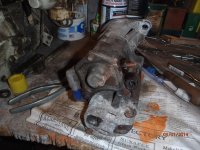
second pic shows the 27 year old starter on the bench. a little corroded on the outside, but not bad. i wire brushed the bellhousing contact areas, so they are shiny.

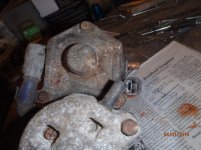
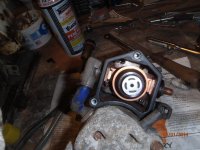
third pic shows the cover that needs to be removed to access the solenoid parts - the contacts and the plunger. the three bolts (w/philips) are 8mm. i squirted the bolts, along with the contact studs, with PB'laster. the cover bolts came out with no problem.

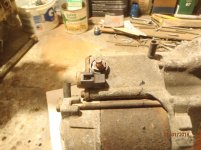
fourth pic shows the battery cable connection and the solenoid energizer wire.
 

Attachments
  • P3010006.jpg
    P3010006.jpg
    136.6 KB · Views: 950
  • P3010009.jpg
    P3010009.jpg
    136 KB · Views: 949
  • P3010010.jpg
    P3010010.jpg
    133.9 KB · Views: 939
  • P3010012.jpg
    P3010012.jpg
    133.5 KB · Views: 967
Last edited:
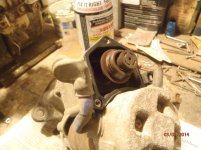
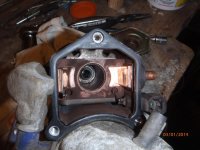
first pic shows the solenoid plunger, which is under the 3-bolt cover. also visible is the rubber gasket under the cover.

second pic shows the corroded contact surface of the plunger. it is only slightly worn, but pitted. third pic shows the plunger that came from the corolla next to the 4r plunger.

fourth pic shows the cleaned contact surface of the plunger. i used a small file to clean it up.

fifth pic shows the solenoid contacts still installed to the housing. the contact at the top of the picture is the worn out one (the contact area was paper thin), while the lower one has minimal wear, and i didn't replace it.
 

Attachments

  • P3010015.jpg
    P3010015.jpg
    129.8 KB · Views: 950
  • P3010016.jpg
    P3010016.jpg
    129 KB · Views: 969
  • P3010017.jpg
    P3010017.jpg
    129.5 KB · Views: 957
  • P3010020.jpg
    P3010020.jpg
    137.2 KB · Views: 989
  • P3010019.jpg
    P3010019.jpg
    125.1 KB · Views: 994
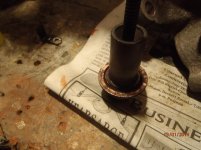
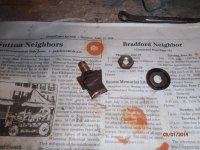
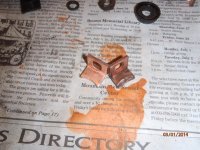
first pic shows the removed contact. this stud is the one that connects to the battery cable directly. the rubber gasket and washer attach to the outside of the housing.

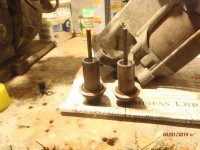
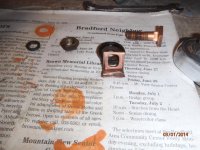
second pic shows a small gasket that seals below the washer, along with a larger square insulator that isolates the contact from the housing.

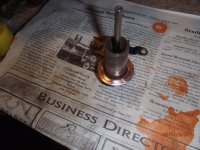
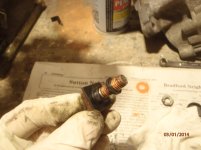
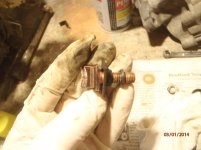
third pic shows the stud/contact/insulator/gasket assembly, and the wear on the contact is clearly visible. this worn area really is paper thin.

fourth pic shows the area worn on the contact.

fifth pic shows the new contact next to the old contact.
 

Attachments

  • P3010022.jpg
    P3010022.jpg
    137.1 KB · Views: 955
  • P3010024.jpg
    P3010024.jpg
    99.7 KB · Views: 987
  • P3010025.jpg
    P3010025.jpg
    105.4 KB · Views: 964
  • P3010028.jpg
    P3010028.jpg
    137.1 KB · Views: 939
  • P3010029.jpg
    P3010029.jpg
    141.8 KB · Views: 938
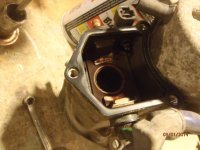
inside the housing, with the new contact installed. shows the slightly worn contact that wasn't replaced, too.

second pic shows the cleaned/filed plunger being installed, and the last pic shows the starter reassembled on the bench.

took it out and put it back on the bellhousing. tested it, and it worked without a click/no-start. done. reinstalling it revealed another poorly designed toyota feature, namely that the clutch slave cylinder bracket is attached to the lower starter bolt. this makes it very difficult to get the bolt back in, since it is a "blind" operation. wtf attach that bracket to the starter attachment bolt?

my amc/jeep starter is much simpler. two bolts. a single battery cable connection. done. nothing in the way to removing it.
 

Attachments

  • P3010030.jpg
    P3010030.jpg
    130.3 KB · Views: 989
  • P3010031.jpg
    P3010031.jpg
    131.4 KB · Views: 972
  • P3010032.jpg
    P3010032.jpg
    137.1 KB · Views: 943
Thanks, Wally for sharing. I've never done contacts so it's good to clearly what's in there. Nice work on the storage, too :)
 
i figured i had no excuse not to record the process with photos and a brief write-up, especially having just done the same replacement on the corolla a few months ago. the biggest challenge with both is not internal - the contacts are very easy to replace. the hardest part is the removal and installation of the starter itself.

fwiw, there are kits that can be purchased that have 2 contacts and the plunger. i chose not to replace the plunger in the runner, but i did replace it in the corolla. now i have a spare that can be cleaned up, along with a single brand new contact, one old usable contact, and two scrap contacts.

the storage shelf was something i wanted. easier to keep the stuff accessible, and clean (and i can see what's in there).
 
I didnt see where you or if you found new door seals but the dealer sells them fairly cheap compared to the the window sash seals. I got the price on the sash seals or window channel I couldn't get the 60 dollar weather strip for the doors.
Ether way nice build and great tech.
 
i got the door weatherstrip seal from autoparts warehouse. they weren't the correct seals - too long, for a door larger than this 4runner.

i haven't had a chance to go to the dealer, although that will be my next try. they've had good prices on some of the other seals/rubber parts, as well as shackle parts; when i get them, i'll post the results.
 
i broke the parking brake cable (the front cable) where it connects to the rear cable assembly, just in front of the gas tank. finally got around to removing it today.

the FSM is useless - no description of this process at all, and the design pretty much sucks.

after doing it the hard way, i've figured out the correct way to remove the front cable. it would have been very helpful if the FSM had this information in it.

here goes:

from the engine bay, pull the speedo cable from the clip that attaches to the pulley housing through which the parking brake cable passes. then, remove the two 12mm nuts to remove the pulley housing from the firewall (although the housing will still be "trapped" by the cable).

from inside, pull the parking brake lever slightly out, but not very much. this should expose the backside of a pin through a hole in the firewall-to-dash brake assembly (this is the pin that depresses/releases the "brake warning light switch") [first pic shows the pin, second pic shows the hole in the assembly]

the cable ferrule will not be able to be removed until the pin is removed so that the parking brake lever can be pushed fully inward [third pic]

drive the pin out the opposite side (drive it from the hole, not out the hole).
[fourth & fifth pics]

once the pin is out, fully push in the parking brake lever. this will extend the assembly into the engine compartment enough to allow the cable to be removed from its "slot". without removing the pin, the assembly can not be pushed far enough out through the firewall in the engine bay to get the cable out of its slot, and nothing else will work. [last pic shows fully extended lever through firewall, with ferrule capture exposed.

from here, the rest is easy. gently pry away the retaining tabs that secure both the parking and speedo cables to the underside of the body (one is located above the transmission, near the back of the engine, the other is located just in front of the crossmember through which the parking cable is clipped. there is also a cable clamp that attaches to the parking cable, and it is secured directly to the body with a 12mm bolt.

remove the other clip from the pulley housing, then pull the small cotter pin from the rear of the cable, and the entire parking brake cable should be removeable at this time.


from the pics, you can see that i removed the p-brake assembly from under the dash. that isn't necessary, as the pin can be driven, with difficulty, with the lever installed. you still have to remove the pulley housing from the engine bay side of the firewall, but you do not have to pull apart the lower dash covers and remove the lever. driving the pin from under the dash will be difficult, as there isn't much space to work in, and the hole to drive the pin out faces the middle dash/heater/etc. all in all, this is a piss-poor design and is totally unnecessary.

another edit: you can also see the various parts associated with this in the bin, including the pulley and pulley housing, and the speedo cable clip that attaches to the pulley housing.
 

Attachments

  • P3310009.jpg
    P3310009.jpg
    119 KB · Views: 930
  • P3310005.jpg
    P3310005.jpg
    86.7 KB · Views: 924
  • P3310010.jpg
    P3310010.jpg
    134 KB · Views: 894
  • P3310007.jpg
    P3310007.jpg
    86.1 KB · Views: 937
  • P3310008.jpg
    P3310008.jpg
    103.4 KB · Views: 934
  • P3310011.jpg
    P3310011.jpg
    127.5 KB · Views: 948
Last edited:
where did you source the new contacts for the starter?

thanks for the detailed write ups....very helpful. I know how tedious it is to do it.
 
i got them either from iowamotorparts.com or discount starter and alternator in georgia.

truth is, the ones i used in my 4runner were supposed to be for my wife's corolla, but they weren't correct (turns out a few made that year had a different style), but, upon doing some searching, i discovered that they'd fit my 4runner. so, i ordered a correct set for the corolla, and kept the incorrect set anyway, since they'd work - and, two months later, i needed them.

i just don't remember which place i ordered which set from. one (or both) can be found on ebay, too.
 
i got them either from iowamotorparts.com or discount starter and alternator in georgia.

truth is, the ones i used in my 4runner were supposed to be for my wife's corolla, but they weren't correct (turns out a few made that year had a different style), but, upon doing some searching, i discovered that they'd fit my 4runner. so, i ordered a correct set for the corolla, and kept the incorrect set anyway, since they'd work - and, two months later, i needed them.

i just don't remember which place i ordered which set from. one (or both) can be found on ebay, too.


cool, I'll look around.

When you had the fuel diaphram issue, can you describe the hard start issue? I'm having some problems that are getting worse and appear to be running rich as well (by the exhaust smell) and that could be my issue as well.
 
pretty much as described.

took from 4 to 8 seconds of cranking to get the engine to fire, and when it finally caught, it would stumble and expel a cloud of dark smoke (unburned fuel) from the tailpipe. i'm used to my vehicles starting pretty much instantly, even 30 year old ones, so i wanted to solve it. it should (and does) start with less than 1 second of cranking.
 
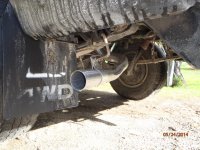
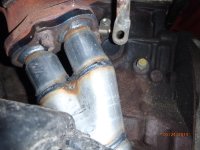
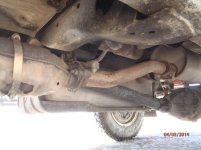
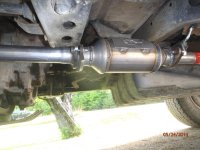
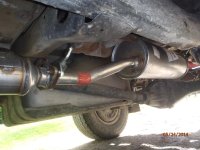
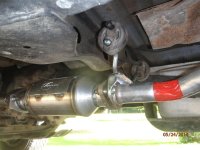
the 4runner had an exhaust leak at both flanges of the catalytic converter. the flanges on the head pipe and intermediate pipe weren't great, and the cat was in poor condition. i ended up purchasing an entire new exhaust system, in stock form, from mostly rock auto, but also toyota overstocks. so, brand new front (head) pipe, new cat, and new muffler/tailpipe assembly (i went with a single-piece unit, rather than getting a new intermediate pipe, muffler, and tailpipe), new cat hanger (that was hard to find), new tailpipe hanger, and new gaskets (both for the cat and for the head pipe at the manifold).

the entire project took only 4 hours, which include removal of the old system, and installation of the new one. i used a grinder to sever the pipe between the cat and muffler, which made getting everything out much easier.

the nice thing about the stock pieces was that everything fit just right. i didn't have to do any bending, stretching, cutting, etc.

and now i've got a leak-free exhaust that is quiet.

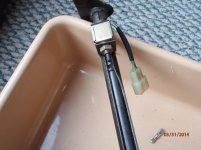
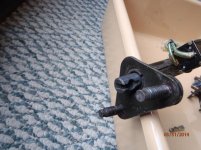
edit: added photos - old cat, new cat
 

Attachments

  • P4030007.jpg
    P4030007.jpg
    120.7 KB · Views: 1,250
  • P5240004.jpg
    P5240004.jpg
    131.1 KB · Views: 1,195
Last edited:
^^^^I need to do that too. What cat did you get and how much did it cost? Were the exhaust parts Borla or Walker? Nice 4Runner BTW. It's in excellent shape for California much less NH.
 
parts from rock auto:
bosal 885867 front pipe $71.79
davico 16075 cat $84.79
walker 35199 hanger/insulator $5.70
bosal 284873 muffler combination $90.79
bosal 256061 pipe flange gasket/seal $2.82 (2)
bosal 255031 hanger/insulator $3.14

parts from toyota overstock (oem)
17503-35130 bracket sub-assembly $25.62
18495-35011 retainer $11.64
90105-10388 bolts/washer base $1.04 (4)

that's it. total $303.27 plus shipping (about $110.00) less than the going rate for a catalytic converter. you can eliminate the 18495-35011 retainer, don't need it, though i used it (instead of nuts). i also used nuts from my "parts jar" to bolt the cat in using the bolts/washer base, and to attach the front (bellhousing) hanger and tailpipe hanger.
 

Attachments

  • P5240005.jpg
    P5240005.jpg
    129.2 KB · Views: 1,614
  • P5240006.jpg
    P5240006.jpg
    126.5 KB · Views: 1,406
  • P5240007.jpg
    P5240007.jpg
    139.5 KB · Views: 1,269
  • P5240008.jpg
    P5240008.jpg
    132.2 KB · Views: 1,207
Last edited:
parts from rock auto:
bosal 885867 front pipe $71.79
davico 16075 cat $84.79
walker 35199 hanger/insulator $5.70
bosal 284873 muffler combination $90.79
bosal 256061 pipe flange gasket/seal $2.82 (2)
bosal 255031 hanger/insulator $3.14

parts from toyota overstock (oem)
17503-35130 bracket sub-assembly $25.62
18495-35011 retainer $11.64
90105-10388 bolts/washer base $1.04 (4)

that's it. total $303.27 plus shipping (about $110.00) less than the going rate for a catalytic converter. you can eliminate the 18495-35011 retainer, don't need it, though i used it (instead of nuts). i also used nuts from my "parts jar" to bolt the cat in using the bolts/washer base, and to attach the front (bellhousing) hanger and tailpipe hanger.

Wow thanks. By "Borla" of course I meant "Bosal." I bet the nuts are the same size I have for the oxygen sensor. Can't remember the size off hand. 8 x 1.25 or something like that.
 
been awhile since i updated the thread, although i haven't done much to the 4runner in that time (it has been performing very well, with just over 23K miles on it in 14 months).

i replaced the heater blower motor resistor. the original had been gradually failing - lost low speed, eventually lost 2nd, and finally lost 3rd, leaving only high. it was very simple to do. the resistor is up under the dash, passenger footwell side. it can be replaced without removing the glovebox assembly, but it is easier to see what's going on by taking the g-b out. unplug the connector to the resistor, remove the single screw, and it comes out. insert the new one. done.


got tired of the grime/oil all over the alternator, which probably contributed to belt squeal/slippage. i replaced the distributor o-ring (direct from toyota), which took all of 7 minutes from start to finish. this should eliminate any oil leakage from the shaft. i believe i have a slight P/S system leak from the various hose/fitting connections at the pump which are also adding to the slimy alternator, but i'll address that in the future. replacing the 0-ring seems to have reduced the amount of oil weeping down the front of the block.

still getting alt squeal, and the adjustment to belt tension was maxed. ordered all three drive belts (P/S, Alt, A/C) to replace them. the FSM does have the correct procedure for removing a drive belt, but not for all three belts, a continued deficiency by the producers of the manual - too many assumptions. start with the P/S belt. loosen the pulley nut, not the tensioner nut. once the pulley nut is loose (19 mm), then loosen the tensioner nut (12 mm) all the way to fully retract the idler assembly. remove the belt. it can be coaxed over the fan assembly without too much difficulty. oh, and before doing any of that, remove the lower engine plate/shroud, if your truck has it, which makes all of this easier, since you need access to the top and bottom of the engine bay. next, loosen the A/C idler pulley nut (14 mm), and then loosen the tensioner nut (14 mm), and fully retract the idler. the belt comes off without having to go over the fan. finally, loosen the lower pivot on the alternator (14mm), and then loosen the upper adjustment nut on the alternator (12 mm). push the alternator toward the block, and the belt should slip off. this belt too can be removed by slipping it over the fan, with the shroud in place.

reassembly is the opposite, starting with the Alt belt, then the A/C, then the P/S. i didn't tighten anything until all three belts were in place correctly.

took it for a drive, and instead of getting mod/heavy squeal at 2500 to 3100 rpm, i got up to 3700 with no squeal. i'll monitor it for a bit and check belt tension in a day or two.
 
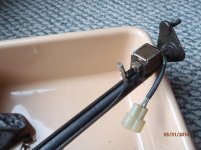
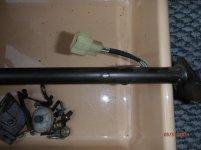
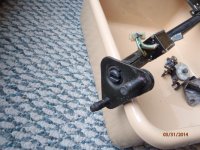
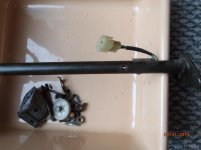
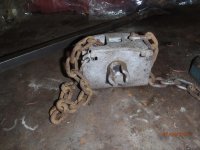
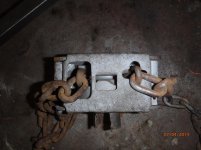
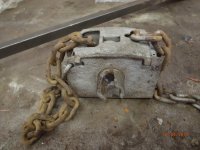
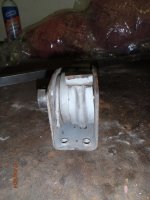
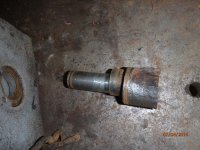
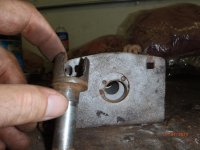
another project that i did a few months ago, and forgot about until a current thread was posted. the spare tire hanger/lowering mechanism didn't function. so, i removed it to try to get it operational. there are three bolts that attach the body of the hanger to the "spare tire frame sub-structure". these may or may not be heavily rusted. i was able to remove all three without breaking them, using torches and lube.

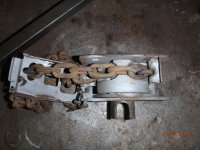
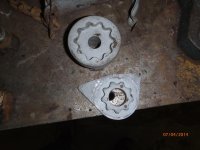
the inside of the hanger was full of dirt, rust, and crud. the moving pieces were solidly fused together. i disassembled the entire mechanism, and sandblasted everthing. to get it apart, gently pry the tabs open on the cover (the piece with the cross through which the chain passes) and lift off. pry off the c-clip at the opposited side of the slotted pin, and the rest of the "innards" should be free to come out.
 

Attachments

  • P7040028.jpg
    P7040028.jpg
    133.7 KB · Views: 1,050
  • P7040029.jpg
    P7040029.jpg
    130.8 KB · Views: 1,063
  • P7040031.jpg
    P7040031.jpg
    132.8 KB · Views: 1,036
  • P7040032.jpg
    P7040032.jpg
    136 KB · Views: 997
Last edited:
the mechanism is pretty basic, and actually fairly stout. it fails because dirt, roadwash, salt, and rust can freeze the parts together. with regular lubing, from a clean start, it should probably work for quite a long time.
 

Attachments

  • P7040033.jpg
    P7040033.jpg
    132.1 KB · Views: 1,018
  • P7040034.jpg
    P7040034.jpg
    137.6 KB · Views: 979
  • P7040035.jpg
    P7040035.jpg
    131.9 KB · Views: 1,014
  • P7040037.jpg
    P7040037.jpg
    132.4 KB · Views: 1,042
  • P7040038.jpg
    P7040038.jpg
    134.5 KB · Views: 973

Members online

Forum statistics

Threads
278,308
Messages
3,554,057
Members
248,016
Latest member
Advally Service

Trending content

Back
Top