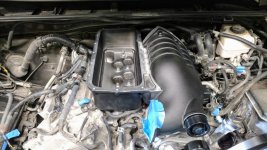
Here is a video of the bypass valve operation. It is on the top (hot side) of the intake. You can see how the butterfly opens and lets air pass though a window back into the intake side of the compressor.
Next one tired to get a shot of the rotors spinning... the lid shown in the previous goes on top of what is shown here....
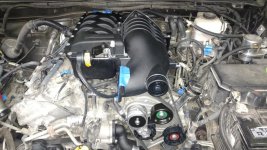
A few more pics of the compressor and intake box installed. Tensioner is correctly oriented here...
This was all very easy to do. Belt was not well explained in the instructions, but I documented the technique and sent the info as feedback and should be included in released documentation. Basically slip on the top green backside idler last. Use a half inch drive to loosen the tensioner arm (cheater pipe and a helper makes it easier).
A few more pics of the compressor and intake box installed. Tensioner is correctly oriented here...
This was all very easy to do. Belt was not well explained in the instructions, but I documented the technique and sent the info as feedback and should be included in released documentation. Basically slip on the top green backside idler last. Use a half inch drive to loosen the tensioner arm (cheater pipe and a helper makes it easier).
Nothing to be envious of at the moment. My truck is a brick with no ECU.. Have to wait and that is just part of what I signed up for with the pilot.
Now, in another week or so.. there should hopefully be something to be envious of and I will post plenty of info to rub it in if there is LOL. Still plenty that could go wrong...
Minor question. Do they make an engine cover that fits on each side of the valve covers or based on what I see you just run it naked once you are done?
Minor question. Do they make an engine cover that fits on each side of the valve covers or based on what I see you just run it naked once you are done?
Yea, you don't put the plastic engine cover or any replacement cover on. You could probably cut up the original and make something if you wanted a specific look....
That shows the charged air cooler. Coolant (in a a dedicated cooling sytem.. not part of the regular engine coolant) is circulated to this from a heat exchanger that sits up in front of the radiator and AC condenser.
It is an Air-> Water system (not air->air). The charged air is forced through it before it can get into the intake runners. This is very different from an air to air system where the charged air travels inside the intercooler and goes through it's piping before traveling back into the intake.
The advantage to the air->water is a much more compact installation with less pressure loss. Pretty much all the TVS style blowers work this way. Turbos or centrfugal superchargers usually use air->air.
The coolant is circulated via an electric pump that turns on with the car. I have not installed the pump or front heat exchanger yet. That is pretty much the remaining steps.
This guy does a great job of explaining how different types of inter-coolers work, including air->water.
I was joking and being serious. My familiarity with superchargers is pretty limited, I have seen some (not toyota) without an inter-cooler, I would only assume that it would run better with one for obvious reasons. Anyway great response, thanks
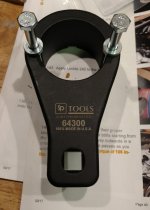
So I got the tool for the crank pulley and verified the torque on the crank pulley bolt with it. It worked fantastic but the bolts that came with it were obviously not long enough to work with the blower crank pulley. So I used 2 M8 1.25 10.9 grade 90mm long with a 65mm shank. 2 or 3 m8 washers were also used. Great tool that is very well made. Pretty much indestructible.
I'm not going to fall for the "Meh" comment. Not sure if you were serious or not. It's not for everyone... Just providing info here, nothing more and trying to keep it drama and :argue: free.
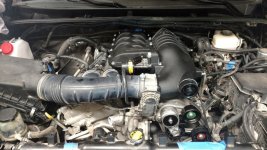
Have not had much time..., but did make a little more progress his morning. Got the TB and intake air track back on. Looks pretty OEM. Just the heat exchange and pump left to go... Mainly waiting on the ECU to get motivated. Hopefully next week.
I'd be interested if Magnusson could build a second tune for 87 Octane for my trips into Baja.
Because you'll never find anything higher than 87 and carrying ethanol or octane booster to do a 2000 mile trip off road would be comically silly and dangerous lugging that much around in the vehicle.