What did you do to/in your 5th Gen today?!

Drove it home [emoji23] 17 with KDSS
ca4f078aadb0dcf26b9559fb2d4bfd8f.jpg


Sent from my iPhone using Tapatalk
 
Hey guys and gals, I'm in need of your awesome knowledge on electrical wiring. Some months ago I went to a very good off-road shop for the installation of my S8 Baja Design light bar. They did an excellent job but it was kind of pricey. I have just received an ARB 12 volt wiring loom to power my Indel-B fridge 24/7. The question is if I can just connect it directly to the stock battery with the wiring of the light bar, or do I have to do something else??? I really don't know shit about electronic wiring and definitely don't want to burn my truck to the ground. Attached are some pics of the light bar wiring so you can tell me if it's ok or not to do the install directly. Thanks in advanced for your help!!!

Cheers,

P.S.
here is the link to the ARB wiring kit

ARB FRIDGE FREEZER WIRING KIT & THREADED SOCKET (10900027)


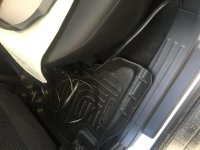
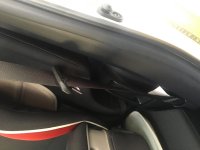
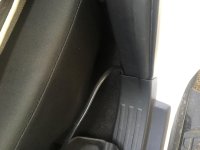
Hey guys, I ran the ARB harness yesterday from the engine bay all the way to the back seat, but I don't know how to pass it to the rear. Do any of you could tell me how to pass the harness to the rear looking like it is from the factory??? Here are some pics to show you where I'm stuck!!!

IMG_6083.jpg

IMG_6084.jpg

IMG_6082.jpg
 

Attachments

  • IMG_6083.jpg
    IMG_6083.jpg
    131.3 KB · Views: 738
  • IMG_6084.jpg
    IMG_6084.jpg
    136.2 KB · Views: 746
  • IMG_6082.jpg
    IMG_6082.jpg
    131.3 KB · Views: 747
That looks good but are you going for a new letter style becuase the best one I've seen is where they make the R like that of the TRD decals. Plus the Trails are just like the TRD models only without the decals, TRD parts an all but it still has dif locks/e-lockers on them.

Thanks for the compliment. I personally don't like the R from the TRD logo, so my design is based on the R from the 4Runner logo on the back of the truck. I like that font and want to carry that theme for my TRAIL logo.
 
Hey guys, I ran the ARB harness yesterday from the engine bay all the way to the back seat, but I don't know how to pass it to the rear. Do any of you could tell me how to pass the harness to the rear looking like it is from the factory??? Here are some pics to show you where I'm stuck!!!

Somewhere there are pics (likely in Antman thread) where he removed the weather stripping along that back panel to push the wire through. It would be just above where you are now. The rear could be a little different depending on if you have third row.
 
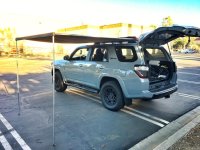
Installed a retractable Sunshade, I have used these in my last 2 vehicles with great success, cheap and very effective.
81c4b0b1251489f847bd533a6ae7bae9.jpg


Sent from my iPhone using Tapatalk
 
5th Gen Regearing

Hey y'all.

New member here... just registered to try and tell everyone about my first mod... can't post directly so I'll just say it here...

Left my '16 TEP with Chase at East Coast Gear Supply in Raleigh this morning... having Nitro 4.56 diff cores installed and my factory e-locker swapped for an ARB along with twin compressors and a front locker as well... could be overkill for a mostly DD, but I hate the gear-hunting the stock setup does on even small hills and I want to go to P285s when the stock P265s are done, and I want to hit the trails in the Uwharrie National Forest here in NC with dual lockers available...

More to come when I pick it up next week!


Haycock
 
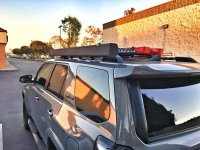
Installed Eezi Awn 1000 Black on stock OEM Roof Rails.

Installed Eezi Awn 1000 Black on stock OEM Roof Rails.

It's hard case.
 

Attachments

  • IMG_9850.jpg
    IMG_9850.jpg
    136.1 KB · Views: 867
  • IMG_9853.jpg
    IMG_9853.jpg
    138.6 KB · Views: 869
Got the 4Runner tinted yesterday.

Went with the Llumar Pinnacle Series and 15% all around. I also went with a clear UV film on the windshield to keep it cooler.

Really like the turn out.
17badac65bdac27fbae6958c61d9c7cf.jpg

848fcdf46bc820e51ee044d33804d0ca.jpg


Sent from my iPhone using Tapatalk
 
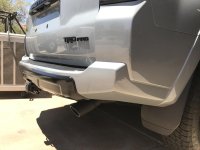
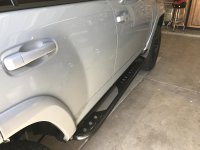
Painted (High Heat flat black) the chrome exhaust tip..not a fan and it was a add on that I didn't have any control of when ordering...also installed Shrockworks sliders
IMG_0669.jpg

IMG_0668.jpg
 

Attachments

  • IMG_0669.jpg
    IMG_0669.jpg
    117.6 KB · Views: 833
  • IMG_0668.jpg
    IMG_0668.jpg
    119.3 KB · Views: 821
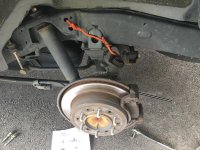
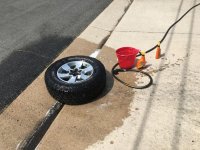
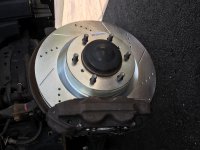
PowerStop Rotors & Pads

Installed the PowerStop Z36 front & rear kit. Front was easy... Rear reminded me how much I hate wrenching...
 

Attachments

  • IMG_0080.jpg
    IMG_0080.jpg
    138.9 KB · Views: 756
  • IMG_0082.jpg
    IMG_0082.jpg
    138.9 KB · Views: 754
  • IMG_0081.jpg
    IMG_0081.jpg
    136.1 KB · Views: 745
  • IMG_0079.jpg
    IMG_0079.jpg
    134.3 KB · Views: 756

Members online

Forum statistics

Threads
278,317
Messages
3,554,129
Members
248,016
Latest member
Advally Service

Trending content

Back
Top