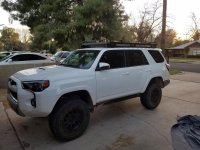
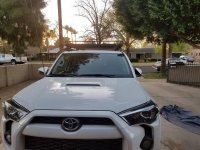
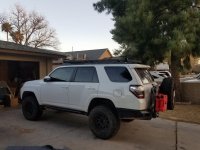
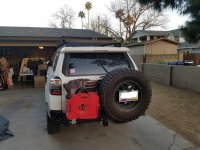
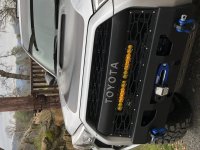
What did you do to/in your 5th Gen today?!

Looking good. Does the kit include a another kill switch to turn the light off? I'm wondering how much power this uses. I know I can just tape the button down to shut the light off but a manual switch would be nice too.

No kill switch included, it’s LED so power draw is almost nothing.
 
Got it aligned today - so glad I purchased a lifetime alignment package. $169 for the package in July, and I’m already 3 alignments in. No limit on number of checks and adjustments per year... Potholes and wheelin’ take their toll!


Sent from my iPad using Tapatalk
 
Last edited:
Got it aligned today - so glad I purchased a lifetime alignment package. $169 for the package in July, and I’m already 3 alignments in. No limit on number of checks and adjustments per year... Potholes and wheelin’ take their toll on!
Sent from my iPad using Tapatalk

That's awesome. What company do you go through?

I know firestone does it near me. Was curious to see what other company has the best rates/customer service

Cheers
 
Glad to see you guys are taking care of this as I'm looking into picking up one of your racks.


As I said earlier, SSO already sent the missing bolts and I should get it in a day or two.
Yesterday, Kevin called me and we went over few options re my stuck bolt:

6952ee5a98b4ad6e7340d494865c2fc5.jpg


He proposed to send the driver side side rail, kinda get the whole cow for a cup of
I didn’t really wanted to remove the rack from the car and I wanted first to try an old trick:

5a7ab8be03bc69a0b278a3c47f99f44b.jpg


Constantly applying pressure on the screw’s head while turning it.

Don’t forget to protect the bracket with some tape

b42c9804ad44df20ffdc2f677cb934d3.jpg


well, lots of tape :)

This will help removing almost any screw where you don’t have access to the nut and the nut is turning.

The rivnut and the screw were out

6dbc7c77ccf651a20fe69c83e56d63b4.jpg


I wanted to reuse the rivnut but the bolt broke inside

3dc2947443e88fc173b66d0b86c0a292.jpg


I installed the bracket back

945698680b514ea3ad412e5e1252aa15.jpg


And I went on SSO website.
I found from past experience that someone will be on chat even if they are during off hours.

Kevin was on chat within about 1-2min from when I logged into chat.
I explained what I did (forgot to mention I sent them and email while waiting, with my doing) and he immediately said he will send me rivnut replacements, rivnut tool, and new wind fairing brackets (passenger’s and driver’s side).
He mentioned that they already implemented several fixes based on my issues:
- slightly ovalizing the brackets’ holes
- moving the side rails rivnuts slightly away from the wind fairing to compensate better for the wind fairing’s thickness.
He said they will send it tomorrow - I just hope will get here before I leave next week for GOES-S launch [emoji573] from Kennedy Spade Center, FL

Will keep everyone updated
 
That's awesome. What company do you go through?


I know firestone does it near me. Was curious to see what other company has the best rates/customer service


Cheers


I went through Firestone - got one for all 3 cars. There are two locations near me to choose from and I always get a before and after printout from them. They were the only ones offering the lifetime package when I was looking, so my decision was pretty easy.


Sent from my iPad using Tapatalk
 
Installed a full Front Runner slimline II - Loving the rack, not so much the rails. install was easy once you got past the drilling part

Notes on install.
- an 11.5 MM drill bit for the rivnuts? Really? err okay it worked perfectly, just took a bit to find one online. Likely there was a standard size I could have used.
- Get a bit depth stop for peace of mind when drilling to ensure it doesn't get into the headliner
- measurements are in mm for the drill marks.... I do not have a tape measure in MM - just laid out the rack mount over the existing holes and marked where to drill

Stupid User issues (aka read first monkey boy)
- The expedition rack corners mean you can't take off the corners without removing the entire rack from the top. This is important as some attachments require using that slot around the top and/or bottom of the outside rail. Luckily the side rails have a pass thru for the nut. At first I was incredulous so I called them up and there is a way to squeeze a nut in there. Whew! or so I thought....
- When they say ensure the expedition rails do not move by using the shims, they mean it, use the shims provided! Mine would not move left/right but could rotate a bit and I though eh, it'll be fine.. NO they turned into noise makers the wind so I have to take the entire rack down. Because.. the corners will not come off (due to design) unless you pull the entire rack down. Ugh. I'll give it one more shot to keep them from howling, else they are coming off.
- MaxTrax must go on the front or back edge unless you purchase their side mount thing. Don't bother with the maxtrax pins unless you get that side mount thing. There is a youtube video on how to do this more cheaply.

Pics

 

Attachments

  • 20180211_175648.jpg
    20180211_175648.jpg
    136.1 KB · Views: 872
  • 20180211_175659.jpg
    20180211_175659.jpg
    136.7 KB · Views: 867
  • 20180211_175732.jpg
    20180211_175732.jpg
    135.9 KB · Views: 873
  • 20180211_175753.jpg
    20180211_175753.jpg
    137.4 KB · Views: 870
Saw Sedona from a different perspective than last time we were here (before the 4Runner).
8b2e36356a0a1c3ef34febd1374fa052.jpg


Sent from my SM-G920P using Tapatalk
 
Installed a full Front Runner slimline II - Loving the rack, not so much the rails. install was easy once you got past the drilling part

Notes on install.
- an 11.5 MM drill bit for the rivnuts? Really? err okay it worked perfectly, just took a bit to find one online. Likely there was a standard size I could have used.
- Get a bit depth stop for peace of mind when drilling to ensure it doesn't get into the headliner
- measurements are in mm for the drill marks.... I do not have a tape measure in MM - just laid out the rack mount over the existing holes and marked where to drill

Stupid User issues (aka read first monkey boy)
- The expedition rack corners mean you can't take off the corners without removing the entire rack from the top. This is important as some attachments require using that slot around the top and/or bottom of the outside rail. Luckily the side rails have a pass thru for the nut. At first I was incredulous so I called them up and there is a way to squeeze a nut in there. Whew! or so I thought....
- When they say ensure the expedition rails do not move by using the shims, they mean it, use the shims provided! Mine would not move left/right but could rotate a bit and I though eh, it'll be fine.. NO they turned into noise makers the wind so I have to take the entire rack down. Because.. the corners will not come off (due to design) unless you pull the entire rack down. Ugh. I'll give it one more shot to keep them from howling, else they are coming off.
- MaxTrax must go on the front or back edge unless you purchase their side mount thing. Don't bother with the maxtrax pins unless you get that side mount thing. There is a youtube video on how to do this more cheaply.

Pics

Makes me want a shrockworks rear bumper more just by looking at yours.
 
Added The Relentless Lo-Pro Winch Bumper

I love this bumper, the look and functionality...winch, tow points, LED light bar all integrated into one high quality solution. However I obviously need help with rotating the image...the file in my documents is orientated correctly. Also tried saving to desktop with same results.
 

Attachments

  • IMG_0230.jpg
    IMG_0230.jpg
    133.1 KB · Views: 833
How do you like them? Seem like a good solution is you don’t want a full rack. Install easy??[/]

I was able to install it by myself in about an hour or so....I was going to wait for my friend to help me over the weekend, but after I unpacked it I couldn’t stop :)

It’s definitely a good solution if you don’t have the OEM roof rails and want to be able to load stuff from Home Depot. I also picked up the optional mounts for the awning for camping.

I love the subtle look...

a51df39f1c015a10ae93a97d9f4a9ed7.jpg


fe78b7790e8673041f01a31c37955d3f.jpg
c975aa4d8130e418317a204a74802bd1.jpg


Sent from my iPhone using Tapatalk Pro
 
Installed my Rago rails...

These look very good. I'm guessing when it comes time to wash the roof these rails will need to be loosened and slid back & forth- or is there enough clearance to clean underneath the rails with your fingers or a rag on a stick?
 
It's a tight fit....I'll have to slide a towel under each rail to clean it.

These look very good. I'm guessing when it comes time to wash the roof these rails will need to be loosened and slid back & forth- or is there enough clearance to clean underneath the rails with your fingers or a rag on a stick?
 

Members online

Forum statistics

Threads
278,317
Messages
3,554,129
Members
248,016
Latest member
Advally Service

Trending content

Back
Top