What did you do to/in your 5th Gen today?!

TRD CAI fits perfectly on my 2018 SR5. Order it from the dealership, have them install it. It will be covered completely on your warranty.
 
Last edited:
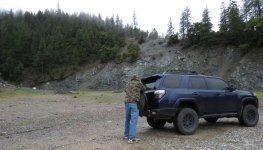
We explored some of the back roads and main roads of Death Valley National Park over the weekend. We saw elevations from 8k' down to -283' at Badwater Basin, wind so strong it made it hard to stand, and temps down as low as 35° at the highest elevations. Overall an awesome weekend, but I definitely could have done without the wind.

DYUeUZy.jpg


qlls9K7.jpg


1RRLcyU.jpg


vOXNe5D.jpg


NOs0Tkt.jpg


C0uc0HG.jpg


XKgI0or.jpg


PpyfWjR.jpg


mAfCiiz.jpg


ZYKIh46.jpg
 
We explored some of the back roads and main roads of Death Valley National Park over the weekend. We saw elevations from 8k' down to -283' at Badwater Basin, wind so strong it made it hard to stand, and temps down as low as 35° at the highest elevations. Overall an awesome weekend, but I definitely could have done without the wind.

Looked like a good time. Was thinking about heading to Death Valley over this upcoming Memorial Day weekend.
 
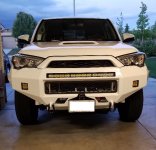
I installed my Pelfreybilt front bumper I got from Bay Area Metal Fab, along with all the other bits I've been hiding from my girlfriend. Theres a good chance she may not notice any change and I wont have to explain a thing. She never even noticed the 3'x3'x7' box with the bumper in it so, who knows.
 

Attachments

  • 20190520_200357_resized.jpg
    20190520_200357_resized.jpg
    121 KB · Views: 2,435
Done quite a lot the past few days.

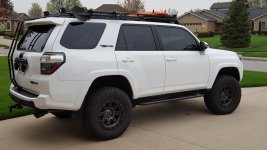
Swapped my toytec rears for Dobinson C59-325
dNHuh1I.jpg

OchoSg3.jpg

Vu0wnjb.jpg


Replaced a CV axle cause the boot tore. CV is perfectly fine and I'll be rebooting it in the future. Running a NAPA CV axle and all was fine until I noticed at full droop, the axle binds. It will rotate just fine until it stops and catches, and have to forcefully rotate the tire and the front driveshaft will have a rotation too until the binding stops. First time I've ran into axle binding so I had a bit of a panic. I'll let it stress me out another day. It wasn't too bad of a job but first time doing it, I was stressed the new axle wouldn't go in right away. Should be easier next time.
yqqC5vF.jpg


And lastly, I installed Element LED Micropod ditch lights today.
SWkhecm.jpg

UgyLzui.jpg

Vxdtxch.jpg

PwBXmNJ.jpg

i14ixeZ.jpg

wyw07ck.jpg

How do you like the Radflows?
 
Installed the ARB onto my 2013 Trail and worked on the bumper lighting. I'm installing a Dobinsons suspension this weekend!

rb27f6F.jpg
 
Got my first dent...but how??

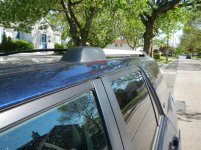
Found this today, I have no idea of what could dent it like this. No marks on the paint at all.
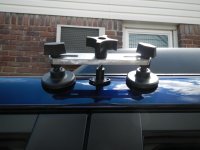
UPDATE: Got this from Harbor freight and gave it a try. No matter what I used to make the glue stick better it kept releasing after only getting a tiny bit of the dent out. After 8 tries it still has two small dents but I'd say 90% is gone. One day when I'm in the mood I'll try again.
 

Attachments

  • dent.jpg
    dent.jpg
    141.9 KB · Views: 876
  • DSCN5345.jpg
    DSCN5345.jpg
    125 KB · Views: 410
Last edited:
Found this today, I have no idea of what could dent it like this. No marks on the paint at all.

Have you ever taken that roof rail end cap/boot off before? I've seen that same dent on multiple 4Runners (including mine) after using a lever to pop that boot off. Doesn't take much force there.
 
How do you like the Radflows?

I like them a lot. They ride well for me and I remember putting them on in place of my Bilsteins, the compressions and rebound felt like a cloud on the road.

Took it off road this past March, I didn't know if it was too soft but I think I was just being picky. They do feel really good though and soaks up the drops and bumps well. Definitely not a harsh feeling but just more bouncy. Kinda wonder at times if I should have spent the extra money on reservoirs and adjustable knobs. But that's why I got the Radflos to begin with; didn't want reservoirs, wanted progressive valving, and wanted 2.5's.
I think the 2.5 rears hold up the rear end an extra inch. I get 3 inches of lift with 2" springs, but these new Dobinson's may still be settling.

I always question how no extra weight and standard coils over my 700 fronts and bumper/winch would feel, but I'm overall happy with them.

Love ease of adjustability since I never had that with the 6112's. I also like how their lock ring is easier to deal with rather than some brands and you can adjust them on the vehicle while on a jack.
 
Last edited:
[MENTION=224676]MRG_TRD[/MENTION]
[MENTION=165831]jasxn[/MENTION]
[MENTION=51033]97BlackAckCL[/MENTION]

More storage area pictures and measurements.

So I already had the rear bumper removed for another project, but it doesn’t need to be removed to build and fit in the custom storage. I removed the molding that holds down the carpet next to the rear hatch (the middle clips are easy, the side clips are a PITA) along with the plastic piece with the D-rings by the seats. Then I pulled out the original carpet and hard foam under padding. I removed the foam from the underside edges of the original carpet, but left the felt padding in the middle. I then placed the carpet back into the rear compartment to use at the base for the storage.

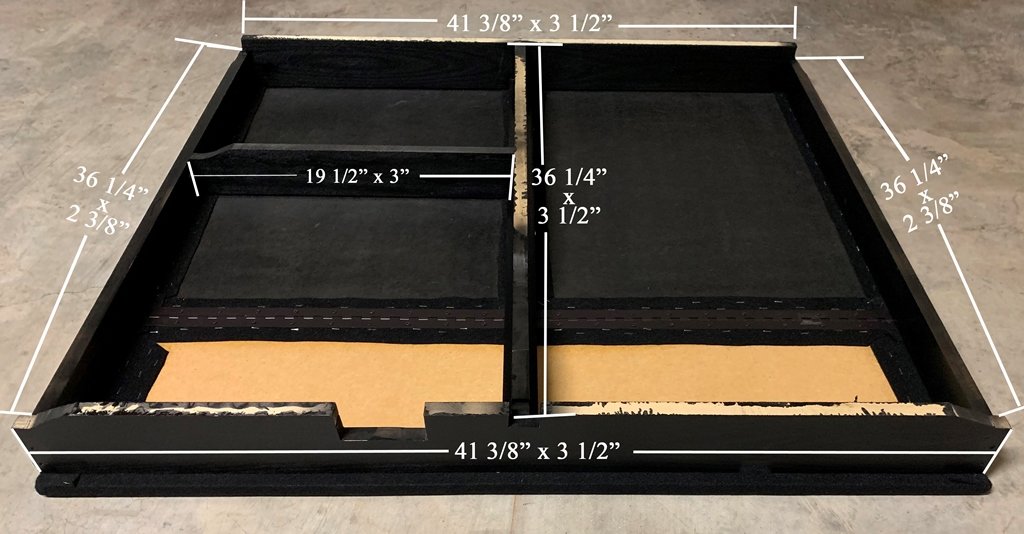
Then we just measured and cut the frame out of 3/8” Poplar boards. The side boards (run front to back) were cut to 36 1/4” (length) x 2 3/8” (height) they sit on the plastic rails that run along the wheel well (in the picture my dad has the level resting on one).

The center support rail is 36 1/4” (length) x 3” (height) with a 1 1/2” board nailed (finishing nails) to the top to make it a T for extra support for the lids (We had to cut the bottom of the board to fit over the metal hump on the floor, in 1st picture).

The boards (that run from the driver to passenger side) were cut to 41 3/8” (length) x 3 1/2” (height) and as you can see in the pictures relief cuts were made to make it fit around the seat brackets.

For all the joints/connections we used wood glue and screws.

I then just used black spray paint on the frame and the under side of the lids.

The top piece and lids are 1/2” MDF boards covered in black automotive carpet (held on with spray adhesive and staples), the fixed top piece is 41 ½” (length) x 11” (width), the lids are both 20” (width) x 28” (length) with a 1/2” aluminum U-channel attached (glued and screwed) to the edge of the lid that opens for extra protection. There is about a 3/8” gap between fixed top piece and lids to allow for the piano hinge to be mounted underneath and out of the way. The lids hang over about 1/2”-3/4” by the rear hatch to lift them open.

Still working on a lid support to keep it open on its own, most likely going to just cut a piece of wood that it can rest on.

Some pictures are same but help explain it.

f40cc44f-d926-43ba-8ef4-312a8e59147b-jpg.27035

5e8cde48-5767-4639-8740-26fbd4f88e32-jpg.27036

full

full

full

full

full

full

8c591e8b-4d62-49e8-8a1b-00d3de9f6288-jpg.27029

bf029b5f-7adb-4912-bbde-6e75f9775fe4-jpg.27030
 
Last edited:

Members online

Forum statistics

Threads
278,317
Messages
3,554,127
Members
248,016
Latest member
Advally Service

Trending content

Back
Top