What did you do to/in your 5th Gen today?!

Do you have the Prothane part # for the bushings you used? Looking at replacing mine.

Sure. Front is 19-1185. Rear is 19-1162-BL. The fronts are red, the rears are black. It doesn't bother me. I think the "BL" on the rears means black so order accordingly.
Straight forward swap except for driver's rear. The grease fitting would be near impossible to get to because of the gas tank location. I installed a 45 degree grease fitting. Also I smeared some grease all around the inside of the bushings before installing them just so I know there's grease all around right from the start. Bolts are 14 MM tighten to 36 Ft. Lbs.
 
did you buy your battery cables that are sleeved premade or did you make them?

The cables are part of the kit from Powertrays. Unfortunately the negative cable had too small of a hole to go over the M8 stud on my battery terminal connector so I had to drill one end out a bit. I also ordered some new 1/0 gauge cables from Powertrays to do the Big Three upgrade soon when I get the upgraded alternator.

Stembot, I'd use insulating positive battery terminal cover to prevent accidental arcing or short. I short circuited my AGM battery accidentally once and it was toast shortly after that.

I will do this, I might have to trim the cover a bit to accommodate the new fuses. I did briefly spark the terminals together with a ratchet yesterday while I was working, hopefully that wasn't enough to fry it.
 
something pretty cool, entered a giveaway on IG on the last day of it, logged on the next day and found out I won. Still can't believe it. I was just about to order 285's and put them on my gray TRD wheels and sell my 265's and now I might sell the trd wheels and 265's all together. Man I'm stoked!

yAdkIQoh.jpg

icOggXch.jpg
 
Not related to 4Runners but is related to dealers doing shitty work. Today I changed the oil on my wife's 2019 Forester for the first time. The first oil change was done at the dealer because it was there for an issue for the tailgate not opening and it was due so I figured I'd just have them do the free oil change. There is a plastic pan under the engine with a window to get to the pan plug. The window has a cover much like our 4Runners but it's held on by 3 plastic fasteners. Well two of them were missing and the cover was left moved out of the way and being held on by the one that's left. Then I had to use a breaker bar to get the plug out of the pan and the oil filter was gorilla'd on too. So incompetence is certainly not limited to Toyota dealerships. This dealer will never see my Forester unless it's for warranty work just like my 4Runner.
 
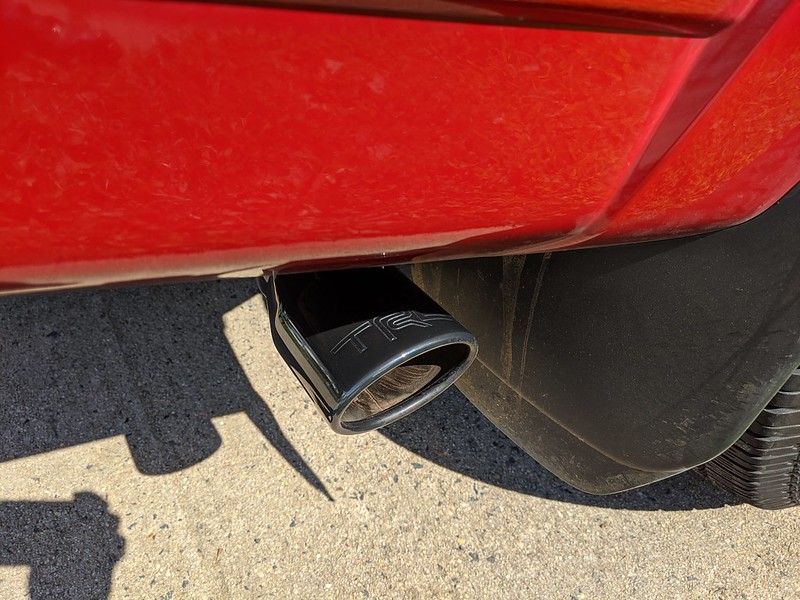
I installed the TRD catback exhaust on my 4Runner today! I got out there early in the morning, and I didn't finish until 1:00PM, but I did it! I almost gave up when I couldn't get the two bolts loose between the tailpipe and the muffler, but I loosened some hangers to let the whole thing hang a bit lower so I could work on the bolts while sitting under the back, and I got them loose enough finally! I used a lot of WD40! There's nothing it can't do! I got the wrench on the nuts as securely as I could from the back above the axle, and I looped a cheater bar in there and just pulled a whole lot, and I did it! It was so cool! I didn't think I could do it, but I did! I feel like this guy right now! https://www.youtube.com/watch?v=5pfSUQpV13I I had to know if I could do it. I always wanted to be a mechanic when I was a kid, and my mom wouldn't let me, and I know that this is kind of expensive Legos level of mechanic work, but I did it! I'm so happy! I had to know if I could do it, just for my own satisfaction, and I did it! I did the crap out of it! I got the truck up on the jackstands! I got the spare tire out! I put extra bricks under the rear tires and put the spare tire under the frame off to the side for extra protection! My truck stayed up there! No problems! I got to work on it safely! I felt a little bit like a guy lifting weights on a bench without a spotter when I took the original muffler down, and I kind of wished I went to the bathroom before I took it down because it was big and heavy and pushing on my belly, but I got it out! Then I put the new one in there! I did it! Yeah! :thumb3:

Just a couple things while I was down there.

1. I'm actually not 100% sure that there was a gasket between the muffler and the catalytic converter. Looking at things online after the fact, I think there was one, and it was in really good shape with only 3,000 miles, but it was a lot harder than I expected a gasket to be. I guess that's just how this type of gasket is. I'm sure nothing fell out, and there was nothing in the pipe on the old muffler, so it probably always was in there.

2. My frame actually looks to be in really good condition. Granted, I haven't gone through salty road conditions with it (except for one extremely brief instance), but I didn't even see any surface rust. I'm happy about that.

 
Nice work and good on you that you tackled it! Now you can have the confidence to do other stuff on your Runner.

Thanks a bunch, Blue Man! I sure hope so! I'm going to install recovery points and the TRD Pro grill soon. I don't know exactly when I'm going to do those, but I'll do them within the next week. I need some dry weather for the adhesive for the grill, and I still need a socket for my torque wrench. It turns out that my new torque wrench has a connecting stub thing (yeah, real good technical term for it) that's bigger than anything else I've got. I want to make sure my lug nuts are properly torqued when I put the wheels back on after installing the recovery points.
 
Updates

I put in an ARB rear locker with 12v air compressor, I also removed the 3rd row seat and made a storage area of my hi-lift, recovery rear and tools.
 
Thanks a bunch, Blue Man! I sure hope so! I'm going to install recovery points and the TRD Pro grill soon. I don't know exactly when I'm going to do those, but I'll do them within the next week. I need some dry weather for the adhesive for the grill, and I still need a socket for my torque wrench. It turns out that my new torque wrench has a connecting stub thing (yeah, real good technical term for it) that's bigger than anything else I've got. I want to make sure my lug nuts are properly torqued when I put the wheels back on after installing the recovery points.


Hey, Gamma, make sure you get a thin wall, non marring socket to use on the lug nuts. Worth a few extra bucks, and you won’t beat up the pockets in the wheels when you use it.


Sent from my iPad using Tapatalk
 
I almost did something stupid. While getting my oil changed at the dealership, I went next door to the Jeep dealership to look around and kill time. I swear a salesman was sitting in the back of a Jeep and he approached me. I said I was just looking. We got to talking about a sarge green Rubicon Recon. Looked at the price and it was $59K. He said let’s go inside and talk numbers. We did and it was crazy how much they offered for my 4R. $51K. I said deal. Write me a check and i will be on my way. He said I have to trade it and buy a Jeep. I said I don’t want a Jeep and especially not one with an $1100 payment. Then he tried to talk me into a diesel Willy’s. I said the diesel is having tons of problems like all Jeeps have. I told him I will be keeping my reliable, old school, great daily driving truck.
 
Also I was looking for a way to mount my Maglite I couldn’t come up with anything so I wedged it between the center console and the seat. It fits perfectly and snug.

b37784c98bd8b8095c2cb68c562390c6.jpg
 
I almost did something stupid. While getting my oil changed at the dealership, I went next door to the Jeep dealership to look around and kill time. I swear a salesman was sitting in the back of a Jeep and he approached me. I said I was just looking. We got to talking about a sarge green Rubicon Recon. Looked at the price and it was $59K. He said let’s go inside and talk numbers. We did and it was crazy how much they offered for my 4R. $51K. I said deal. Write me a check and i will be on my way. He said I have to trade it and buy a Jeep. I said I don’t want a Jeep and especially not one with an $1100 payment. Then he tried to talk me into a diesel Willy’s. I said the diesel is having tons of problems like all Jeeps have. I told him I will be keeping my reliable, old school, great daily driving truck.

I did a quick estimate of that Jeep on Kelly bluebook with almost every single option added. Their idea of a fair price was $50-54K. You did the right thing. :thumb3:
 
I did a quick estimate of that Jeep on Kelly bluebook with almost every single option added. Their idea of a fair price was $50-54K. You did the right thing. :thumb3:


Yeah the salesman just texted and told me what a great deal they offered for the diesel and that they hold their value better than any other vehicle. I said you offered me $51K on a vehicle that I bought 8 months ago for $51.5K so there is no way the Jeep could bring that. They also tried to add some piece of crap add on called Club Pass for $1700 which they couldn’t even tell me what it was. I laughed and said I lost my ass on every Wrangler I ever traded in especially the Recon I traded for my 4R. All I know is I will never buy a Jeep in the future from that dealership. Their sister Toyota dealer seemed to do a great job with my 10K service.

As I was driving on the highway today at 95mph which I would have never done in any wrangler, I realized the 4R is the better daily driver by a large margin. I’m very happy with the 4R.
 
Last edited:
All I did was a simple wash and wax. I have still have some rough spots, but have never clay bared. Someone once told me to be careful of the clear coat if I did clay bar - that has spooked me ever since...
 
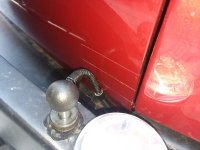
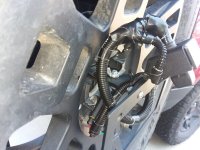
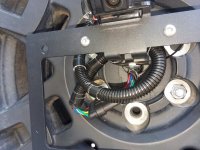
Finally finished the last step of our rear bumper install - relocating the backup camera. I'll count this as what I did today, because today I finally wrapped everything up, and put the cover for the back hatch back on.

We added a Victory 4x4 bumper, and a swing out arm for the spare tire. Did that a while back, and that was the easy part... Getting the wiring re-routed for the camera, that took a bit of doing.

I used the bracket from the Victory kit, but didn't want to cut and splice the wires in the head-liner, per their instructions. Instead, I bought 4 20-foot lengths of 20 AWG wire (camera), and 2 20-foot lengths of 18 AWG wire (license plate LED) and used that to route down to the connection points inside of the back hatch. I wound up using about 18.5 feet for the main cable, and the 1.5 feet for a connector 'tail' that allows the camera and licence plate to be easily removed.

I didn't want to cut the original short camera connecting wire, so instead bought a couple of connectors - one on Amazon, one from a company that sells on ebay. That was a mistake. The camera connector was designed for 22 or maybe 24 AWG wire, and I was working with 20 AWG. And the connector I bought from eBay wouldn't seat all the way... Turns out that the connecting wire is only $11 from Toyota. So I bought one of those to cut and splice, and that was so much easier. Water over the dam... But for others doing this, you can buy the Toyota OEM cables and cut them to use for connectors for a reasonable price.

Other notes that might be helpful to someone else doing this:
- I was able to use 1/4" split loom cable wrap, and run it all the way up the pillar inside the hatch. This keeps the wires from being pinched in the upper corner of the rear hatch as they are pulled.
- I also used 1/4" split loom to run from the headliner down past the passenger rear tail-light, and out the rubber grommet on the rear passenger side. Plus a bit of 3/8" split loom as reinforcement in key areas.
- I added some Racer's tape / Helicopter tape to the back hatch to eliminate any scuffing from the wire-loom against the hatch.
- Finally, instead of just terminating the wires at the camera connector, and the LED license plate light, I put a 6-pin Weatherpack connector in the mix. This makes it very easy to disconnect the license-plate bracket with the camera in a way that then makes it easy to take the spare tire off. I think this is a very important improvement. Who wants to be futzing with the connector to the camera when trying to change a spare? Yes, this connector will need to be cut off, if the carrier itself is removed, but that should be far less frequent an occurrence than pulling off the spare tire.

I've added a few pictures. Not the best, but they may give someone some ideas about what can be done.
 

Attachments

  • 20200818_114518.jpg
    20200818_114518.jpg
    39.1 KB · Views: 604
  • 20200818_110445.jpg
    20200818_110445.jpg
    52.6 KB · Views: 609
  • 20200818_110405.jpg
    20200818_110405.jpg
    52.9 KB · Views: 603
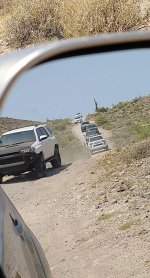
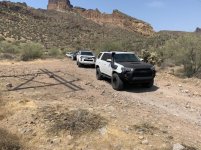
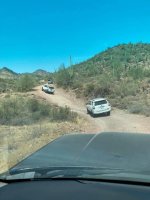
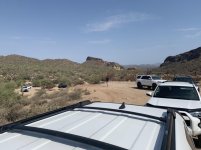
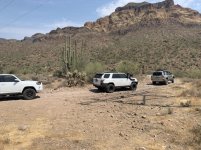
Mobbed deep. Four hours of 4WD.
 

Attachments

  • C8B73C2F-73F3-4880-A4F1-2121A2202F5B.jpg
    C8B73C2F-73F3-4880-A4F1-2121A2202F5B.jpg
    150.3 KB · Views: 595
  • 808DA686-72F6-49F3-9C49-6EEDCAED5480.jpg
    808DA686-72F6-49F3-9C49-6EEDCAED5480.jpg
    142.4 KB · Views: 590
  • 0B98B5B4-4DF0-47AD-ACCA-88E4D7873CE7.jpeg
    0B98B5B4-4DF0-47AD-ACCA-88E4D7873CE7.jpeg
    101.2 KB · Views: 591
  • 7387401C-0C00-4B13-86B7-2E1AB090939F.jpg
    7387401C-0C00-4B13-86B7-2E1AB090939F.jpg
    76.4 KB · Views: 580
  • 55976411-2BEB-4395-BAA6-50442AF2190A.jpg
    55976411-2BEB-4395-BAA6-50442AF2190A.jpg
    137.1 KB · Views: 585
Last edited:
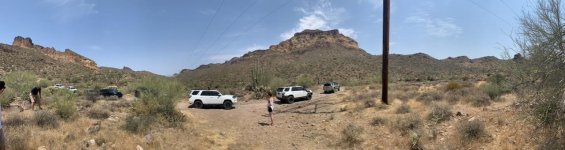
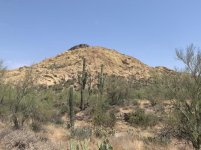
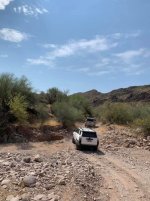
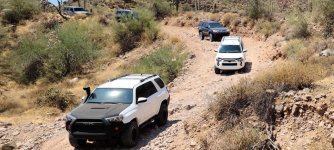
Usery Pass to the 88.
 

Attachments

  • 60D2EED6-65C6-477C-8DEF-D69D6D79741A.jpg
    60D2EED6-65C6-477C-8DEF-D69D6D79741A.jpg
    115.6 KB · Views: 600
  • 511299DF-F5A3-454C-8348-7C14983CC666.jpg
    511299DF-F5A3-454C-8348-7C14983CC666.jpg
    141.1 KB · Views: 586
  • 5B6DE36C-3E47-4501-8552-8FACD217C995.jpg
    5B6DE36C-3E47-4501-8552-8FACD217C995.jpg
    95.8 KB · Views: 584
  • 3CDA6450-C442-410C-863B-B241006731B6.jpg
    3CDA6450-C442-410C-863B-B241006731B6.jpg
    141.9 KB · Views: 583
  • E03FD1FF-7173-41DA-99A9-4F3DBE333052.jpeg
    E03FD1FF-7173-41DA-99A9-4F3DBE333052.jpeg
    98.7 KB · Views: 583
Last edited:
Sprint Booster

Thanks to gearguywb selling a Sprint booster for an amount that I felt was fair and good enough for me to make the purchase, I now installed one in my Runner this morning. The install is very easy, the hardest part is getting my hands under there and pressing the little release tab to get the plug off of the pedal. I took it out for a short trial run and have settled right now on S5. I tried it from off (stock) to S5, then S7 then S9 and it makes a real difference from stock in each setting. I really like how it holds each gear a little longer and downshifts much sooner in the pedal travel. Just to see how it felt I tried R9 and it's a bit too sensitive there. It's kinda fun but it really is too much. This is a truck not a sports car and I'm not looking for an overly sensitive pedal response. I think I'll be leaving it in S5 but I'll play with it a little more to be sure then unplugging the control and just put it in the console.
So thank you gearguywb, I'm happy with the Sprint Booster.
 
Last edited:

Members online

No members online now.

Forum statistics

Threads
278,317
Messages
3,554,129
Members
248,016
Latest member
Advally Service

Trending content

Back
Top