What did you do to/in your 5th Gen today?!

Installed the Treaty Oak KDSS spacers this weekend. I also mocked up the Eimkeith PCK and it looks like it's going to have my sway-bar almost perfectly level.

Tips for anyone else doing these spacers:
-Breaker bar is a must. Those stock bolts are *TIGHT*, especially after 90k miles.
-Unbolt the front sway bar bolts evenly. Mine was under a lot of tension and wedged a bolt in before it was fully out. I had to use the floor jack to relieve the tension.
-It helps to unbolt both rears at the same time to get the KDSS piston back on the sway bar. Then you'll have to use your floor jack to jack the sway bar up to connect the solid linked end.
-Anti-sieze is your friend.


51997334216_e5129e49b2_b.jpg

51997604909_dc76b36de8_b.jpg

51997604269_8f4f41e7e8_b.jpg
[/url]

Any impact on ride quality with the spacers or just improved articulation?
 
Any impact on ride quality with the spacers or just improved articulation?

helps clearance so you can run extended travel shocks, helps getting your suspension geometry back into spec. Supposedly, helps with KDSS lean, but not too sure about that.
 
Any impact on ride quality with the spacers or just improved articulation?
helps clearance so you can run extended travel shocks, helps getting your suspension geometry back into spec. Supposedly, helps with KDSS lean, but not too sure about that.

Ride quality seems exactly the same. I took a 6 hour drive to Long Beach and back the day after I installed it and didn't notice a difference. I did it mostly for the improved articulation. And like [MENTION=151737]mrblah[/MENTION] said, it is supposed to help with KDSS lean, but the lean on my truck was never very egregious (less than 1/2" side to side). I need to find a level spot and measure it now.
 
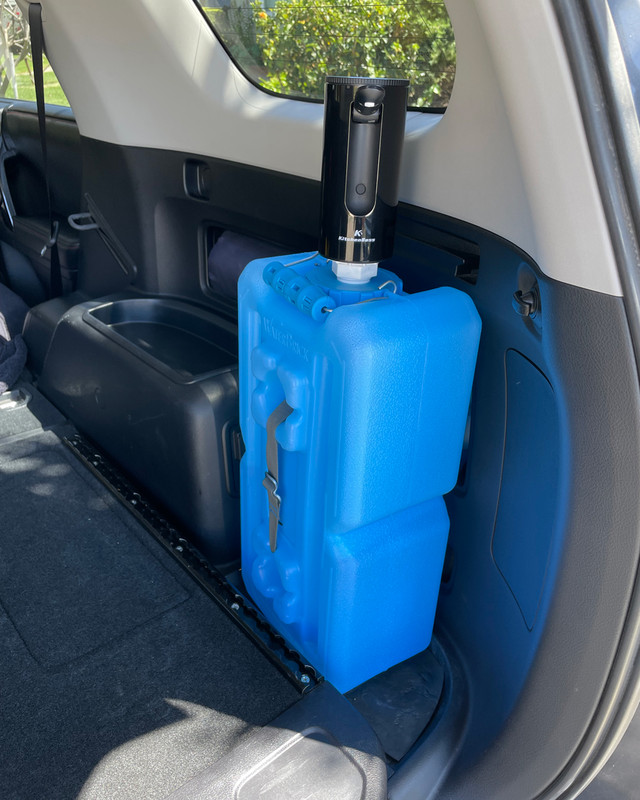
WaterBrick and Electric Pump

Set this up recently and now have 3.5gal of water with a electric pump faucet. This fits well in this space and stays in place with a single strap though the middle and around the cross piece on that plastic cubby space. Finally no more lifting 2.5gal grocery store jugs.

IMG-4361.jpg


I've been using the 2.5gal water jugs from the grocery store for years because I couldn't really find a solution that fit with my setup. The 2.5gal grocery store water jugs fit nicely vertically in that space behind the passenger side wheel well. But they are flimsy and you have to lift it out, drain water into your Nalgene or pot, allow air in because of suction and then put it back when you're done. I liked the Scepter and pump setups but 5gal took up to much space.

I wanted something that occupied the space behind the wheel well as its nice and out of the way there in all the configurations I have the back setup in, fully packed up, arranged to sleep on one side, and all variations of empty once camp is set up or at a destination and doing day trips. This solution is exactly what I was looking for, sturdy enough and cheap compared to a scepter + $100 electric 12v pump setups I've seen.

Waterbrick on Amazon

I just saw they now offer their own dispenser, a month a go when I put mine together they did not.


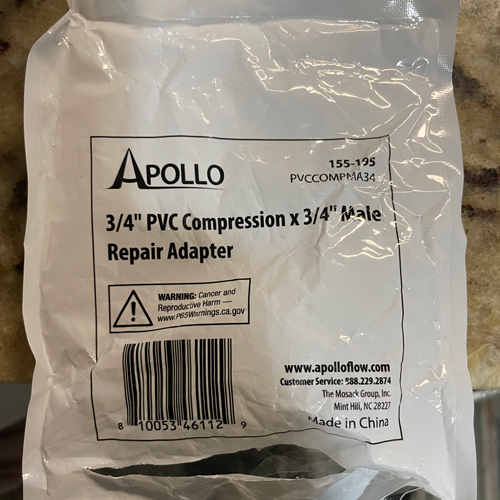
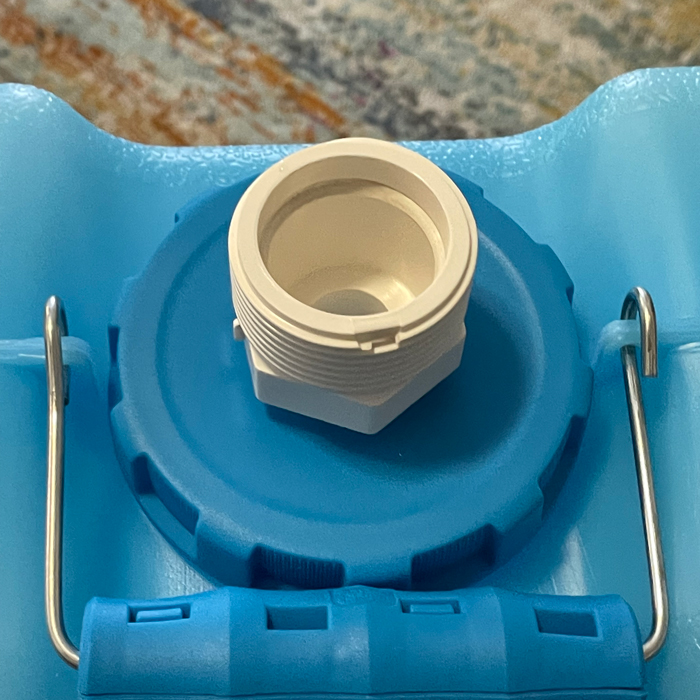
I made mine with a 3/4 inch pipe compression adapter.
IMG-3009.jpg


One end of the adapter from Home Depot screws right into their spigot cap.
IMG-3012.jpg


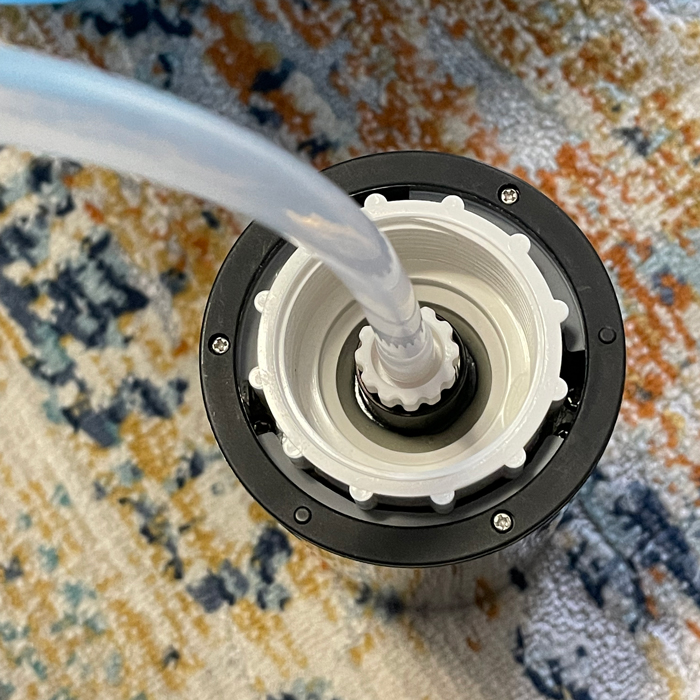
To attach the pump I used some plastic bonder and attached to the underside of the pump I got off amazon. I like the amazon pump because it has water measuring settings so I can set it for one touch to dispense the exact amount I need for my freeze dried meals or cup soups.
IMG-3011.jpg
 
Set this up recently and now have 3.5gal of water with a electric pump faucet. This fits well in this space and stays in place with a single strap though the middle and around the cross piece on that plastic cubby space. Finally no more lifting 2.5gal grocery store jugs.

IMG-4361.jpg


I've been using the 2.5gal water jugs from the grocery store for years because I couldn't really find a solution that fit with my setup. The 2.5gal grocery store water jugs fit nicely vertically in that space behind the passenger side wheel well. But they are flimsy and you have to lift it out, drain water into your Nalgene or pot, allow air in because of suction and then put it back when you're done. I liked the Scepter and pump setups but 5gal took up to much space.

I wanted something that occupied the space behind the wheel well as its nice and out of the way there in all the configurations I have the back setup in, fully packed up, arranged to sleep on one side, and all variations of empty ........]

Very nice...do you secure it in any way????

I can definitely see me doing this mod as that space is often wasted and tends to get filled with dirty socks and underwear with skid marks....lol...not really...maybe once.
 
Ok, here is the part I meant:

2018 Toyota 4Runner Grille Assembly 53101-35080-J1 | TRDShop.com

Would that piece of the grill be a direct swap with the equivalent on a 2022 ORP?

Thanks again

it looks like those chrome inserts might come out. look at the 2021 part (website didn't have 2022). you can see it's interchangeable except for the TRD PRO trims which have the Toyota letters on the grille. the chrome pieces might just snap into place. you could try taking yours off and checking. or even call a local dealer parts dept, they should be able to get you the right part if in fact it's a direct swap or the inserts come out

2020-2021 Toyota 4Runner Grille Assembly 53101-35100-B0 | TRDShop.com
 
...do you secure it in any way????

Just a simple strap that goes though the water brick and around the center member of that cubby/pocket that's behind it. The weight keeps it down the strap is just to keep it from tipping when it gets bumpy. It's worked very well thus far.
 
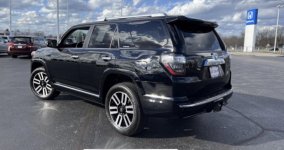
Sold my Gen5 ltd!

I hated to, but I just wasn’t using my ‘15 ltd much. As a matter of fact, it’s been mostly sitting in the garage for the last 6 months on a battery tender. With only 46k on the clock too.
Decided to go shopping for a new hybrid vehicle instead, so will be trading it in. I have owned it since May 2016.
 

Attachments

  • 7579C6DA-3EAE-4891-B587-E00F7F145E5D.jpg
    7579C6DA-3EAE-4891-B587-E00F7F145E5D.jpg
    131.1 KB · Views: 553
Last edited:
Installed the RCI cat guards on my trans skid plate. Total time to do it was about 30mins. If anybody tries to steal the cats, they're going to have a hell of a time...hopefully, nobody tries it after seeing the full skids and guards. A dealership a few miles North of me had people go in overnight and strip all the cars on the lot.

Waiting on my RCI roof rack now, should be in on Monday.
 
Installed Bilstein 5100s in the rear of my 4runner today. I added these to compliment the 6112s I put in the front a few weeks ago. I debated between the 5100 and the 5160s but in the end I decided the 5160s were not necessary as this is mostly a daily driver. I did notice that even though the stock rear shocks are gas charged, they have very little dampening at low speed when I compress them on the ground where the Bilsteins do, not sure if that is me noticing the digressive valving or just a statement of how soft and compliant the stock shocks are.

Install tips: Use a strap wrench to hold the top of the shock body so you can loosen the top retaining nut. The top stud does have a small square you could likely get a little wrench or vice grip on however it is behind the flange in the body and tough to get to. I used a 2lb soft face dead blow hammer to help get the lower shock on and off the post. Lastly the top cone washer on the Bilstein instructions shows that the cone faces up, the factory piece has the cone facing down and my gut says it should face down. The only reason to face it up would be to aid in articulation, so I did it the Bilstein way.
 
Last edited:
How do you like the 6112s with the 5100s? Thinking the same set up.

Did the 6112s fit in you upper control arms or did you have to go aftermarket UCA's?
 
How do you like the 6112s with the 5100s? Thinking the same set up.

Did the 6112s fit in you upper control arms or did you have to go aftermarket UCA's?

Would like to know this as well. Making the plunge soon. Also what size tires? I’m torn between .85” and 265 or 275s or going up to 1.75”. I really just want a slightly more aggressive look but maintaining the smooth ride and mpgs.
 
Installed ARB skid plates. Not as beefy as some out there but for what I use the truck for they're perfect and reasonably priced.

hZSkkjx.jpg
 
Would like to know this as well. Making the plunge soon. Also what size tires? I’m torn between .85” and 265 or 275s or going up to 1.75”. I really just want a slightly more aggressive look but maintaining the smooth ride and mpgs.

I did 5100's all the way around. Went up 1.75" in front and added 1.5" rear spacer on springs. Still has a half inch forward rake = which I like.
Love the ride. less bouncy than stock and not as much body roll.
 
How do you like the 6112s with the 5100s? Thinking the same set up.

Did the 6112s fit in you upper control arms or did you have to go aftermarket UCA's?

I only went up 2" in the front with the 6112s, at 2" the new upper control arms are not needed. I have adjusted the front arms cam adjusters forward and I have a little over 4 deg of caster. Need to fine tune the adjustment now that I have a few miles on the front. Initial driving impressions are that I am happy so far. Less dive upon braking, way more comfortable over speed bumps, turn in more confident. I would need to get some more time on the setup before I have a full review. This vehicle is my girlfriends main driver and what we drive when we are going somewhere together, she does not notice it is significantly different than before.

I wanted to add that even though I only went up 2" in the front from the factory ride height, my stock front springs had sagged 1/2" from when I purchased this vehicle new 1.5 years ago. I really wanted to get rid of the nose down look so I did not raise the rear at all, still on the factory rear springs.
 
Last edited:
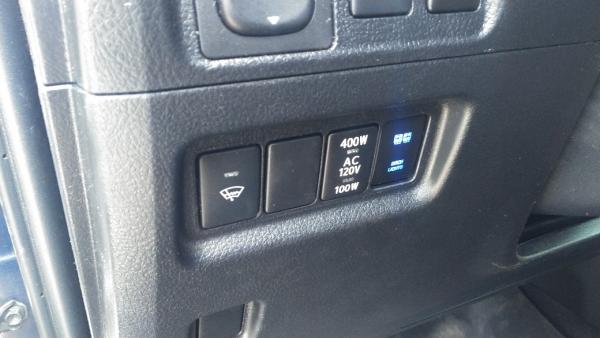
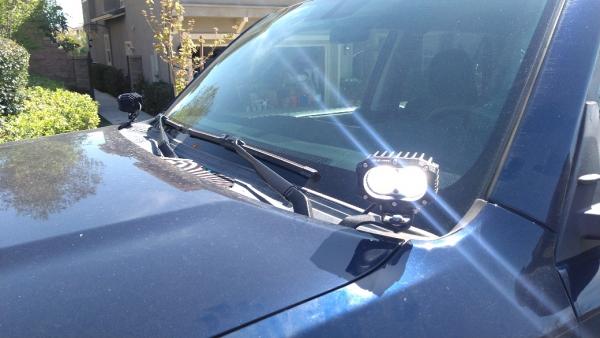
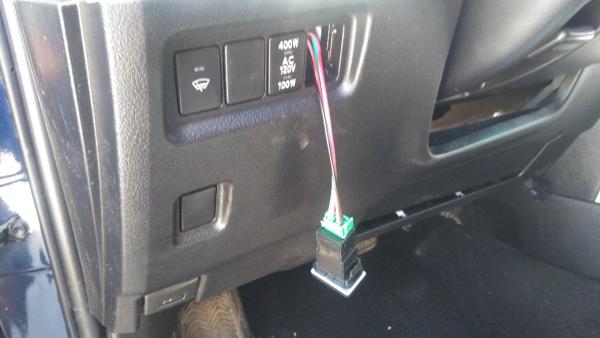
Continuing what I am calling my 'electrical update', I added ditch lights to the hood and wired the switch in the dash. Some ditch lights a friend gave me (might replace with smaller ones if I can find some). Cali-raised low profile mounts and a cali-raised ditch light switch-

I wired it to turn on the backlight only when on (so it can catch my eye if I ever accidentally hit it on (though not like I wouldn't notice if it's anything less than 100% daylight, those suckers are bright!))-
moonrakerscm-albums-photos-picture61804-ditch-light-switch.jpg


They don't look too shabby on the hood-
moonrakerscm-albums-photos-picture61803-ditch-lights.jpg


The only thing I had to do was shave some teeny tiny tabs on the inside of the switch space (see two 'whitish' spots inside the switch hole) for the cali-raised as the switch was not engaging to the on position due to them-
moonrakerscm-albums-photos-picture61805-dash-switch-details.jpg


Next weekend will be my anytime backup camera setup (with front camera add-on)... I'm looking forward to that as the only complaint I could ever say about the 4runner is not being able to see beyond the massive hood when cresting a hill etc. :-p
 

Members online

No members online now.

Forum statistics

Threads
278,317
Messages
3,554,129
Members
248,016
Latest member
Advally Service

Trending content

Back
Top